

How to: Replace starter motor solenoid contacts – intermittent starting problem
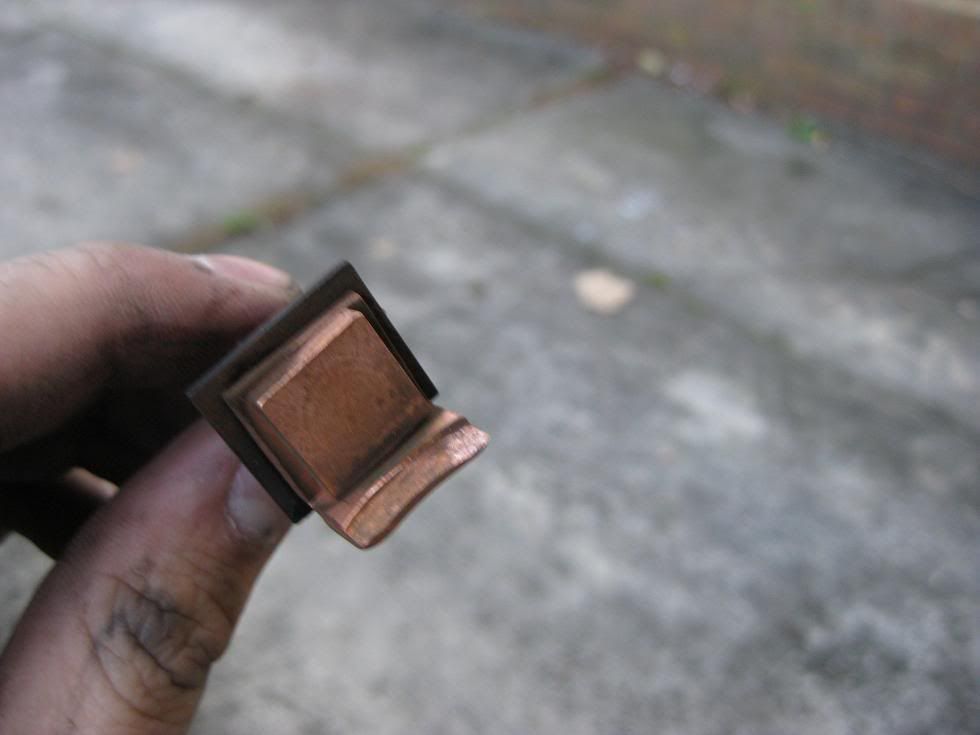
So as some of you know, a common problem with our Gen 2’s is an intermittent starting problem. You get a click but no crank despite having a healthy battery. One of the most common causes are worn starter contacts. It’s actually a common problem with many Nippon Denso starters that have been around for a while. The battery side (facing you) contact gets worn, as if it’s been machined – otherwise it looks fine.
1) First, disconnect the battery terminal. My rule is ‘negative is always the first to come off and last to go on’.
![Image]()
2) Undo the bolt holding the battery in place and remove the battery and plastic tray underneath. Okay, now you may be able to jump straight to step 5 and start attacking the starter (which is what i first tried) but ended up doing these extra steps because i couldn't get the starter out.
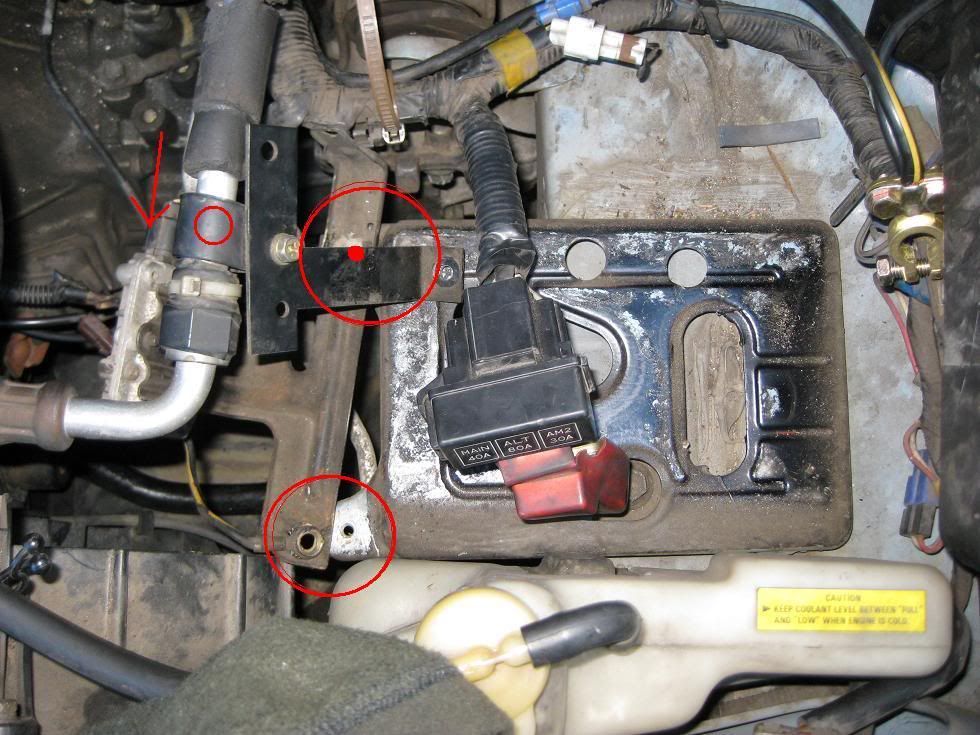
3) Undo the two bolts holding those brackets together. Manoeuvre is away as best as you can without fully removing it.
![Image]()
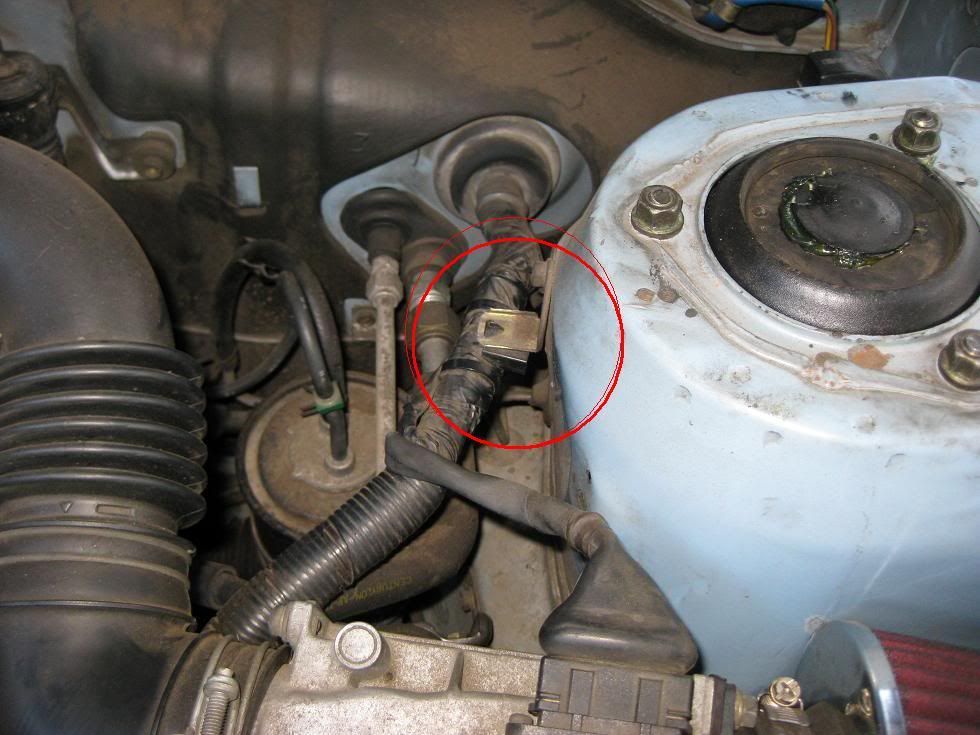
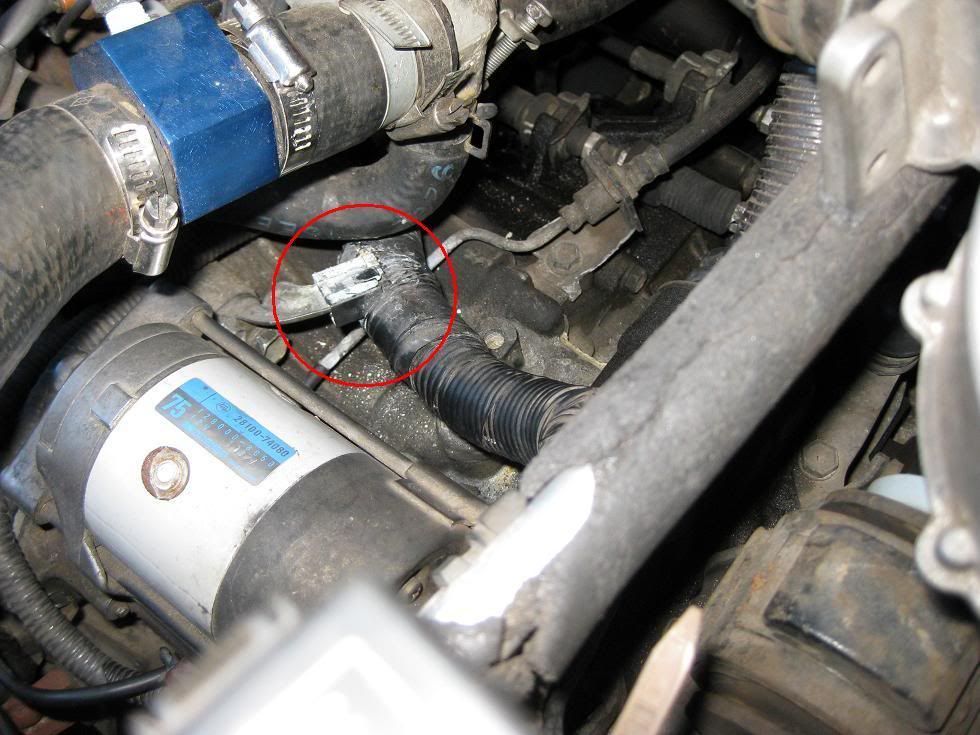
4) Disconnect the main harness from the 3 clip attachment points. Last one is somewhere behind the battery. I'm sure you'll find it
![Image]()
![Image]()
5) Undo the nut holding a wire to the starter and disconnect the plug. You'll have to remove the plastic cover. It pops right off.
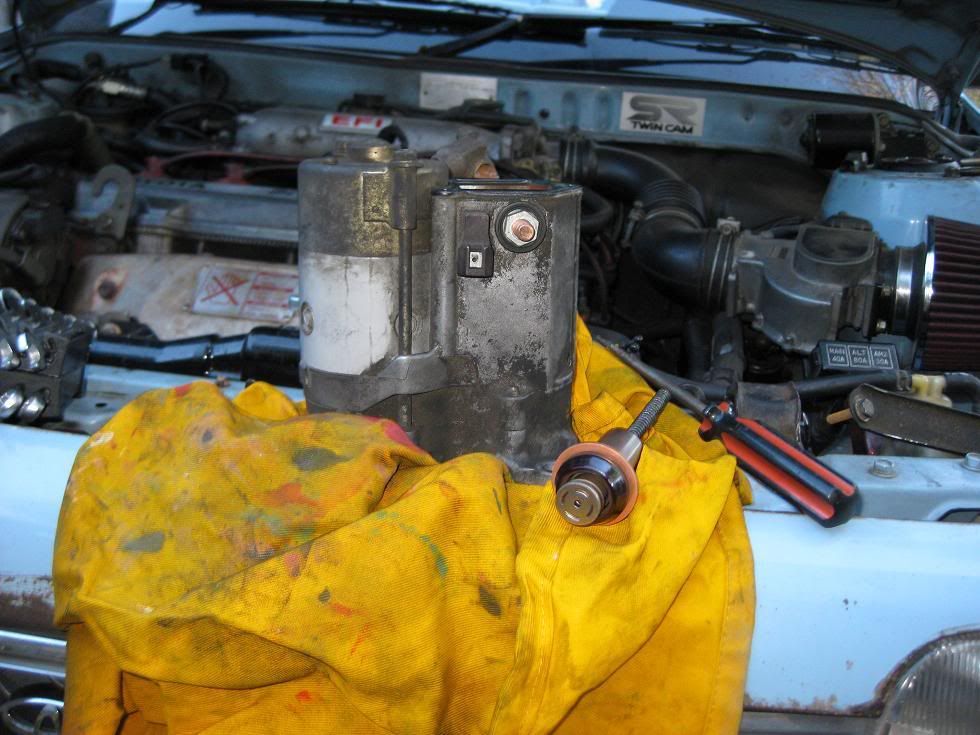
6) Pull out 14mm socket and undo the bolts holding the starter on. There’s one on either side.
7) Once the bolts are out, take the starter out.
![Image]()
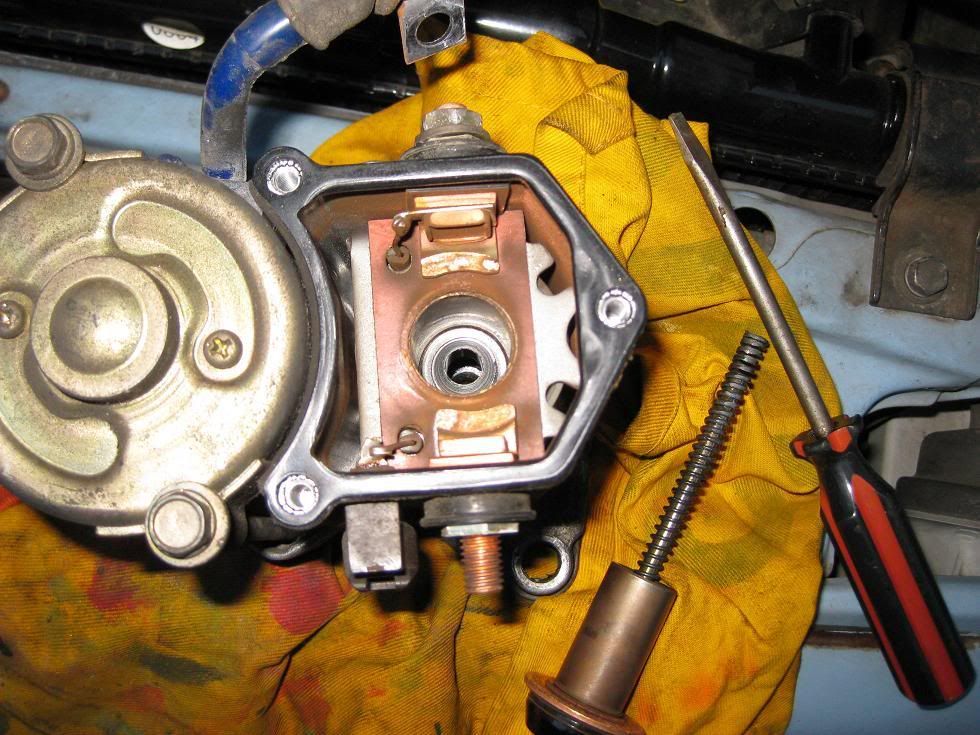
8) Undo the 3 screws holding the solenoid cover on.
![Image]()
That's not what you want.
![Image]()
And again. As you can see, my contact some how ended up on an angle and was only contacting on the very edge. This caused frequent starting problems - maybe once a week/fortnight.
9) Undo the two 14mm nuts holding the contacts in. Be careful, they’re real easy to round. You can get new nuts if you wish, but I just reversed them lol. On the side facing away, the one with the large insulated wire, you'll need to undo the nut holding the wire on before you can get to the 14mm nut. I think it's a 10mm or a 12mm.
10) Take the spacers, washers and o rings off. Make sure you remember how they came off because you’ll have to put them back on the same way.
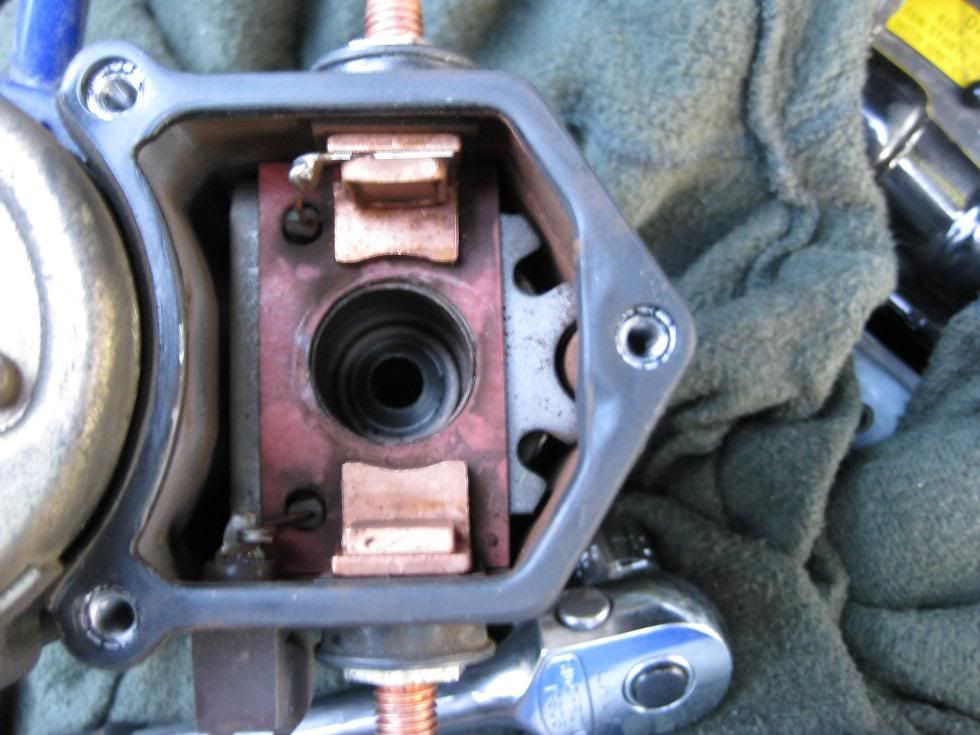
11) Slide the new contacts in and re-assemble. On the battery side’s (facing you) contact, you don’t need to fully engage the contact into the end of the stud – when you do up the nut it will slip into position.
![Image]()
That's what you want.
12) Put everything back together - assembly is the reverse of installation. I’d advise on putting a light smear of grease on the plunger’s rod.
I should note that my plunger was a pitted on the contact side but i didn't bother replacing it.
So as some of you know, a common problem with our Gen 2’s is an intermittent starting problem. You get a click but no crank despite having a healthy battery. One of the most common causes are worn starter contacts. It’s actually a common problem with many Nippon Denso starters that have been around for a while. The battery side (facing you) contact gets worn, as if it’s been machined – otherwise it looks fine.
1) First, disconnect the battery terminal. My rule is ‘negative is always the first to come off and last to go on’.

2) Undo the bolt holding the battery in place and remove the battery and plastic tray underneath. Okay, now you may be able to jump straight to step 5 and start attacking the starter (which is what i first tried) but ended up doing these extra steps because i couldn't get the starter out.
3) Undo the two bolts holding those brackets together. Manoeuvre is away as best as you can without fully removing it.
4) Disconnect the main harness from the 3 clip attachment points. Last one is somewhere behind the battery. I'm sure you'll find it
5) Undo the nut holding a wire to the starter and disconnect the plug. You'll have to remove the plastic cover. It pops right off.
6) Pull out 14mm socket and undo the bolts holding the starter on. There’s one on either side.
7) Once the bolts are out, take the starter out.
8) Undo the 3 screws holding the solenoid cover on.
That's not what you want.
And again. As you can see, my contact some how ended up on an angle and was only contacting on the very edge. This caused frequent starting problems - maybe once a week/fortnight.
9) Undo the two 14mm nuts holding the contacts in. Be careful, they’re real easy to round. You can get new nuts if you wish, but I just reversed them lol. On the side facing away, the one with the large insulated wire, you'll need to undo the nut holding the wire on before you can get to the 14mm nut. I think it's a 10mm or a 12mm.
10) Take the spacers, washers and o rings off. Make sure you remember how they came off because you’ll have to put them back on the same way.
11) Slide the new contacts in and re-assemble. On the battery side’s (facing you) contact, you don’t need to fully engage the contact into the end of the stud – when you do up the nut it will slip into position.
That's what you want.
12) Put everything back together - assembly is the reverse of installation. I’d advise on putting a light smear of grease on the plunger’s rod.
I should note that my plunger was a pitted on the contact side but i didn't bother replacing it.


