

My wife has been complaining that the car wouldn't start for about a week. One Sunday I decided to drive it and experienced the same issue. The car would click when the ignition was turned but would not crank. I would later crank after about 4 to 5 clicks. I thinking it was the 4 year old battery decided to have it replaced. I inspected all the battery cables and everything looked fine. I have been treating the battery connectors ever since I've owned the car.
After doing some research on this incident I was convinced that it was definetely the solenoid contacts and plunger (for now).
This is what I bought
Electrical Cleaner Spray - $5.60
Hi Temp Grease - $3.99
Solenoid Plunger - $32.00
Solenoid Contacts both kits $25.00
Torque Wrench - $20.00 at Harbor freight
Light - $10.00 at Lowes
Websites that helped me
http://www.camrystuff.com/manuals/Gen4/Starting.pdf
http://www.4crawler.com/4x4/CheapTricks/Starter.shtml
http://www.toyotanation.com/forum/t27312.html
You can porbably get the kit cheaper online but I chose to go to the local Toyota dealer as I was in a hurry. Besides I am an amateur at this and wanted to be 100 % sure of the right parts. Tip - If going to a dealer make sure you take your car VIN number as they can match your equipment based on that information.
I decided to tackle this on friday and began at 2:00 pm. The whole process took me about 3 hr and that is because I am slow as hell.
These are the steps.
1. Park you car in a comfortable position for you to work. Do not start work (i.e disconnect battery) until atleast 5 min has past since you parked the car. That is because of the issues with airbags etc. Don't quote me on this but someone mentioned it online and i decided to take that advise.
2. Remove the battery terminals. Always disconnect the negative terminal. I put the battery in my trunk. I also had a zip loc bag where I put all my nuts and bolts.
![Image]()
3. Below the battery is the battery plate. Remove the battery plate and you will see three nuts that hold the cruise actuator in place.
![Image]()
4. Remove the three bolts and place cruise away so you can get to the starter. The cruise also has a electrical connector that can easily be disconnected. That electrical cable is also attached to the actuator by means of a clip which can easily be removed. The first pictures show the clip in my hand.
![Image]()
![Image]()
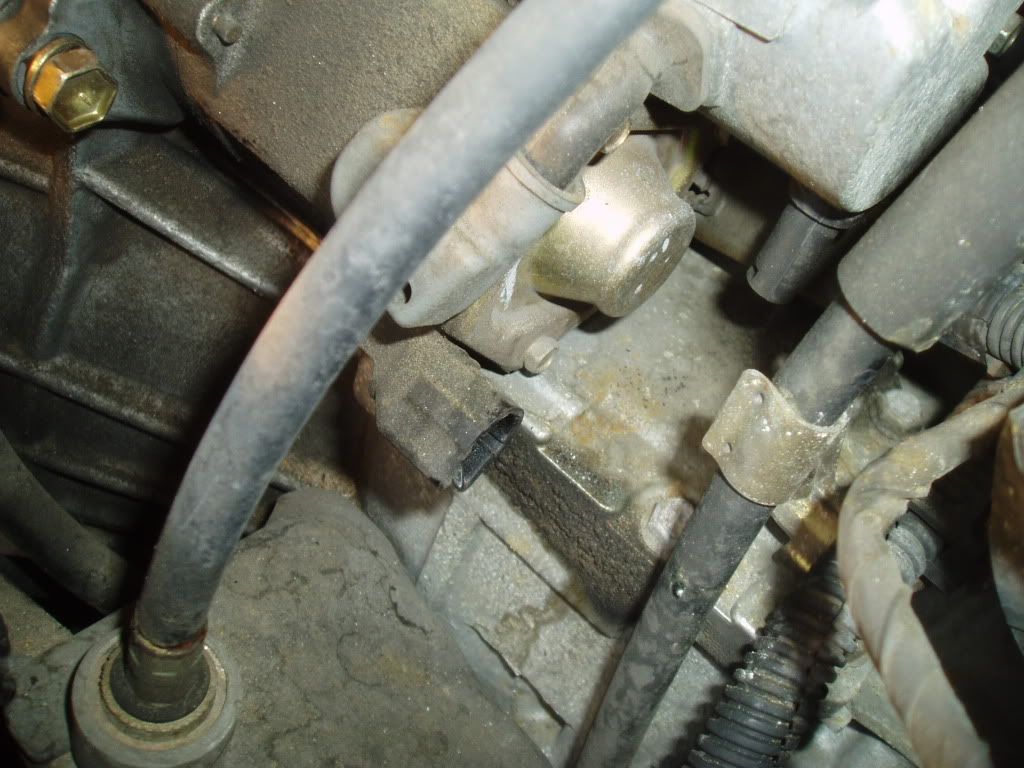
5. After that you should have a pretty good view of the starter. Do not unbolt the long bolts you see. Those are not the ones you need to go after.
6. Disconnect the starter connector. It is clipped on.
![Image]()
7. Start unbolting the starter from the engine body. You will need 14mm socket set.
![Image]()
8. Remove the starter and turn it over so you can remove the starter cable coming from the positive battery terminal. You will need a 12 mm to get this done and may have to turn the starter on its side.
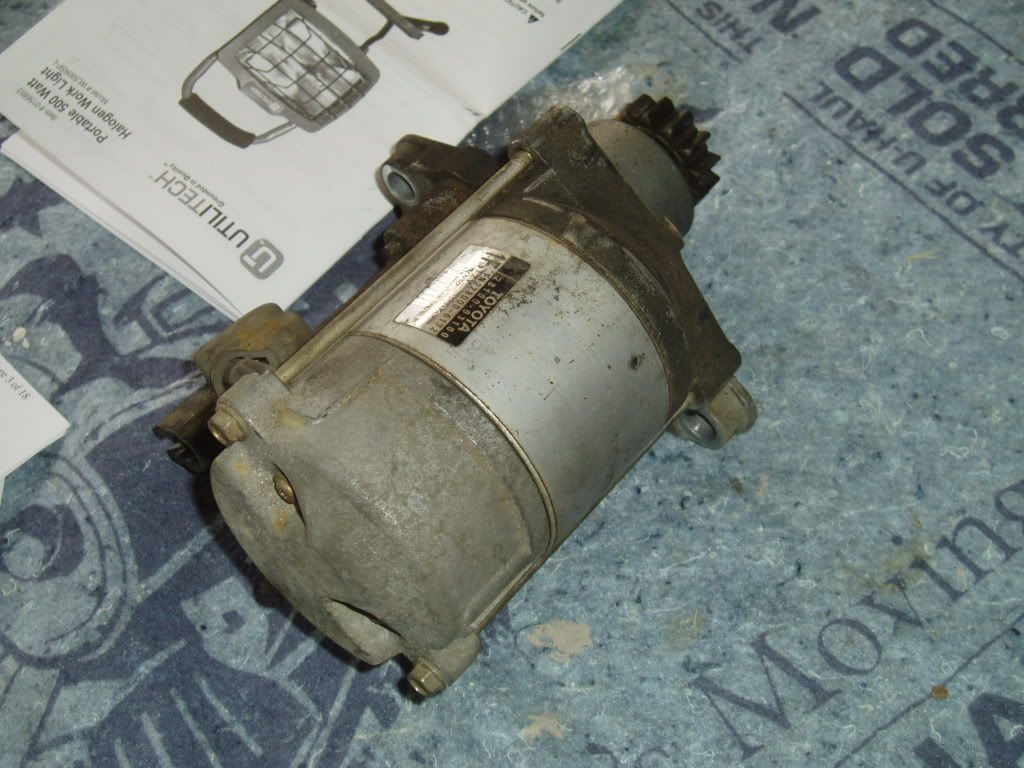
9. Remove the starter and place on work bench. The starter has a bearing in it and i read somewhere that if it is accidentally removed from the gear slot it and not put back in its place can cause a whinning sound at start up. I did not want that to happen and therefore always kept the starter horizontal.
![Image]()
10. My Solenoid Contacts did not look so bad but my plunger was in pretty bad shape and definitely needed to be replaced.
11. Remove the three bolts (7mm) that hold the plunger and house the contacts. and you will see the plunger pop out. There is also a connection between the two starter compartments. Peel off the rubber boot to see and disconnect the connection.
12. I replaced one contact at at time and cleaned the inside with a little electrical cleaner. I also used some Hi Temp grease on the spring and on the gear. Basically you will put together the contacts the same way as you take them out. One tip I found usefuly was that I connect the electrical cable between the starter compartement after I put three bolts that hold the plunger compartment in place.
![Image]()
14. You perform the steps in reverse to get it back on.
15. I connected the starter wire from the positive terminal of the battery before I attached the starter to the engine body. Don't forget to put the boot back on.
16. Also, don't forget to connect the starter connector and the cruise control wire.
16. Also, I inspected all parts including the connectors and the boots and found little or no wear. I sprayed electrical cleaner on all the connectors.
17. Connect the negative terminal of the batter first and then the positive.
18. After I did that the car cranked immediately. It also sounded much more powerful on startup.
The dealer had quoted me $650.00 to do this job. I am glad to have saved that money. The torque wrench was used only on one bolt. I could use it on the other as there was too much of inteference. Also, now I have a whole can of Hi Temp grease. Let me know where else i can put some grease on the car.
After doing some research on this incident I was convinced that it was definetely the solenoid contacts and plunger (for now).
This is what I bought
Electrical Cleaner Spray - $5.60
Hi Temp Grease - $3.99
Solenoid Plunger - $32.00
Solenoid Contacts both kits $25.00
Torque Wrench - $20.00 at Harbor freight
Light - $10.00 at Lowes
Websites that helped me
http://www.camrystuff.com/manuals/Gen4/Starting.pdf
http://www.4crawler.com/4x4/CheapTricks/Starter.shtml
http://www.toyotanation.com/forum/t27312.html
You can porbably get the kit cheaper online but I chose to go to the local Toyota dealer as I was in a hurry. Besides I am an amateur at this and wanted to be 100 % sure of the right parts. Tip - If going to a dealer make sure you take your car VIN number as they can match your equipment based on that information.
I decided to tackle this on friday and began at 2:00 pm. The whole process took me about 3 hr and that is because I am slow as hell.
These are the steps.
1. Park you car in a comfortable position for you to work. Do not start work (i.e disconnect battery) until atleast 5 min has past since you parked the car. That is because of the issues with airbags etc. Don't quote me on this but someone mentioned it online and i decided to take that advise.
2. Remove the battery terminals. Always disconnect the negative terminal. I put the battery in my trunk. I also had a zip loc bag where I put all my nuts and bolts.
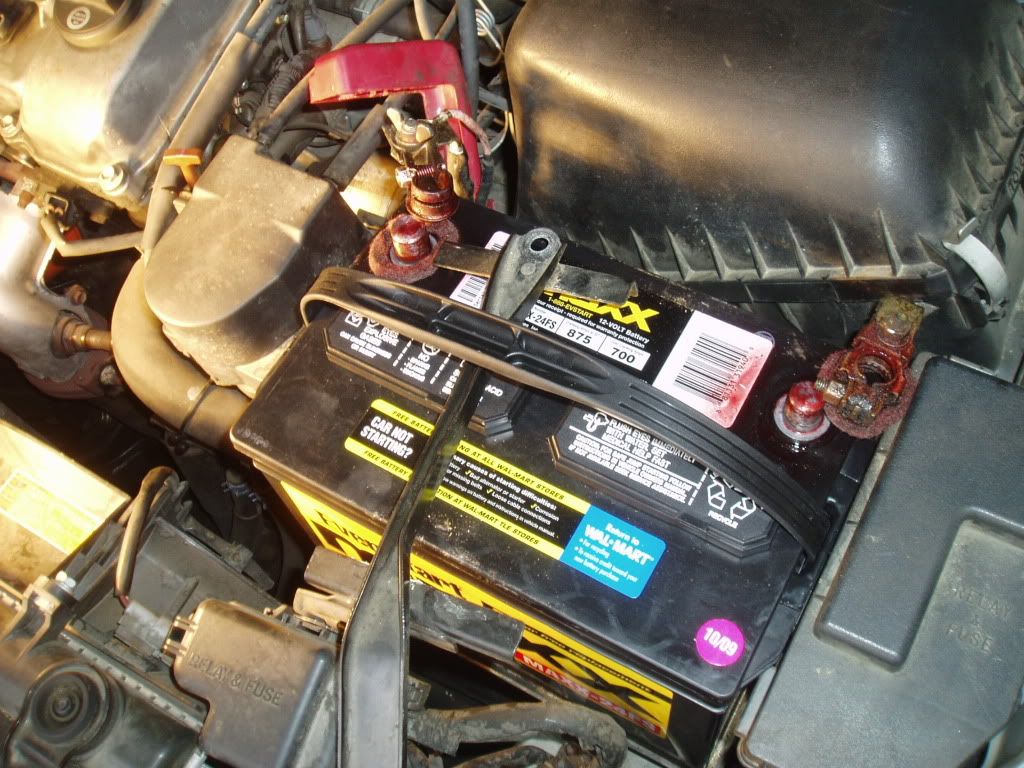
3. Below the battery is the battery plate. Remove the battery plate and you will see three nuts that hold the cruise actuator in place.
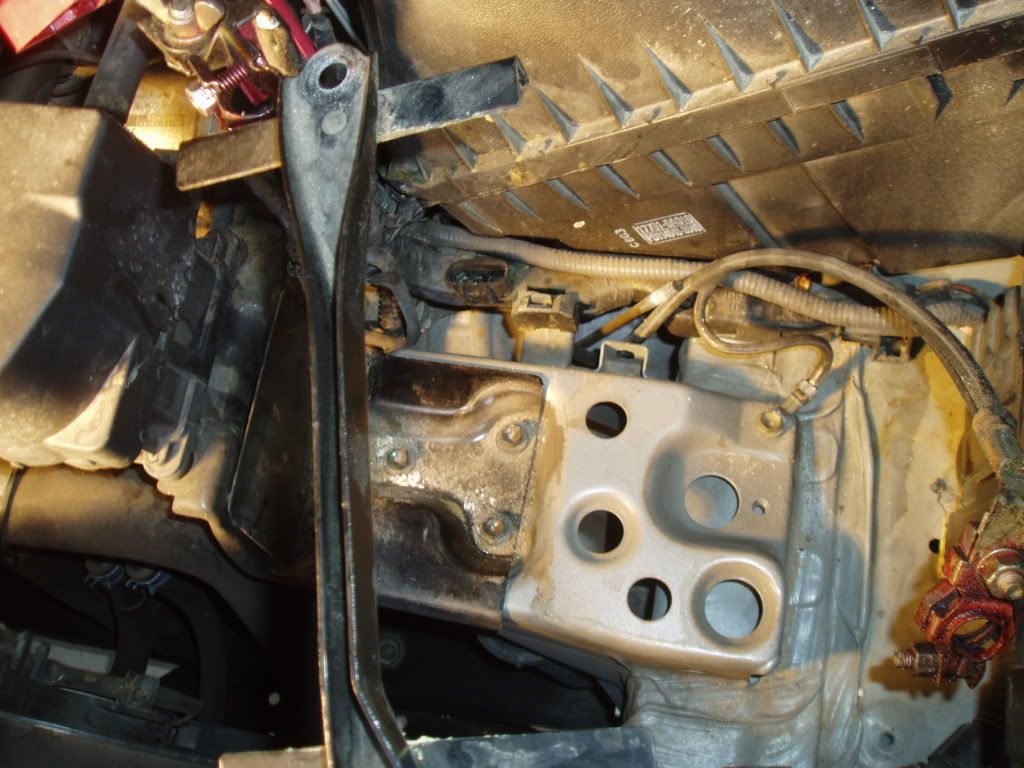
4. Remove the three bolts and place cruise away so you can get to the starter. The cruise also has a electrical connector that can easily be disconnected. That electrical cable is also attached to the actuator by means of a clip which can easily be removed. The first pictures show the clip in my hand.
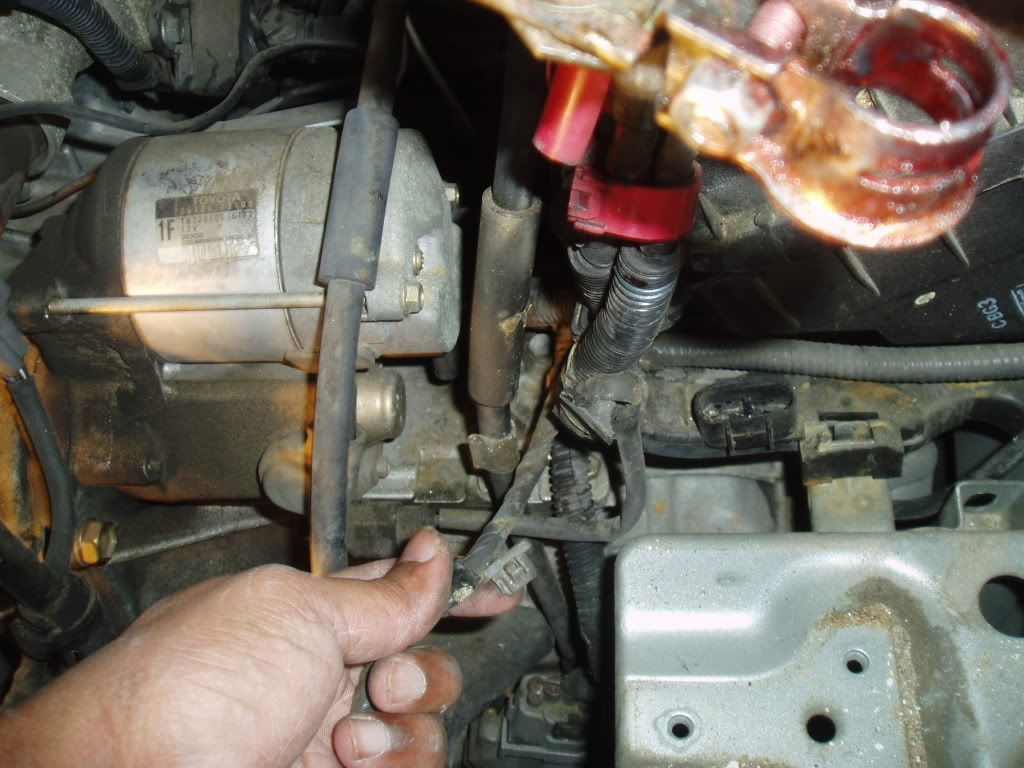
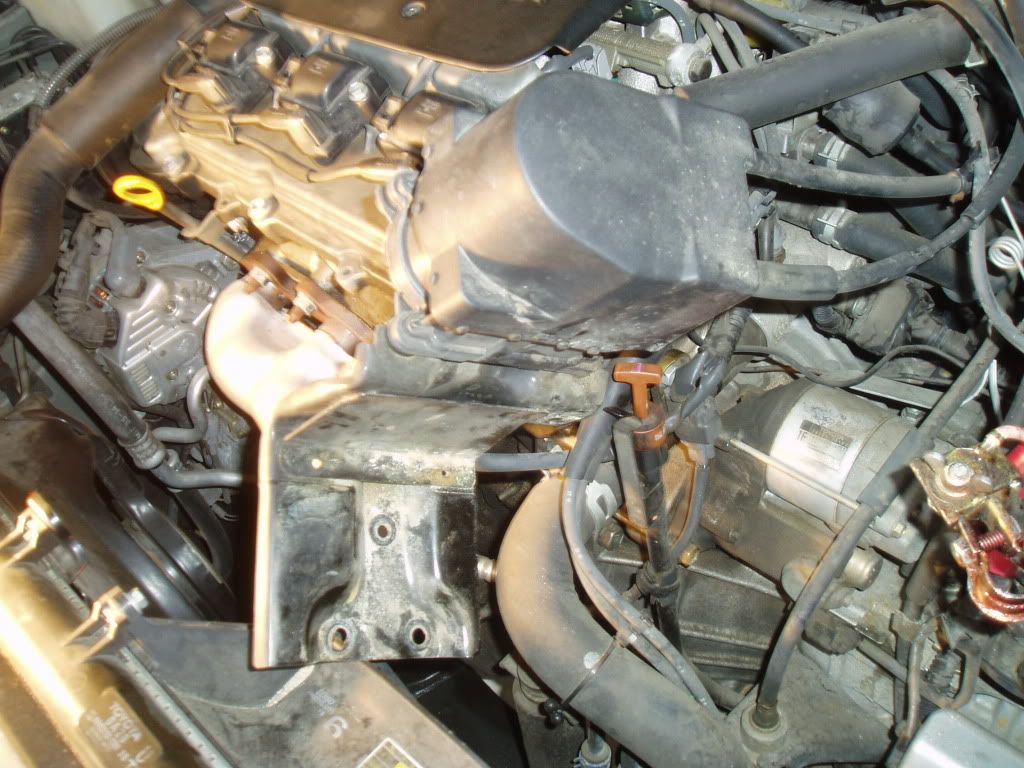
5. After that you should have a pretty good view of the starter. Do not unbolt the long bolts you see. Those are not the ones you need to go after.
6. Disconnect the starter connector. It is clipped on.
7. Start unbolting the starter from the engine body. You will need 14mm socket set.

8. Remove the starter and turn it over so you can remove the starter cable coming from the positive battery terminal. You will need a 12 mm to get this done and may have to turn the starter on its side.
9. Remove the starter and place on work bench. The starter has a bearing in it and i read somewhere that if it is accidentally removed from the gear slot it and not put back in its place can cause a whinning sound at start up. I did not want that to happen and therefore always kept the starter horizontal.
10. My Solenoid Contacts did not look so bad but my plunger was in pretty bad shape and definitely needed to be replaced.
11. Remove the three bolts (7mm) that hold the plunger and house the contacts. and you will see the plunger pop out. There is also a connection between the two starter compartments. Peel off the rubber boot to see and disconnect the connection.
12. I replaced one contact at at time and cleaned the inside with a little electrical cleaner. I also used some Hi Temp grease on the spring and on the gear. Basically you will put together the contacts the same way as you take them out. One tip I found usefuly was that I connect the electrical cable between the starter compartement after I put three bolts that hold the plunger compartment in place.

14. You perform the steps in reverse to get it back on.
15. I connected the starter wire from the positive terminal of the battery before I attached the starter to the engine body. Don't forget to put the boot back on.
16. Also, don't forget to connect the starter connector and the cruise control wire.
16. Also, I inspected all parts including the connectors and the boots and found little or no wear. I sprayed electrical cleaner on all the connectors.
17. Connect the negative terminal of the batter first and then the positive.
18. After I did that the car cranked immediately. It also sounded much more powerful on startup.
The dealer had quoted me $650.00 to do this job. I am glad to have saved that money. The torque wrench was used only on one bolt. I could use it on the other as there was too much of inteference. Also, now I have a whole can of Hi Temp grease. Let me know where else i can put some grease on the car.
")


