

BMR note: See this new thread for the same content, but with the pics fixed.
***
i noticed a problem when i was driving down the highway and the backend felt loose. i also noticed a clunking noise every so often when driving and braking.
video of the movement:

but its noticable when the rear wheels are off the ground and a wheel is grabbed at the 3 and 9 o'clock positions has some movement. i ordered a replacement part (there are 4 different lateral control arms - 2 fixed length front and 2 adjustable rear) from rockauto.com (adjustable right rear was $70 with shipping). its really not challenging to replace as its held in place by 2 nuts, but i just wanted to take some photos in case anyone was wondering.
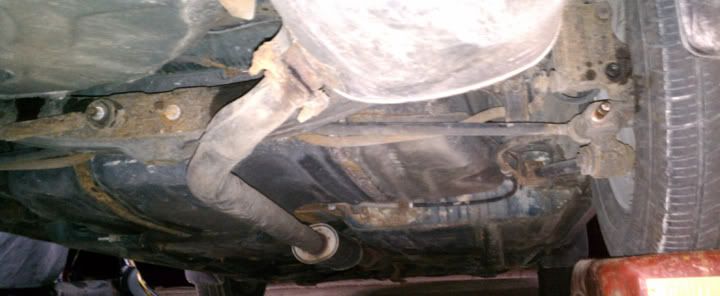
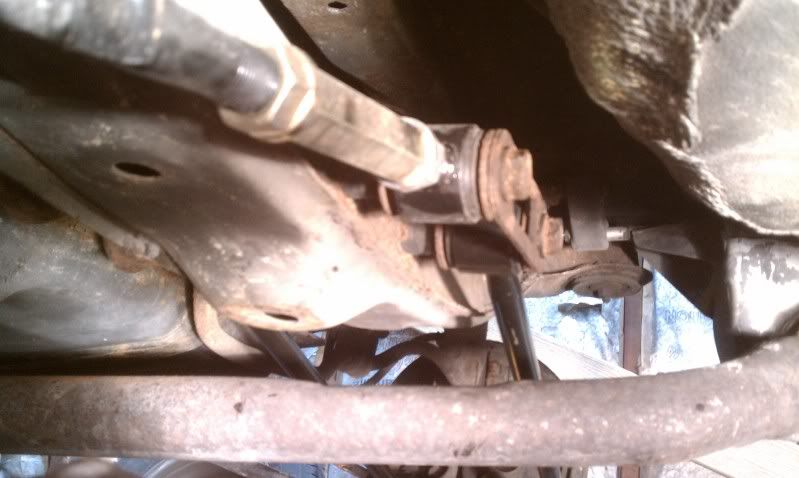
view from behind the car looking up.
![Image]()
after chiseling some rust off and dousing with PB blaster (nuts are either 19mm or 3/4" (mine were so rusty, after hammering each on i couldnt tell which was a better fit)). i had to use 2 24" breaker bars to break the nuts loose from the bolts. the nut holding the left side arm had to be removed in order to move the brace out of the way to remove the right arm.
![Image]()
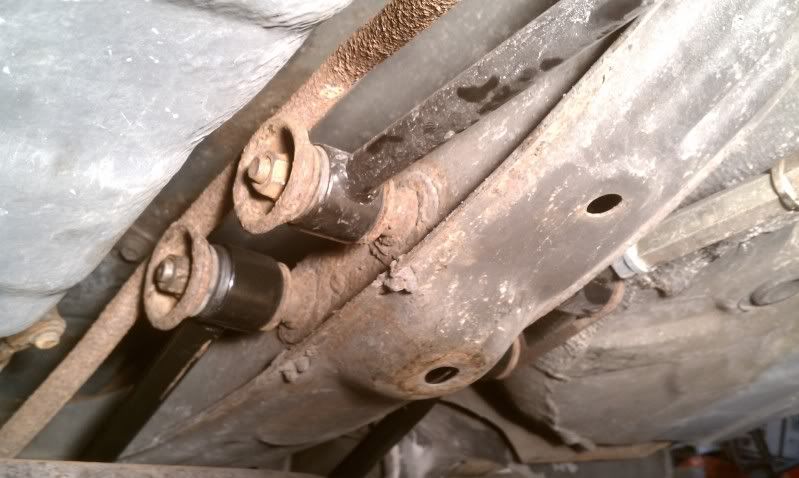
pic of lateral arm removed
![Image]()
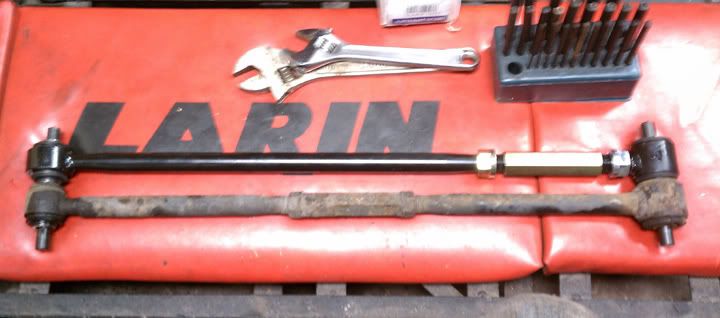
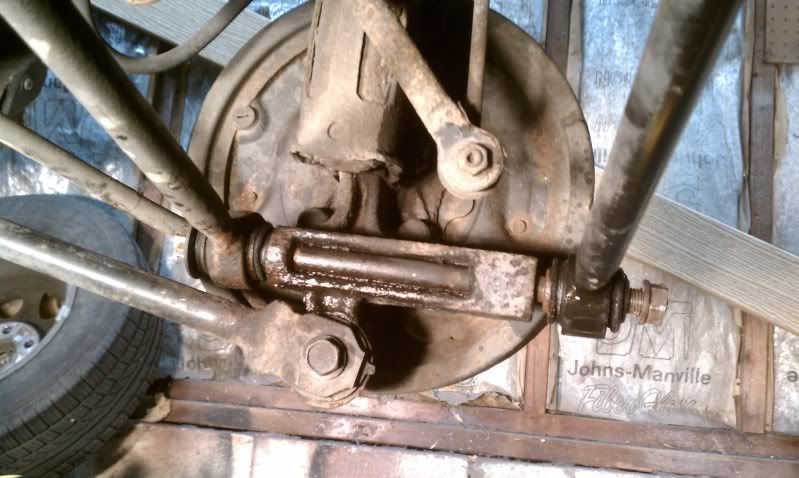
pic of the old next to the new. i used a transfer punch to line up the busings to adjust the new arm to the correct length.
![Image]()
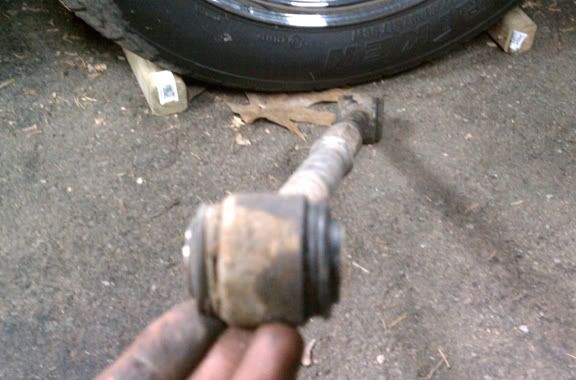
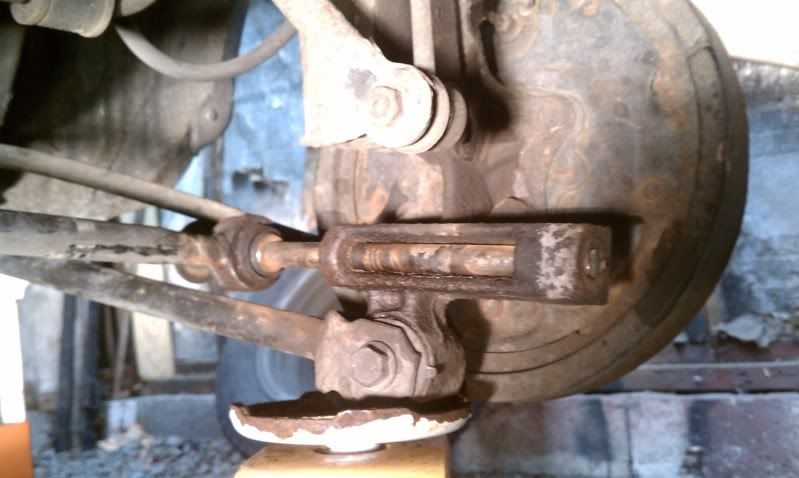
when installing, the arm isnt perfectly straight but rather slightly offset. i tried taking a photo holding the camera perpendicular to the bushings to show the offset of the two ends. the arm can be installed backwards if not paying attention (i did this, it can fit just not fit well).
![Image]()
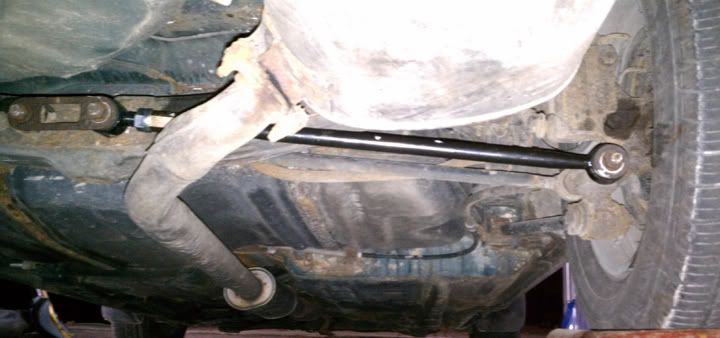
finally the photo of the new arm installed. its always recommended to get an alignment after any suspension work, but im cheap and wont unless i notice issues driving or increased tire wear.
![Image]()
hope this helps!
edit
this part is how to replace the forward rear lateral control arm. with the inner and outer nuts removed, the bolts also have to be removed. there are several ways to remove the inner since they were factor installed before the fuel tank was in place. you can A.) drop the exhaust and fuel tank B.) drop the exhaust and rear sub-frame or C.) cut the old bolts out and replace them. since i live in the rust belt i figured i would either snap the bolts for the tank or sub-frame i opted for option C of cutting the old bolts and replaced them with bolts i bought from a local salvage yard. i also then inserted them backwards so they could slide back in place.
![Image]()
i did transfer the cup-thingie on the bolt head end on the bolt to the nut end. i think it is there just in case of sever rear-end collisions to lesson the likelihood of piercing the fuel tank.
![Image]()
at least for me, the true challenge was removing the outter bolts going through the rear knuckle (is is called the knuckle?)
![Image]()
since i had those extra bolts and matching nuts from the junk yard to replace the inner bolts, it was okay if i partially mangled a nut. after soaking the bolt shaft and ends in PB blaster i used a 24" breaker bar on the bolt head. the bolt didnt even budge. i left the rear control arm in place to help guide the bolt, i loosened the nut until there was only about 3/16" of the bolt sticking out past the nut. i started off using a 4lb mallet to hit the bolt through. after an hour with that and zero progress, i switched to my 8lb sledge. i stopped every so often in attempt to spin the bolt with the breaker bar while yelling profanities. after about another hour it finally started to break loose.
because the end of the bolt that was sticking out 3/16" was beaten severely, it was now flattened and preventing the nut from coming off. i spun the somewhat-mangled nut further only the bolt (a couple of my swings werent exactly on target and the nut protected the threads) i used a grinder to re-taper the end of the bolt. now that the bolt was sliding out, the arm that connects forward was in the way of the bolt sliding out, so i unbolted the knuckle from the rear strut and tilted it around to give me the room i needed. an end of the arm could be removed instead, but mine were pretty rusty and after a feeble attempt, seemed fused in place.
![Image]()
after spending about 5 hours getting the old front arms off, it took about 15 minutes to reassemble everything. just like the rear lateral arms, the non-adjustable fronts have to be installed in a certain orientation with the 'skinnier' bushings on the wheel side and at the proper angle or else the bushings will really be flexed just installing.
***
i noticed a problem when i was driving down the highway and the backend felt loose. i also noticed a clunking noise every so often when driving and braking.
video of the movement:
but its noticable when the rear wheels are off the ground and a wheel is grabbed at the 3 and 9 o'clock positions has some movement. i ordered a replacement part (there are 4 different lateral control arms - 2 fixed length front and 2 adjustable rear) from rockauto.com (adjustable right rear was $70 with shipping). its really not challenging to replace as its held in place by 2 nuts, but i just wanted to take some photos in case anyone was wondering.
view from behind the car looking up.

after chiseling some rust off and dousing with PB blaster (nuts are either 19mm or 3/4" (mine were so rusty, after hammering each on i couldnt tell which was a better fit)). i had to use 2 24" breaker bars to break the nuts loose from the bolts. the nut holding the left side arm had to be removed in order to move the brace out of the way to remove the right arm.

pic of lateral arm removed
pic of the old next to the new. i used a transfer punch to line up the busings to adjust the new arm to the correct length.
when installing, the arm isnt perfectly straight but rather slightly offset. i tried taking a photo holding the camera perpendicular to the bushings to show the offset of the two ends. the arm can be installed backwards if not paying attention (i did this, it can fit just not fit well).
finally the photo of the new arm installed. its always recommended to get an alignment after any suspension work, but im cheap and wont unless i notice issues driving or increased tire wear.
hope this helps!
edit
this part is how to replace the forward rear lateral control arm. with the inner and outer nuts removed, the bolts also have to be removed. there are several ways to remove the inner since they were factor installed before the fuel tank was in place. you can A.) drop the exhaust and fuel tank B.) drop the exhaust and rear sub-frame or C.) cut the old bolts out and replace them. since i live in the rust belt i figured i would either snap the bolts for the tank or sub-frame i opted for option C of cutting the old bolts and replaced them with bolts i bought from a local salvage yard. i also then inserted them backwards so they could slide back in place.
i did transfer the cup-thingie on the bolt head end on the bolt to the nut end. i think it is there just in case of sever rear-end collisions to lesson the likelihood of piercing the fuel tank.
at least for me, the true challenge was removing the outter bolts going through the rear knuckle (is is called the knuckle?)
since i had those extra bolts and matching nuts from the junk yard to replace the inner bolts, it was okay if i partially mangled a nut. after soaking the bolt shaft and ends in PB blaster i used a 24" breaker bar on the bolt head. the bolt didnt even budge. i left the rear control arm in place to help guide the bolt, i loosened the nut until there was only about 3/16" of the bolt sticking out past the nut. i started off using a 4lb mallet to hit the bolt through. after an hour with that and zero progress, i switched to my 8lb sledge. i stopped every so often in attempt to spin the bolt with the breaker bar while yelling profanities. after about another hour it finally started to break loose.
because the end of the bolt that was sticking out 3/16" was beaten severely, it was now flattened and preventing the nut from coming off. i spun the somewhat-mangled nut further only the bolt (a couple of my swings werent exactly on target and the nut protected the threads) i used a grinder to re-taper the end of the bolt. now that the bolt was sliding out, the arm that connects forward was in the way of the bolt sliding out, so i unbolted the knuckle from the rear strut and tilted it around to give me the room i needed. an end of the arm could be removed instead, but mine were pretty rusty and after a feeble attempt, seemed fused in place.
after spending about 5 hours getting the old front arms off, it took about 15 minutes to reassemble everything. just like the rear lateral arms, the non-adjustable fronts have to be installed in a certain orientation with the 'skinnier' bushings on the wheel side and at the proper angle or else the bushings will really be flexed just installing.
")


