

i finally got through this job last night so i tool photos as i put it back together as a how-to since i couldnt find decent instructions or photos, i wanted to at least offer some insight in how to accomplish replacing the expansion valve or evaporator.
the impetus for me was a leak in the AC system o-rings at the condenser so i decided to replace the expansion valve while the system was empty and since they seem to be a weak point.
okay, lets see if my memory serves.
first step is disconnect the battery.
then remove the black cover under the passenger side of the dash. it pulls down from the front and is held in by clips that snap out. it can then be pulled forward to be removed. then the trim under the glove box is removed. i believe there are 2 black screws and the rest is just snapped in place.
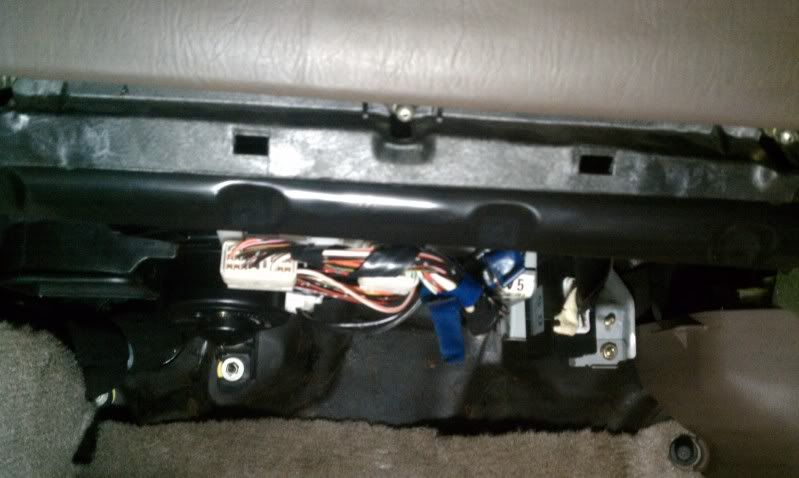
the glove box door can now be removed by taking out the 3 nuts at the bottom.
![Image]()
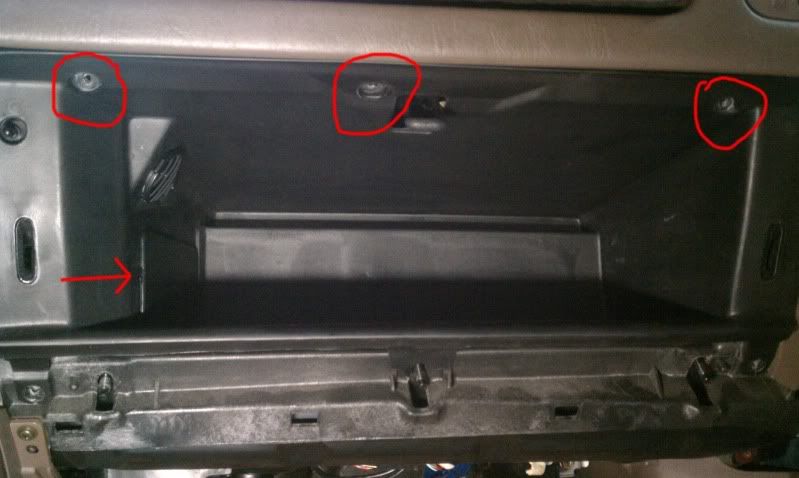
now remove the glove box liner. there are three screw circled at the top, but there is also one or two screws at the bottom (not circled) that need to be removed.
![Image]()
also pop out the connection for the airbag by prying up the front edge then it should pop out. slip it though the hole as you remove the liner and disconnect the light.
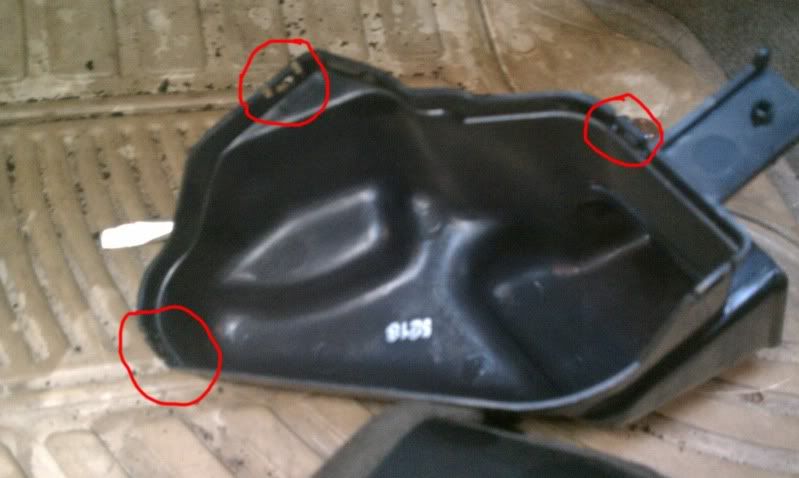
remove the plastic floor vent duct on the left. it just pulls off and the plastic clips will release.
![Image]()
![Image]()
there is some velcro on the bottom of this duct to help hold the carpet in place.
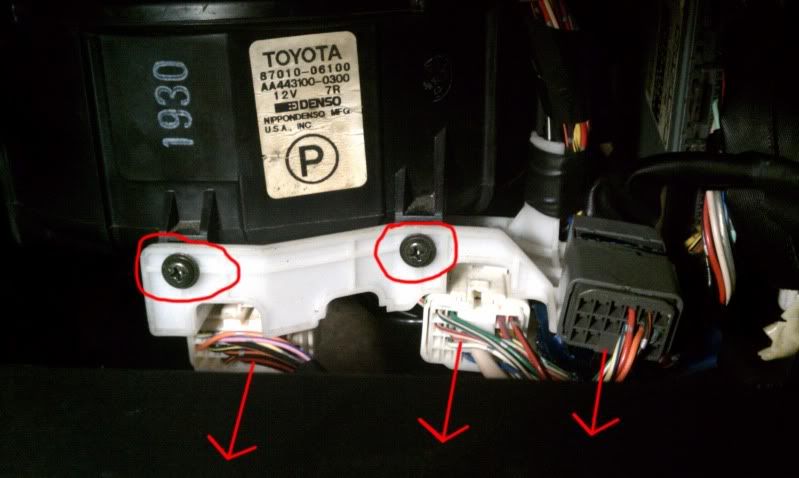
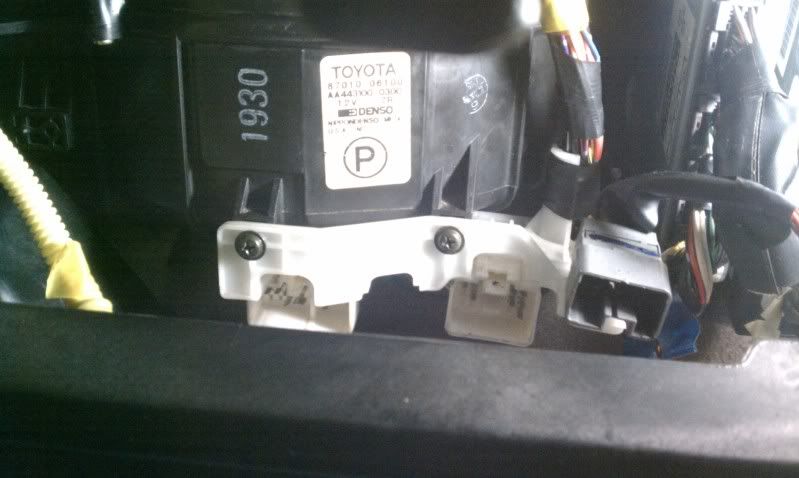
next disconnect the 3 wire connections at the bottom of the blower assembly, then remove the white bracket.
![Image]()
![Image]()
remove the vent for the passenger side vent. the center section unsnaps and slides to the left, then can be rotated down and pulled off. the vent remaining on the left can also be pulled off.
![Image]()
![Image]()
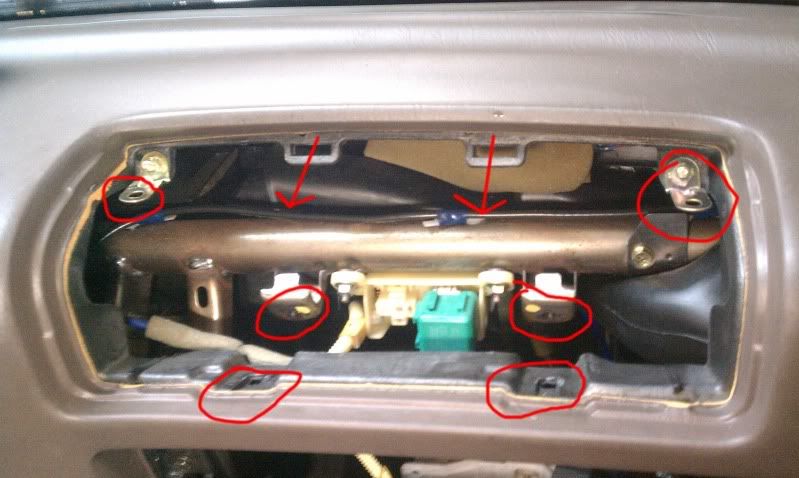
next the airbag needs to be removed to access a bolt for the blower unit. it doesnt HAVE to be removed, but it would be quite difficult to access this bolt. to remove the airbag there are 6 bolts holding it in place. first disconnect the wiring by rotating the white plastic retaining bracket down the press the release button and pull apart.
![Image]()
![Image]()
once these six bolts are removed, there are two clips in the top that will release when the airbag is pulled forward, or better yet, pushed from the backside out.
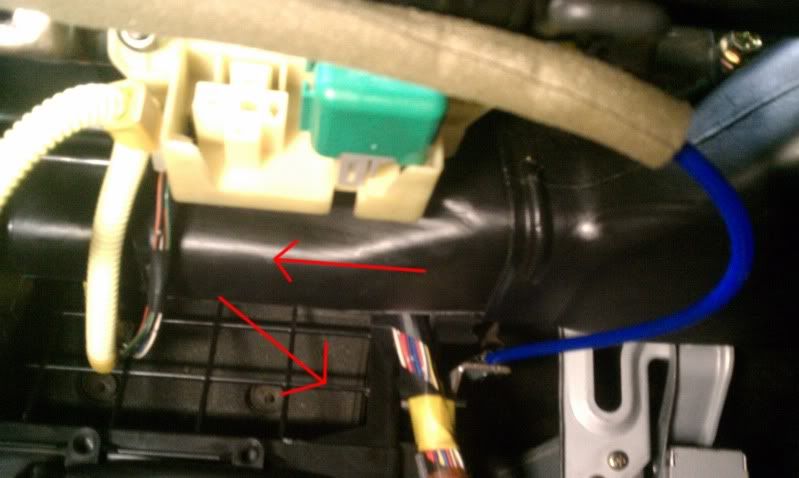
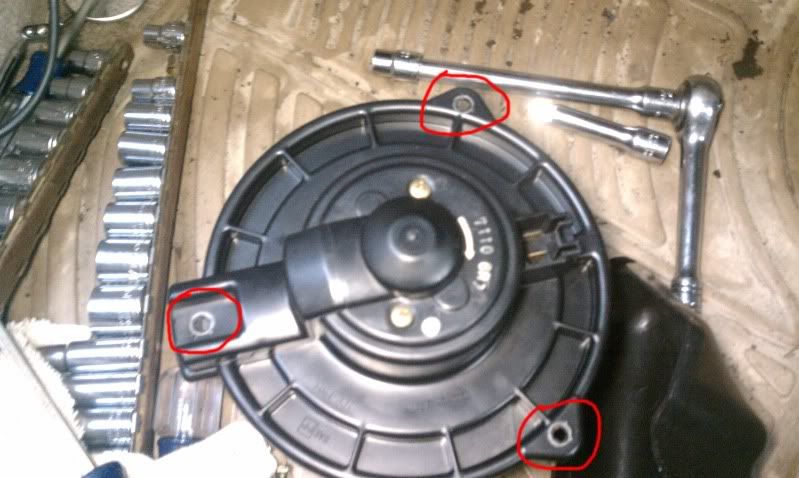
now it's time to tackle the blower assembly. it helps to remove the weight of the blower motor. disconnect the wire running to it and remove the 3 screws holding it in place. here is a view from the bottom showing the wire connection and the screw locations.
![Image]()
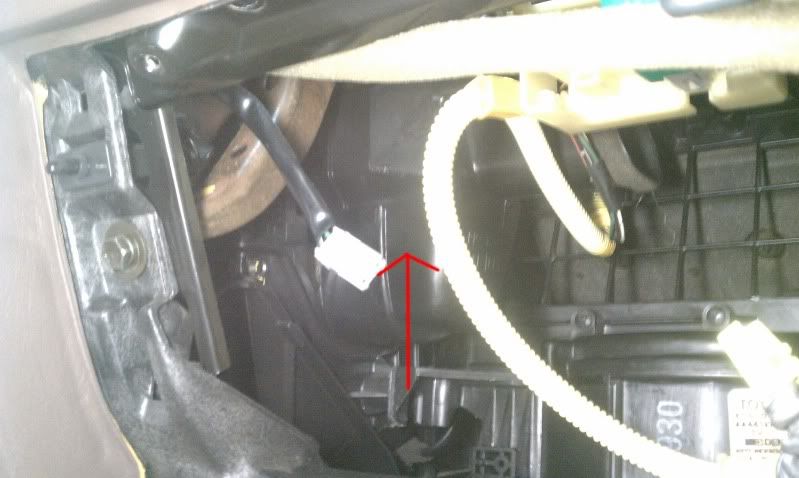
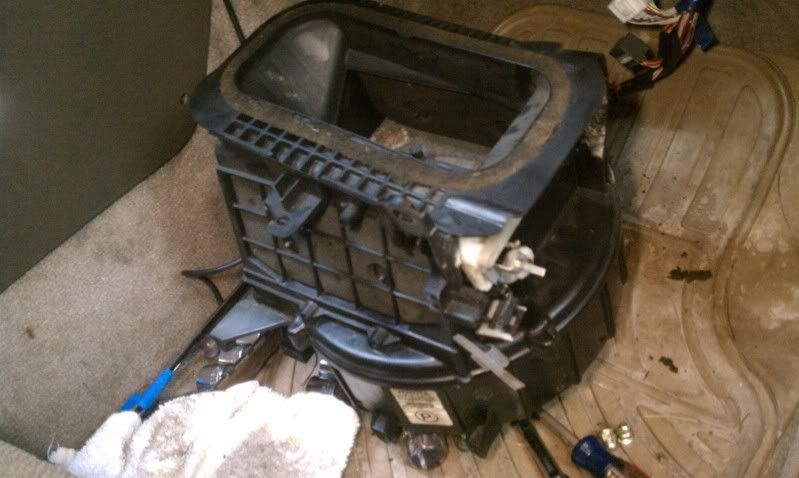
the blower motor will then drop out. now remove the case/housing it's located in. here are two reference photos of what this looks like removed.
![Image]()
![Image]()
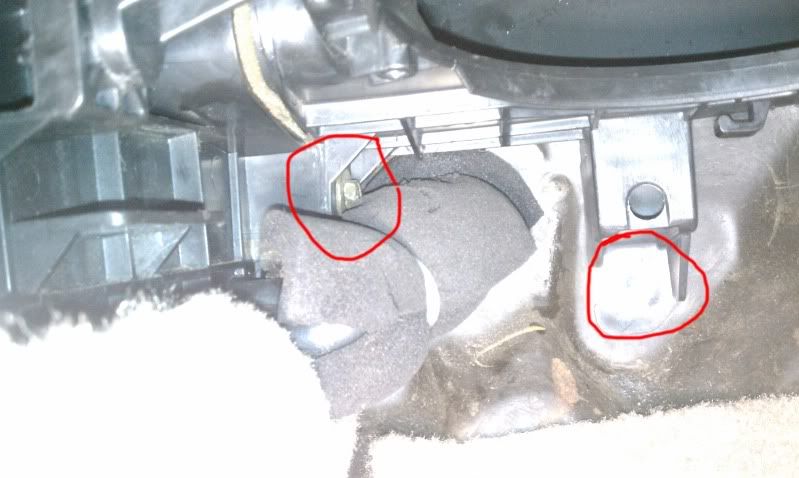
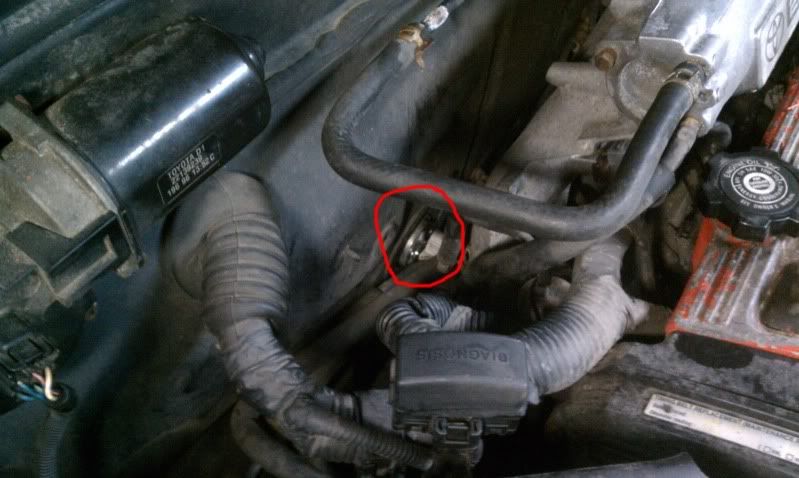
there is one nut the three bolts holding this in place. the nut is on the firewall, one bolt is near that directly above a cooling line
![Image]()
another bolt is by the cover for the evaporator
![Image]()
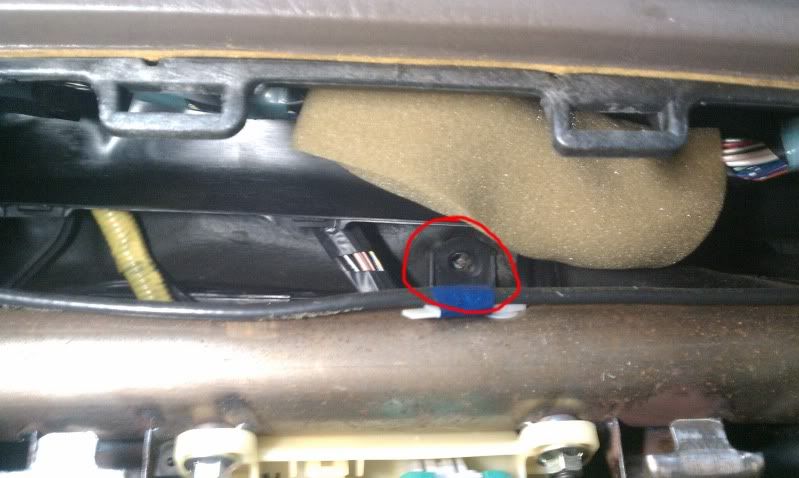
and the last bolt is the difficult one to reach behind the airbag
![Image]()
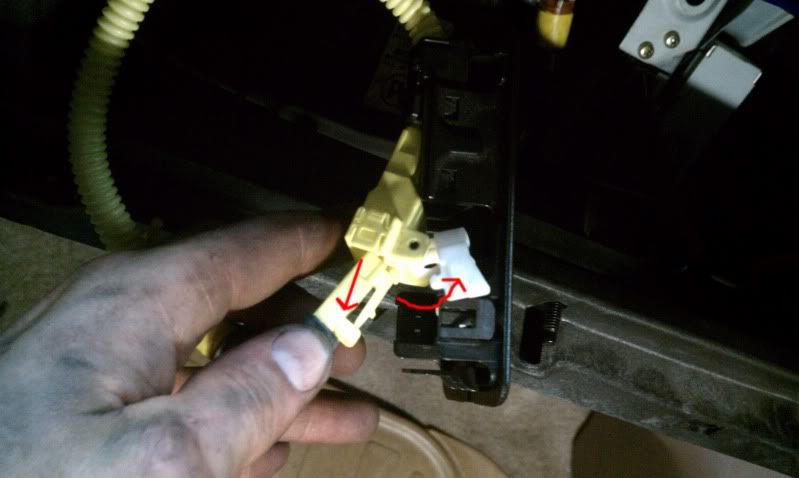
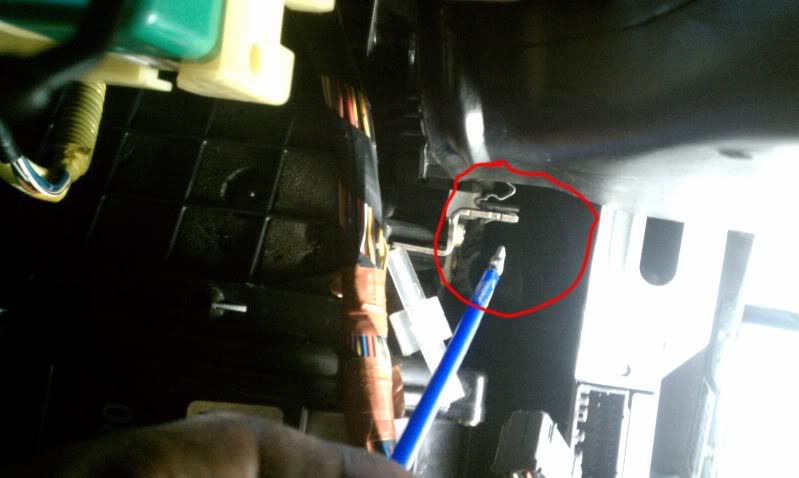
now disconnect the blue wire/cord on the right side. the end slides off the lever and then pull the cord out from the clip.
![Image]()
even though everything is now disconnected, it needs to be pulled down. everything around it including old foam seals help to suspend the housing in place. there is also a white plastic wire clip on the top that can be popped off.
once that is removed, pull down the carpet and now there is clear access to the evaporator cover. here is a photo of it removed to show the bolt locations.
![Image]()
do take note that one bolt is also holding a probe in place that will certainly need to be re-inserted later.
![Image]()
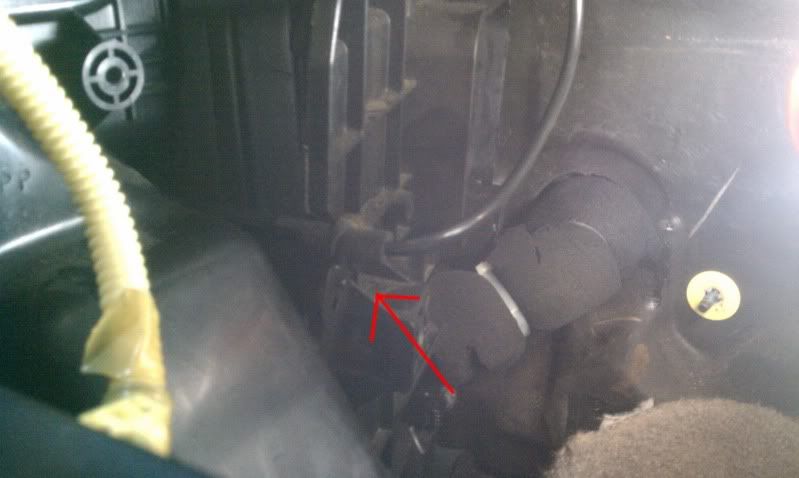
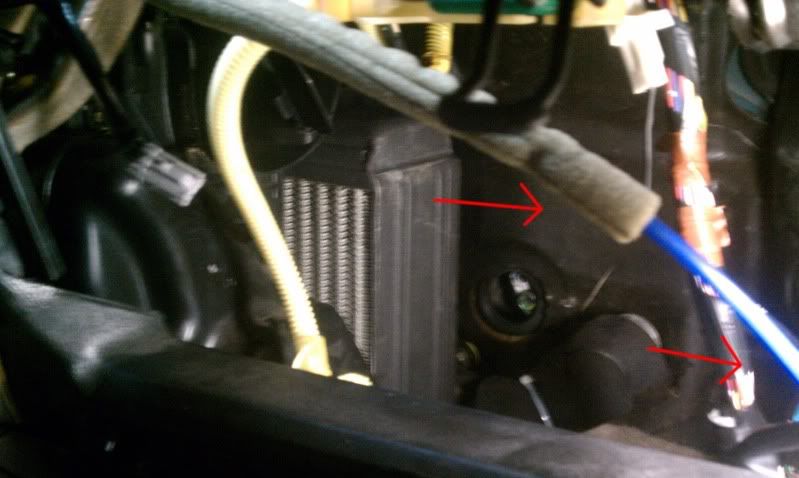
assuming the AC system has already been purged, disconnect the cooling lines under the hood going through the firewall.
![Image]()
i broke them loose form above, but had better access to unscrew and remove them from underneath.
form inside, pull the cooling line connection out from the firewall slightly and slide them and the evaporator out.
![Image]()
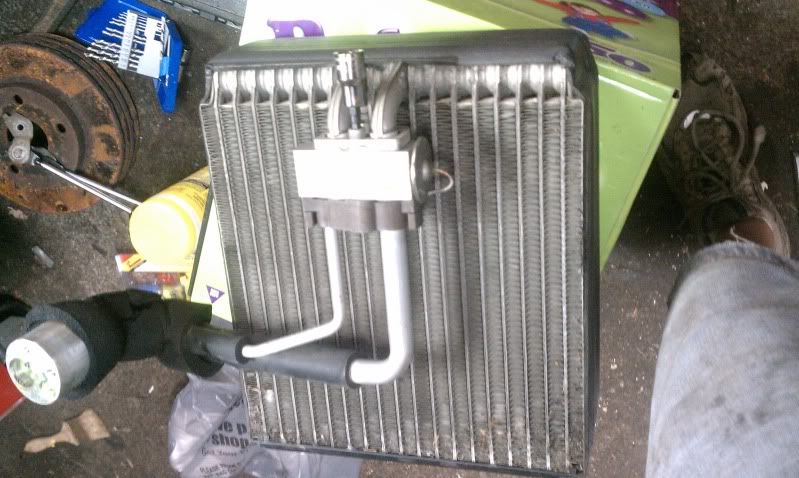
you now have removed the evaporator and expansion valve. you can separate these by taking out the two allen bolts.
![Image]()
installation is pretty much the reverse.
so, i hope i didnt skip any steps but this should give a better understanding on what is involved with removing and replacing the evaporator and/or expansion valve.
the impetus for me was a leak in the AC system o-rings at the condenser so i decided to replace the expansion valve while the system was empty and since they seem to be a weak point.
okay, lets see if my memory serves.
first step is disconnect the battery.
then remove the black cover under the passenger side of the dash. it pulls down from the front and is held in by clips that snap out. it can then be pulled forward to be removed. then the trim under the glove box is removed. i believe there are 2 black screws and the rest is just snapped in place.
the glove box door can now be removed by taking out the 3 nuts at the bottom.
now remove the glove box liner. there are three screw circled at the top, but there is also one or two screws at the bottom (not circled) that need to be removed.
also pop out the connection for the airbag by prying up the front edge then it should pop out. slip it though the hole as you remove the liner and disconnect the light.
remove the plastic floor vent duct on the left. it just pulls off and the plastic clips will release.
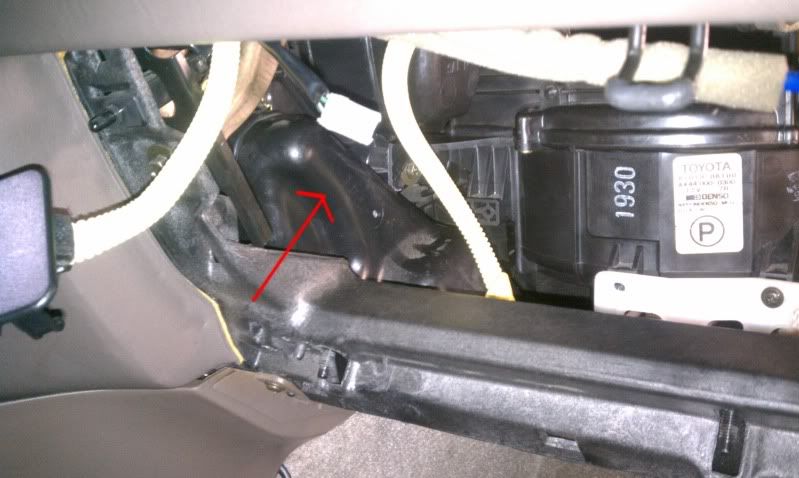
there is some velcro on the bottom of this duct to help hold the carpet in place.
next disconnect the 3 wire connections at the bottom of the blower assembly, then remove the white bracket.
remove the vent for the passenger side vent. the center section unsnaps and slides to the left, then can be rotated down and pulled off. the vent remaining on the left can also be pulled off.
next the airbag needs to be removed to access a bolt for the blower unit. it doesnt HAVE to be removed, but it would be quite difficult to access this bolt. to remove the airbag there are 6 bolts holding it in place. first disconnect the wiring by rotating the white plastic retaining bracket down the press the release button and pull apart.
once these six bolts are removed, there are two clips in the top that will release when the airbag is pulled forward, or better yet, pushed from the backside out.
now it's time to tackle the blower assembly. it helps to remove the weight of the blower motor. disconnect the wire running to it and remove the 3 screws holding it in place. here is a view from the bottom showing the wire connection and the screw locations.
the blower motor will then drop out. now remove the case/housing it's located in. here are two reference photos of what this looks like removed.

there is one nut the three bolts holding this in place. the nut is on the firewall, one bolt is near that directly above a cooling line
another bolt is by the cover for the evaporator

and the last bolt is the difficult one to reach behind the airbag
now disconnect the blue wire/cord on the right side. the end slides off the lever and then pull the cord out from the clip.
even though everything is now disconnected, it needs to be pulled down. everything around it including old foam seals help to suspend the housing in place. there is also a white plastic wire clip on the top that can be popped off.
once that is removed, pull down the carpet and now there is clear access to the evaporator cover. here is a photo of it removed to show the bolt locations.

do take note that one bolt is also holding a probe in place that will certainly need to be re-inserted later.
assuming the AC system has already been purged, disconnect the cooling lines under the hood going through the firewall.
i broke them loose form above, but had better access to unscrew and remove them from underneath.
form inside, pull the cooling line connection out from the firewall slightly and slide them and the evaporator out.
you now have removed the evaporator and expansion valve. you can separate these by taking out the two allen bolts.
installation is pretty much the reverse.
so, i hope i didnt skip any steps but this should give a better understanding on what is involved with removing and replacing the evaporator and/or expansion valve.
")


