Toyota Forum banner

Trying the 4.5 Clear Headlights in my 1999

5K views 16 replies 3 participants last post by  kent55  
#1 · (Edited)
I'm learning how to modify the Gen 4 to fit the much updated Gen 4.5 (CLEAR) headlights.
There are 2 ways to do it.
The correct way to do this is to exchange the front bumper cover, bumper energy absorber, grill, center support for the grill, Headlight support brackets, and bumper cover clips - ALL off the 2000-2001 Camry.
I'm on a budget so I doing it the second way - ' hack and tack ' .
My front bumper is all smashed up so I don't mind cutting it to get better headlights.
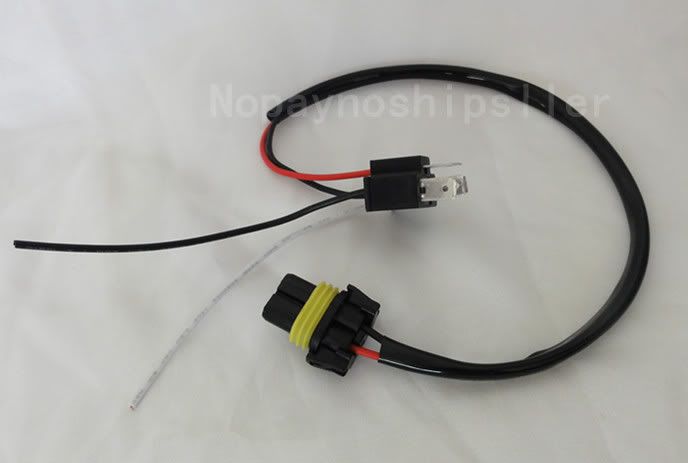
9006 & 9005 are much better bulbs to work with.

This tread http://www.toyotanation.com/forum/1...7-2001/162282-how-00-01-headlight-conversion-w-minimal-parts-no-56k-no-56k.html lost it's pictures but the write-up is my direction.
UPDATE: I also used http://www.toyotanation.com/forum/103-3rd-4th-generation-1992-1996-1997-2001/430667-definitive-gen4-gen4-5-front-end-conversion-guide.html

I got it.
Done!
Image
 
#3 ·
#4 · (Edited)
Here is my progress so far.

Step 1. found a 2001 Camry headlight to practice with before installing brand new ones.

Step 2. Removed Driver's side headlight - This is what it looks like.

Image


Image


Step 3. Bent the headlight support bracket out of the way. (Just pushed it to the left or right) It is riveted to the bumper

Image


Step 4. Trim the bumper cover plastic back. (not sure how much needs trimmed yet , so just started with the back side where it can't be seen.)
Not sure if I needed to do this on my car. On the other side this will be my last step.

I found out later, the inner corner is where the bumper needs cut - marked in red. That lip but test fit before cutting. (mine is already cracked there)
Image


Step 5. Through research, 'slavie' posted this picture of where he though the cut will be:
Original Post : http://www.toyotanation.com/forum/103-3rd-4th-generation-1992-1996-1997-2001/430667-definitive-gen4-gen4-5-front-end-conversion-guide.html

Image


This is the start of my cuts.

Image


You will want to make sure you have the proper cutting tools.
I started off with a battery powered Dremel Tool. The battery died so the cutting was taking forever - recharging.
I went out and bought a bigger rotary tool and the cutting went a lot faster with more power.

I ended up cutting a lot more then I thought I needed to, for my practice headlight to fit.

Image


Before
Image


After
Image


This is where I cut.

Image


Image


Step 6. Inserted the 2001 light and found the bottom mounting hole does NOT line up - BUT there is a hole in the plastic that just about lines up.

Image

Image


So I ground the plastic away just enough for the bolt fit.

Image


Bolt Installed

Image


Step 7. The top outside bolt hole does not line up for some reason.
I ground away a little tab on the back of the housing.
But it still doesn't line up.
.....Hmmmmmmmm
Image

Image

Image


Cut it as close as you can and the top bracket WILL fit.

Step 8. Hint explained by 97trdcamry (http://www.toyotanation.com/forum/103-3rd-4th-generation-1992-1996-1997-2001/162282-how-00-01-headlight-conversion-w-minimal-parts-no-56k-no-56k.html )

I took the adjustment off the 1999 headlight and replace it where the fixed mounting point on the 2001 headlight was.
It lines up prefect.

Image


Image

Image

Image


I didn't realize how bad the corner lights would look as others stated.
I guess I will need to upgrade those.


Next will be the wiring. I'm waiting for the harness to come in from Ebay.
And I still need to buy the new headlights.
I practiced with this used headlight so I didn't mess up a new headlight (making it Not Returnable) if this mod did work out
 
  • Like
Reactions: slavie
#5 ·
Looking good so far. :)

I just noticed on your pic, are those 3 small holes, and that large rectangular hole used for anything on the US camry? Just curious, as that's where the headlamp height adjustment motor is going on the EU/JDM models. In case someone was wondering and maybe wanted to install it. It's on both gen 4 and 4.5.

Here's how the motor is installed and works (note i've temporary removed the bracket to fasten the turn-signal lamp in this video):
 
#6 ·
Looking good so far. :)

I just noticed on your pic, are those 3 small holes, and that large rectangular hole used for anything on the US camry?
Wow that's NEAT!!!!!!

The circles are not used on my US Carmy, though the square is where the headlight adjustment fits (manual/screw adjustment).
Image
 
#7 · (Edited)
This is the wiring harness I bought.
I ordered 1 for the low beams and 1 for the high beams.
I'm going to splice a 9003 adapter in.

Image

Image


Image
 
  • Like
Reactions: randybill
#8 ·
Good work! You did a way better job in taking pictures than I did. Somehow I forgot to take some important pics along the way.

You will notice the increase in light output immediately with the new lights. Enjoy!
 
#11 ·
Keep in mind: those dual-filament light bulbs work in two ways - low beam, or high beam. Normally, when you have high beam you also have low beam. If you just split the connector, you'll have either or, but not both. Also, DRL adds another layer of complexity if your car has it and you plan on keeping it.
 
#12 ·
Excellent Point. I may look into that after I get them to work first. I will look over your post some more and try to figure it out.
 
#13 ·
The parts are starting to come in.

It's like Christmas over here!


Image


Image
 
#14 · (Edited)
Here is the before:

Image
Image


After

Image

Image


You can see how the 2001 Gen 4.5 corner lights fit much better then the 1999.

Image


And with the 1999 corner light still on
Image
 
#15 · (Edited)
The light output is so much better. I'm glad I did this!
Also, as slavie was saying, when I turn the high beams on, the low beams turn off because I split the connection.
The high beams work amazing. I don't need the low beams on at the same time right now.
 
#16 ·
The new lights on Low beam.

Image


Still Low beam

Image


High beams (only) Same View

Image
 
#17 ·
Then I found where to disconnect the Day Time Running light - The grey plug

Image


Image