How to install rear Koni inserts, tips - Toyota Nation Forum : Toyota Car and Truck Forums


» Auto Insurance
» Featured Product
» Wheel & Tire Center

Go Back   Toyota Nation Forum : Toyota Car and Truck Forums > Toyota Passenger and Sports Car Forums > Corolla Forum > 7th Generation (1993-1997)

7th Generation (1993-1997) Specific discussion of the 7th generation

ToyotaNation.com is the premier Toyota Forum on the internet. Registered Users do not see the above ads.
Reply
 
LinkBack Thread Tools Display Modes
Old 07-19-2010, 12:49 PM   #1 (permalink)
New TN User
 
jfgarro's Avatar
 
Join Date: Jul 2008
Location: Doral, Florida
Posts: 42
Gameroom cash: $152205
Thanks: 4
Thanked 1 Time in 1 Post
iTrader Score: 1 reviews
View jfgarro's Photo Gallery
How to install rear Koni inserts, tips

Hi people, I open this thread to share my experiences installing rear Koni inserts to the AE100/101. There are many threads in this respect, but none for our cars! For example, one of the best I read:

http://forums.nasioc.com/forums/show....php?t=1219607

First of all, I live in Costa Rica, and because of the roads here, with potholes every corner, my rear suspension was almost collapsed, too soft and bouncy. About one month ago, I hit one of this asteroid's gifts with my car, and one of the rear shock decided to die in the process. Thanks to Piloter, one of this forum contributors, I have one almost new set of rear Koni inserts, and the last week I decided to install it in my Corolla.

First step, was take the rear suspension out of my car:


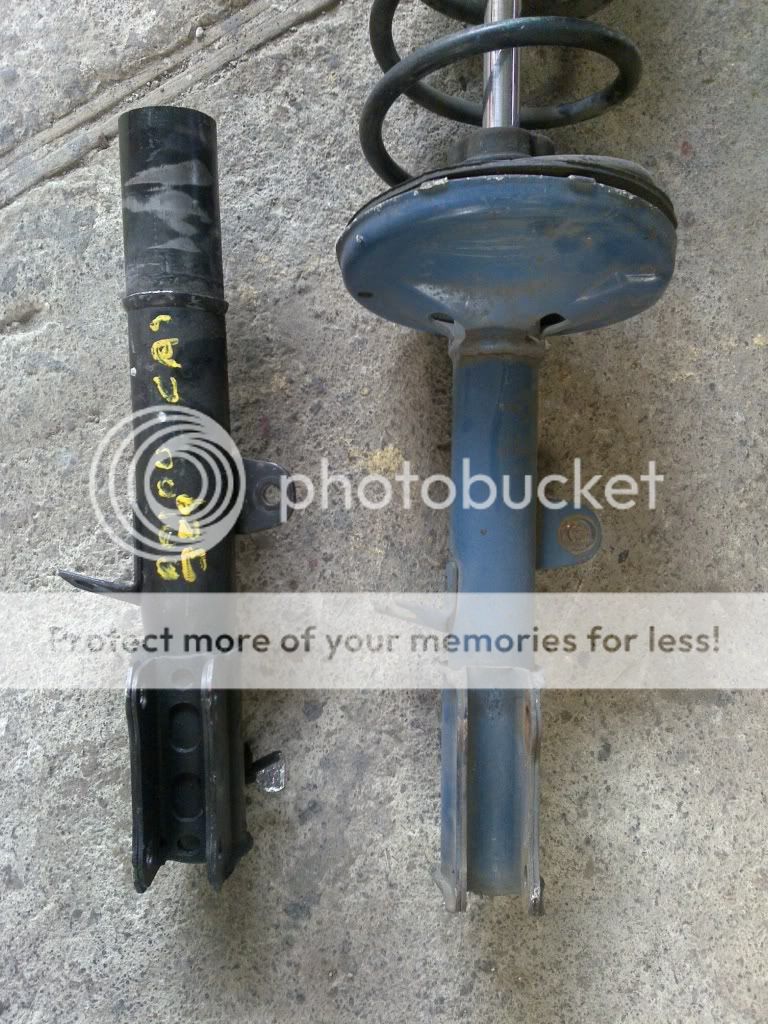
My car have a set of rear blue Australian-made-by-Toyota gas shocks, I never saw this setup in other car. By the way, I have a 1994 base model, with almost 170k miles on it. Because this shock's body has less diameter than the KYB OEM, I bought a pair of collapsed shock in the junkyard for about $20. In the next picture, you can see my old setup (right), with the OEM AE100/101 normal setup (left), cut and ready to accept the Koni insert:


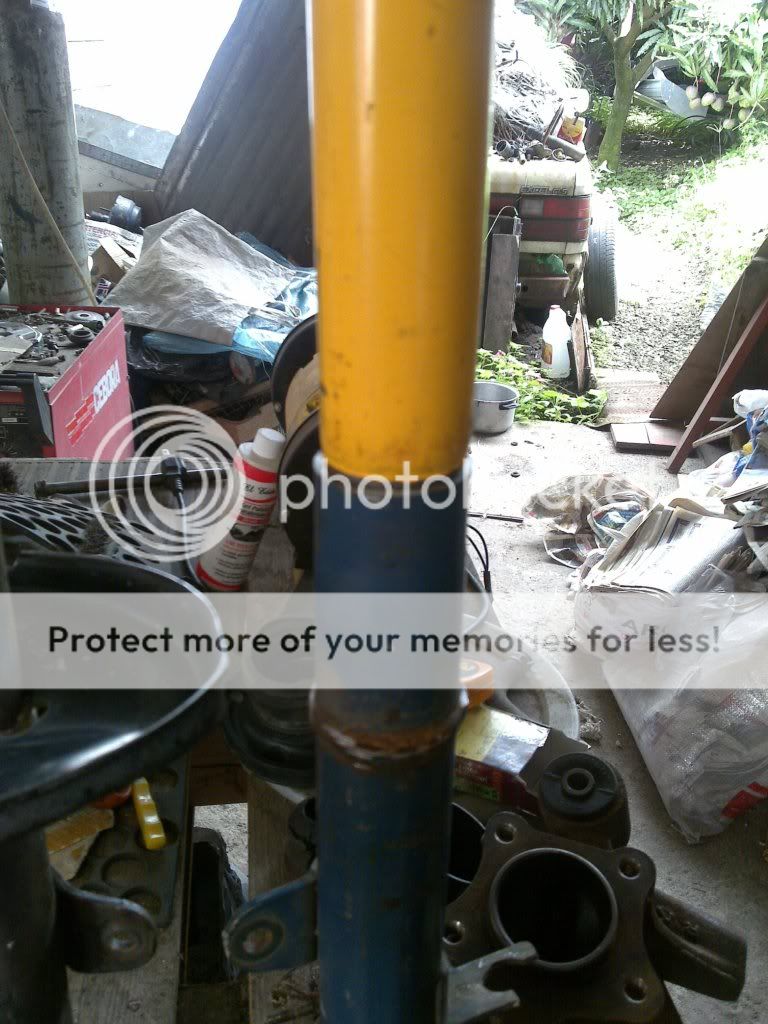
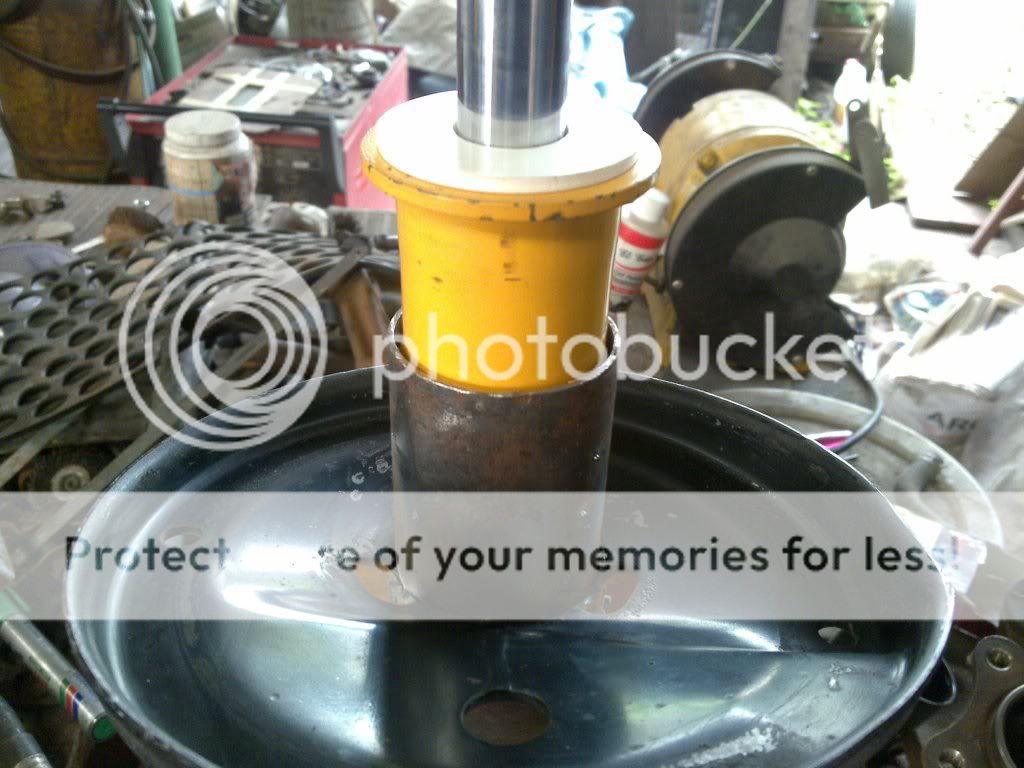
But is in this step when the first problem emerged: the OEM strut is too thick, and insert the Koni cartridge in it is a nightmare. You can see this in the next picture:


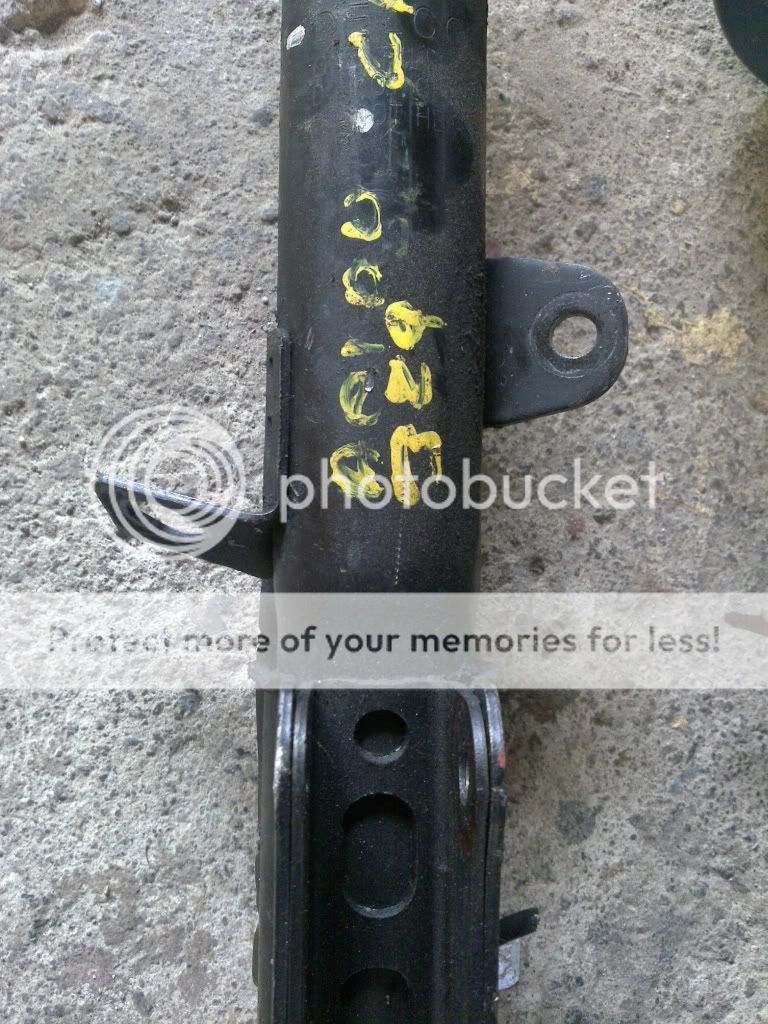
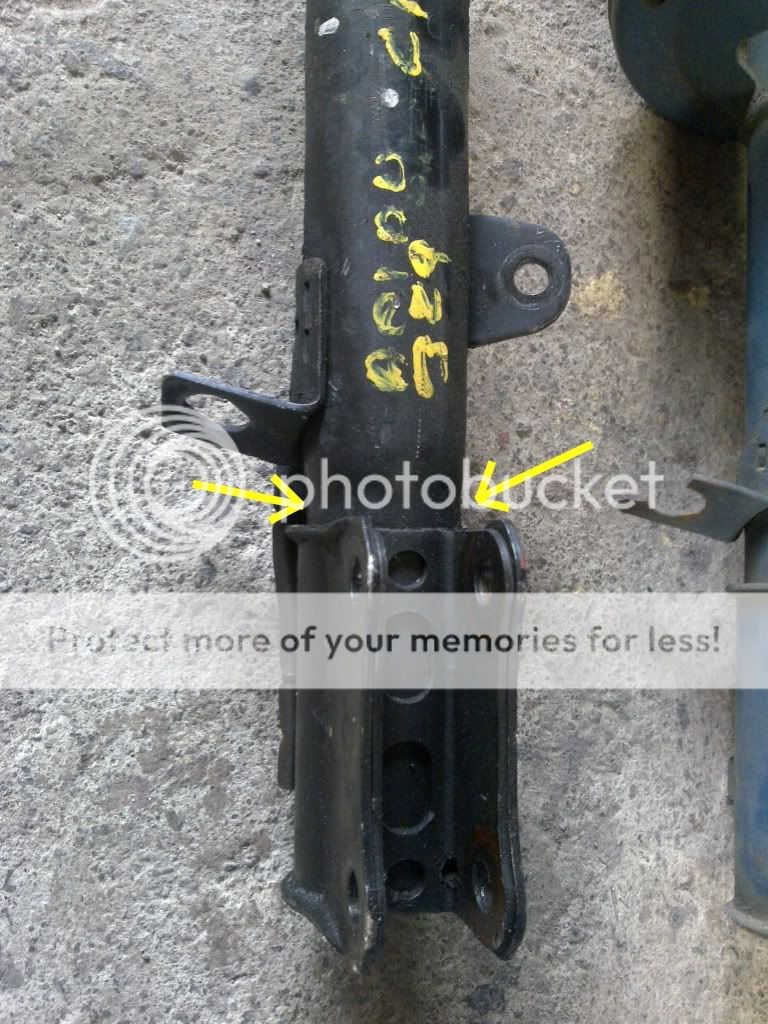
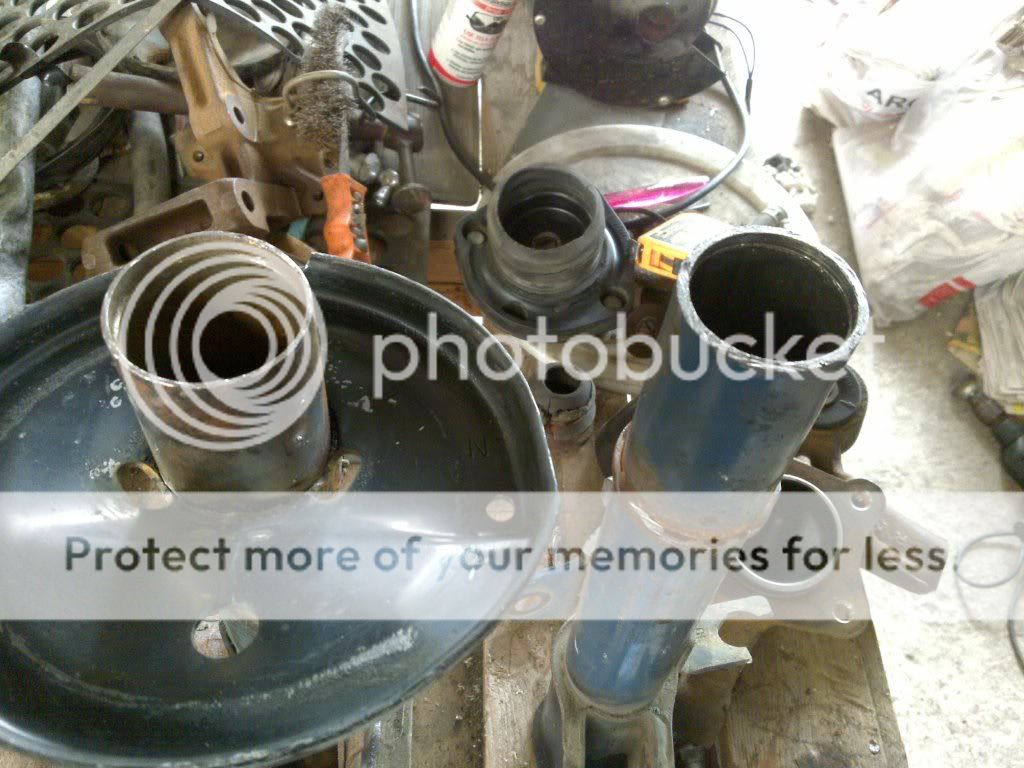
But with patience, force and a lot of McGyver thinking, you can do it...and then, the second problem shows: the last third of the OEM strut has a contraction, near the base where the suspension arms attachs. Hope you can see it in the next 2 pictures, in the second I draw a pair of yellow arrows where this happens:


When this happens, you can call all the japanese engineers and send them to the h....one day lost!!! But, checking my dad's car (an AE92), in special the rear struts, they are almost the same of the AE100/101, but without the contraction.


Other trip to the junkyard and $20 after, this is what I found:


At last! In the next picture, you can see the diference in thickness, the AE92 to the left, the AE100/101 to the right:


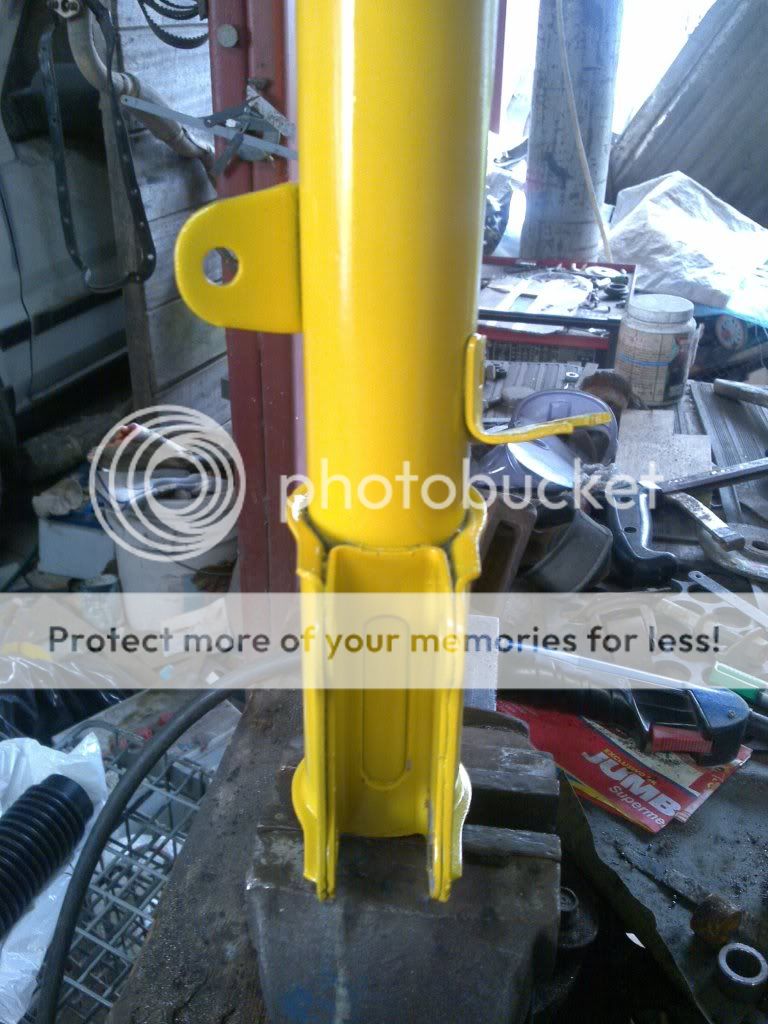
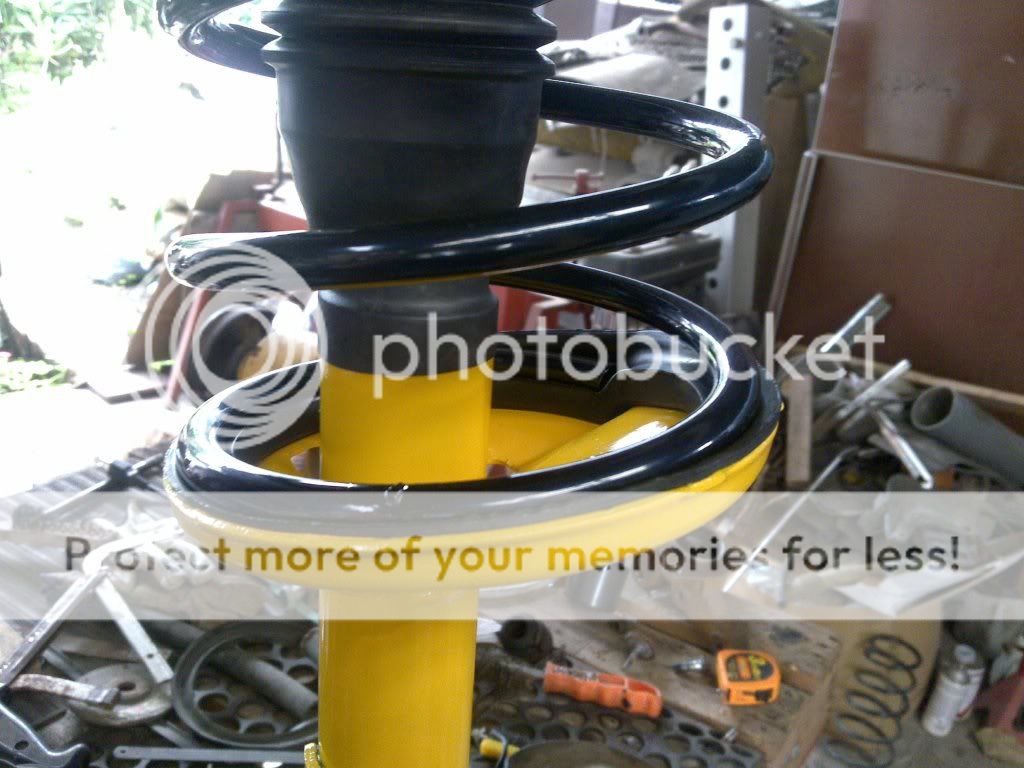
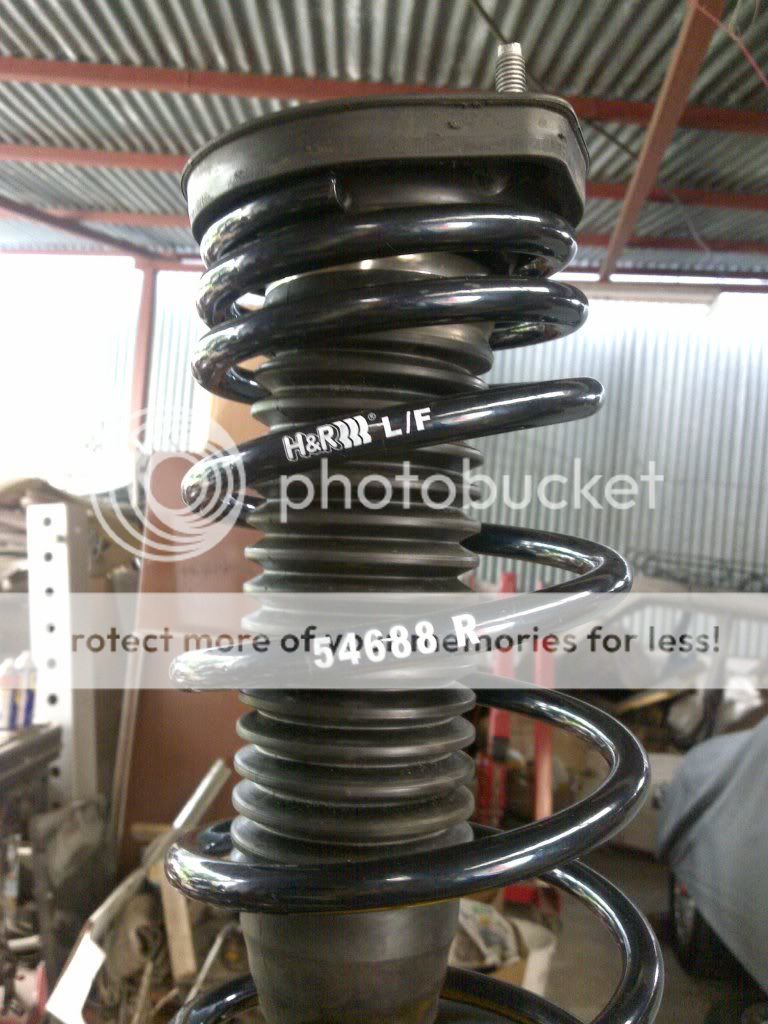
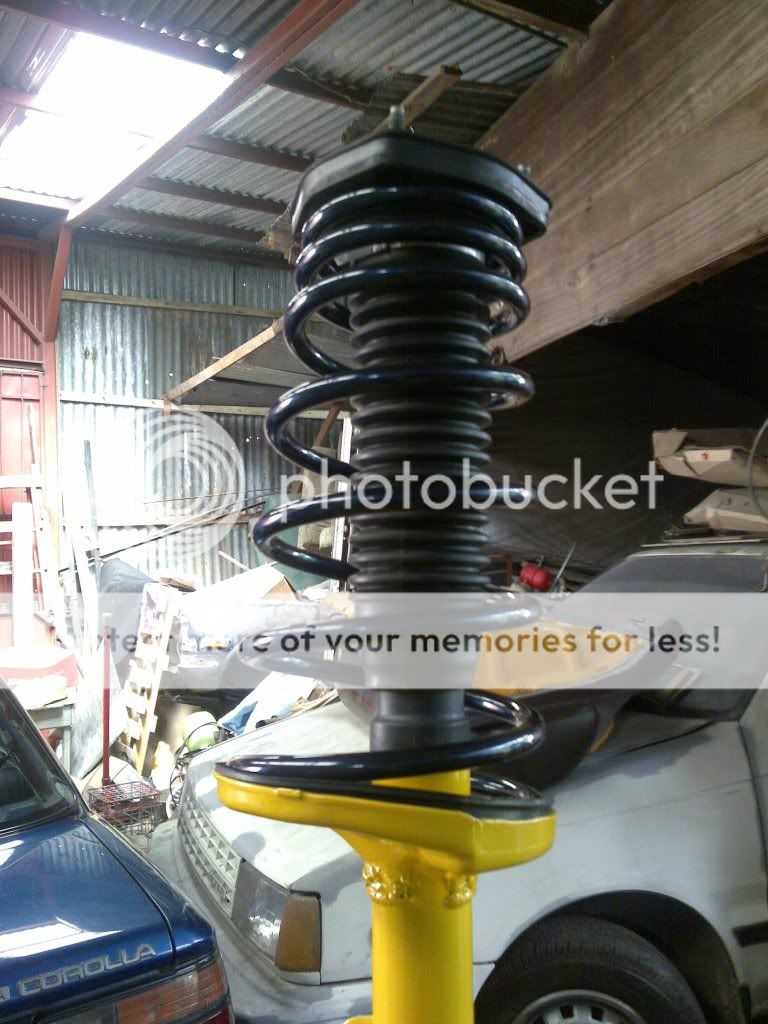
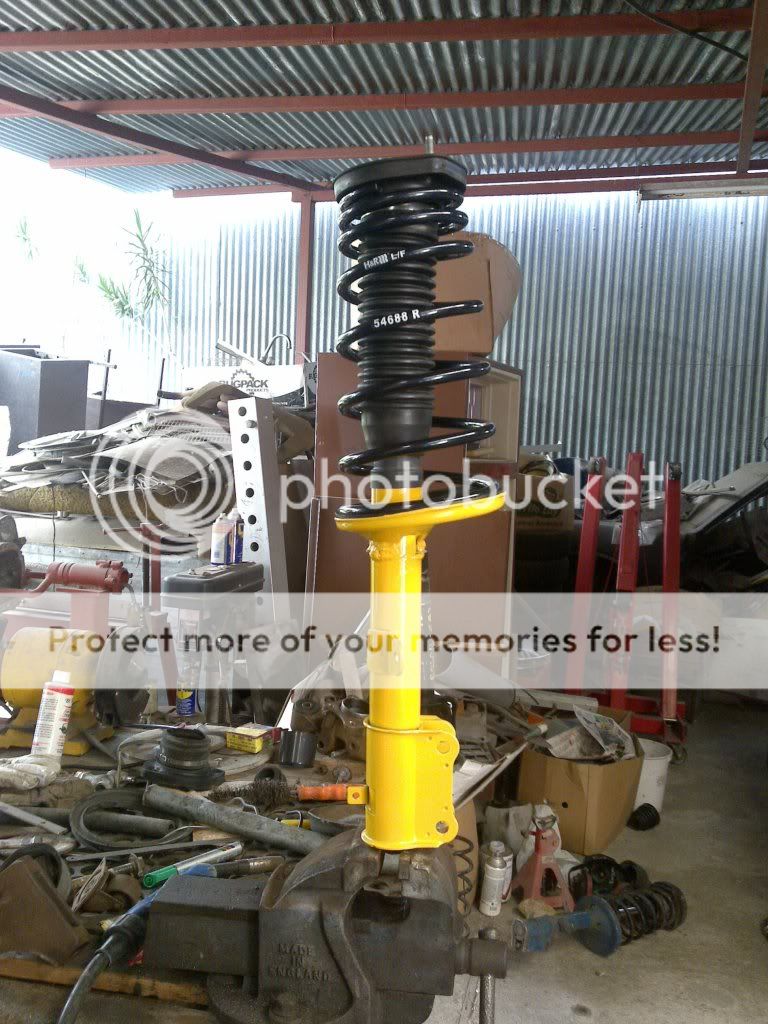
The problem is the base plate (where the spring rest) is smaller in the AE92. Solution: transplant the base plate of the AE100 to the AE92 assembly. This way, the first $20 weren't a waste after all! In the next pictures, you can see the lower part of the AE92 strut (no contraction here), and the assembly completed, a mix of AE92 with AE100 parts. As you can see, I installed on it a set of H&R springs, and when the Konis are set in full soft, they are about twice as stiff than my old OEM setup!


I'm still waiting for the Whiteline rear sway bar I bought on eBay, and because my car don't has front sway bar, I bought an used one, $30 in the same junkyard. All the bushings are in good condition (I tested each one, and can't believe it!) Next step: buy the front Konis, when I have the money for this...I'll keep posting, hope to improve the ride in my car! DTM style anyone??? Just kidding!
jfgarro is offline   Reply With Quote
Sponsored Links
Advertisement
 
Old 07-19-2010, 02:44 PM   #2 (permalink)
Full Throttle
 
Kiwi-Corolla's Avatar
 
Join Date: Apr 2009
Location: New Zealand
Posts: 6,362
Gameroom cash: $953415
Thanks: 69
Thanked 485 Times in 451 Posts
Lifetime Supreme Member
Garage
iTrader Score: 16 reviews
View Kiwi-Corolla's Photo Gallery
Great write up! The pictures are excellent. Nice end result I'll put this link in the DIY sticky thread so that others can find it easily in the future
__________________

** Click here to view my CarDomain page **
Kiwi-Corolla is offline   Reply With Quote
Old 07-27-2010, 05:38 PM   #3 (permalink)
New TN User
 
jfgarro's Avatar
 
Join Date: Jul 2008
Location: Doral, Florida
Posts: 42
Gameroom cash: $152205
Thanks: 4
Thanked 1 Time in 1 Post
iTrader Score: 1 reviews
View jfgarro's Photo Gallery
This weekend I finished all the installation of the suspension, including a rear Whiteline swaybar and the front OEM one (my car is a base model, it didn't had any). With the Konis set half turn from full soft, new OEM bushings all around, and of course the H&R springs, I went for a test drive in my favorite mountain road, and the results were amazing! The car is other now, feels like a sport compact GTi more than the grandma-approved feeling of old days! Very balanced and solid, with a hint of understeer at the limit of tire adhesion. The only thing lack is more information in the steering wheel of the front tires and what they are doing. I set the tire pressures 32/30 psi front / rear, this because the roads here in Costa Rica are not the best ones in the world, and the H&R / Koni combo is stiffer than the OEM setup. But for self knowledge, with the Konis at 3/4 full stiff and the tires pressures set at 36/34, the sensation is DTM or similar race car like, turns almost flat through corners but the downside is a bumpy ride when the road is any but perfect. Here is a few pictures I take today near my office, I really love the new stance with the dropped springs!!! For information my car has Work JDM 15" wheels, with Cooper Cobra 205/60 tires...


jfgarro is offline   Reply With Quote
Old 07-28-2010, 05:06 PM   #4 (permalink)
TIEyota fighter ace
 
Piloter's Avatar
 
Join Date: Sep 2005
Location: Washington State
Posts: 1,243
Gameroom cash: $142700
Thanks: 5
Thanked 22 Times in 22 Posts
iTrader Score: 0 reviews
View Piloter's Photo Gallery
Holy crap, dude, you made it work. Great thinking with the AE92 struts, and congrats on your awesome ride quality!
__________________
WIP AE102.

Piloter is offline   Reply With Quote
The Following User Says Thank You to Piloter For This Useful Post:
jfgarro (07-28-2010)
Old 09-02-2011, 01:58 AM   #5 (permalink)
Official TN Member
 
monkeypower102's Avatar
 
Join Date: Apr 2010
Location: San Diego
Posts: 137
Thanks: 3
Thanked 2 Times in 2 Posts
iTrader Score: 0 reviews
View monkeypower102's Photo Gallery
I have a few questions, how did you know where to cut the strut housing at? I'm scared I might cut them too high or too low. Also, did you weld the cuts back? And how do you adjust them? I just got mine and I'm confused just looking at them lol
__________________
"The Frequent Flyer!"
monkeypower102 is offline   Reply With Quote
Old 09-02-2011, 07:43 AM   #6 (permalink)
One with the force
 
Bitter's Avatar
 
Join Date: Sep 2006
Location: Near Chicago
Posts: 4,833
Gameroom cash: $558900
Thanks: 3
Thanked 152 Times in 148 Posts
iTrader Score: 0 reviews
View Bitter's Photo Gallery
get better tires than cooper cobra man.
Bitter is offline   Reply With Quote
Old 09-02-2011, 01:05 PM   #7 (permalink)
Andele, andele!
 
speedy25's Avatar
 
Join Date: Aug 2009
Location: NE oHIo
Posts: 1,337
Gameroom cash: $235545
Thanks: 0
Thanked 84 Times in 83 Posts
iTrader Score: 0 reviews
View speedy25's Photo Gallery
I didnt see a pic of how the struts were reattached to the tubes. While your pics show they are, since the springs are on!

I congratulate you on your tenacity and ingenuity of finding the right parts to make it work.

-SP
speedy25 is offline   Reply With Quote
Old 09-03-2011, 02:46 PM   #8 (permalink)
New TN User
 
jfgarro's Avatar
 
Join Date: Jul 2008
Location: Doral, Florida
Posts: 42
Gameroom cash: $152205
Thanks: 4
Thanked 1 Time in 1 Post
iTrader Score: 1 reviews
View jfgarro's Photo Gallery
Quote:
Originally Posted by monkeypower102 View Post
I have a few questions, how did you know where to cut the strut housing at? I'm scared I might cut them too high or too low. Also, did you weld the cuts back? And how do you adjust them? I just got mine and I'm confused just looking at them lol
I measured the Konis top to bottom, then cut the strut housings about one inch short. There is two ways the Konis keep attached to the strut, the first is by friction, because it has small indentations for this: you need to work hard for the Konis to enter full length in the OEM strut. The second way is by the lower bolt you need to screw, and by this 2 ways, the Konis will never pull apart from the OEM strut housing. To prevent water finding his way to the interior, I cut a piece from a bike pneumatic and put around the housing cutting.

For adjust the front dampers, you need to use the tool Koni put in the kit: you put this tool in the strut upper pin and rotate according what you want for the ride: clockwise for stiff, or the other way for a soft ride. For the rears, you need to take out the full strut from the car, remove the springs, full compress the strut and rotate the damper's pin like the fronts. Then assemble the whole thing and put back in the car. I need to do this at least 4 times until I was happy with the ride, an afternoon of work. Hope this help you!!!
jfgarro is offline   Reply With Quote
Old 09-03-2011, 04:50 PM   #9 (permalink)
Official TN Member
 
monkeypower102's Avatar
 
Join Date: Apr 2010
Location: San Diego
Posts: 137
Thanks: 3
Thanked 2 Times in 2 Posts
iTrader Score: 0 reviews
View monkeypower102's Photo Gallery
Quote:
Originally Posted by jfgarro View Post
I measured the Konis top to bottom, then cut the strut housings about one inch short. There is two ways the Konis keep attached to the strut, the first is by friction, because it has small indentations for this: you need to work hard for the Konis to enter full length in the OEM strut. The second way is by the lower bolt you need to screw, and by this 2 ways, the Konis will never pull apart from the OEM strut housing. To prevent water finding his way to the interior, I cut a piece from a bike pneumatic and put around the housing cutting.

For adjust the front dampers, you need to use the tool Koni put in the kit: you put this tool in the strut upper pin and rotate according what you want for the ride: clockwise for stiff, or the other way for a soft ride. For the rears, you need to take out the full strut from the car, remove the springs, full compress the strut and rotate the damper's pin like the fronts. Then assemble the whole thing and put back in the car. I need to do this at least 4 times until I was happy with the ride, an afternoon of work. Hope this help you!!!
Thanks man! But I gotta ask you though, what's the pin look like? I don't seem to see it on the rears that I have (I'll try to post pics when I can if it helps). Also, how can you tell when the struts are full soft or stiff? I messed with them and now I don't know if the rebound is even, and I'm scared to install them like that :/
__________________
"The Frequent Flyer!"
monkeypower102 is offline   Reply With Quote
Sponsored Links
Advertisement
 
Reply

  Toyota Nation Forum : Toyota Car and Truck Forums > Toyota Passenger and Sports Car Forums > Corolla Forum > 7th Generation (1993-1997)

Bookmarks

Thread Tools
Display Modes

Posting Rules
You may not post new threads
You may not post replies
You may not post attachments
You may not edit your posts

BB code is On
Smilies are On
[IMG] code is On
HTML code is Off
Trackbacks are On
Pingbacks are On
Refbacks are On


Powered by vBadvanced CMPS v3.2.2

All times are GMT -5. The time now is 12:31 AM.


Powered by vBulletin® Copyright ©2000 - 2012, Jelsoft Enterprises Ltd.
Search Engine Optimization by vBSEO 3.6.0
Garage Plus vBulletin Plugins by Drive Thru Online, Inc.
ToyotaNation.com is an independent Toyota/Lexus enthusiast website. ToyotaNation.com is not sponsored by or in any way affiliated with Toyota Motor Sales, USA, Inc. The Toyota, Lexus and Scion names and logos are trademarks owned by Toyota Motor Sales, USA, Inc.