

Disclaimer: i take no responsibilities for your fuck-ups, do at own risk.
So it was time to change the oil in the coupe and I was hesitant to dish out 35 bucks to the local jiffy lube to get my oil done, or 75 bucks if i wanted synthetic. So I went to Kragens, picked up a case of Mobil 7500 Synthetic blend oil for 20 bucks, a fram oil filter for 4 bucks and figured i'd do it myself. I did half the body work on my car and a full suspension set-up so i thought i could tackle this too.
Parts required :
oil filter wrench
oil (5W30 Mobil 7500 synthetic)
containers for old oil
a socket to take the drain plug off with (i think it was a 14mm)
time to get to work!
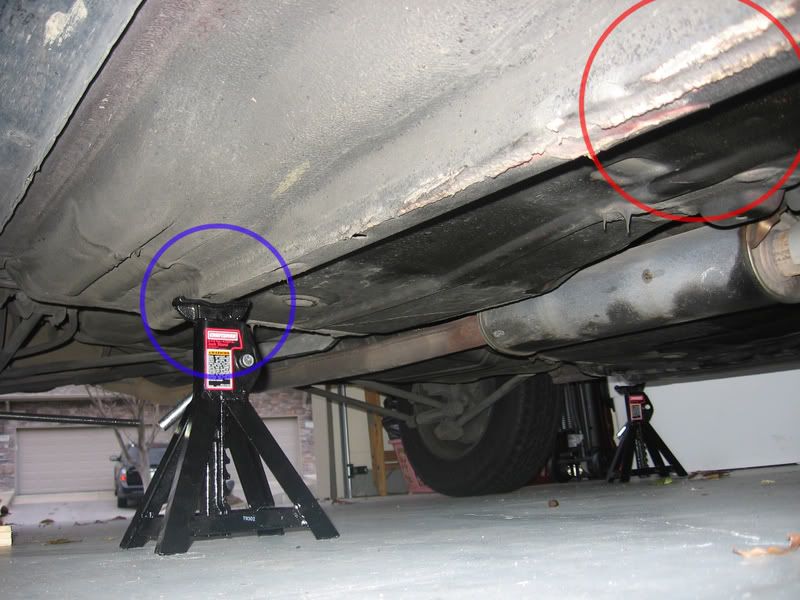
Step 1 : warm car up to a warm state (just above the low mark so that the oil is fairly liquidy) and raise the car up on jackstands. In my case, i secured my hood with an old broom handle simply because i don't trust the hood struts.
![Image]()
Step 2: remove and inspect oil cap for sludge or for symptoms of a blown headgasket. (mine was gunky and old, but no noticable sludge or headgasket problems)
![Image]()
![Image]()
Step 3: Locate drain plug. On the bottom-side of the car near the passenger wheel. Should be easy to spot.
![Image]()
(I have no clue what that small leaf on it was :lol: )
Step 4: place catch container below the drain plug, unscrew it and let 'er rip. The key is to yank the plug as fast as you can so you don't have hot oil going down your hand as you turn the final few threads and decide to pull it out. Once you feel it is almost out, spin fast and yank it away, making sure the stream of oil goes into the catch container.
![Image]()
I used a total of two Gallon containers. Filled up one and a half.
Step 5: clean off the drain plug and place a new washer on it if the old one is worn out. Mine was a bronze one that was good as new. I'll replace it on the next oil change.
![Image]()
Step 6: now is a good time to take off the oil filter (do it only once all of your oil is drained. Grab your wrench and spin counter clockwise. Once it is loose, you want to take it off as fast as you can and don't turn it over! the filter is full of oil (in my case hot oil) that will want to go everywhere. The filter is essentially a cup on the inside so you want to make sure it is in the right orientation when you take it off so that there is no major spillage everywhere.
![Image]()
What the block looks like without the filter.
Step 7: (I may have lost count =P ) Now is a good time to reinstall the drain plug. Put it back in and tighten it but not too much. By hand first and then via socket. Don't overtighten as it may cause the threads to wear. Use your own judgement. Tighten to the point where it feels tight and then move on. Clean off random oil residue along the pan so that once you start putting oil in, spills and drips will be easy to spot.
![Image]()
Step 8: Take your new filter, unpackage it, oil up the rubber washer and the surface that will touch the block with the new oil and tighten it on. tighten by hand and once the rubber washer contacts the block, do a 3/4 turn more and then it'll be fine. Check to make sure it is securely tigthened.
![Image]()
![Image]()
![Image]()
(filter in place)
Last step : fill your car up with oil. After each quart, inspect for visual leaks. I put in 5 quarts. Turn the car on, pray it doesn't explode, and let it run, observing for any leaks. I let mine run for about 15 minutes with no visible leakeage.
You're done. Go have a cookie and take your car for a spin around the block. Congrats as you just did your own oil change!
p.s. make sure to properly dispose of old oil at an oil recycling center.
As the coupe stands now, 6k miles after massive front-end collision
![Image]()
![Image]()
(yes.....it is lowered :lol: )
Thanks and i hope this was of some help!
-alex
So it was time to change the oil in the coupe and I was hesitant to dish out 35 bucks to the local jiffy lube to get my oil done, or 75 bucks if i wanted synthetic. So I went to Kragens, picked up a case of Mobil 7500 Synthetic blend oil for 20 bucks, a fram oil filter for 4 bucks and figured i'd do it myself. I did half the body work on my car and a full suspension set-up so i thought i could tackle this too.
Parts required :
oil filter wrench
oil (5W30 Mobil 7500 synthetic)
containers for old oil
a socket to take the drain plug off with (i think it was a 14mm)
time to get to work!
Step 1 : warm car up to a warm state (just above the low mark so that the oil is fairly liquidy) and raise the car up on jackstands. In my case, i secured my hood with an old broom handle simply because i don't trust the hood struts.

Step 2: remove and inspect oil cap for sludge or for symptoms of a blown headgasket. (mine was gunky and old, but no noticable sludge or headgasket problems)


Step 3: Locate drain plug. On the bottom-side of the car near the passenger wheel. Should be easy to spot.

(I have no clue what that small leaf on it was :lol: )
Step 4: place catch container below the drain plug, unscrew it and let 'er rip. The key is to yank the plug as fast as you can so you don't have hot oil going down your hand as you turn the final few threads and decide to pull it out. Once you feel it is almost out, spin fast and yank it away, making sure the stream of oil goes into the catch container.

I used a total of two Gallon containers. Filled up one and a half.
Step 5: clean off the drain plug and place a new washer on it if the old one is worn out. Mine was a bronze one that was good as new. I'll replace it on the next oil change.

Step 6: now is a good time to take off the oil filter (do it only once all of your oil is drained. Grab your wrench and spin counter clockwise. Once it is loose, you want to take it off as fast as you can and don't turn it over! the filter is full of oil (in my case hot oil) that will want to go everywhere. The filter is essentially a cup on the inside so you want to make sure it is in the right orientation when you take it off so that there is no major spillage everywhere.

What the block looks like without the filter.
Step 7: (I may have lost count =P ) Now is a good time to reinstall the drain plug. Put it back in and tighten it but not too much. By hand first and then via socket. Don't overtighten as it may cause the threads to wear. Use your own judgement. Tighten to the point where it feels tight and then move on. Clean off random oil residue along the pan so that once you start putting oil in, spills and drips will be easy to spot.

Step 8: Take your new filter, unpackage it, oil up the rubber washer and the surface that will touch the block with the new oil and tighten it on. tighten by hand and once the rubber washer contacts the block, do a 3/4 turn more and then it'll be fine. Check to make sure it is securely tigthened.


(filter in place)
Last step : fill your car up with oil. After each quart, inspect for visual leaks. I put in 5 quarts. Turn the car on, pray it doesn't explode, and let it run, observing for any leaks. I let mine run for about 15 minutes with no visible leakeage.
You're done. Go have a cookie and take your car for a spin around the block. Congrats as you just did your own oil change!
p.s. make sure to properly dispose of old oil at an oil recycling center.
As the coupe stands now, 6k miles after massive front-end collision


(yes.....it is lowered :lol: )
Thanks and i hope this was of some help!
-alex
 . I'm hoping now that I'm maintaining the car, my frequent oil changes will offset the slight lack of maintenance in its earlier life.


