

DIY: 1996 Camry Transmission Fluid & Strainer Replacement Procedure 5S-FE (GEN 3)
I completed this procedure at 207,000 km on my 1996 Camry 2.2L automatic (5S-FE engine). The transmission fluid was turning a brownish-red colour. The transmission fluid was previously flushed at 145,000 km. No problems with the transmission - just preventive maintenance. Although, this procedure only covers the transmission, I also drained and filled the differential fluid at the same time. There is a very good DIY already posted on TN for the differential drain and fill. I recommend that you follow this.
http://www.toyotanation.com/forum/showthread.php?t=197974
Note that my local Toyota service department advised me that Toyota does NOT recommend changing the transmission strainer. Toyota officially only recommends a drain and fill. However, most other references including a local independent transmission shop informed me that for the small cost of a new strainer, they always change the strainer at the same time. After taking mine apart, the strainer was clean. It didn't appear to be in need of replacement.
Disclaimer
Use this guide at your own risk! I assume no responsibility for any damage to your vehicle or personal injury as a result of following this guide. Any comments to improve the procedure will be gratefully received and incorporated where possible.
Special Tools Required
¼” drive torque wrench (suitable to be set to 48 in.lbs. of torque).
10mm Allen (Hex) Key Wrench
Time Required
It took me 4 hours from start to finish, including time to take photos and make notes as well as fill the transmission and differential to the right level and take the car for a test drive. If I had to do it again, I think I could reasonably pare this down to about 2 hours.
![Image]()
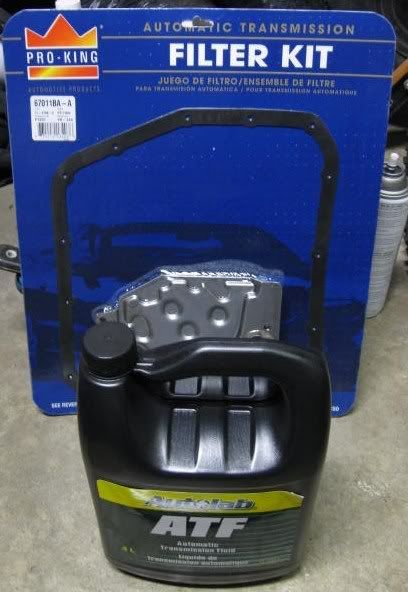
Parts Required.
Aftermarket transmission gasket & strainer $19.72 taxes and environmental handling charge included (Partsource no. FK244)
10 liters of transmission fluid (compatible with Dexron II) $40.02 taxes and “Ecofee” included (Canadian Tire no. 028-1534-0). This is enough fluid to flush the transmission and refill the differential.
Total = $59.74 CAD (taxes included).
Note: For comparison, a Toyota OEM gasket = $18.31 + Toyota OEM transmission strainer = $146.90 = $165.21 (taxes included). Transmission flush at local lube shop is $112 (taxes included). To drop the pan, replace the filter and flush the transmission at a local transmission shop is $248.60 (taxes included).
Let’s get started!
![Image]()
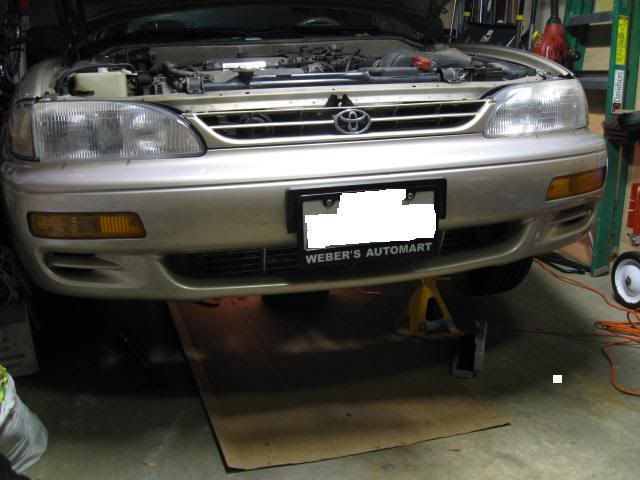
1. Warm up the engine and transmission by driving the car just before this procedure. Hot transmission fluid is more effective than cold fluid at removing built up sediment. Block the rear tires, set the parking brake, jack up the front of the car and lower it on to jack stands. Ensure that the car is stable and adequately supported prior to proceeding. Place large amounts of newspaper or cardboard under the car to catch any spills.
![Image]()
![Image]()
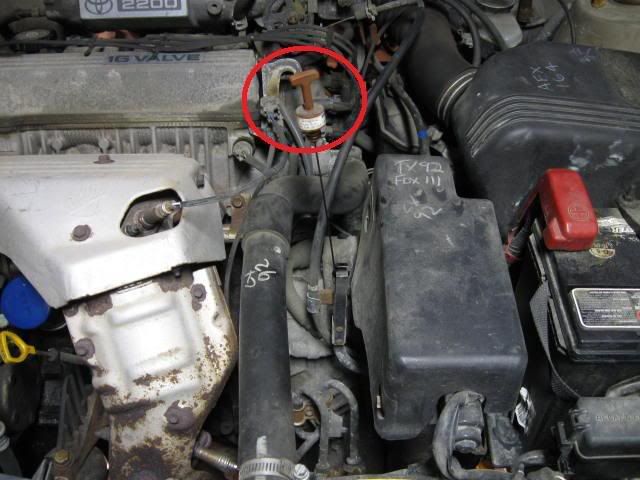
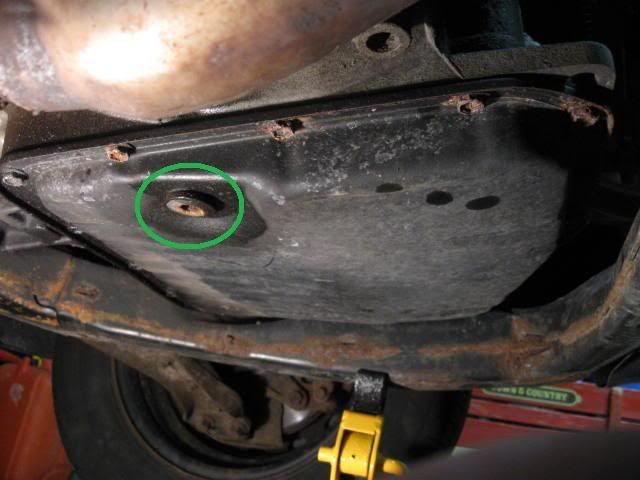
2. Remove the transmission fluid dip stick (red circle) and set aside. Place a catch pan under the drain plug (green circle). The drain plug is on the bottom of the transmission pan which is located on driver’s side of the engine compartment. It is accessed by crawling underneath the car from the front.
![Image]()
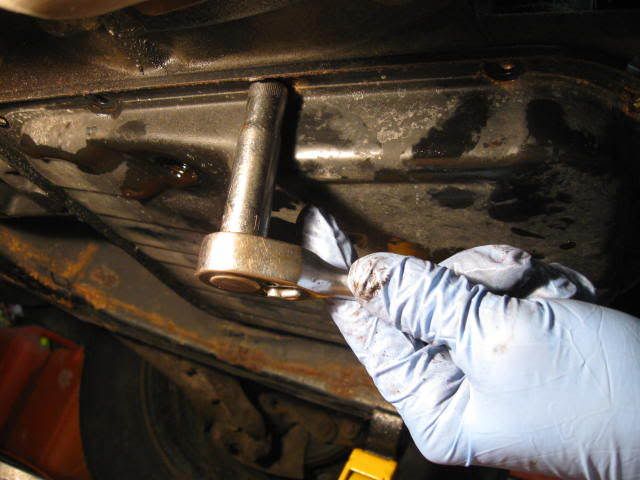
3. Remove the plug (10mm hex key wrench required) and allow the fluid to drain. Warning: Fluid temperatures can exceed 350°F in a hot transmission, so be very careful when draining. Wear protective gloves. Be sure the drain pan is properly centered as the fluid will come out with some force.
![Image]()
4. There are 15 bolts securing the transmission pan to the transmission. While the transmission is draining, remove all of the rear bolts (10mm socket) and loosen the remaining two front bolts. Note that my front bolts were severely rusted and I rounded off the corners on a couple of them trying to remove them. I was eventually able to get them out by spraying the bolts with penetrating oil and using a slightly smaller 3/8” ( 9.5mm) socket to turn them out. If your bolts are rusted, be very careful. If you break the head off or round the corners, this will significantly complicate this job. Note that I replaced the two damaged bolts with stainless steel bolts and washers. For reference, the bolt size is M6 x1.0 x 14mm. My transmission pan stuck to the transmission even after that the 13 bolts were removed and the other two were loosened.
![Image]()
5. Reposition the drain pan to the back of the transmission and gently loosen the rear of the pan by prying downward with small pry bar or flat head screwdriver using one hand, while holding the pan up with your other hand. Slowly lower the rear corner of the pan. Fluid will pour out into your drain pan. This is where the newspapers come in handy – in case you miss the target!
![Image]()
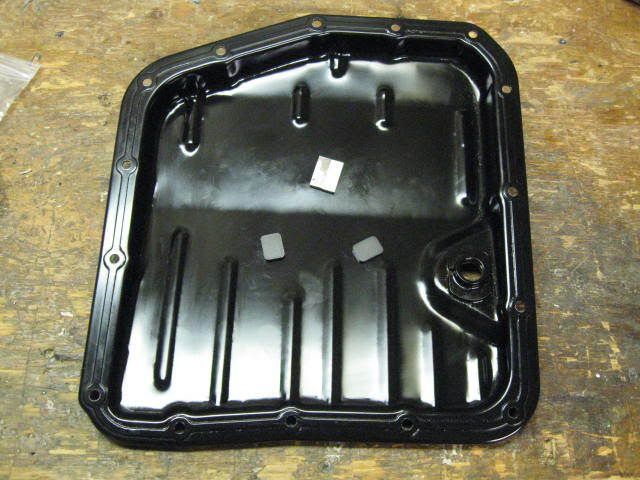
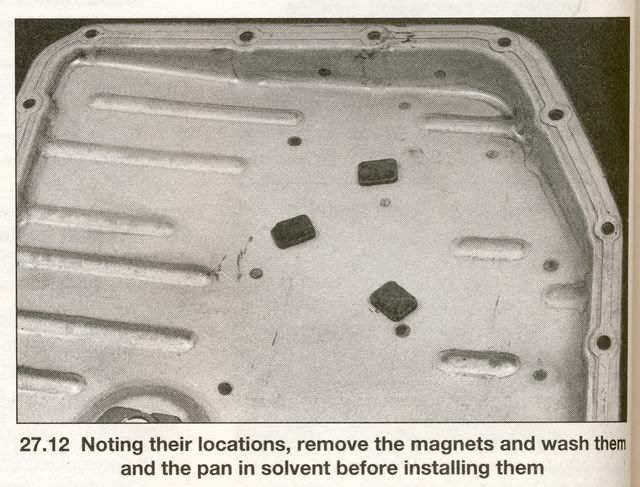
6. When the fluid has stopped draining from the transmission pan, remove the last two bolts and lower the transmission pan. Here is what mine looked like. There should be three magnets. Mine was missing one, presumably lost by the person who did this procedure before me. Magnets are circled in red.
[EDIT: Nov. 22, 2011] I have subsequently learned that the photo shown in my Haynes manual with three magnets is for the transmission pan in a six cylinder Camry engine. The 5SFE four cylinder engine only has two magnets in the transmission pan as shown in the above photo. Thanks to TN member Posimoto for pointing this out.
![Image]()
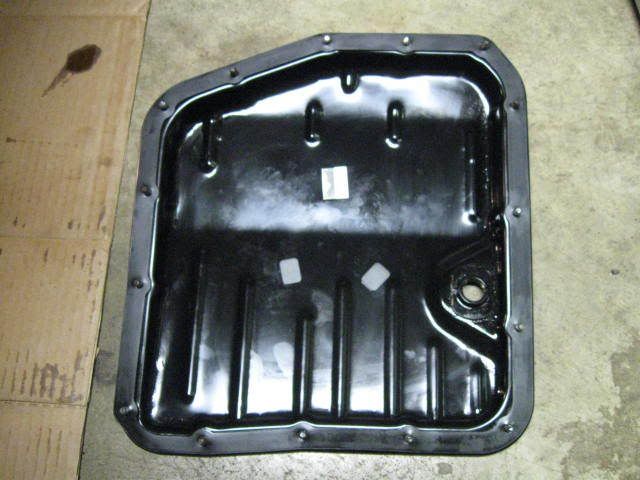
7. Remove the magnets and clean them up with a rag. Pick all of the metal filings off of the magnets.
![Image]()
8. Wipe the transmission pan clean with rags and scrape off the gasket. My gasket stuck entirely to the transmission pan and scraped off mostly in one piece. Ensure that there is no residual gasket on either the pan or the transmission prior to proceeding to the next. The instructions in my filter kit indicated that it is NOT recommended to sand or wire brush the gasket surfaces, presumably because it may damage the paint and cause the pan to corrode? I just used a paint scraper and the gasket came off quite easily. There was no residue on the transmission flange.
![Image]()
![Image]()
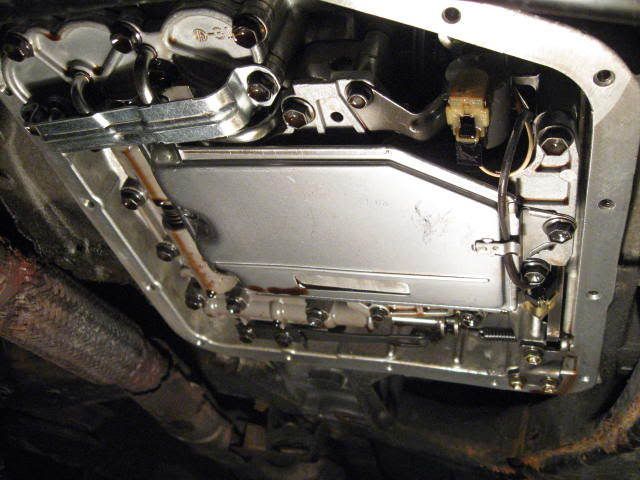
9. Reposition the drain pan over the strainer (green arrow). Unclip the cable that is secured to the bottom of the strainer and then remove the three strainer retaining bolts (10mm) with one hand while holding the strainer up with the other hand. Carefully tilt the strainer in order to drain the fluid into the drain pan. Note that one of the bolts (red circle) is longer than the other two bolts (red arrows). Make a mental note of which bolts go where.
![Image]()
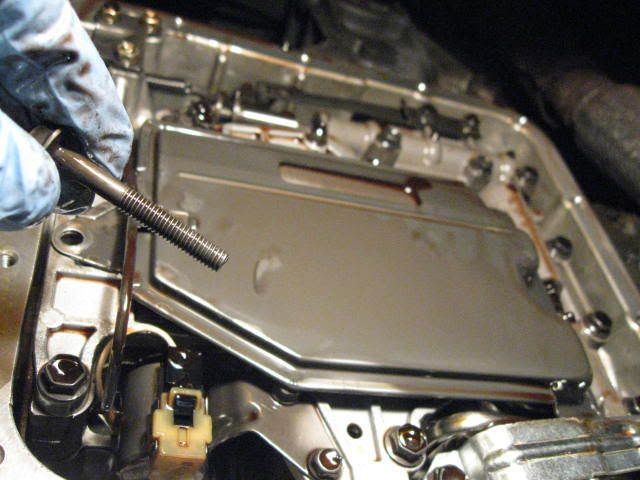
10. Install the new strainer. Ensure that the longer bolt goes in the correct position. Slide the cable under the clip on the strainer. The recommended torque for the strainer bolts is 84 in.lbs.
[EDIT: Nov. 22, 2011] The recommended torque specification was changed from 96 in.lbs. to 84 in.lbs. Thanks to TN forum member Dodgertown for supplying this information from the Toyota factory service manual.
![Image]()
11. Place the clean magnets in the transmission pan in the approximate location where they were removed. I actually changed their position to be near where the fluid discharges from the strainer and added a third magnet.
[EDIT: Nov. 22, 2011] The 5SFE four cylinder engine only has two magnets in the transmission pan as shown in Step 6 above. photo. It is not recommended to change this. Thanks to TN member Posimoto for pointing this out.
![Image]()
12. It is not recommended to use gasket adhesive to adhere the gasket to the pan. Some recommend using grease to hold the gasket in place, but I didn’t find it necessary. I simply pushed the bolts up through the holes in the transmission pan and through the holes in the rubber gasket. The holes in the gasket were tight enough to hold the bolts and the gasket in place.
![Image]()
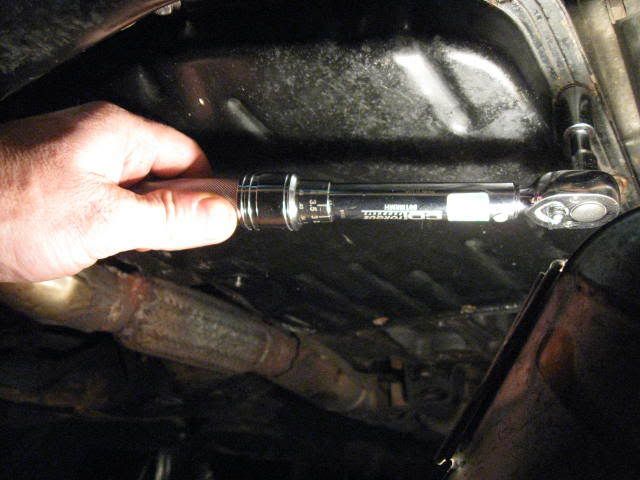
13. Bolt the transmission pan to the transmission and evenly torque the bolts to 43 in.lbs. Note...this is INCH-pounds, not FOOT-pounds! Be careful not to over tighten the bolts, or it may squeeze the gasket out, causing a leak. 43 in.lbs is a very low torque. My ½” torque wrench did not go down this low, so I had to borrow a ¼” torque wrench to do this step. I recommend that check your torque wrench prior to tackling this job. Install the drain plug. Recommended torque for the drain plug is 36 ft.lbs.
[EDIT: updated Nov. 22, 2011] The recommended torque specification was changed from 48 in.lbs. to 43 in.lbs. Thanks to TN forum member Dodgertown for supplying this information from the Toyota factory service manual.
![Image]()
14. Lower the vehicle so that it is level. With the engine off, add about 3 liters of clean transmission fluid (Dexron II or compatible) to the transmission through the dipstick hole. The capacity for a transmission drain and refill is listed in the Haynes manual as 2.6 quarts. Check under the car to ensure that there are no leaks.
![Image]()
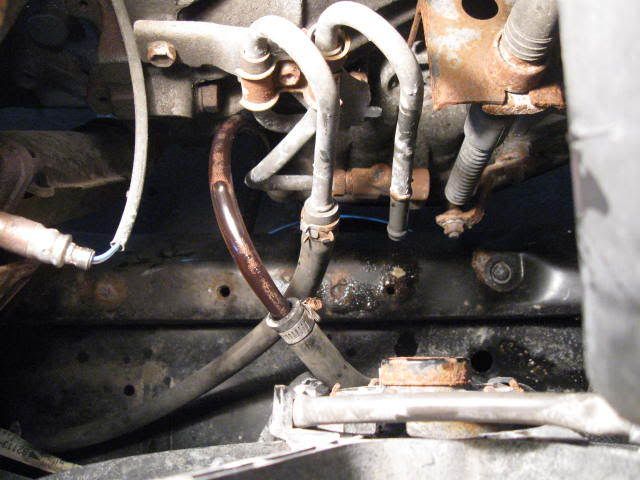
15. Locate the transmission cooler lines. Disconnect the hose that returns fluid from the transmission cooler to the transmission (red arrow). A small amount of transmission fluid will leak from the hose – not much. On my Camry, the return hose was on the driver side. If you are not sure which one is the correct hose, disconnect one of them and get a helper to momentarily start the car. With the car running, you want the fluid coming out of the hose that leads to the radiator. If fluid is coming out of the metal tube that leads back to the transmission, you have got the wrong one.
![Image]()
![Image]()
16. Insert a clear flexible PVC hose inside the transmission cooler hose and clamp it with a hose clamp. I found that a piece of 7/16” OD x 5/16” ID x 4’ long hose worked perfectly. This line is not high pressure, so don’t worry too much about the integrity of the connection. Insert the other end of the clear PVC hose into a drain pan or waste container.
![Image]()
17. Get a helper to start the car and while the old, dirty fluid is being pumped out of the transmission cooler pour clean transmission fluid into the dipstick hole. With the 5/16” ID PVC hose, the fluid came out at about 1 liter/15 seconds. I found if you keep the dipstick funnel full, it pours in at a slightly slower rate than it comes out, so I stopped the car a few times to catch up. If you see air bubbles coming out of the drain line, then stop the car and allow the transmission to fill some more before starting the car again. Continue this until the fluid in the drain line comes out red, like the new fluid going in. I found that it took about 6 liters in addition to the 3 liters already added. Reconnect the transmission cooler line.
18. With the engine idling, check the fluid level. Add fluid up to the “cool” level on the dipstick. Replace the dipstick. Over the next several days, re-check the level and adjust if necessary. CAUTION: Do not overfill the transmission.
Note: Drop the transmission fluid off at a local garage or lube shop. In our city, they will take the old transmission fluid with the recycle goods, provided that it is placed in the original containers.
I completed this procedure at 207,000 km on my 1996 Camry 2.2L automatic (5S-FE engine). The transmission fluid was turning a brownish-red colour. The transmission fluid was previously flushed at 145,000 km. No problems with the transmission - just preventive maintenance. Although, this procedure only covers the transmission, I also drained and filled the differential fluid at the same time. There is a very good DIY already posted on TN for the differential drain and fill. I recommend that you follow this.
http://www.toyotanation.com/forum/showthread.php?t=197974
Note that my local Toyota service department advised me that Toyota does NOT recommend changing the transmission strainer. Toyota officially only recommends a drain and fill. However, most other references including a local independent transmission shop informed me that for the small cost of a new strainer, they always change the strainer at the same time. After taking mine apart, the strainer was clean. It didn't appear to be in need of replacement.
Disclaimer
Use this guide at your own risk! I assume no responsibility for any damage to your vehicle or personal injury as a result of following this guide. Any comments to improve the procedure will be gratefully received and incorporated where possible.
Special Tools Required
¼” drive torque wrench (suitable to be set to 48 in.lbs. of torque).
10mm Allen (Hex) Key Wrench
Time Required
It took me 4 hours from start to finish, including time to take photos and make notes as well as fill the transmission and differential to the right level and take the car for a test drive. If I had to do it again, I think I could reasonably pare this down to about 2 hours.
Parts Required.
Aftermarket transmission gasket & strainer $19.72 taxes and environmental handling charge included (Partsource no. FK244)
10 liters of transmission fluid (compatible with Dexron II) $40.02 taxes and “Ecofee” included (Canadian Tire no. 028-1534-0). This is enough fluid to flush the transmission and refill the differential.
Total = $59.74 CAD (taxes included).
Note: For comparison, a Toyota OEM gasket = $18.31 + Toyota OEM transmission strainer = $146.90 = $165.21 (taxes included). Transmission flush at local lube shop is $112 (taxes included). To drop the pan, replace the filter and flush the transmission at a local transmission shop is $248.60 (taxes included).
Let’s get started!
1. Warm up the engine and transmission by driving the car just before this procedure. Hot transmission fluid is more effective than cold fluid at removing built up sediment. Block the rear tires, set the parking brake, jack up the front of the car and lower it on to jack stands. Ensure that the car is stable and adequately supported prior to proceeding. Place large amounts of newspaper or cardboard under the car to catch any spills.
2. Remove the transmission fluid dip stick (red circle) and set aside. Place a catch pan under the drain plug (green circle). The drain plug is on the bottom of the transmission pan which is located on driver’s side of the engine compartment. It is accessed by crawling underneath the car from the front.
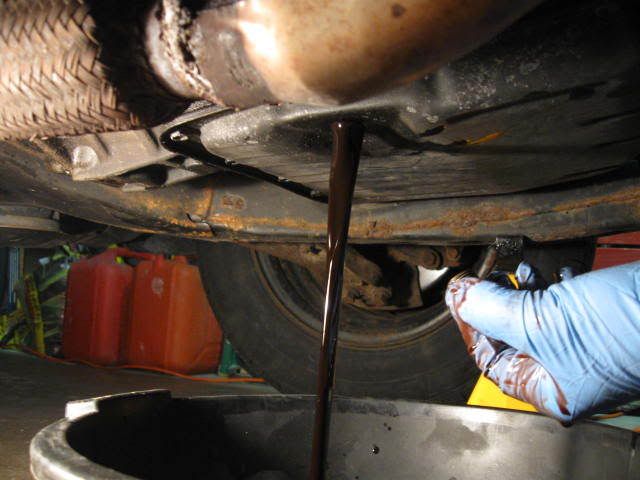
3. Remove the plug (10mm hex key wrench required) and allow the fluid to drain. Warning: Fluid temperatures can exceed 350°F in a hot transmission, so be very careful when draining. Wear protective gloves. Be sure the drain pan is properly centered as the fluid will come out with some force.
4. There are 15 bolts securing the transmission pan to the transmission. While the transmission is draining, remove all of the rear bolts (10mm socket) and loosen the remaining two front bolts. Note that my front bolts were severely rusted and I rounded off the corners on a couple of them trying to remove them. I was eventually able to get them out by spraying the bolts with penetrating oil and using a slightly smaller 3/8” ( 9.5mm) socket to turn them out. If your bolts are rusted, be very careful. If you break the head off or round the corners, this will significantly complicate this job. Note that I replaced the two damaged bolts with stainless steel bolts and washers. For reference, the bolt size is M6 x1.0 x 14mm. My transmission pan stuck to the transmission even after that the 13 bolts were removed and the other two were loosened.

5. Reposition the drain pan to the back of the transmission and gently loosen the rear of the pan by prying downward with small pry bar or flat head screwdriver using one hand, while holding the pan up with your other hand. Slowly lower the rear corner of the pan. Fluid will pour out into your drain pan. This is where the newspapers come in handy – in case you miss the target!
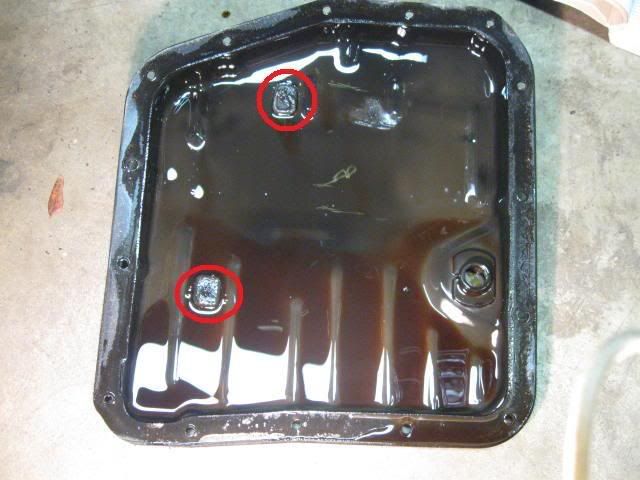
6. When the fluid has stopped draining from the transmission pan, remove the last two bolts and lower the transmission pan. Here is what mine looked like. There should be three magnets. Mine was missing one, presumably lost by the person who did this procedure before me. Magnets are circled in red.
[EDIT: Nov. 22, 2011] I have subsequently learned that the photo shown in my Haynes manual with three magnets is for the transmission pan in a six cylinder Camry engine. The 5SFE four cylinder engine only has two magnets in the transmission pan as shown in the above photo. Thanks to TN member Posimoto for pointing this out.
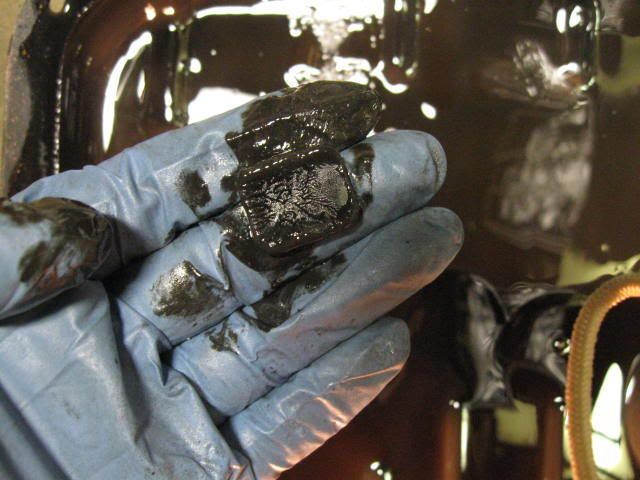
7. Remove the magnets and clean them up with a rag. Pick all of the metal filings off of the magnets.
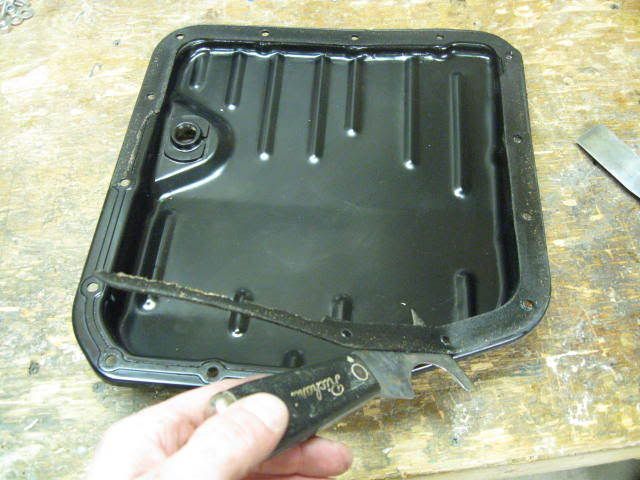
8. Wipe the transmission pan clean with rags and scrape off the gasket. My gasket stuck entirely to the transmission pan and scraped off mostly in one piece. Ensure that there is no residual gasket on either the pan or the transmission prior to proceeding to the next. The instructions in my filter kit indicated that it is NOT recommended to sand or wire brush the gasket surfaces, presumably because it may damage the paint and cause the pan to corrode? I just used a paint scraper and the gasket came off quite easily. There was no residue on the transmission flange.
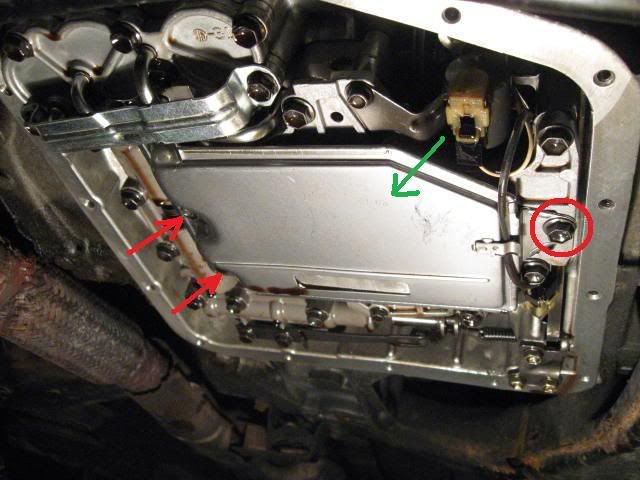
9. Reposition the drain pan over the strainer (green arrow). Unclip the cable that is secured to the bottom of the strainer and then remove the three strainer retaining bolts (10mm) with one hand while holding the strainer up with the other hand. Carefully tilt the strainer in order to drain the fluid into the drain pan. Note that one of the bolts (red circle) is longer than the other two bolts (red arrows). Make a mental note of which bolts go where.
10. Install the new strainer. Ensure that the longer bolt goes in the correct position. Slide the cable under the clip on the strainer. The recommended torque for the strainer bolts is 84 in.lbs.
[EDIT: Nov. 22, 2011] The recommended torque specification was changed from 96 in.lbs. to 84 in.lbs. Thanks to TN forum member Dodgertown for supplying this information from the Toyota factory service manual.
11. Place the clean magnets in the transmission pan in the approximate location where they were removed. I actually changed their position to be near where the fluid discharges from the strainer and added a third magnet.
[EDIT: Nov. 22, 2011] The 5SFE four cylinder engine only has two magnets in the transmission pan as shown in Step 6 above. photo. It is not recommended to change this. Thanks to TN member Posimoto for pointing this out.
12. It is not recommended to use gasket adhesive to adhere the gasket to the pan. Some recommend using grease to hold the gasket in place, but I didn’t find it necessary. I simply pushed the bolts up through the holes in the transmission pan and through the holes in the rubber gasket. The holes in the gasket were tight enough to hold the bolts and the gasket in place.
13. Bolt the transmission pan to the transmission and evenly torque the bolts to 43 in.lbs. Note...this is INCH-pounds, not FOOT-pounds! Be careful not to over tighten the bolts, or it may squeeze the gasket out, causing a leak. 43 in.lbs is a very low torque. My ½” torque wrench did not go down this low, so I had to borrow a ¼” torque wrench to do this step. I recommend that check your torque wrench prior to tackling this job. Install the drain plug. Recommended torque for the drain plug is 36 ft.lbs.
[EDIT: updated Nov. 22, 2011] The recommended torque specification was changed from 48 in.lbs. to 43 in.lbs. Thanks to TN forum member Dodgertown for supplying this information from the Toyota factory service manual.

14. Lower the vehicle so that it is level. With the engine off, add about 3 liters of clean transmission fluid (Dexron II or compatible) to the transmission through the dipstick hole. The capacity for a transmission drain and refill is listed in the Haynes manual as 2.6 quarts. Check under the car to ensure that there are no leaks.

15. Locate the transmission cooler lines. Disconnect the hose that returns fluid from the transmission cooler to the transmission (red arrow). A small amount of transmission fluid will leak from the hose – not much. On my Camry, the return hose was on the driver side. If you are not sure which one is the correct hose, disconnect one of them and get a helper to momentarily start the car. With the car running, you want the fluid coming out of the hose that leads to the radiator. If fluid is coming out of the metal tube that leads back to the transmission, you have got the wrong one.
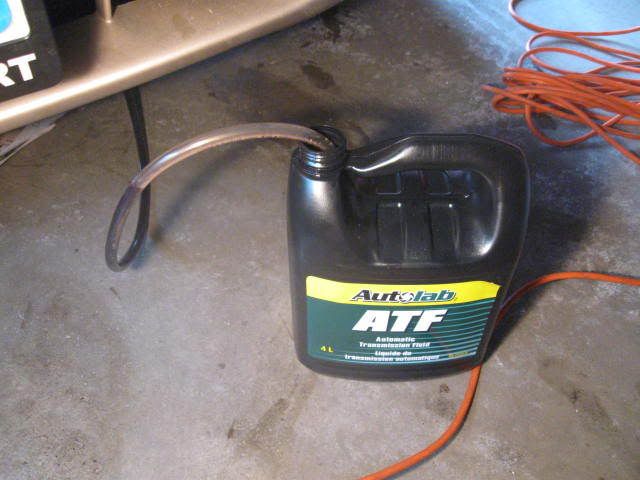
16. Insert a clear flexible PVC hose inside the transmission cooler hose and clamp it with a hose clamp. I found that a piece of 7/16” OD x 5/16” ID x 4’ long hose worked perfectly. This line is not high pressure, so don’t worry too much about the integrity of the connection. Insert the other end of the clear PVC hose into a drain pan or waste container.
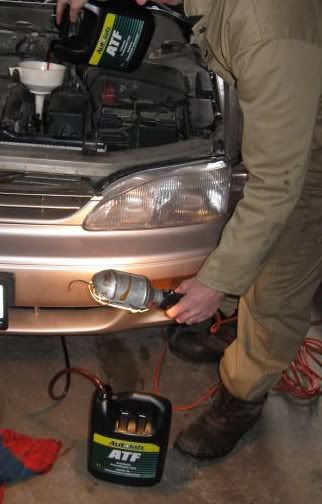
17. Get a helper to start the car and while the old, dirty fluid is being pumped out of the transmission cooler pour clean transmission fluid into the dipstick hole. With the 5/16” ID PVC hose, the fluid came out at about 1 liter/15 seconds. I found if you keep the dipstick funnel full, it pours in at a slightly slower rate than it comes out, so I stopped the car a few times to catch up. If you see air bubbles coming out of the drain line, then stop the car and allow the transmission to fill some more before starting the car again. Continue this until the fluid in the drain line comes out red, like the new fluid going in. I found that it took about 6 liters in addition to the 3 liters already added. Reconnect the transmission cooler line.
18. With the engine idling, check the fluid level. Add fluid up to the “cool” level on the dipstick. Replace the dipstick. Over the next several days, re-check the level and adjust if necessary. CAUTION: Do not overfill the transmission.
Note: Drop the transmission fluid off at a local garage or lube shop. In our city, they will take the old transmission fluid with the recycle goods, provided that it is placed in the original containers.
")


