

This is all the information and tips that you will need to replace your door handle on the 4th Generation Camry. (This was done on a 1999 Le, it may be a little different.)
DO THIS AT YOUR OWN RISK< I AM NOT RESPONSIBLE IF ANY HARM WAS DONE!
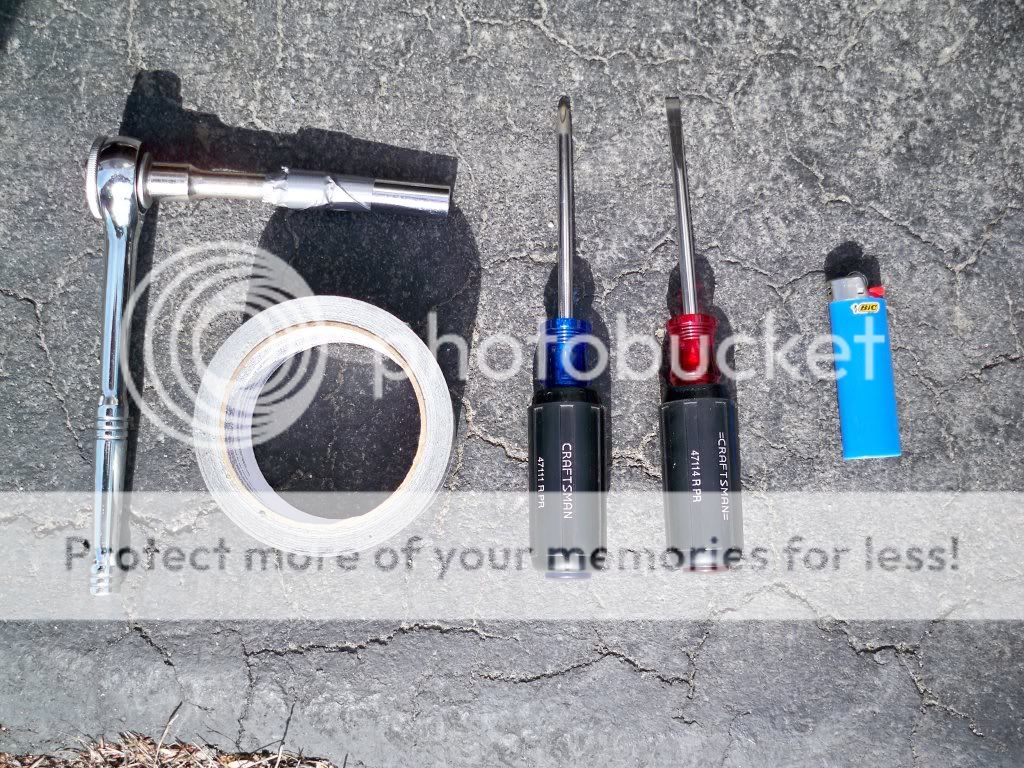
For starters, you'll only need minor tools: Two Screw Drivers (Flathead and a Phillips Head), 10 mm socket wrench with extension, some electrical tape or duck tape (not required, but useful) and a candle lighter (not required, but useful)
![Image]()
THANKS TO Delay_FTB for his door removal DIY.
![Image]()
Then you remove the white one by using the flat head screw driver placing it into a small groove and twisting it to take it off easily. Also circled in green.
![Image]()
![Image]()
![Image]()
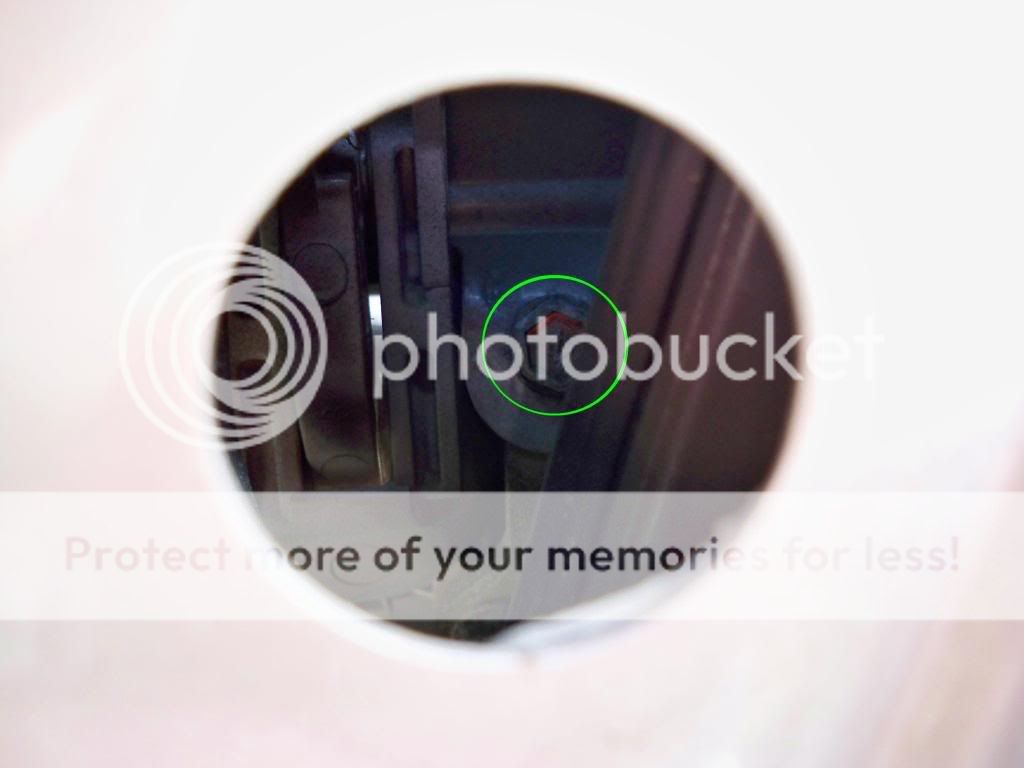
The bolt near the center of the door and the easiest to get to.
![Image]()
The one that is closer to the side of the door which is difficult to reach the bolt. You might have to try a few times to get the socket attached to the bolt.
![Image]()
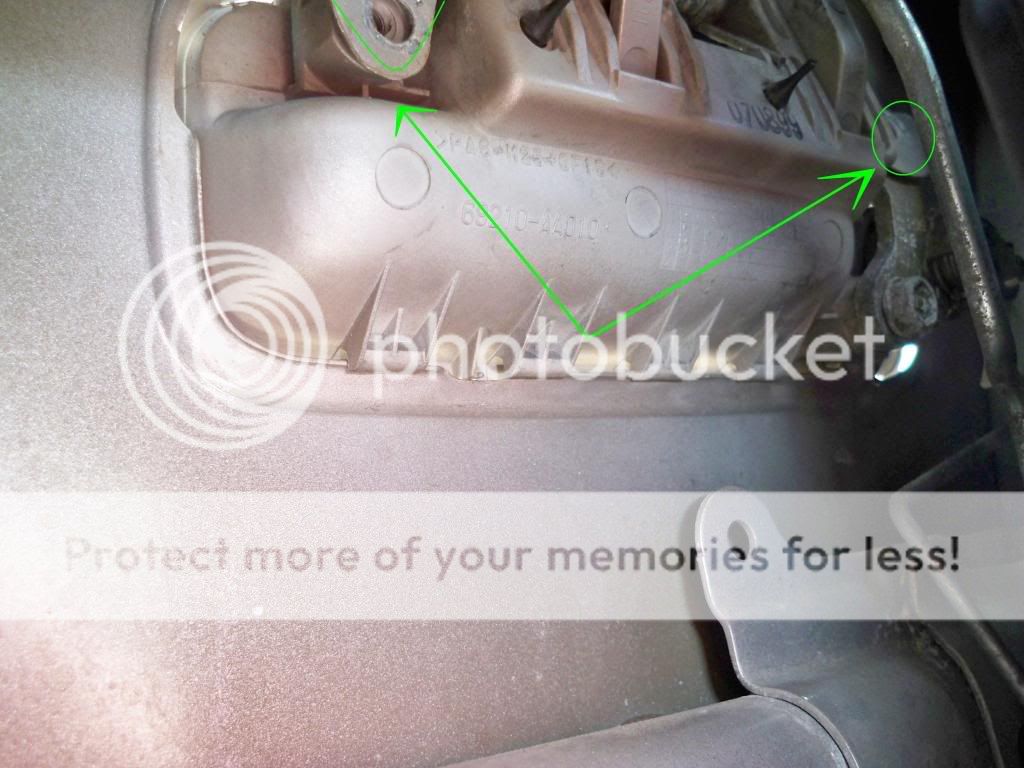
Here is a picture on how it looks inside the door using 10mm bolts.
IMPORTANT!: There are two rods, one to control the lock and the other one to open the door. We remove the one that opens the door first, then later when told we remove the lock rod!)
![Image]()
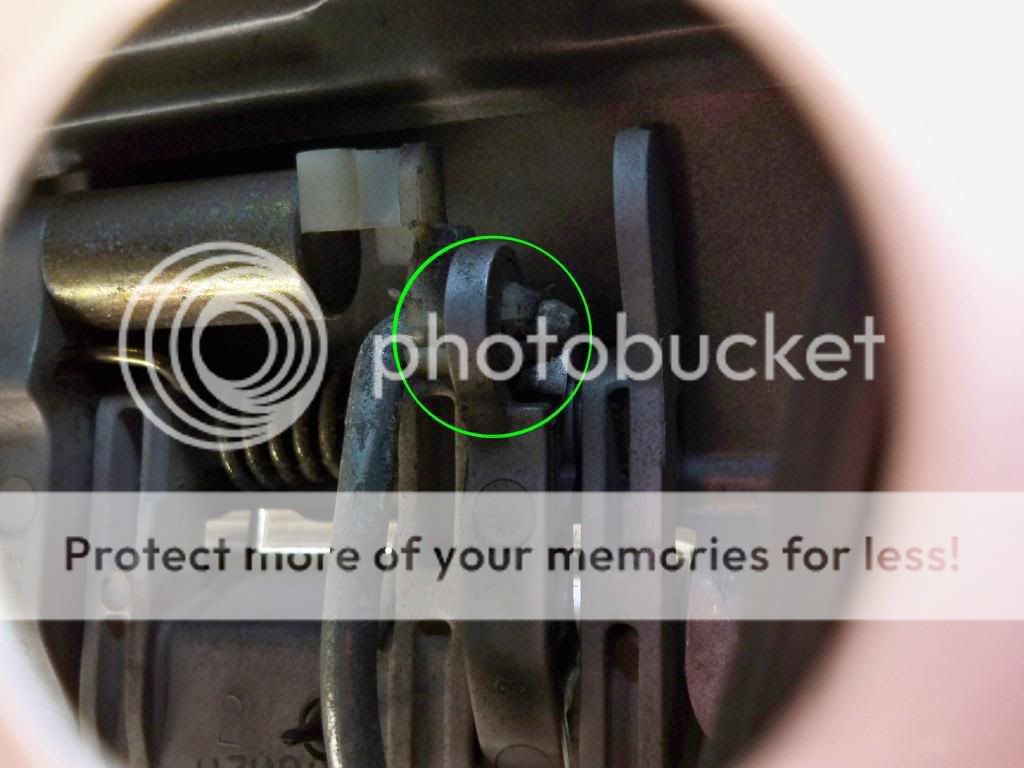
Once you remove the two bolts, then you have to remove the rod that is connected to the handle. (The rod that is used to open the door.)
![Image]()
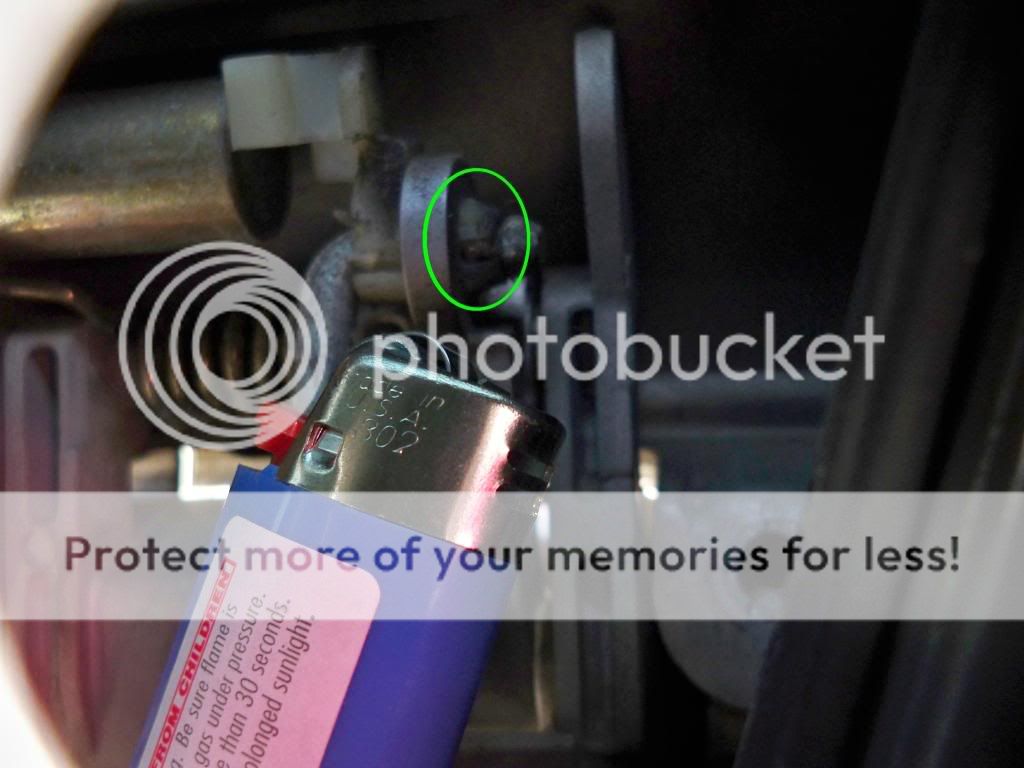
I had great difficulty removing this part, but if your replacement handle comes with the yellow part to attach the handle there is no need of saving the old one. I used a lighter to melt/soften the plastic so it is easier to pull apart.
![Image]()
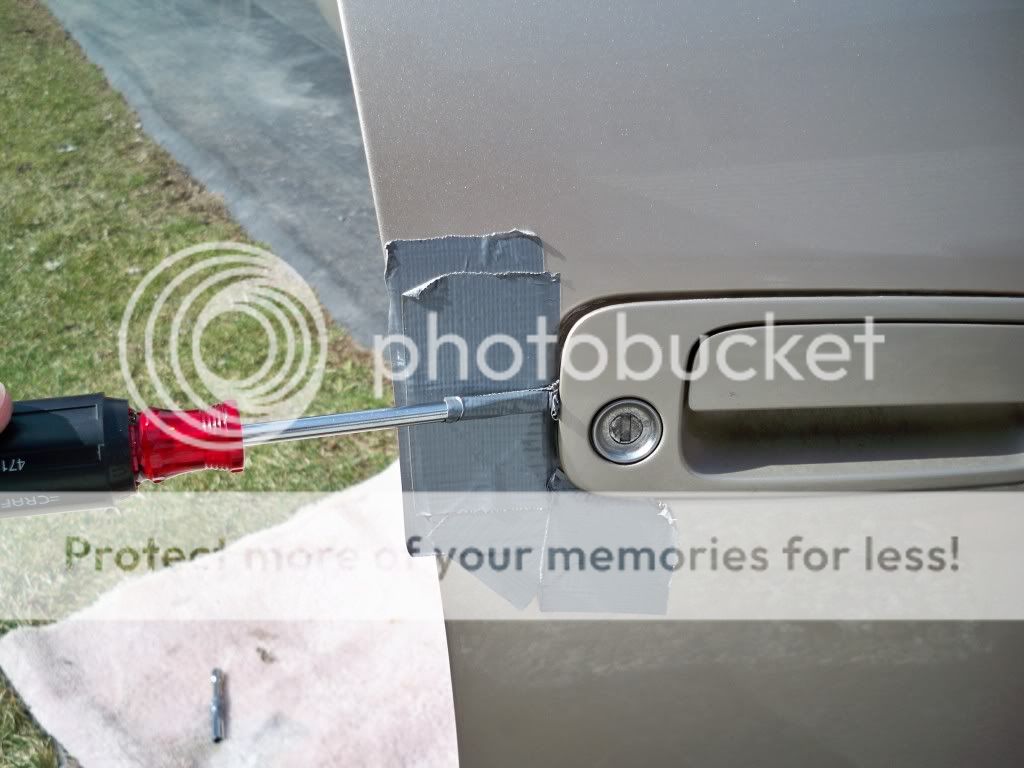
Once the rod is removed, we can move on to the next step. I would recommend taping the edge of the handle so there is less chance of scratching the paint. Then use the screwdriver to gently remove the handle.
![Image]()
![Image]()
Then the handle will not be attached to the door. But then you have to remove the lock rod. Push the handle slightly up wards and near the center of the door, you will notice the rod on the bottom left. By using the screw driver detach it from the yellow locker. DO NOT LOOSE OR BREAK THE YELLOW LOCKER, YOU WILL NEED IT TO INSTALL THE NEW HANDLE! Once that is done simple remove the handle.
Then you have to remove the lock and install it to the new handle which is connected by one bolt.
![Image]()
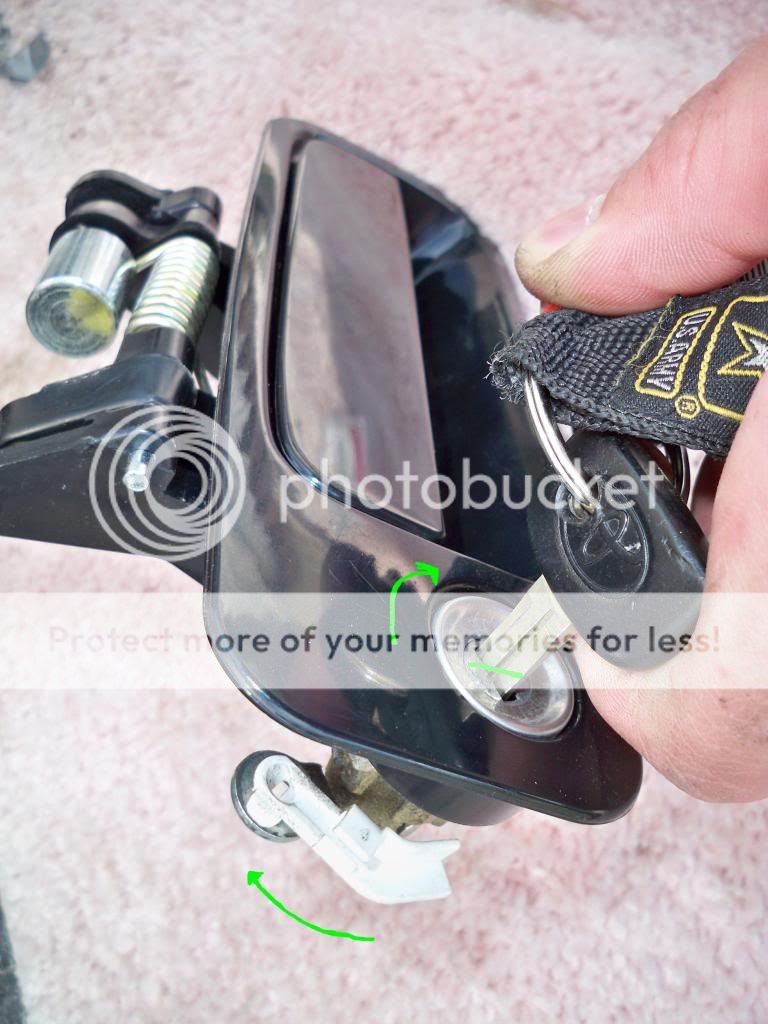
Once that is done put the handle back into the door while connecting the lock rod. You cannot install the lock rod when the handle is in the outside of the door!
To make it easier use your key and turn the lock while connecting the lock rod like in this picture.
![Image]()
Once all that is done just simply reverse the steps. The Handle rod will simply snap into place and do not need the lighter any more if you used it.
DO THIS AT YOUR OWN RISK< I AM NOT RESPONSIBLE IF ANY HARM WAS DONE!
For starters, you'll only need minor tools: Two Screw Drivers (Flathead and a Phillips Head), 10 mm socket wrench with extension, some electrical tape or duck tape (not required, but useful) and a candle lighter (not required, but useful)
THANKS TO Delay_FTB for his door removal DIY.
That is the driver side, the passenger side is almost the same put the clips for the wire harness is a little different. In the passenger side, first you remove the black one first by using a flat head screw driver and releasing the tab. Circled in green.Use the tape, and tape over the head of the Flathead. You'll use this taped-over Flathead to remove cover pieces and pry at things as needed (the tape provides some protection against scratching your interior all to hell).
Now that all our "prep work" is done, we'll start of easy. There isn't an exact order that is necessary to do all this in, but it helps to be logical. I start at the side of the door, work my way around, then attack the center, and it gets the job done.
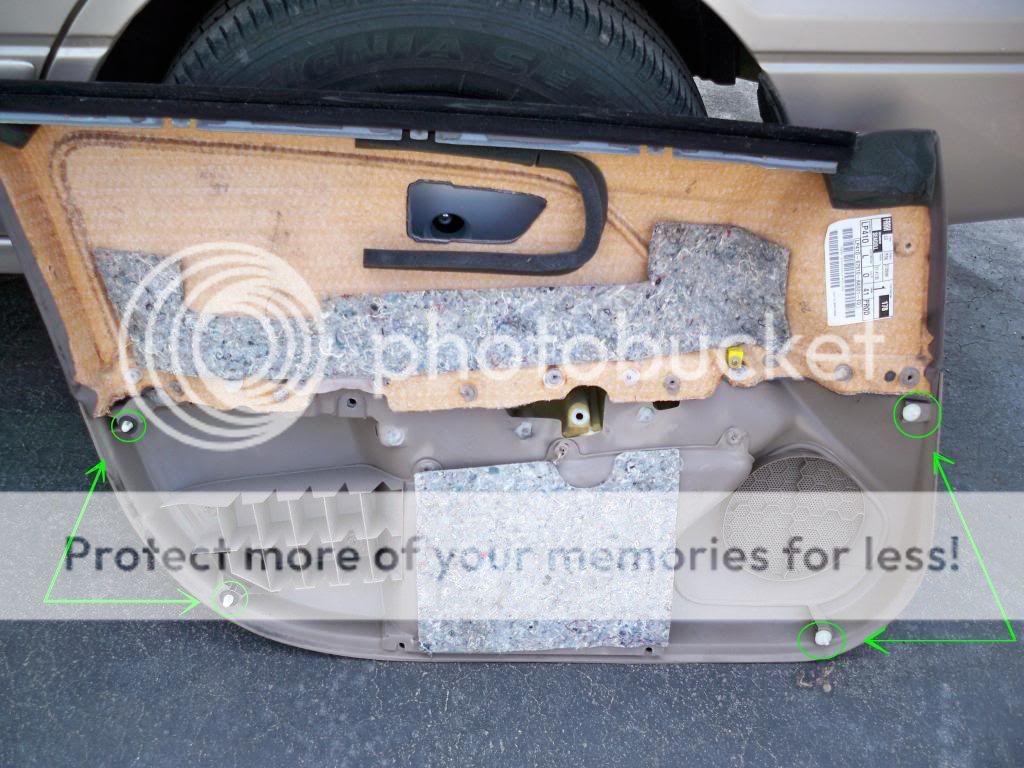
Areas that need attention: Red being our main focus (screws, bolts, etc...) and the green being internal panel retainers (holding the panel to the door from the inside, they allow for a snug connection; be gentle with these, they're not cheap to replace, and are a headache if you need to replace them See here for inner pic of panel).
![Image]()
Start at the outter edge of the door. You should notice a small plastic circle within a circle. This is a panel retainer that needs to be removed.
![Image]()
Take your Flathead, and depress the button in the center.
![Image]()
Then just pull the piece out with your fingers. It should come out fairly easily.
![Image]()
From here, I move to the top inner (vehicle) side of the door, where there is a round plastic cover, that is snapped onto a screw.
![Image]()
Get your Flathead out again, and pry off the cover, gently, so you don't break it, it is rather thin.
![Image]()
Remove that cover to find the Phillips head screw. Unscrew that.
![Image]()
From here, we move to the bottom of the door, the very bottom, to find two phillips/hex head screws/bolts. Remove these two and we're done with the outside fixtures.
![Image]()
Moving to the center of the door, you should find two covered holes on the side/bottom of the armrest. The outter one has a larger cover.
![Image]()
Remove that cover with your Flathead.
![Image]()
Underneath, way down in there, you'll find a Phillips head screw awaiting your removal.
![Image]()
Once down with that one, move to the other covered hole and repeat. The two screws are identical. If for some reason you think you've removed the screw from its threaded hole, but it doesn't come out, wiggle the door panel, and they should fall from their places.
![Image]()
While we're on the armrest, go ahead and remove the control switches for the windows and locks. To do this, slide your Flathead under the back of the panel and pry it upwards. Be careful because there are three plastic attachments (one on the nose and one on each side). There is a spring-like piece of metal along the back that holds the panel in place, you need to push into this with the Flathead before you pry upwards. Slide the panel back and up until the entier panel is out from the door panel.
![Image]()
Once the panel is out, we need to disconnect the wireharness. Take your Flathead and push down on the middle section and slide out the harness.
![Image]()
Once that is done, we move on to the cou-de-gras: The Door Handle!


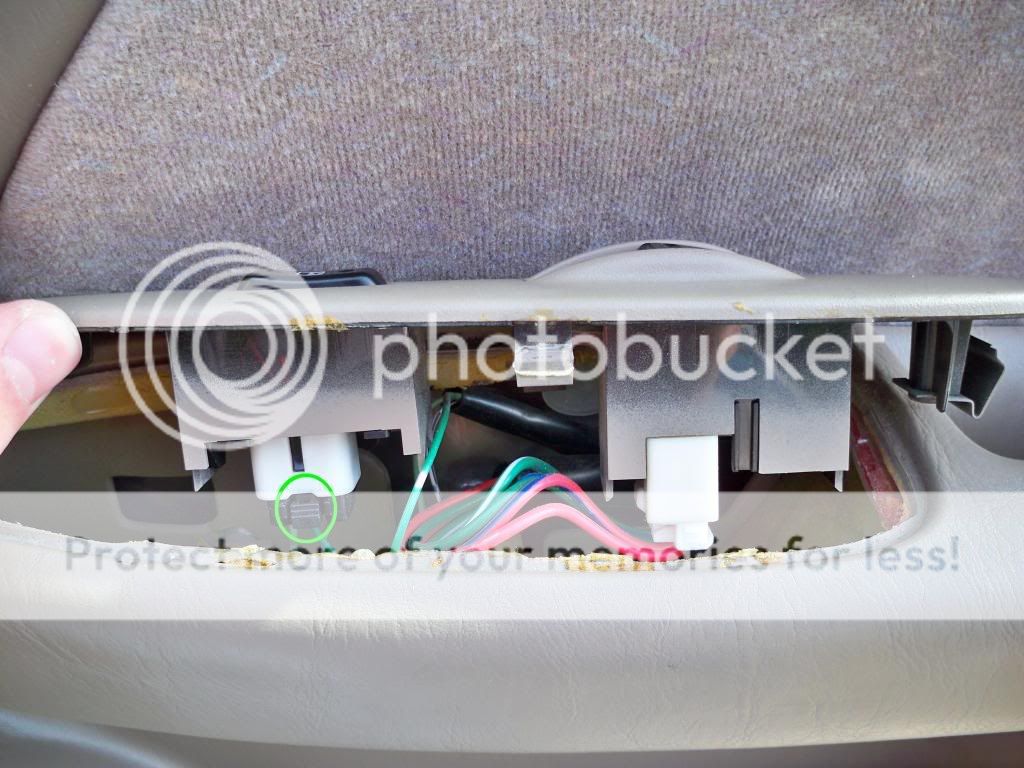
Then you remove the white one by using the flat head screw driver placing it into a small groove and twisting it to take it off easily. Also circled in green.

This might be a more useful pic of the back side of the panel, If you are still having trouble. Clips are circled in green.First, we need to pry open the screw cover that is recessed in the middle of the handle.
![Image]()
Once that is open, we find the Phillips head screw awaiting removal, so do it.
![Image]()
Then, this is where people get confused. To get the door handle trim ring out, it is necessary to pry at both the top
![Image]()
and bottom
![Image]()
to remove the trim ring. Once removed, you can see how it is affixed, and why it can be difficult to remove if you don't know its intricacies. The two marked areas show you that there are holes that act as securing grooves on the door handles side of things (think male to female connection).
![Image]()
Once all your parts are removed, you would think you could just pop off the panel...WRONG! Those four interior panel retainers need to be removed from their securing places, so pry along the edges noted before (the green areas) to pop the retainers from their places.
![Image]()


The easy part is done. One the door panel is off you have to gentle pull of the plastic shielding off to the side to get to the holes. The holes are located on the other side of the handle, but one hole is covered by a circle tape. Holes are circled in green.Once that is done, you'll need to angle the door panel up, meaning the anchor point will be near the sail panel on the inner (vehicle) side of the door. Angle up from the outside working your way inwards. The bottom green line in the picture below denotes the outter rubber window seal that is attached to the door (you know, to keep the water out when it rains and whatnot). The upper line is the panel being angled upward. Normally, these lines will be parallel, forming a seal against each side of the window.
![Image]()
Once removed, you can see that the door panel has a metal track along the top that matches up with the door frame's lip at the top. this track has segments that act as clips to secure the door panel to the top of the frame.
![Image]()
Then...TADA!!!
![Image]()
You have a bare door to do with whatever you please. To reattach the panel, simply reverse the instructions, again, minding the sail panel, retracking the panel to the door, guiding your wireharness back through to the controls, and screwings your screws back in and replacing your coverings. One specific thing you'll find once you've removed the door is that on the outter edge, where we started, there is a while plastic piece, this is what that original panel retainer affixes itself to, so be sure that it gets back where it belongs.
And thats all there is to it. See, I told you it was easy! And so help me god, if anyone ever asks how to do this again...well...you don't wanna know...:nutkick:


The bolt near the center of the door and the easiest to get to.
The one that is closer to the side of the door which is difficult to reach the bolt. You might have to try a few times to get the socket attached to the bolt.
Here is a picture on how it looks inside the door using 10mm bolts.
IMPORTANT!: There are two rods, one to control the lock and the other one to open the door. We remove the one that opens the door first, then later when told we remove the lock rod!)
Once you remove the two bolts, then you have to remove the rod that is connected to the handle. (The rod that is used to open the door.)
I had great difficulty removing this part, but if your replacement handle comes with the yellow part to attach the handle there is no need of saving the old one. I used a lighter to melt/soften the plastic so it is easier to pull apart.
Once the rod is removed, we can move on to the next step. I would recommend taping the edge of the handle so there is less chance of scratching the paint. Then use the screwdriver to gently remove the handle.

Then the handle will not be attached to the door. But then you have to remove the lock rod. Push the handle slightly up wards and near the center of the door, you will notice the rod on the bottom left. By using the screw driver detach it from the yellow locker. DO NOT LOOSE OR BREAK THE YELLOW LOCKER, YOU WILL NEED IT TO INSTALL THE NEW HANDLE! Once that is done simple remove the handle.
Then you have to remove the lock and install it to the new handle which is connected by one bolt.

Once that is done put the handle back into the door while connecting the lock rod. You cannot install the lock rod when the handle is in the outside of the door!
To make it easier use your key and turn the lock while connecting the lock rod like in this picture.
Once all that is done just simply reverse the steps. The Handle rod will simply snap into place and do not need the lighter any more if you used it.
")


