

Winter is quickly approaching, and if it's going to be anything like last year was in Chicago, we are going to freeze. But rather than stealing envious looks at those luxury cars that are zooming past your trusty old Corolla, you should be just as comfortable as they are in the cold. Which means - heated seats. Aaaah.
You will likely need some new tools for this job, but it shouldn't be that extensive. You'll also need the heated seat kit, some electrical wiring, fuses, terminal connectors and such. In total you'll probably spend $70 or so for the parts, plus the cost of any new tools you'll need.
Parts list
For this job I used a carbon fiber heated seat kit. There are several of these available on eBay and Amazon, and their price range varies a lot. They also largely seem unbranded, but I found that the kit I purchased is probably produced by The Install Bay - http://www.theinstallbay.com/subcategory/IB-S_HEAT/IB-S-HEAT. It looks like several sellers sell this kit with slight modifications (different button configuration, with/without fuses, etc), and the prices vary 3-400% for what is essentially the same kit. Here is the one I got - primarily because the rectangle control box fits with very little modification in the center console by the handbrake: http://amzn.com/B00HDAW1SO It was also more reasonably priced at $55 at the time of purchase.
![Image]()
In addition I picked up some 16 gauge wire at the Home Depot, some terminal connectors, and such. I also ordered the following from Amazon:
6" side cutters: http://amzn.com/B0001IW89W
Dewalt hog ring plier kit, with 1000 hog rings. You don't need that many - I'd estimate you need around 60 or so for both seats, depending on how many times you miss when you install (there's going to be some misses for the more difficult spots). But I liked this one since it auto feeds the hog rings - http://amzn.com/B00I7PCF3K
2 x Add-A-Circuit kits. They each come with an assortment of fuses. http://amzn.com/B0002BGELQ
In addition you'll need 10, 12, 14 mm sockets and a torque wrench, along with some Phillips head and flat head screw drivers and a pair of scissors. You'll also need some pliers for the terminal connectors.
The job (start with either the passenger or driver side seat).
![Image]()
![Image]()
![Image]()
![Image]()
![Image]()
![Image]()
![Image]()
![Image]()
![Image]()
You will likely need some new tools for this job, but it shouldn't be that extensive. You'll also need the heated seat kit, some electrical wiring, fuses, terminal connectors and such. In total you'll probably spend $70 or so for the parts, plus the cost of any new tools you'll need.
Parts list
For this job I used a carbon fiber heated seat kit. There are several of these available on eBay and Amazon, and their price range varies a lot. They also largely seem unbranded, but I found that the kit I purchased is probably produced by The Install Bay - http://www.theinstallbay.com/subcategory/IB-S_HEAT/IB-S-HEAT. It looks like several sellers sell this kit with slight modifications (different button configuration, with/without fuses, etc), and the prices vary 3-400% for what is essentially the same kit. Here is the one I got - primarily because the rectangle control box fits with very little modification in the center console by the handbrake: http://amzn.com/B00HDAW1SO It was also more reasonably priced at $55 at the time of purchase.

In addition I picked up some 16 gauge wire at the Home Depot, some terminal connectors, and such. I also ordered the following from Amazon:
6" side cutters: http://amzn.com/B0001IW89W
Dewalt hog ring plier kit, with 1000 hog rings. You don't need that many - I'd estimate you need around 60 or so for both seats, depending on how many times you miss when you install (there's going to be some misses for the more difficult spots). But I liked this one since it auto feeds the hog rings - http://amzn.com/B00I7PCF3K
2 x Add-A-Circuit kits. They each come with an assortment of fuses. http://amzn.com/B0002BGELQ
In addition you'll need 10, 12, 14 mm sockets and a torque wrench, along with some Phillips head and flat head screw drivers and a pair of scissors. You'll also need some pliers for the terminal connectors.
The job (start with either the passenger or driver side seat).
- Remove the headrest.
- Use a flat head screw driver to pop off the plastic covers off the ends of the seat rails (2 in front, 2 in back). This will expose 4 x 14mm bolts. Loosen and remove the bolts.
- Carefully lift the seat out of the car. You might have to play with the angle of the seat back to get it out.
- Find somewhere comfortable to sit and work with the seat.
- Unscrew the plastic covers on both sides of the seat, along with the plastic cover on the adjustment handle. This will expose a 12 mm bolt on each side that holds the seat bottom. In addition there are one 12 mm bolt on each side on the front underside of the seat bottom. Loosen all of them and pop the seat bottom off and set it aside. I didn't do this on the first seat, and found it was much harder to do the seat back with the bottom still installed. You need the bottom removed anyhow to get the fabric off it.
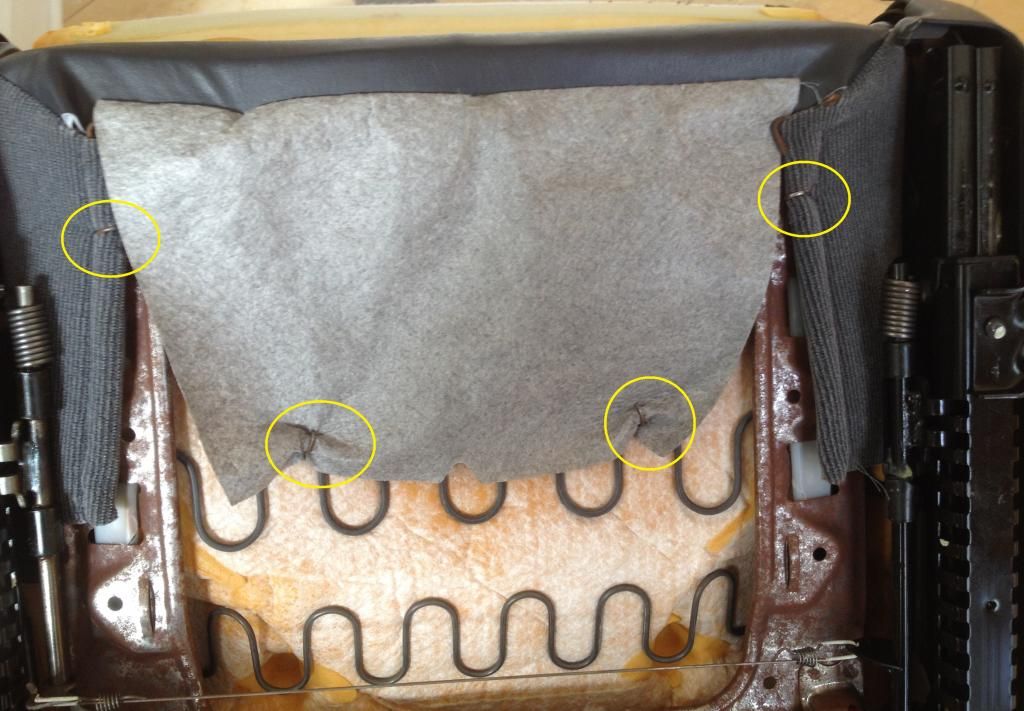
- Drag down on the back of the seat back to unlock the back and front piece of the upholstery. This will expose some rubber "thread" coming from the back and fastened with hog rings (circled):
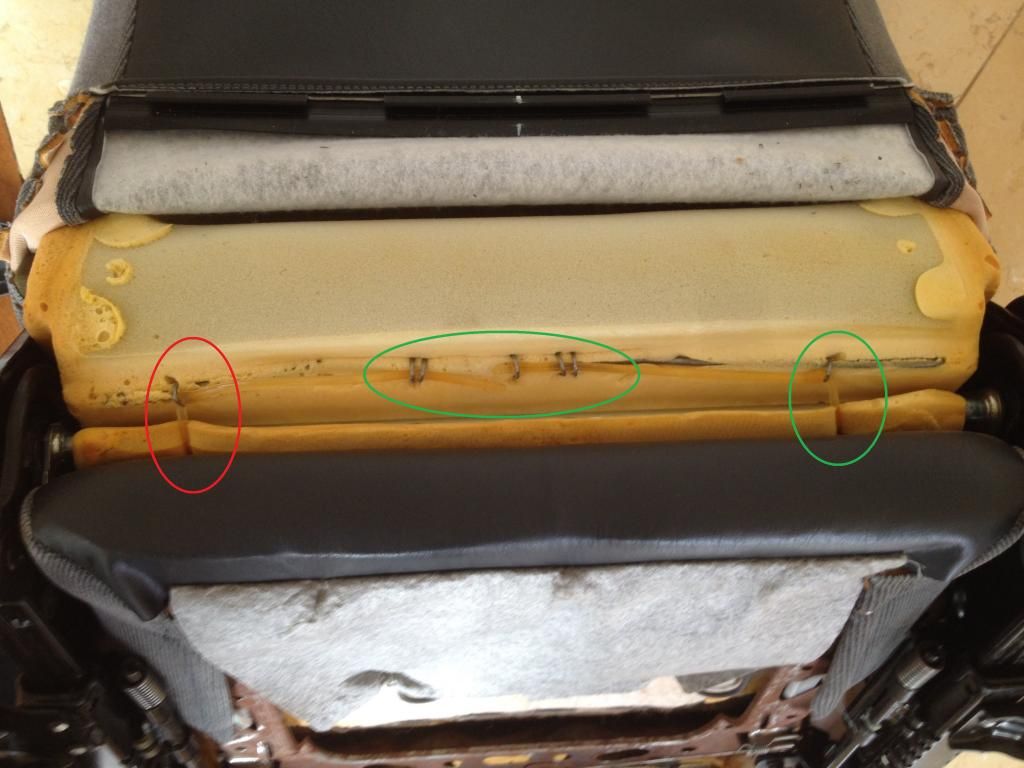
- Use the side cutters to remove the hog rings. You don't necessarily need to cut them with the pliers, it also works to just twist them loose. Just be sure to not damage the rubber or fabric.
- Pull the threads through to the front, and start pulling the fabric up. This will expose a new set of hog rings attached to a steel wire a bit further up on the seat back:
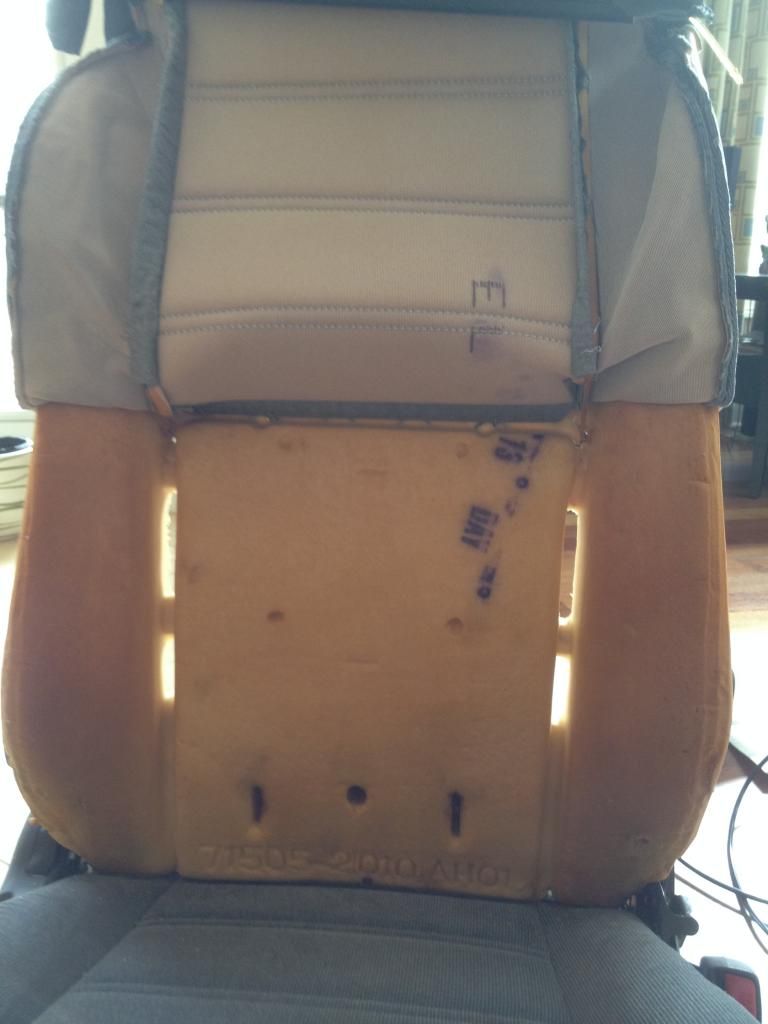
- Up close with hog rings circled:
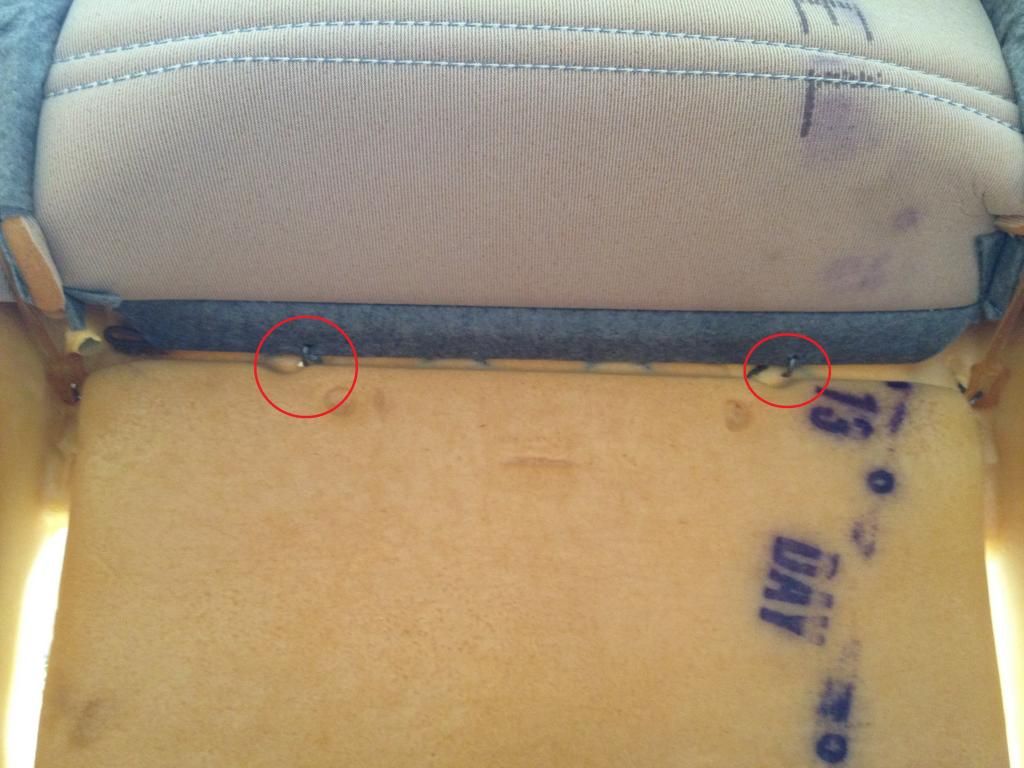
- Cut the hog rings. Pull the fabric further up.
- Get the seat heater kit out. Disconnect the wiring on one of the heater pads (doesn't matter which one as all four are the same), and line it up against the foam of the seat back so the bottom of the pad is at the bottom of the seat back. Measure where the hog rings were on the upper part of the seat and mark on the heater pad a line of no more than 1". Use the scissors to make an incision.
- Pull off the top 5-10" of the sticky tape on the back of the pad. Start applying it to the seat back foam so the incisions line up with where the hog rings will go. Make sure you tape the pad so it follows the contours of the foam, i.e. you'll have a small fold in where the wire that connects the hog rings comes in from the upholstery.
- Insert some new hog rings where the old ones were, to force the wire from the upholstery against the wire of the upper seat back. This is tricky, and you will probably waste a couple of hog rings before you get it right. Be patient, and be sure not to damage any fabric or the heat pad.
- Pad applied:
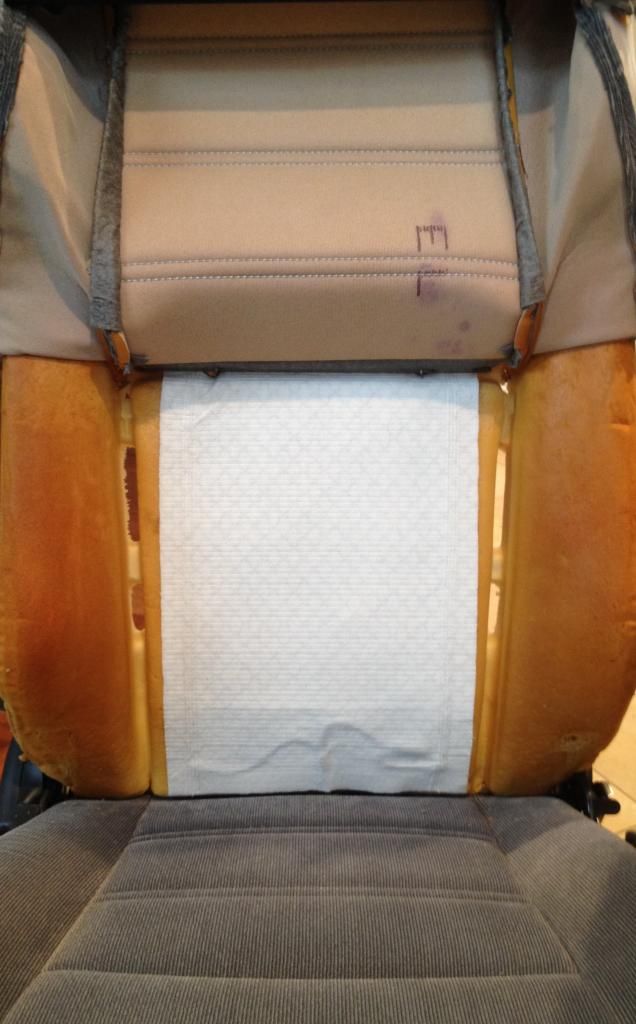
- Pull back down the upholstery.
- Line up the rubber threads again and use new hog rings to fasten. You'll notice a couple of "bumps" on the threads where the first hog ring should hold them in position.
- Make sure you line up the electrical cord so it outputs to the side that goes against the mid console. Put the front and back of the fabric back together again by stretching it back on.
- Time for the seat bottom - upside down view with hog rings circled. If you do the driver side you'll have to deal with the cord that runs to the seat belt buckle. Cutting a couple of the tabs that hold it in place will make it easier. You can just use zip ties to put it back on.
- Flipping the grey felt material will uncover some more hog rings. Remove all hog rings.
- The front of the seat has some metal tabs that holds the fabric in. Bend them back. Flip out the fabric, it has some plastic sown into it that should be flipped.
- Pull off the seat cover. You'll notice that the top of the seat also has three wires that are attached with hog rings. Remove those hog rings too.
- You now have the seat bottom metal harness, the seat bottom foam, and the seat bottom upholstery. If this is your driver side seat and you have the same issue as I do with the left side being collapsed, now's the time to either try to repair that foam or replace it. Pulling a passenger side seat bottom from a Corolla at a yard now that you know how to remove it might be the best way to fix this. I tried to glue it with some 3M spray glue and sports tape but it didn't last long.
- Line up the bottom heater pad, and do it the same way you did the seat back. Two incisions for the two hog rings, and tape it in place so the back with the electrical cord lines up.
- Put the hog rings back on for the three metal wires. This again is tricky. Be patient.
- Flip the seat over, and put the hog rings on the underside too, and bend the metal tabs back. Ensure the electrical cord once again lines up so it will face the mid console.
- Install the seat bottom back in the rail harness with the four bolts. Torque spec is 13 ft/lbs. Don't wing this, do it properly with a torque wrench. You do not want to compromise the seat integrity in the event of an accident.
- Put the plastic covers back on the sides.
- Install the seat back in the car. Torque spec is 27 ft/lbs. Again, do this properly for safety sake.
- Put the plastic covers back on.
- Repeat on the opposite seat.
- To pop off the mid console there are two screws down by each side of the shifter. Remove those.
- Remove the bezel around the shifter. Pull it forward, not backward, or you'll break the plastic tabs.
- Take the felt bottom out of the compartment behind the handbrake. This exposes another three screws. Remove those.
- Pull the handbrake as high as it goes.
- Gently lift the middle console out.
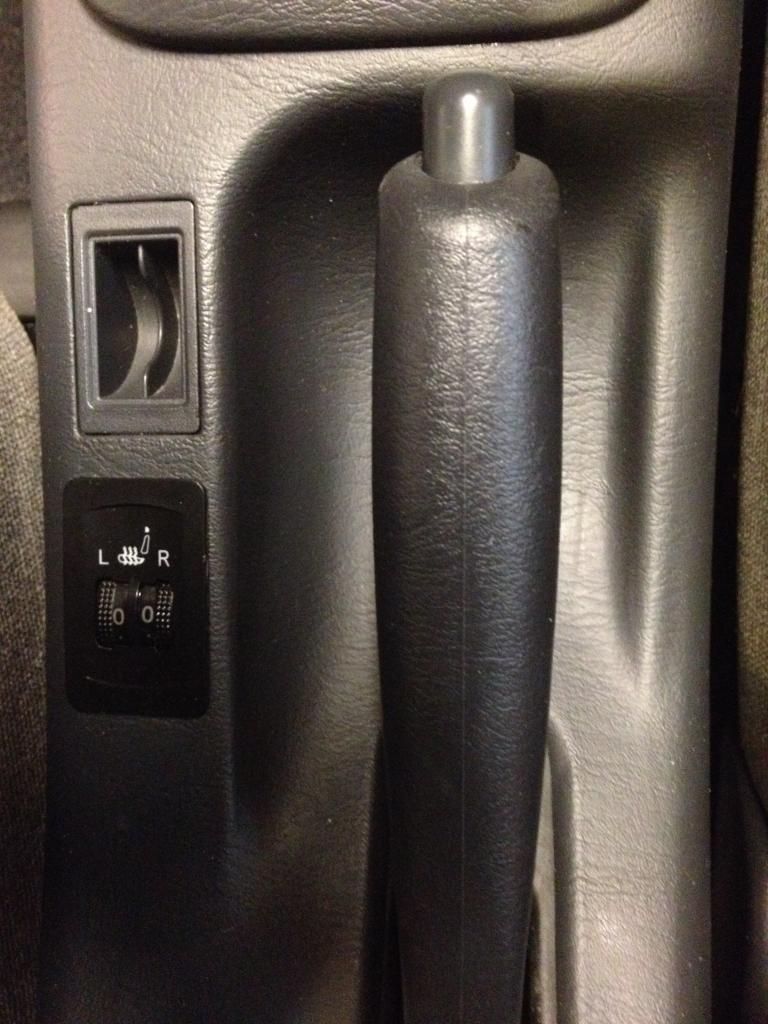
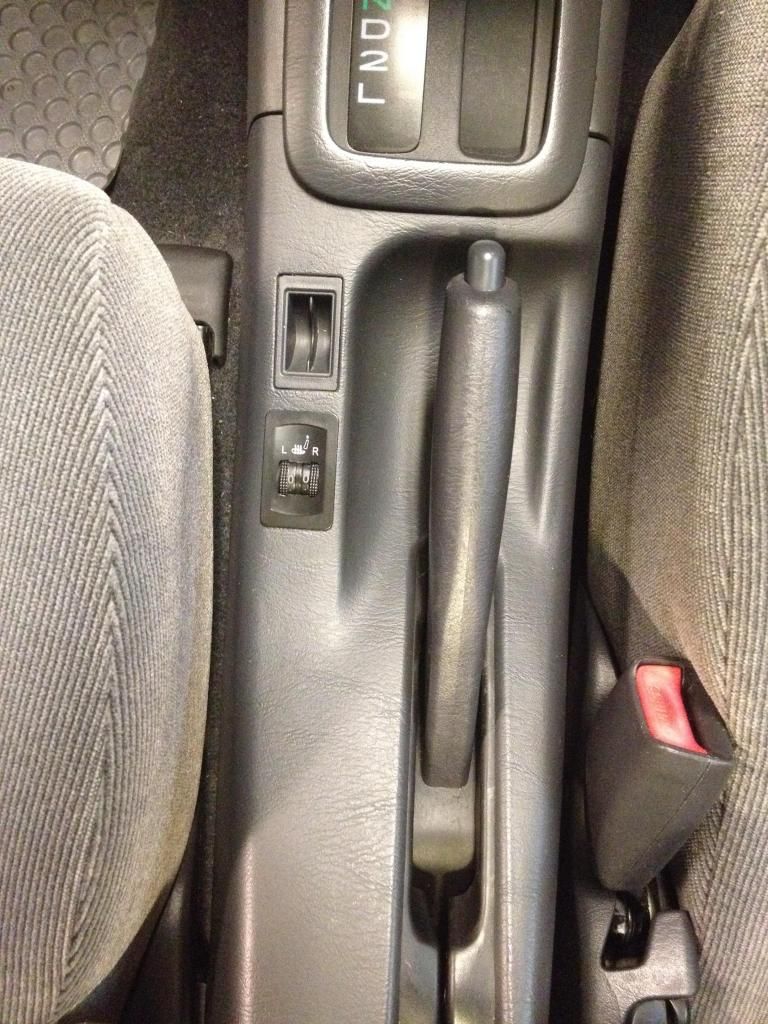
- Turn it upside down, and pop out the small faceplate behind the coin holder. The rectangular hole is almost the same size as the controls for the seat heaters. File to fit, and pop the controls in.
- Pop off the little tray directly in front of the shifter. This is where you'll want the relay for the wiring harness to go. Run the wiring from the relay through the left side of the console out under the steering wheel (you can tuck it between the console and the duct work, and run it all the way to the driver side kick panel. Remove kick panel. Remove the screw and pull back the larger plastic cover as well. Wire as follows:
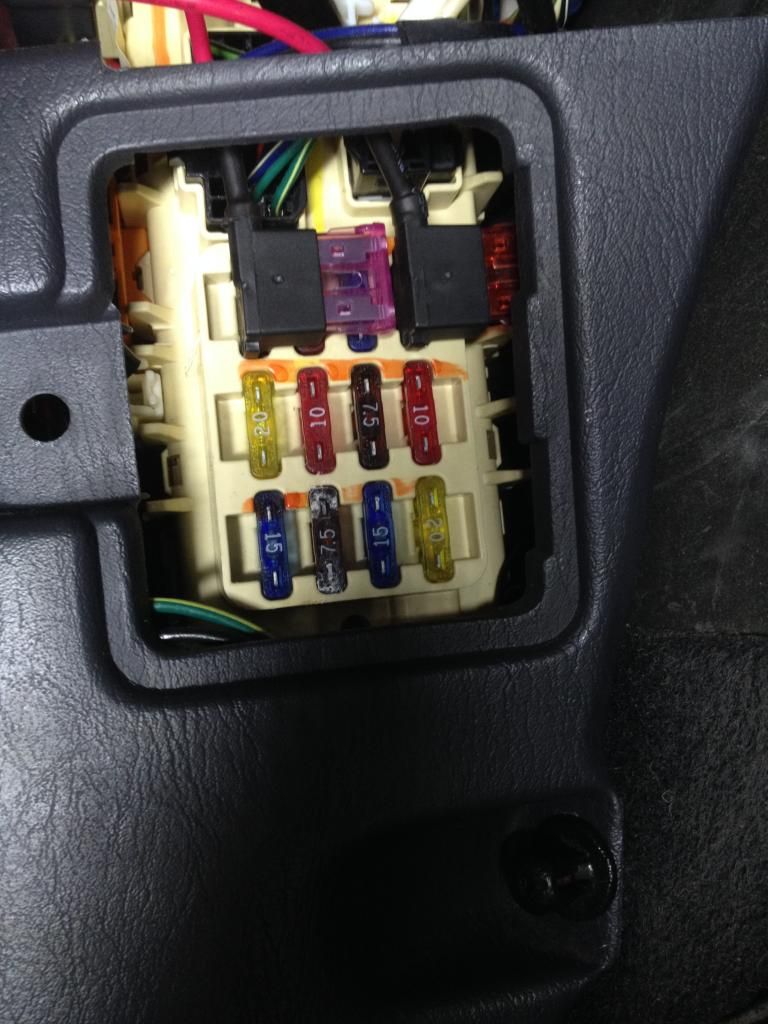
- Red wire from harness goes to unused upper right fuse holder. This will give power when the ignition is ON only. Use the add-a-circuit to install with a 10A fuse.
- Also, tiny red wire from controls also goes to this point. That tiny wire gives power to the controls so they can control the relay. So you'll need to stretch some separate wire (not included in the kit) and hook up to the same add-a-circuit.
- Black wire from wiring harness goes to ground. You'll see a ground bolt (10mm) towards the bottom once you peel back the larger plastic cover.
- Tiny yellow wire from controls also needs a new separate wire (not included in kit) and goes to add-a-circuit that you pop in the upper left unused fuse holder. This gives power only when headlights or parking lights are on. The yellow wire illuminates the L, R and heater icon, and you want that to happen only when your lights are on. I think I used the smallest fuse in the kit for this, like 3 A or something.
- Now, from the relay back to the handbrake area you're running the wires to the controls, and you also run the two wire harnesses that go to each of the seats. Idiotically they are not labeled, so before you run them under the carpet this is the time to hook one of them up to a heating pad to see if the harness is for the left or the right side. You need to switch the ignition ON for this test. It might take a couple of minutes before you feel the heat.
- Once you have confirmed which harness is left, and which is right, line them up accordingly. With the mid console still off, what I did was run the harness under the carpet, and cut a tiny slit in the carpet under the seat. Then I popped the harness up from that slit, and connected the two wires (one from the seat bottom, one from the seat back).
- Install the mid console again. Make sure all wires are lining up.
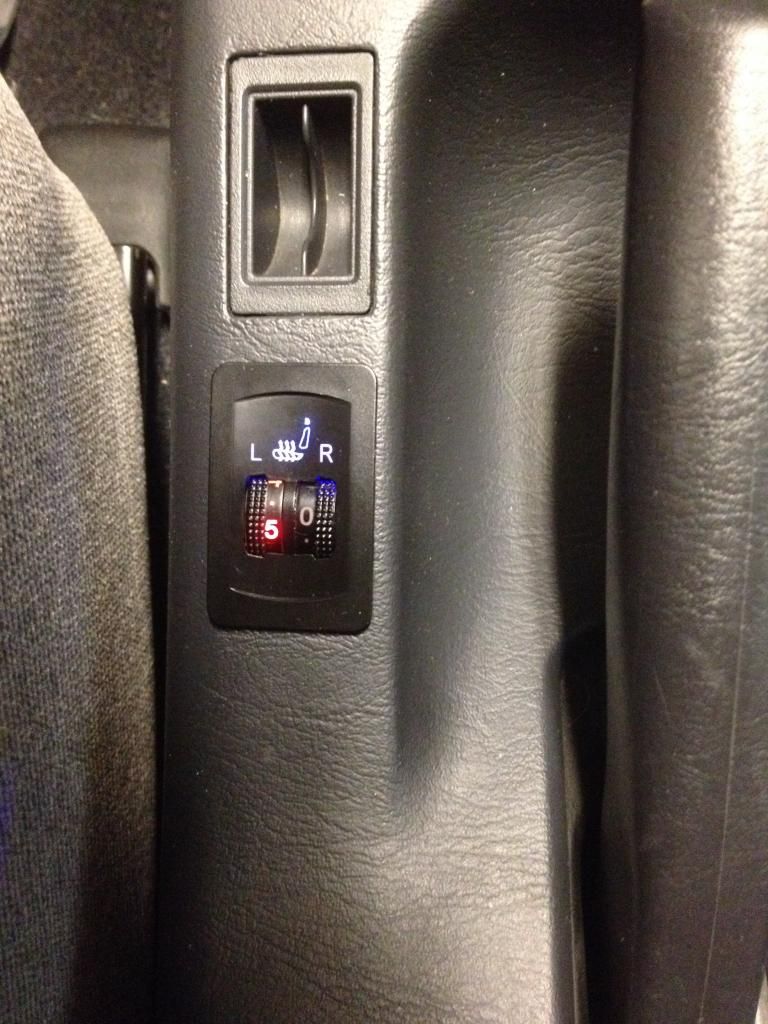
- Enjoy the result!!
")


