

Most people on this board probably already know how to do this or have done this before, but I thought this might be helpful for the newbs and first timers. When I did mine for the first time it would have helped a bunch if there was a thread like this. I changed mine today and decided to take some pics and do a write up.
The 2az-fe is the engine used on all four cylinder Gen 5 and Gen 6 Camry's from 2002-2009.
DISCLAIMER: This guide is meant only to give you a general idea on what the job entails. I am NOT a technician, mechanic or expert. I'm just an average joe who enjoys doing my own maintenance. If there is any inaccurate information on here the more knowledgable posters on here will be quick to point it out. I am not responsible for any damage you may do to your car while following this guide. That said, its a very easy and quick job even for diy newbs so if you've never done it before and feel up to it, there is nothing at all to be intimidated about.
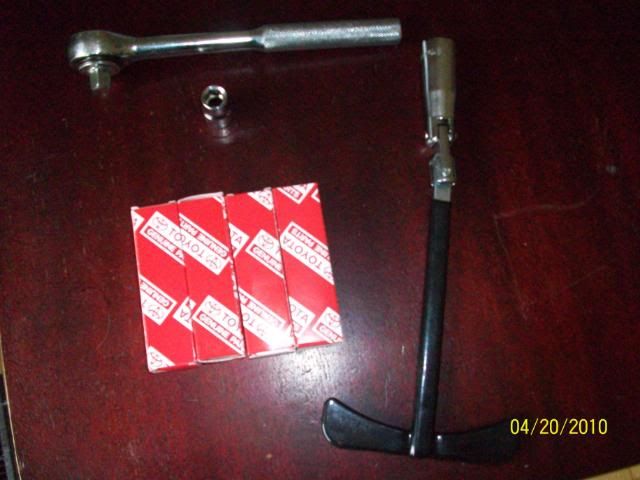
Tools Required: A socket wrench or torque wrench with a 6 inch extension, a 10mm socket, a 16mm spark plug deep socket or 16mm socket tool (you will want a deep socket with a rubber gasket which will grip the spark plug and help when pulling the plug out and lowering it back in) , your 4 new spark plugs and about 30 mins of free time.
![Image]()
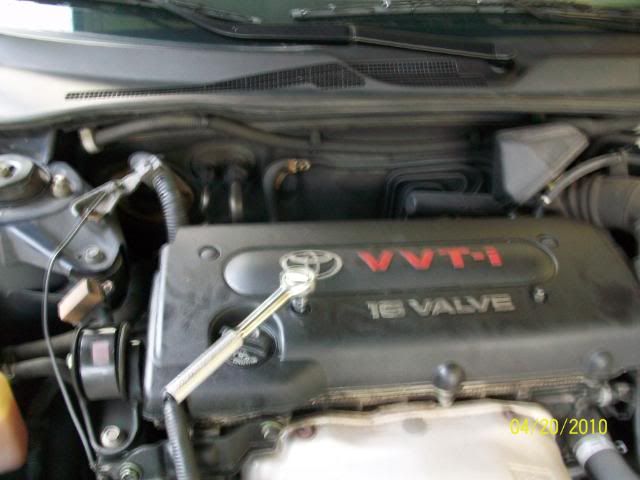
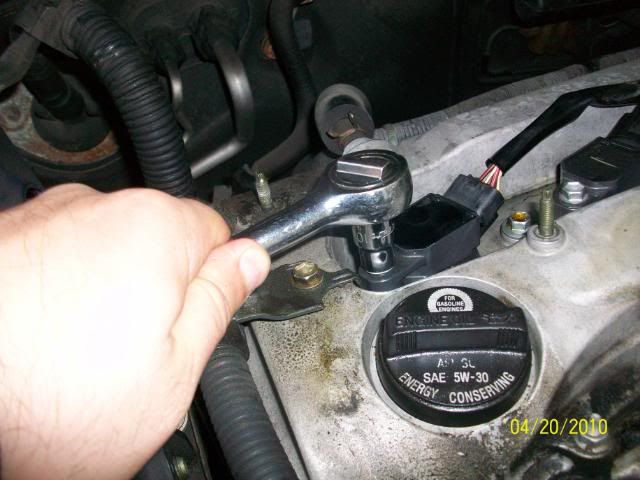
STEP 1: Use your 10mm socket to remove the two nuts holding the plastic cover.
![Image]()
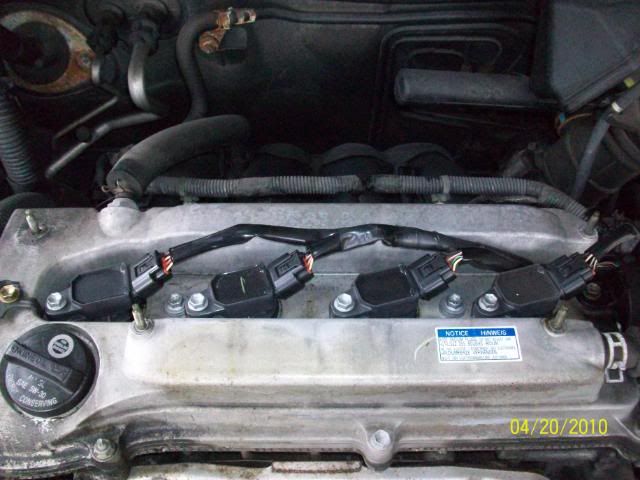
Put your nuts and cover somewhere safe and clean and take a look underneath. It's all laid out nice and easy. BEFORE YOU DO ANYTHING, make sure you do the spark plugs one at a time. You want to make sure all the plugs, ignition coils and wires are where they are supposed to be.
![Image]()
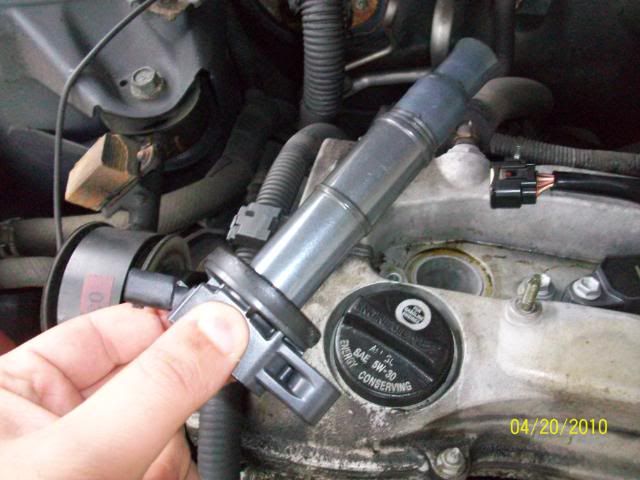
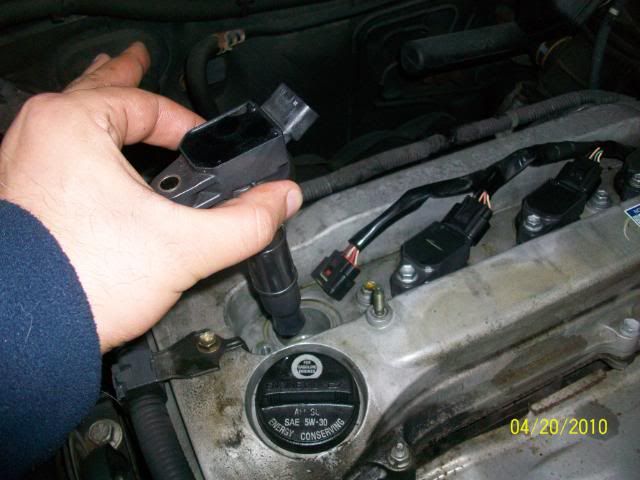
STEP 2: Use your 10mm socket to remove the bolt that is holding the ignition coil in place. Press down on the pressure tab to remove the wire from the ignition coil
![Image]()
STEP 3: Pull out the ignition coil and put it somewhere clean. It should just slide out without much resistance.
![Image]()
STEP 4: You don't want any dirt or foreign crap getting in your engine. Before you remove the spark plug clean around the hole with either compressed air, or carefully wipe it with a dry cloth making sure you dont wipe any dirt down the hole
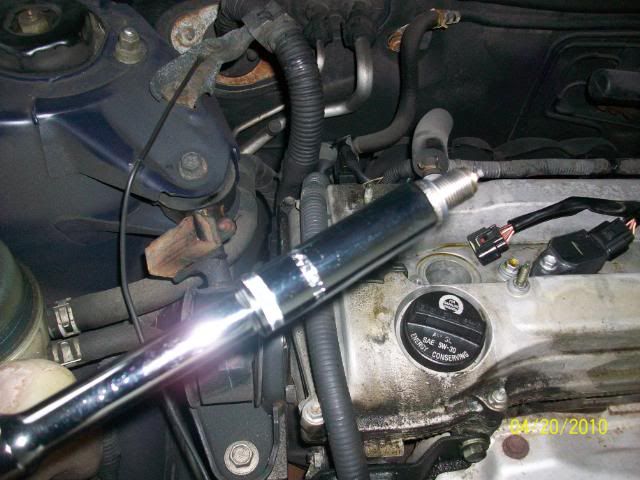
STEP 5: Once its clean look down the hole and you will see the top of your spark plug about 6 inches down. Put the the spark plug tool or torque wrench with the 16mm spark plug socket down until you feel it grip the spark plug. GENTLY unscrew the plug. Be very careful not to break the spark plug or you will be in a world of hurt. If it doesn't budge just be patient and work on it gently until it loosens.
![Image]()
STEP 6: Remove the old spark plug. Once its out of the threads the plug should stick to the rubber gasket on the socket and pull right out with your wrench/tool. If it doesn't take a pair of needle nose pliers and carefully fish the spark plug out.
![Image]()
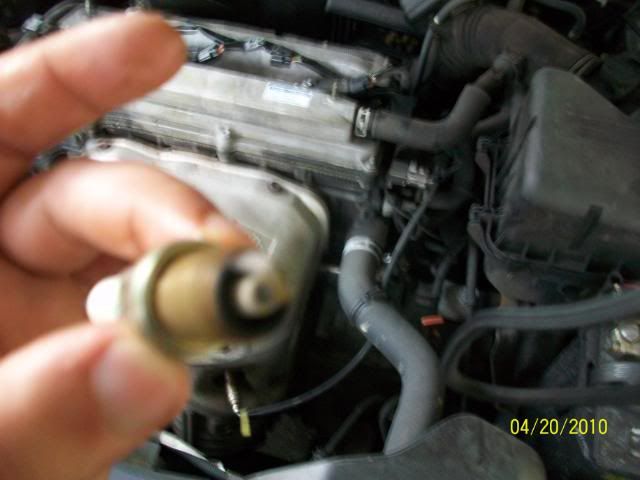
The old worn out spark plug:
![Image]()
STEP 7: Put the new spark plug onto the torque wrench/spark plug tool. Make sure its in there tight and lower it down where the old plug was. Screw it in place
DO NOT CROSSTHREAD. The spark plugs should thread in very smoothly and effortlessly with almost no resistance until they make contact. See post #9 for a technique to avoid crossthreading. DO NOT OVERTIGHTEN. Again you don't want to break it or make it too difficult to take them out when you relplace them. The proper way to do this is to use a torque wrench and torque it to spec, but hand tightening is also fine as long as you don't overdo it.
![Image]()
STEP 8: Once the new plug is in there tight and secure, get the ignition coil that you took out earlier and put it back in place
![Image]()
STEP 9: Put the 10 mm bolt back on and tighten it until the ignition coil is nice and snug. Plug the wire back into the ignition coil
![Image]()
STEPS 10, 11, and 12: Repeat this with the other 3 spark plugs
STEP 13: Put the plastic engine cover back on, and you're done! Enjoy the improved MPG and engine performance.
The 2az-fe is the engine used on all four cylinder Gen 5 and Gen 6 Camry's from 2002-2009.
DISCLAIMER: This guide is meant only to give you a general idea on what the job entails. I am NOT a technician, mechanic or expert. I'm just an average joe who enjoys doing my own maintenance. If there is any inaccurate information on here the more knowledgable posters on here will be quick to point it out. I am not responsible for any damage you may do to your car while following this guide. That said, its a very easy and quick job even for diy newbs so if you've never done it before and feel up to it, there is nothing at all to be intimidated about.
Tools Required: A socket wrench or torque wrench with a 6 inch extension, a 10mm socket, a 16mm spark plug deep socket or 16mm socket tool (you will want a deep socket with a rubber gasket which will grip the spark plug and help when pulling the plug out and lowering it back in) , your 4 new spark plugs and about 30 mins of free time.
STEP 1: Use your 10mm socket to remove the two nuts holding the plastic cover.
Put your nuts and cover somewhere safe and clean and take a look underneath. It's all laid out nice and easy. BEFORE YOU DO ANYTHING, make sure you do the spark plugs one at a time. You want to make sure all the plugs, ignition coils and wires are where they are supposed to be.
STEP 2: Use your 10mm socket to remove the bolt that is holding the ignition coil in place. Press down on the pressure tab to remove the wire from the ignition coil

STEP 3: Pull out the ignition coil and put it somewhere clean. It should just slide out without much resistance.
STEP 4: You don't want any dirt or foreign crap getting in your engine. Before you remove the spark plug clean around the hole with either compressed air, or carefully wipe it with a dry cloth making sure you dont wipe any dirt down the hole
STEP 5: Once its clean look down the hole and you will see the top of your spark plug about 6 inches down. Put the the spark plug tool or torque wrench with the 16mm spark plug socket down until you feel it grip the spark plug. GENTLY unscrew the plug. Be very careful not to break the spark plug or you will be in a world of hurt. If it doesn't budge just be patient and work on it gently until it loosens.

STEP 6: Remove the old spark plug. Once its out of the threads the plug should stick to the rubber gasket on the socket and pull right out with your wrench/tool. If it doesn't take a pair of needle nose pliers and carefully fish the spark plug out.
The old worn out spark plug:
STEP 7: Put the new spark plug onto the torque wrench/spark plug tool. Make sure its in there tight and lower it down where the old plug was. Screw it in place
DO NOT CROSSTHREAD. The spark plugs should thread in very smoothly and effortlessly with almost no resistance until they make contact. See post #9 for a technique to avoid crossthreading. DO NOT OVERTIGHTEN. Again you don't want to break it or make it too difficult to take them out when you relplace them. The proper way to do this is to use a torque wrench and torque it to spec, but hand tightening is also fine as long as you don't overdo it.
STEP 8: Once the new plug is in there tight and secure, get the ignition coil that you took out earlier and put it back in place
STEP 9: Put the 10 mm bolt back on and tighten it until the ignition coil is nice and snug. Plug the wire back into the ignition coil
STEPS 10, 11, and 12: Repeat this with the other 3 spark plugs
STEP 13: Put the plastic engine cover back on, and you're done! Enjoy the improved MPG and engine performance.
")


