

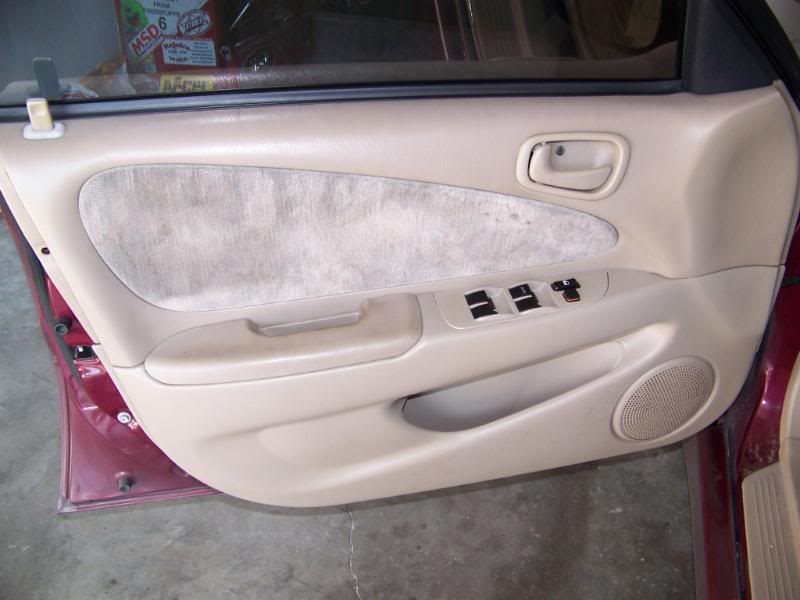
This is a DIY of Front Door Speakers . The replacement or upgrade .
![Image]()
![Image]()
First you remove the door handle with a phillips screw driver . ( Warning : When you are putting the door handle back DO NOT OVER TIGHTEN THE SCREW make it snug so that the inside of the handle doesn't crack )
![Image]()
Then with a flat head screw driver you pop the plastic piece gently off the metal rod that connects to the handle lever . ( Important : When putting this back make sure the plastic snaps around the rod or else the rod will pop out of the lever handle )
![Image]()
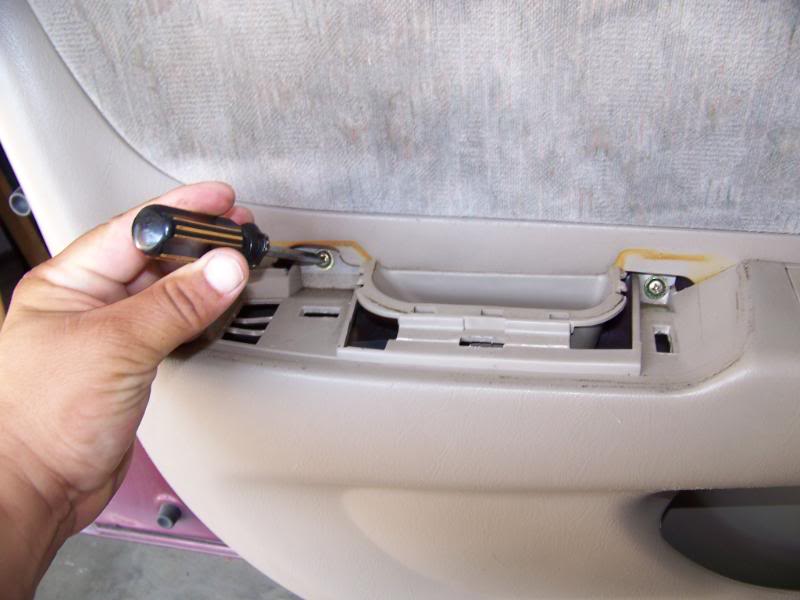
Then with a flat head screw driver you pop up the arm rest to uncover the two screws that are holding the door panel to the door .
![Image]()
Then with a phillips screw driver you remove the 2 screws . ( Reminder : It is very important to put these screws back or else the panel will rattle , plus you are screwing into a plastic piece so dont over tighten )
![Image]()
Remove the side mirror bolt cover panel .
![Image]()
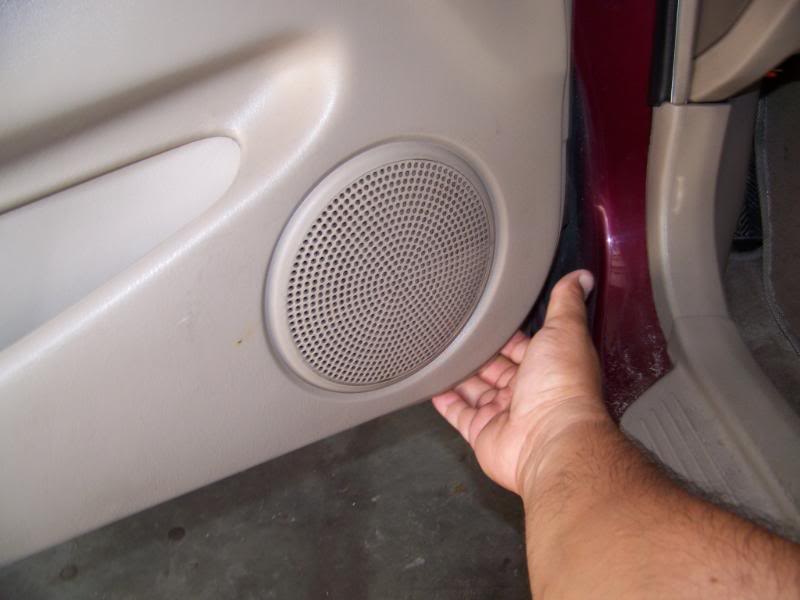
Then pull from the bottom of the panel away from the door and you will hear snapping sounds be very careful you dont pull it hard all the way off because the window switch plug is still plugged in . ( Reminder : You may need a flat head screw driver to help you at first and make sure all the plastic snaps come out if they didnt then pop them out and put then back where they belong on the door panel makes it easier to put the panel back and keeps it from rattling . )
![Image]()
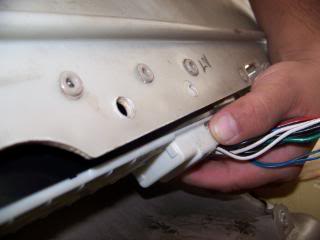
Unplug the window switch plug then remove the panel and put it aside so that you have a nice view of the door . ( Reminder : Make sure you plug this back before you put the panel back and test the window lift motor . )
![Image]()
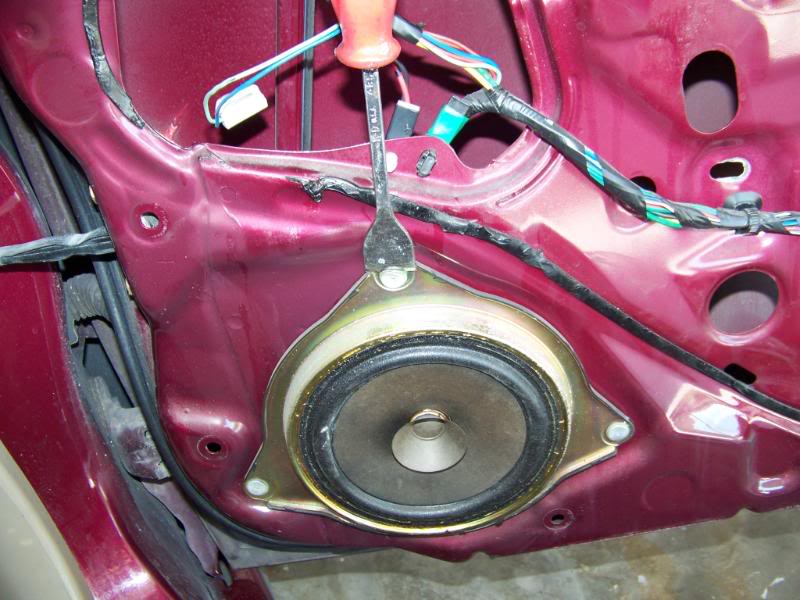
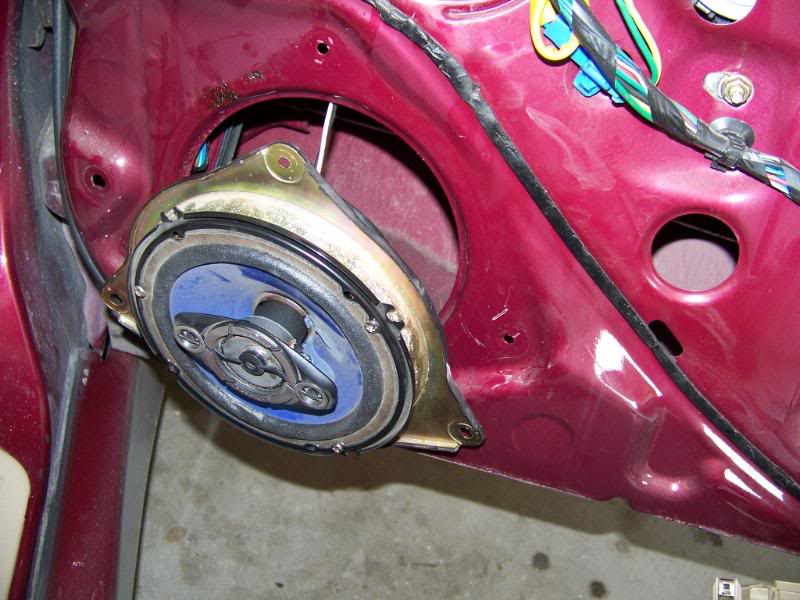
Then your speaker will be exposed . ( If you like you can remove the plastic shield so that you can see the speaker wiring or you can pull down the plastic shield half way off with removing it . )
![Image]()
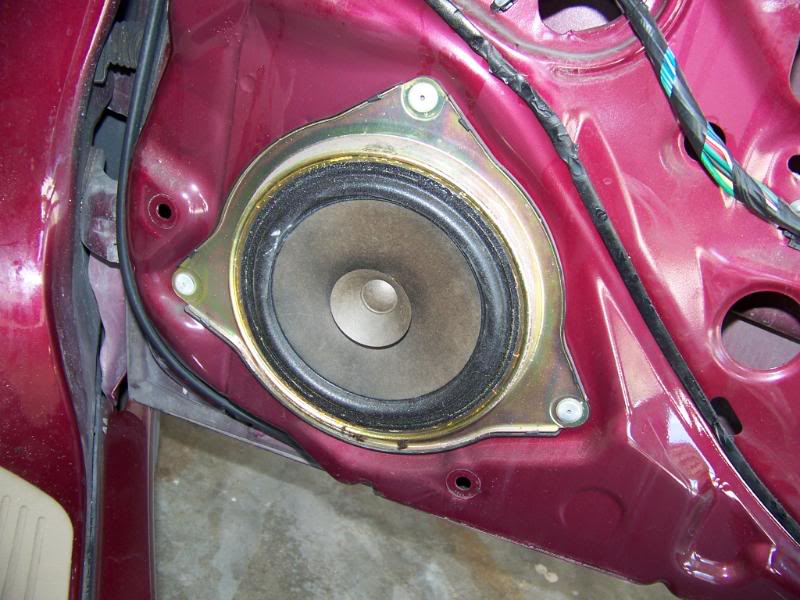
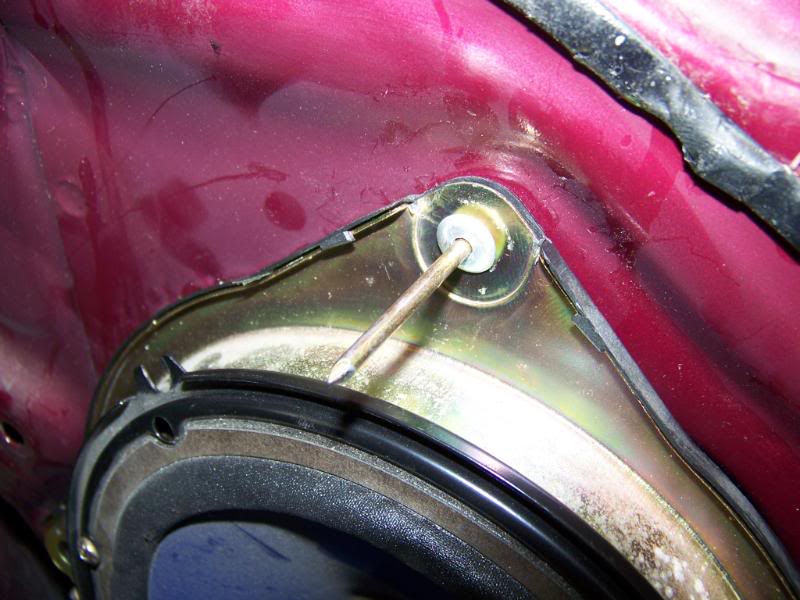
With a chisel you can remove the plastic rivet that is holding your OEM speaker frame to the door . Once you break the rivits you unplug the speaker and then remove the whole spreaker and frame .
![Image]()
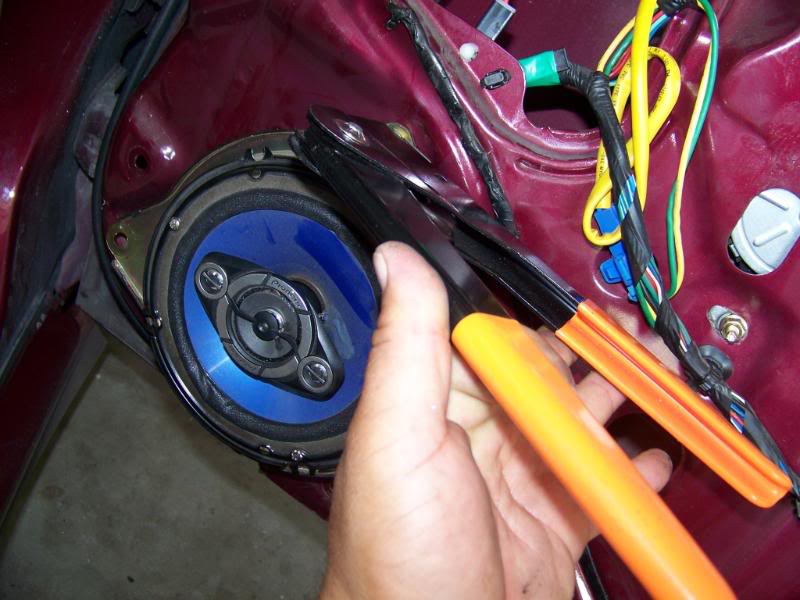
With a dremel you cut off the frame of the speaker that holds the magnic , because this frame can be re-used for your new speakers .
![Image]()
![Image]()
![Image]()
![Image]()
Once you remove the old speaker then with your new speaker you first wire up using the same connector as your OEM speaker , Then once you do that then you align your aftermarket speaker to the frame and mark off where you will be placing new holes . After you drill your holes then you tightly screw the aftermarket speaker to the frame . ( In this case I used Pioneer 3 way speaker 6 1/2 . )
![Image]()
![Image]()
![Image]()
![Image]()
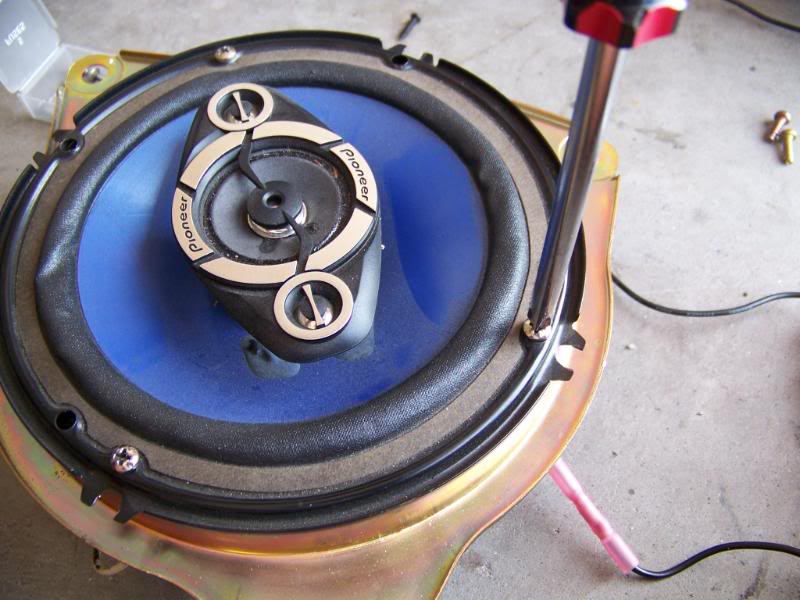
Then once you are done you wire up the speaker so that when you put the frame with your new aftermarket speaker you can hide the wires correctly so that they don't get caught on the window track . Then with new rivets you realign the frame holes and rivit your frame to the door .
![Image]()
Then in the end your speaker should look like this . Before you put everything back on make sure your speakers are playing correctly , Then you reverse the order you took off to put the door panel back on .
For more DIY Click here : http://rinconrolla98.blogspot.com/
.
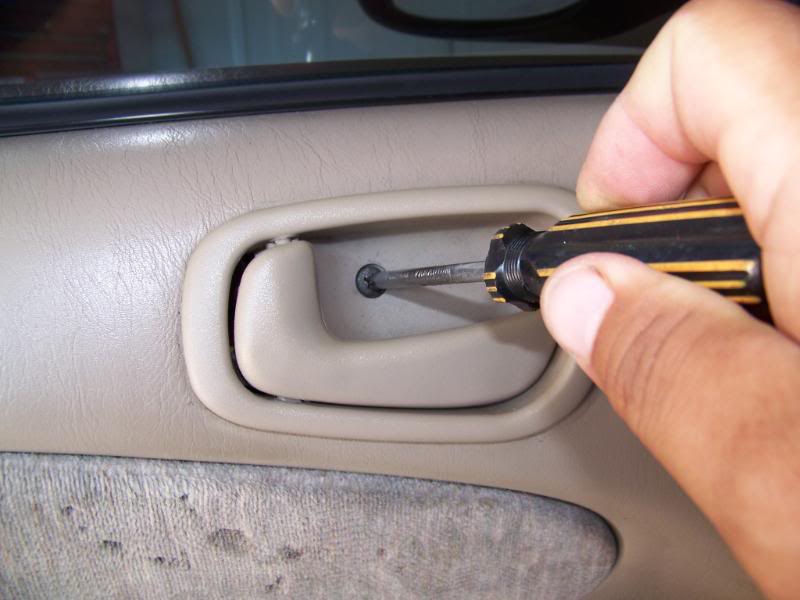
First you remove the door handle with a phillips screw driver . ( Warning : When you are putting the door handle back DO NOT OVER TIGHTEN THE SCREW make it snug so that the inside of the handle doesn't crack )
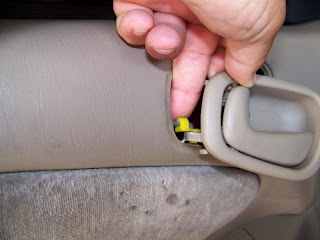
Then with a flat head screw driver you pop the plastic piece gently off the metal rod that connects to the handle lever . ( Important : When putting this back make sure the plastic snaps around the rod or else the rod will pop out of the lever handle )
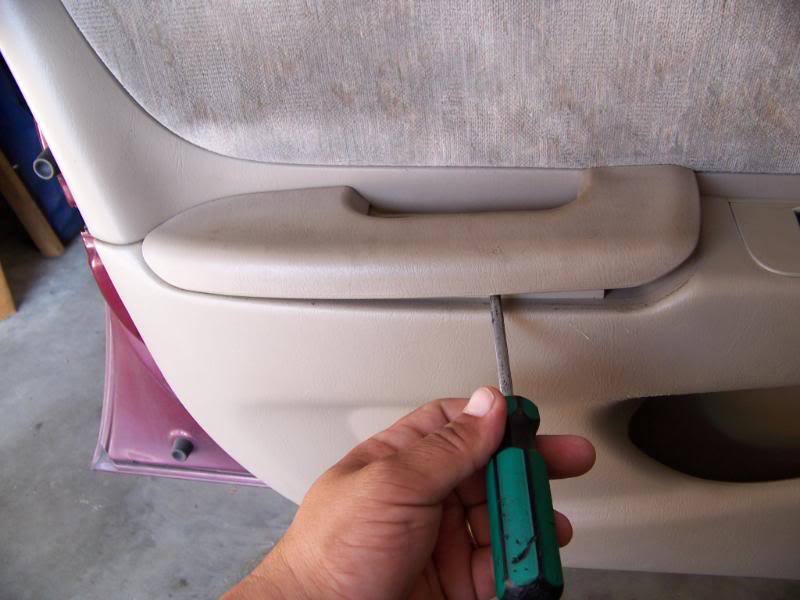
Then with a flat head screw driver you pop up the arm rest to uncover the two screws that are holding the door panel to the door .
Then with a phillips screw driver you remove the 2 screws . ( Reminder : It is very important to put these screws back or else the panel will rattle , plus you are screwing into a plastic piece so dont over tighten )

Remove the side mirror bolt cover panel .
Then pull from the bottom of the panel away from the door and you will hear snapping sounds be very careful you dont pull it hard all the way off because the window switch plug is still plugged in . ( Reminder : You may need a flat head screw driver to help you at first and make sure all the plastic snaps come out if they didnt then pop them out and put then back where they belong on the door panel makes it easier to put the panel back and keeps it from rattling . )
Unplug the window switch plug then remove the panel and put it aside so that you have a nice view of the door . ( Reminder : Make sure you plug this back before you put the panel back and test the window lift motor . )
Then your speaker will be exposed . ( If you like you can remove the plastic shield so that you can see the speaker wiring or you can pull down the plastic shield half way off with removing it . )
With a chisel you can remove the plastic rivet that is holding your OEM speaker frame to the door . Once you break the rivits you unplug the speaker and then remove the whole spreaker and frame .
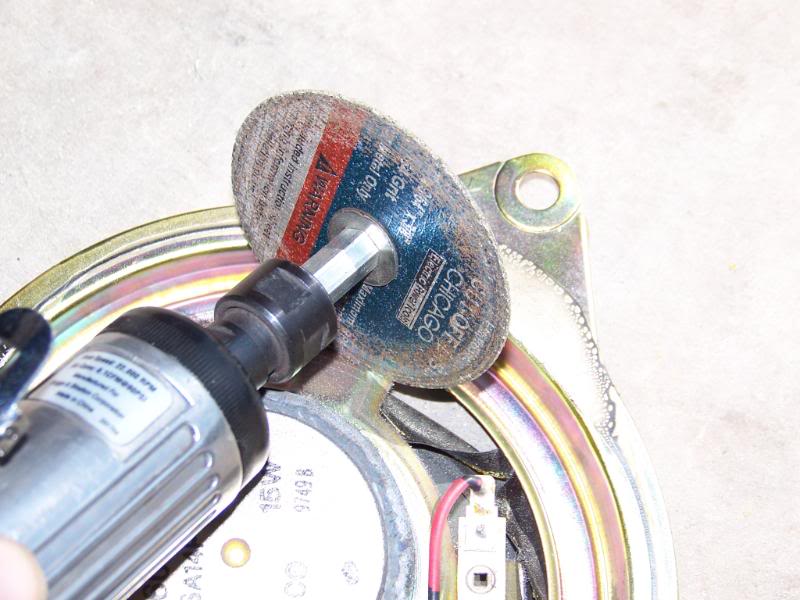
With a dremel you cut off the frame of the speaker that holds the magnic , because this frame can be re-used for your new speakers .

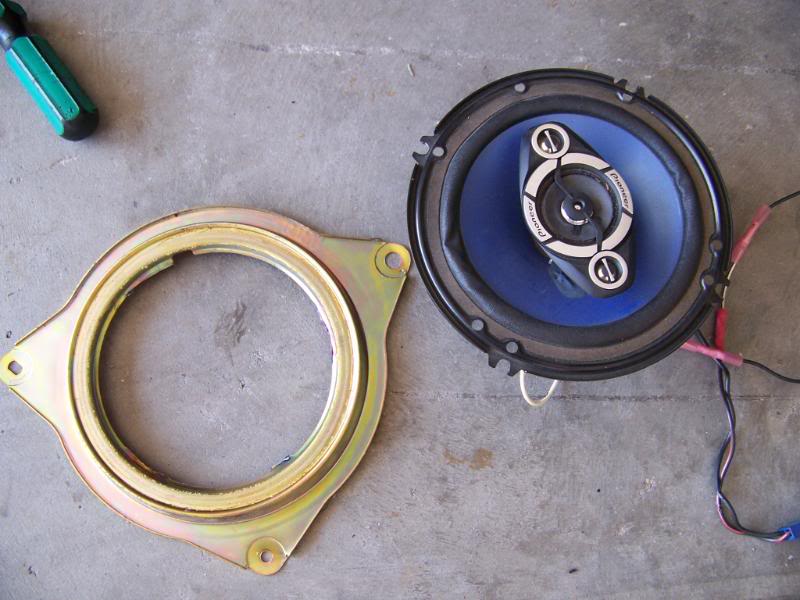

Once you remove the old speaker then with your new speaker you first wire up using the same connector as your OEM speaker , Then once you do that then you align your aftermarket speaker to the frame and mark off where you will be placing new holes . After you drill your holes then you tightly screw the aftermarket speaker to the frame . ( In this case I used Pioneer 3 way speaker 6 1/2 . )
Then once you are done you wire up the speaker so that when you put the frame with your new aftermarket speaker you can hide the wires correctly so that they don't get caught on the window track . Then with new rivets you realign the frame holes and rivit your frame to the door .
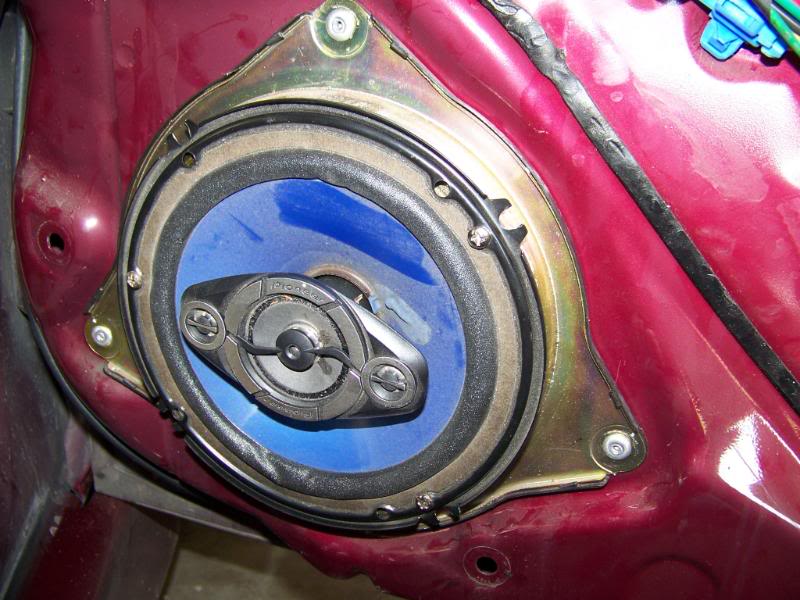
Then in the end your speaker should look like this . Before you put everything back on make sure your speakers are playing correctly , Then you reverse the order you took off to put the door panel back on .
For more DIY Click here : http://rinconrolla98.blogspot.com/
.


