

Hi everyone,
Only two places have ever worked on my van other than myself:
Maplewood Toyota - Failed to notice obvious and severe uneven tire wear that nearly made the van unsafe to drive. I noticed the severe inside shoulder wear the night before taking it to them for a service but wanted to see if they would find it themselves. It was bad enough for the inside shoulder of the tread to be completely gone and the next layer of rubber was showing, but the inspection sheet showed "green" for all four tires.
Firestone in Vernon, CT - Badly overtorqued the lug nuts when they put tires on in November, and completely failed to recognize the uneven pad wear during their courtesy inspection when rotating the tires.
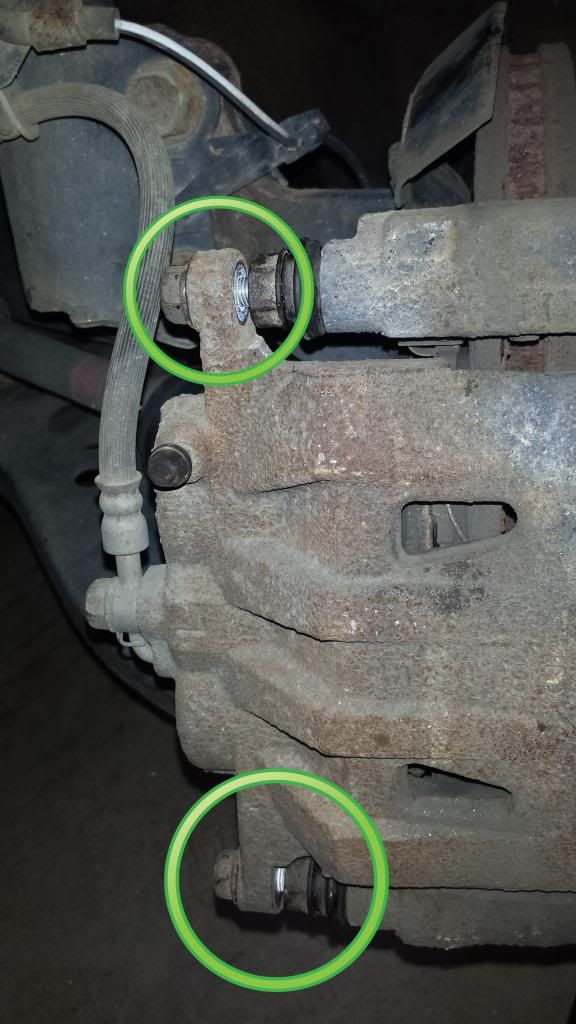
This is why I prefer to do my own maintenance. Last week I noticed that the front pads on both sides were wearing unevenly. Identifying this takes about 15 seconds once the wheel is off, and is one of the most basic checks any mechanic can do. The typical cause of this is frozen slide pins which prevent the outside pad on the caliper from properly engaging the brake rotor. Total time was less than an hour with me taking my time. You remove the caliper by removing both mounting bolts found here:
Hang the caliper from the coil spring using a rope, coat hangar, or plastic cable tie. Here's what the pads looked like:
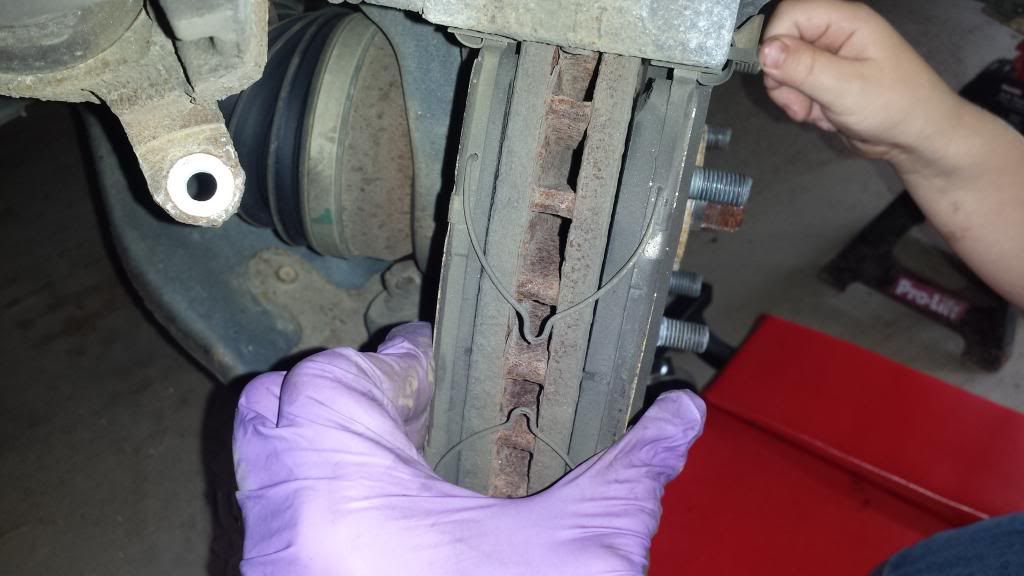
See how unevenly they are worn? The inside pad is being pushed on by the caliper piston, but the caliper couldn't slide to apply pressure to the other side which caused this. I forgot to get a good photo, but the slide pins are what the mounting bolts fasten to. Mine were frozen in their bores which is causing the wear, so they didn't come right out. I used vice grips to rotate them back and forth until I was able to work them out, here's what they looked like:
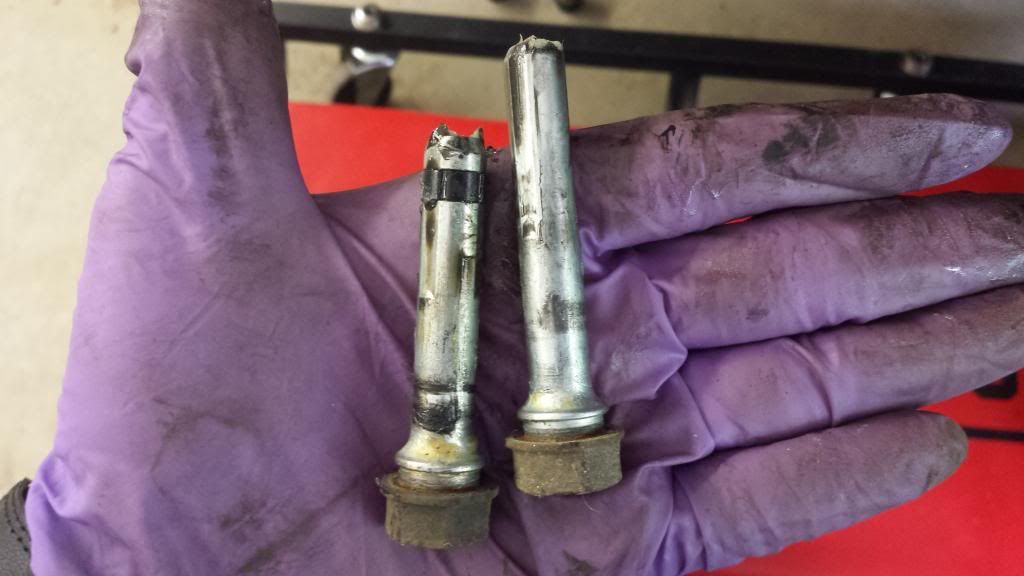
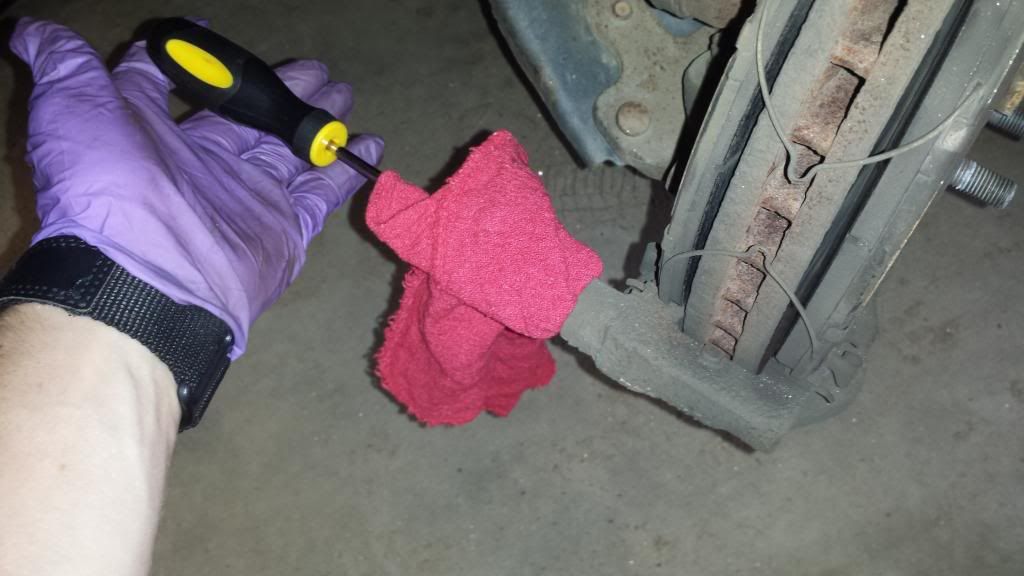
Note the one with the plastic clip goes on bottom. You can see the white goo towards the outside end of the slide pins; this is where water mixed with the grease and caused the pins to freeze. Next work the rubber boots out of the bracket, be careful not to tear them. Use a paper towel or rag to clean out as much goo as you can and then press them back into the bracket. Clean up the slide pins with some paper towels and some brake cleaner if needed. Cleaning out the bore is harder, but I used a screwdriver and a rag:
For this step you're going to need some caliper grease. Do NOT use standard grease because it can swell and damage the rubber boots! Here's what I used: http://www.permatex.com/products/pr...e-repair/brake-maintenance-repair/permatex-ultra-disc-brake-caliper-lube-detail
Apply a few beads of grease around the slide pins and insert them back in the bore. Push them down until the rubber boot seats on the outside lip of the pin just the way you found them. Mount the caliper taking special care to NOT twist the brake line. Fasten the caliper mounting bolts to 42 ft-lbs. Reinstall the tire and tighten the lug nuts to 76 ft-lbs. Repeat for the other side; NEVER service only one side of a brake system!
Only two places have ever worked on my van other than myself:
Maplewood Toyota - Failed to notice obvious and severe uneven tire wear that nearly made the van unsafe to drive. I noticed the severe inside shoulder wear the night before taking it to them for a service but wanted to see if they would find it themselves. It was bad enough for the inside shoulder of the tread to be completely gone and the next layer of rubber was showing, but the inspection sheet showed "green" for all four tires.
Firestone in Vernon, CT - Badly overtorqued the lug nuts when they put tires on in November, and completely failed to recognize the uneven pad wear during their courtesy inspection when rotating the tires.
This is why I prefer to do my own maintenance. Last week I noticed that the front pads on both sides were wearing unevenly. Identifying this takes about 15 seconds once the wheel is off, and is one of the most basic checks any mechanic can do. The typical cause of this is frozen slide pins which prevent the outside pad on the caliper from properly engaging the brake rotor. Total time was less than an hour with me taking my time. You remove the caliper by removing both mounting bolts found here:

Hang the caliper from the coil spring using a rope, coat hangar, or plastic cable tie. Here's what the pads looked like:

See how unevenly they are worn? The inside pad is being pushed on by the caliper piston, but the caliper couldn't slide to apply pressure to the other side which caused this. I forgot to get a good photo, but the slide pins are what the mounting bolts fasten to. Mine were frozen in their bores which is causing the wear, so they didn't come right out. I used vice grips to rotate them back and forth until I was able to work them out, here's what they looked like:

Note the one with the plastic clip goes on bottom. You can see the white goo towards the outside end of the slide pins; this is where water mixed with the grease and caused the pins to freeze. Next work the rubber boots out of the bracket, be careful not to tear them. Use a paper towel or rag to clean out as much goo as you can and then press them back into the bracket. Clean up the slide pins with some paper towels and some brake cleaner if needed. Cleaning out the bore is harder, but I used a screwdriver and a rag:

For this step you're going to need some caliper grease. Do NOT use standard grease because it can swell and damage the rubber boots! Here's what I used: http://www.permatex.com/products/pr...e-repair/brake-maintenance-repair/permatex-ultra-disc-brake-caliper-lube-detail
Apply a few beads of grease around the slide pins and insert them back in the bore. Push them down until the rubber boot seats on the outside lip of the pin just the way you found them. Mount the caliper taking special care to NOT twist the brake line. Fasten the caliper mounting bolts to 42 ft-lbs. Reinstall the tire and tighten the lug nuts to 76 ft-lbs. Repeat for the other side; NEVER service only one side of a brake system!


