

I know allot of people are interested in saving a few bucks on this service (drain and fill), but are apprehensive about performing it themselves. This guide can also be useful for those who have mistakenly drained the AT pan instead of the base pan when performing an oil change. The following will serve as an official "How To" and hopefully aid some individuals who need such information.
DIY'er beware however, as I take no responsibility if you should screw this up, costing you a tow to the dealer (or worse). I strongly recommend anyone who tries this should consult the Toyota Factory Service Manual for further clarification, and become competent in getting the truck to enter the temp check mode before attempting any drain/fill, but honestly it is only a little more involved than a typical oil change for anyone with moderate mechanical ability.
The drain and fill procedure on the Toyota 5 speed AT (mated to the 4.0L V6) is different than that of traditional transmissions. Since this transmission has no dipstick to check fluid level, the correct level must be confirmed by an overflow plug on the bottom of the pan. The fluid temperature MUST BE between 46°C (115°F) and 56°C (130°F) to accurately check the fluid level. Toyota techs utilize the Toyota computerized scan tool to accurately verify the ATF temperature. Since most of us have no access to the Toyota tool, we must utilize method “B” and use the trucks onboard diagnostic system (OBD).
MATERIALS REQUIRED:
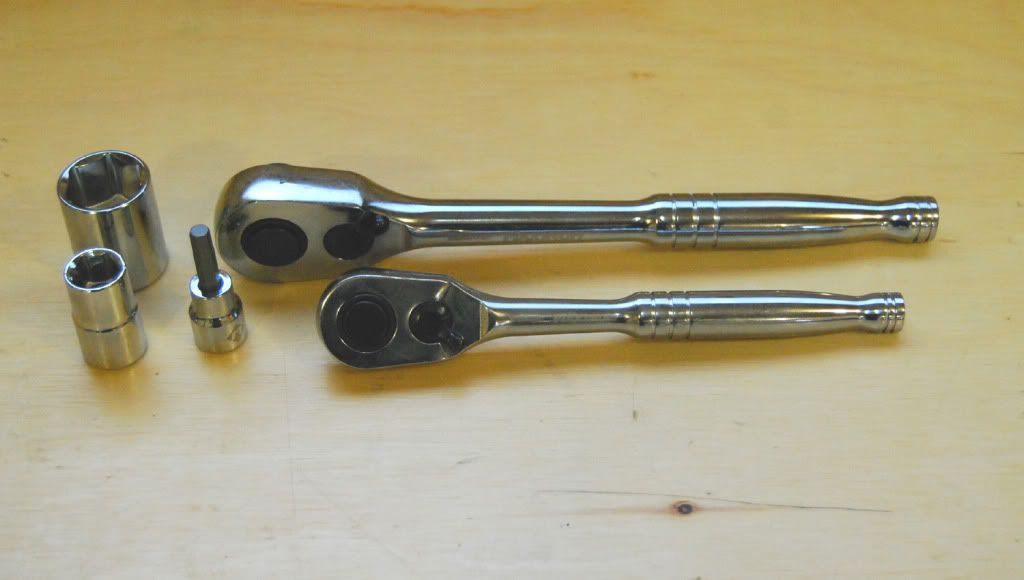
24mm socket or wrench
14mm socket or wrench
5mm hex socket or allen key
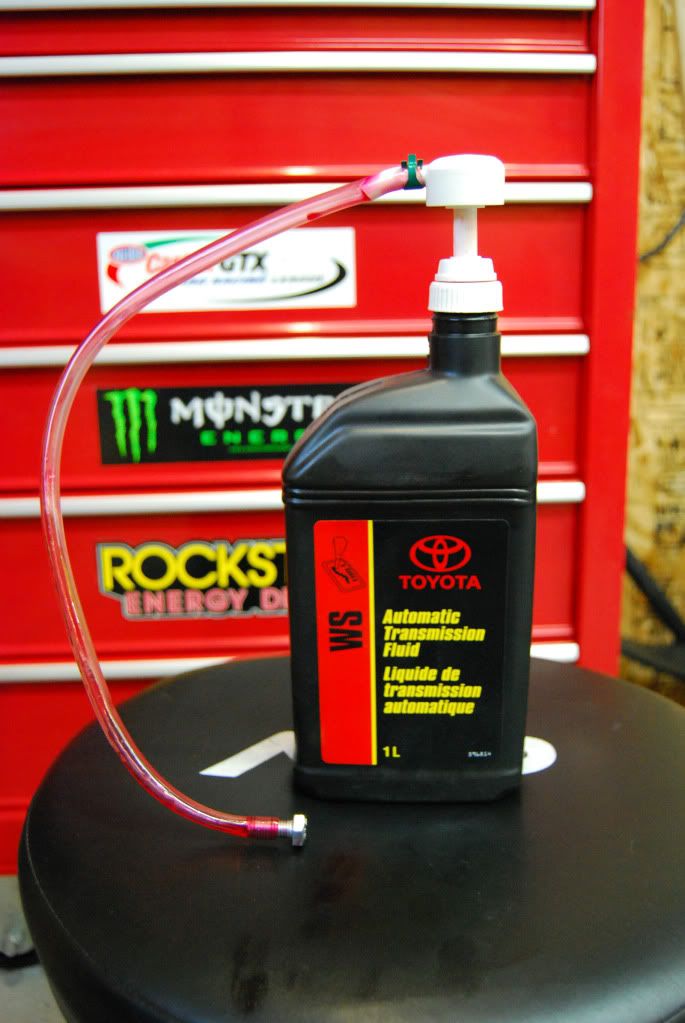
4-5 quarts of Toyota ATF WS (WS certification is the only compatible fluid).
Small piece of copper wire (used to jump the OBD connector)
New Crush washers from dealer (not necessary but not a bad idea)
Bottle pump and hose or funnel and hose (both available at Wal Mart for few $$$)
Drain Pan
![Image]()
![Image]()
![Image]()
PROCEDURE:
Remove the fill plug (24mm) which is located on the passenger side of the automatic transmission (AT). It is important to first ensure that you can remove the fill plug. If the fill plug cannot be removed for some unknown reason or the head becomes stripped – the vehicle is still mobile as you haven’t YET drained the fluid. If you drain the fluid first and later can’t get the fill plug removed – a tow to the dealer is inevitable. No matter what service you perform, always remove the fill plug first!
Loosen the overflow plug (5mm hex) located on the bottom of the AT fluid pan to ensure its ability to be removed when required. If you should remove the overflow plug now, have a pan ready as fluid will spill.
Place your drain pan underneath the transmission fluid pan and remove the 14mm drain plug. You may want to gather the "used" ATF so you can measure exactly what had been drained – in my case it turned out to be 2.9 liters (3.0 quarts). I had purchased 5 liters from the dealer just in case as I was unsure of the required volume.
Replace the drain plug (and overflow plug if removed) and proceed to fill the AT with approximately 1/3 quart more than what drained out. It is important to overfill the AT slightly as you will want excess fluid to spill when you remove the overflow plug later in the procedure. Upon pumping the required amount into the AT with the bottle pump (or funnel and hose), replace the fill plug and start the engine. While the truck idles, move the shift lever through ALL of the gear positions to circulate the fluid. Return the gear selector to Park.
With the AT fluid circulated, it is now time to set the truck in "Temperature Check Mode" to verify the correct level. To describe the Temp Check Mode briefly, there is a light (AT TEMP) located within the the tachometer circle. After a series of shifts to enter the check mode, the AT TEMP light will illuminate when the ATF temperature is within the 46°C (115°F) and 56°C (130°F) range required to accurately check the fluid level. When the ATF temperature surpasses 56°C (130°F), the AT TEMP light will begin to flash indicating the system is too hot for verification.
You may leave the truck idling, or shut off the engine before the next step – your choice.
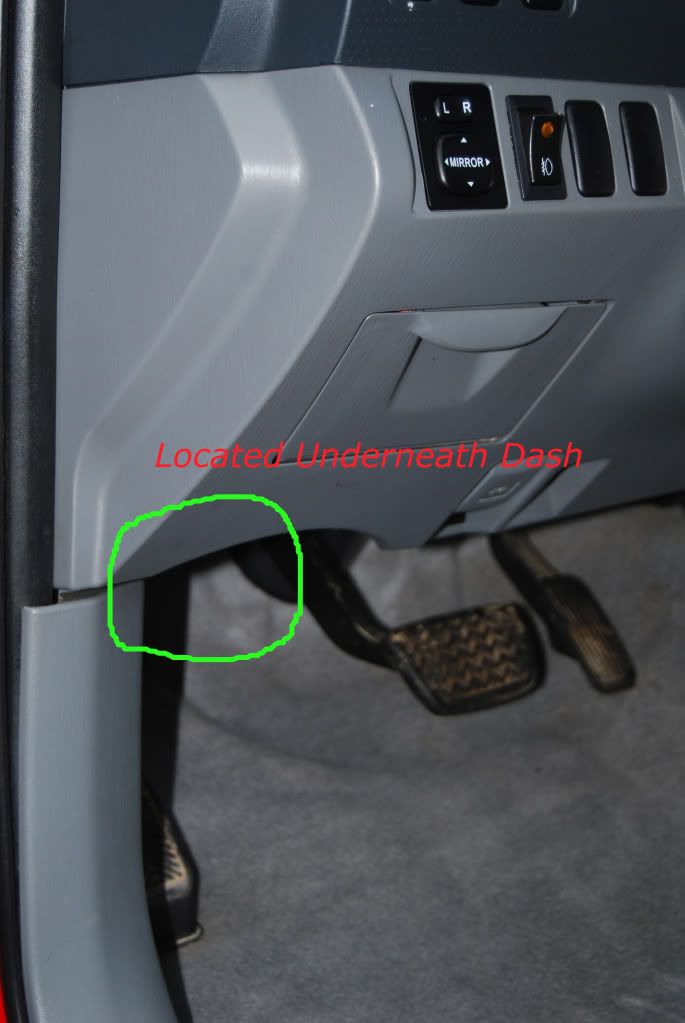
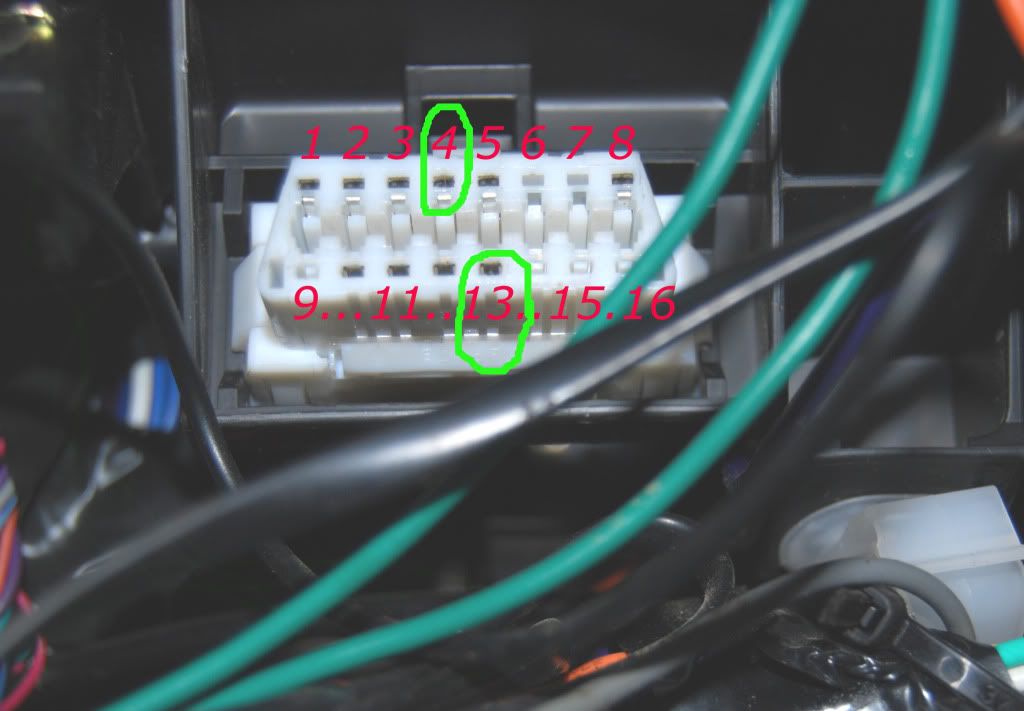
Jump the #4 and #13 pins on the On Board Diagnostics (OBD) white connector located near the drivers kick panel with a short piece of wire and start the engine (if not already started). There are 16 pins on the white OBD connector (8 top and 8 bottom). Number 1 is the top left corner, with number 8 on the top right corner. Number 9 is on the left lower corner, number 16 on the lower right corner. Start at number 1 connector and continue counting the connectors in the same order as you would read a book.
![Image]()
![Image]()
![Image]()
Several of the dash warning lights will begin to flash (normal). Then shifting from "P" to "N" (pausing briefly in "N"), began a series (six shifts) of "N" to "D" to "N" cycles with the shifter. After the 6 shifts are completed the red AT TEMP light should illuminate for 2 seconds (important to note). Place the AT back into "P" (light will illuminate again for 2 seconds) and let the truck idle to warm the fluid. It is important to note that the light illuminated verifying that the truck entered "Temp Check Mode". Without this verification, you may wait all day for a light to illuminate without the truck actually being in mode.
When the AT TEMP light illuminates constantly, the fluid is at the correct temperature for checking. If the AT TEMP light should begin to start blinking, this means the fluid temp has surpassed the allowable range and you must shut off the truck and let the system cool. Retry again after a 1/2 hour break.
Here is a linked Youtube video I uploaded to clarify the procedure. Sorry for the poor quality, but all I had to use was my P&S Camera with video mode.
After approximately 14 mins of idling (my fluid originally was at room temp of 13*C or 56*F) the AT Temp light finally illuminated, indicating the AT fluid was at the correct temperature for a fluid level check (sometimes it will flicker for several seconds, then illuminate steadily). With the truck still idling and in "P", remove the overflow plug to check the fluid level (THE ENGINE MUST BE RUNNING WHEN THE OVERFLOW PLUG IS REMOVED). Remember, the Toyota Service Manual describes the fluid being at the correct level when a "small trickle" escapes from the overflow hole. If a steady flow is found, it must be left to drain until all that remains is a "small trickle".
If after removing the overflow plug no fluid escapes, you must shut off the engine and return back to pumping in more fluid, then proceed again with entering temp check mode.
NOTES:
- Overflow plug torque = 15 ft/lbs
- Fill plug torque = 29 ft/lbs
- Drain plug torque = 15 - 20 ft/lbs
- Allow common sense to prevail. Set your E brake and block your wheels before crawling under your truck. Careful of the exhaust as it gets quite hot.
- This service is recommended at 60,000 miles in the United States. *Updated by Toyota Nov. 2009
- This service is recommended at 96,000 kms in Canada.
- Practice entering the “temp check mode” before attempting this procedure.
- Truck must be level when the procedure is performed.
- I have heard of individuals utilizing an infrared thermometer to measure the temperature of the AT fluid pan instead of the putting the truck in “temp check mode”. Differences in temperature exist between the AT fluid and the steel pan. Some posts on other forums (some from dealership techs) indicate a difference can exist of up to 25 degrees. Heat takes time to transfer from the fluid into the exterior of the pan. When the exterior of the pan reaches the appropriate temperature, the fluid has likely already surpassed it. Keep this in mind if you should want to use an IR thermometer.
DIY'er beware however, as I take no responsibility if you should screw this up, costing you a tow to the dealer (or worse). I strongly recommend anyone who tries this should consult the Toyota Factory Service Manual for further clarification, and become competent in getting the truck to enter the temp check mode before attempting any drain/fill, but honestly it is only a little more involved than a typical oil change for anyone with moderate mechanical ability.
The drain and fill procedure on the Toyota 5 speed AT (mated to the 4.0L V6) is different than that of traditional transmissions. Since this transmission has no dipstick to check fluid level, the correct level must be confirmed by an overflow plug on the bottom of the pan. The fluid temperature MUST BE between 46°C (115°F) and 56°C (130°F) to accurately check the fluid level. Toyota techs utilize the Toyota computerized scan tool to accurately verify the ATF temperature. Since most of us have no access to the Toyota tool, we must utilize method “B” and use the trucks onboard diagnostic system (OBD).
MATERIALS REQUIRED:
24mm socket or wrench
14mm socket or wrench
5mm hex socket or allen key
4-5 quarts of Toyota ATF WS (WS certification is the only compatible fluid).
Small piece of copper wire (used to jump the OBD connector)
New Crush washers from dealer (not necessary but not a bad idea)
Bottle pump and hose or funnel and hose (both available at Wal Mart for few $$$)
Drain Pan

PROCEDURE:
Remove the fill plug (24mm) which is located on the passenger side of the automatic transmission (AT). It is important to first ensure that you can remove the fill plug. If the fill plug cannot be removed for some unknown reason or the head becomes stripped – the vehicle is still mobile as you haven’t YET drained the fluid. If you drain the fluid first and later can’t get the fill plug removed – a tow to the dealer is inevitable. No matter what service you perform, always remove the fill plug first!
Loosen the overflow plug (5mm hex) located on the bottom of the AT fluid pan to ensure its ability to be removed when required. If you should remove the overflow plug now, have a pan ready as fluid will spill.
Place your drain pan underneath the transmission fluid pan and remove the 14mm drain plug. You may want to gather the "used" ATF so you can measure exactly what had been drained – in my case it turned out to be 2.9 liters (3.0 quarts). I had purchased 5 liters from the dealer just in case as I was unsure of the required volume.
Replace the drain plug (and overflow plug if removed) and proceed to fill the AT with approximately 1/3 quart more than what drained out. It is important to overfill the AT slightly as you will want excess fluid to spill when you remove the overflow plug later in the procedure. Upon pumping the required amount into the AT with the bottle pump (or funnel and hose), replace the fill plug and start the engine. While the truck idles, move the shift lever through ALL of the gear positions to circulate the fluid. Return the gear selector to Park.
With the AT fluid circulated, it is now time to set the truck in "Temperature Check Mode" to verify the correct level. To describe the Temp Check Mode briefly, there is a light (AT TEMP) located within the the tachometer circle. After a series of shifts to enter the check mode, the AT TEMP light will illuminate when the ATF temperature is within the 46°C (115°F) and 56°C (130°F) range required to accurately check the fluid level. When the ATF temperature surpasses 56°C (130°F), the AT TEMP light will begin to flash indicating the system is too hot for verification.
You may leave the truck idling, or shut off the engine before the next step – your choice.
Jump the #4 and #13 pins on the On Board Diagnostics (OBD) white connector located near the drivers kick panel with a short piece of wire and start the engine (if not already started). There are 16 pins on the white OBD connector (8 top and 8 bottom). Number 1 is the top left corner, with number 8 on the top right corner. Number 9 is on the left lower corner, number 16 on the lower right corner. Start at number 1 connector and continue counting the connectors in the same order as you would read a book.

Several of the dash warning lights will begin to flash (normal). Then shifting from "P" to "N" (pausing briefly in "N"), began a series (six shifts) of "N" to "D" to "N" cycles with the shifter. After the 6 shifts are completed the red AT TEMP light should illuminate for 2 seconds (important to note). Place the AT back into "P" (light will illuminate again for 2 seconds) and let the truck idle to warm the fluid. It is important to note that the light illuminated verifying that the truck entered "Temp Check Mode". Without this verification, you may wait all day for a light to illuminate without the truck actually being in mode.
When the AT TEMP light illuminates constantly, the fluid is at the correct temperature for checking. If the AT TEMP light should begin to start blinking, this means the fluid temp has surpassed the allowable range and you must shut off the truck and let the system cool. Retry again after a 1/2 hour break.
Here is a linked Youtube video I uploaded to clarify the procedure. Sorry for the poor quality, but all I had to use was my P&S Camera with video mode.
After approximately 14 mins of idling (my fluid originally was at room temp of 13*C or 56*F) the AT Temp light finally illuminated, indicating the AT fluid was at the correct temperature for a fluid level check (sometimes it will flicker for several seconds, then illuminate steadily). With the truck still idling and in "P", remove the overflow plug to check the fluid level (THE ENGINE MUST BE RUNNING WHEN THE OVERFLOW PLUG IS REMOVED). Remember, the Toyota Service Manual describes the fluid being at the correct level when a "small trickle" escapes from the overflow hole. If a steady flow is found, it must be left to drain until all that remains is a "small trickle".
If after removing the overflow plug no fluid escapes, you must shut off the engine and return back to pumping in more fluid, then proceed again with entering temp check mode.
NOTES:
- Overflow plug torque = 15 ft/lbs
- Fill plug torque = 29 ft/lbs
- Drain plug torque = 15 - 20 ft/lbs
- Allow common sense to prevail. Set your E brake and block your wheels before crawling under your truck. Careful of the exhaust as it gets quite hot.
- This service is recommended at 60,000 miles in the United States. *Updated by Toyota Nov. 2009
- This service is recommended at 96,000 kms in Canada.
- Practice entering the “temp check mode” before attempting this procedure.
- Truck must be level when the procedure is performed.
- I have heard of individuals utilizing an infrared thermometer to measure the temperature of the AT fluid pan instead of the putting the truck in “temp check mode”. Differences in temperature exist between the AT fluid and the steel pan. Some posts on other forums (some from dealership techs) indicate a difference can exist of up to 25 degrees. Heat takes time to transfer from the fluid into the exterior of the pan. When the exterior of the pan reaches the appropriate temperature, the fluid has likely already surpassed it. Keep this in mind if you should want to use an IR thermometer.


