

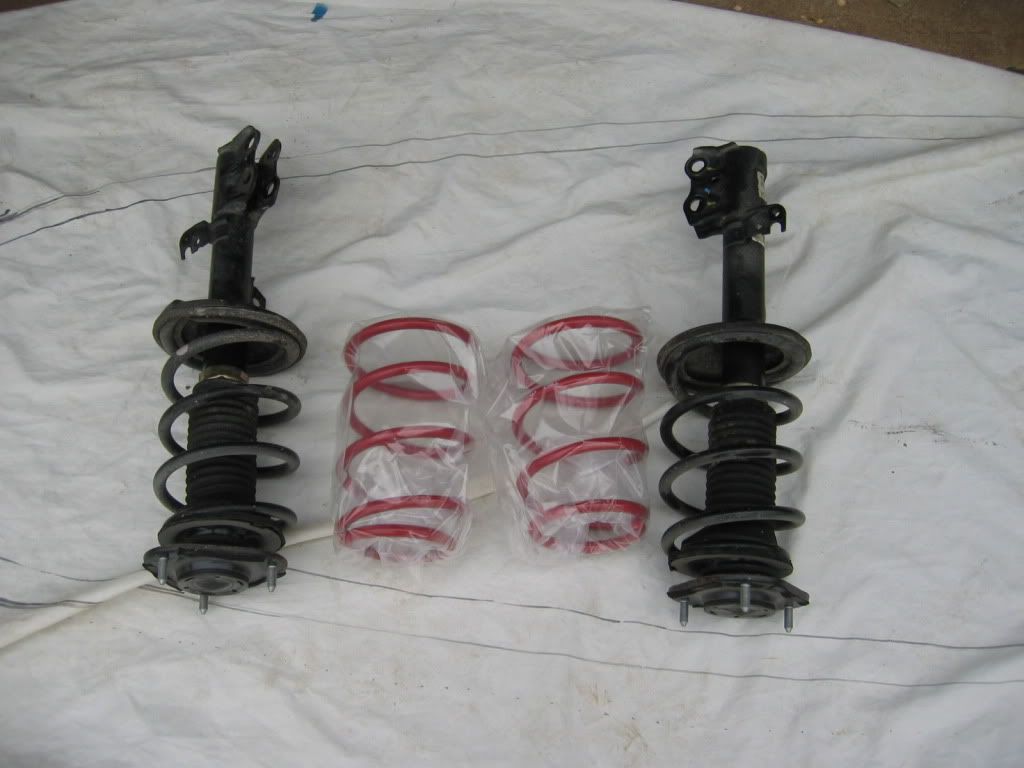
A How To replace your FRONT STRUT COIL SPRINGS.
![Image]()
Difficulty level 1 (easy) – 5 (hard)
1 (easy) = some instructions on TRD is not necessary but please use your own judgment.
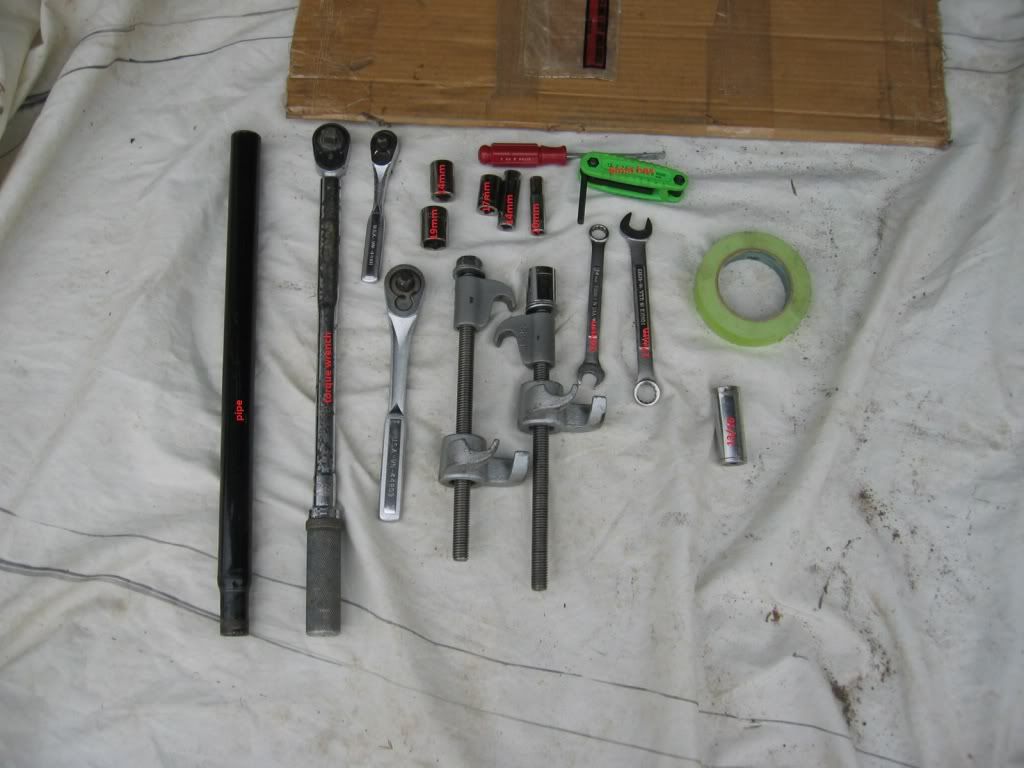
Use proper tools for the application and proper safety precautions.
Read all instruction provided or look it up on-line.
![Image]()
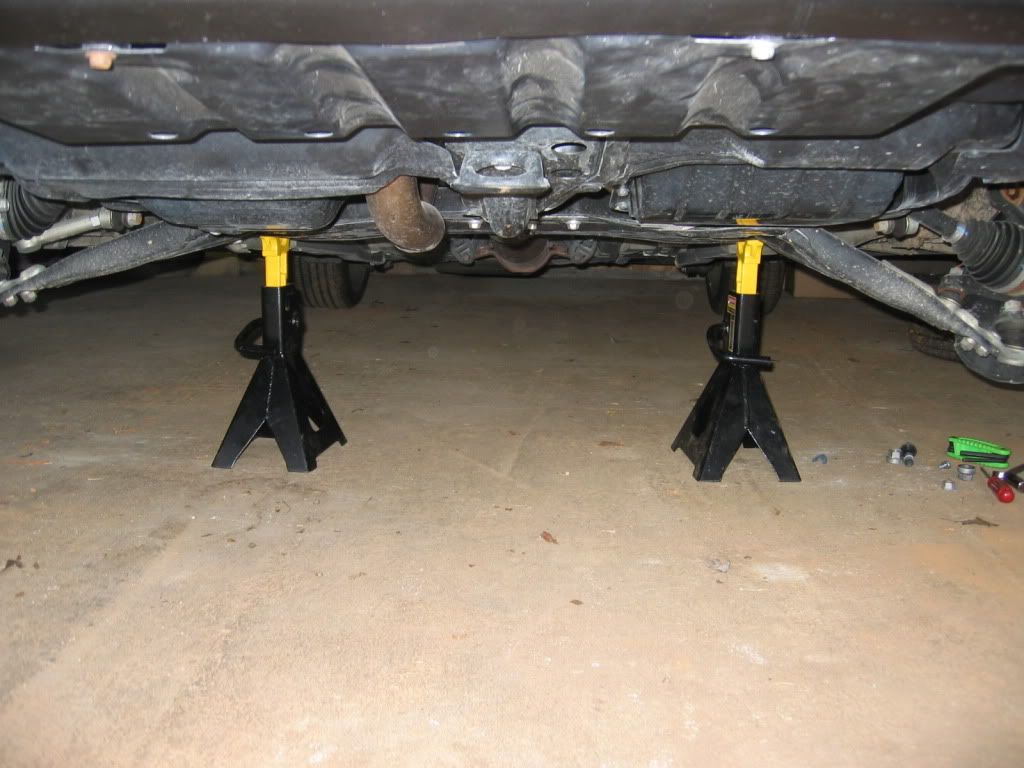
Loosen lug nuts on front wheels and jack up the front of vehicle. Secure with stands and remove front wheels.
![Image]()
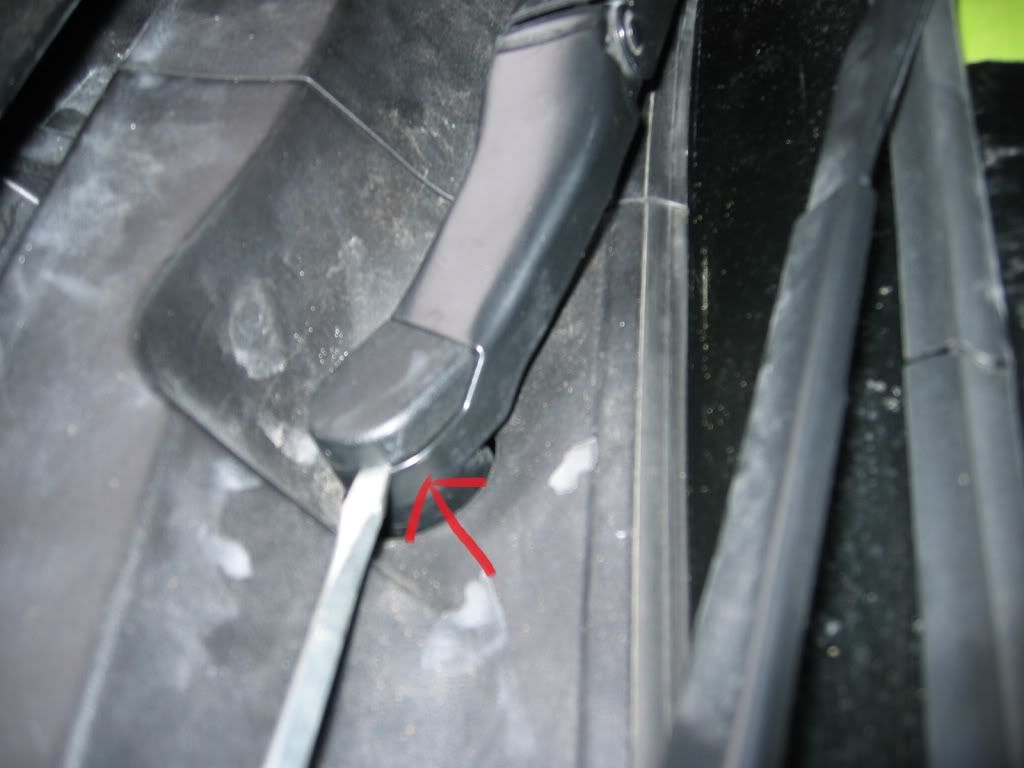
Open the front hood to remove nut covers on windshield wipers with screwdriver as indicated.
![Image]()
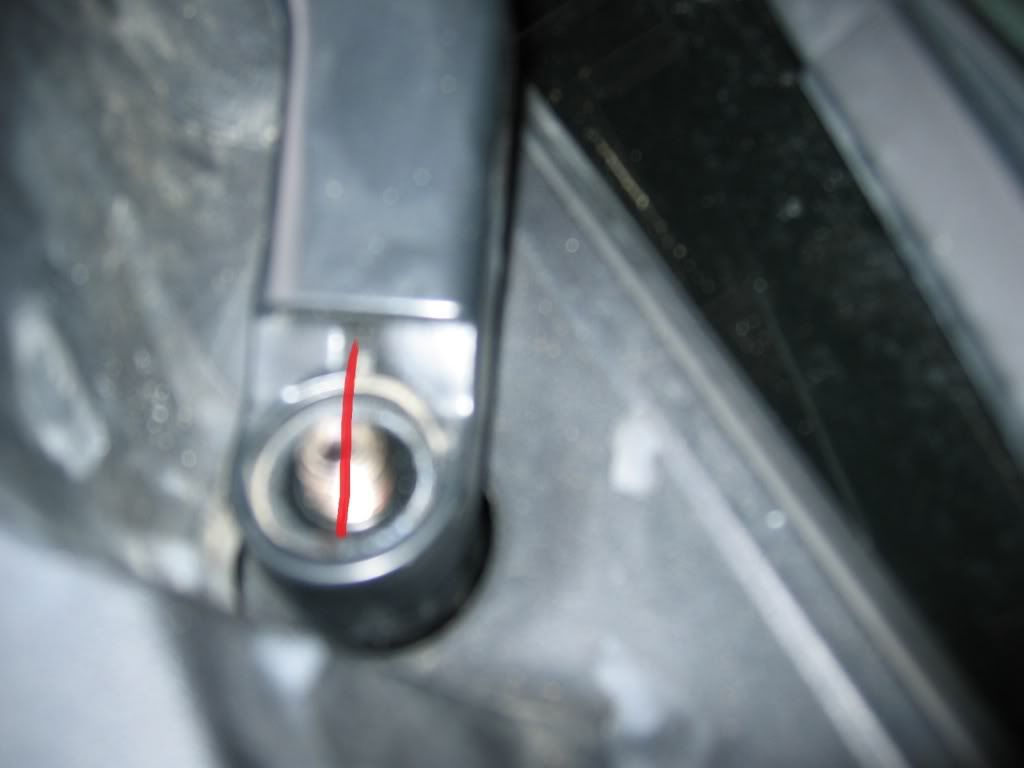
(Optional) you can take a marker to place a line as reference for installation or use tape to mark your wipers.
Using 14mm socket remove nut from wiper. Take care when removing wipers from gear bolt. Gently rock it back and forth until loosen, and then pull up slowly. You might want to use a protective cover on hood to avoid scratches.
![Image]()
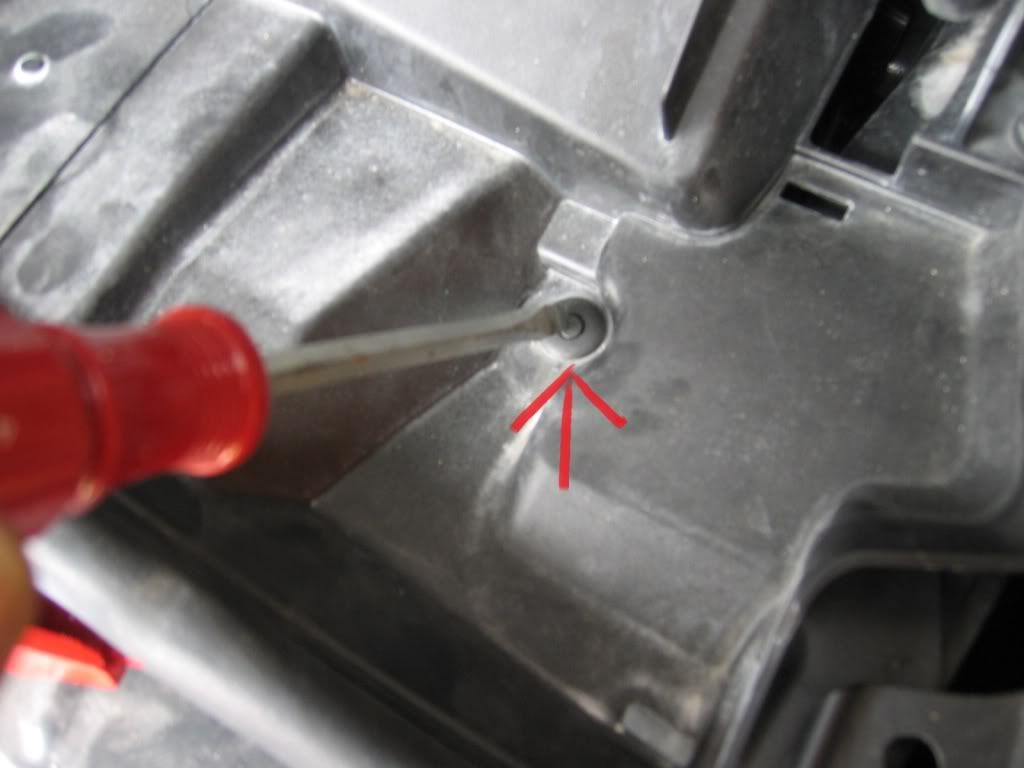
Remove 2 plastic fasteners on each end under the hood on the windshield cowl. press the center down carefully with a srewdriver. you will hear a clcik which will release it easy
![Image]()
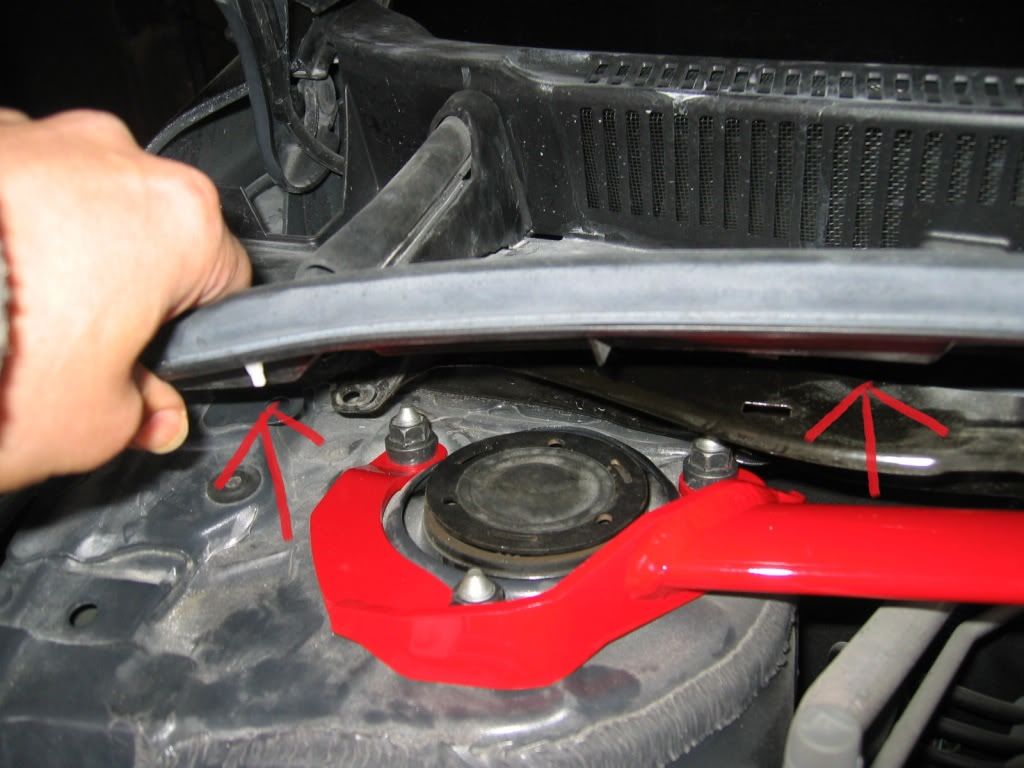
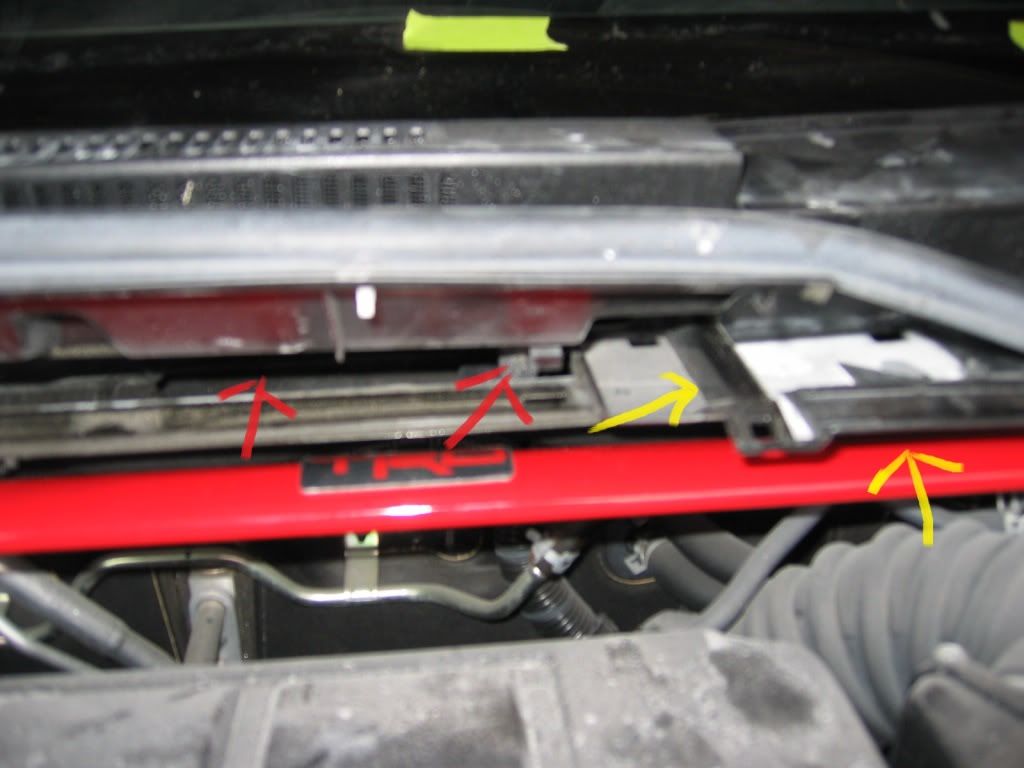
Starting on the corner of the plastic cowl gently pull up until the clips release as you work toward the center. The cowl will be in 2 half just work on each ends. Yellow arrow indicates other half on picture.
![Image]()
![Image]()
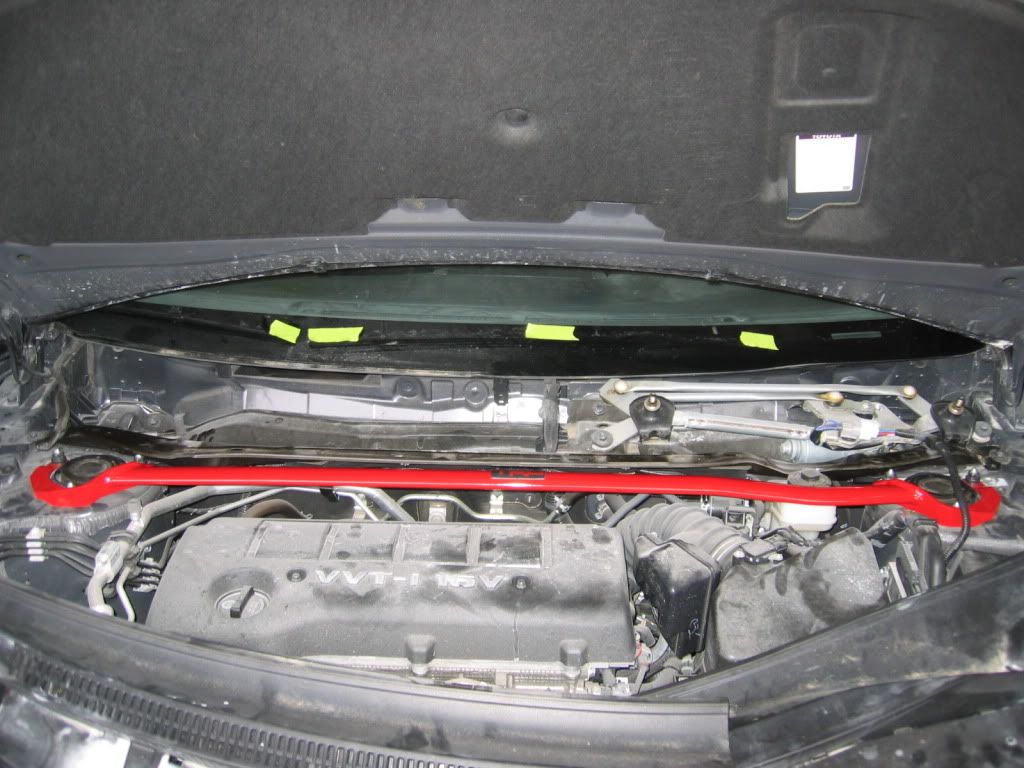
After cowl removal it should look like this. You can remove the rest of the windshield parts and cover if desired but not really necessary.
![Image]()
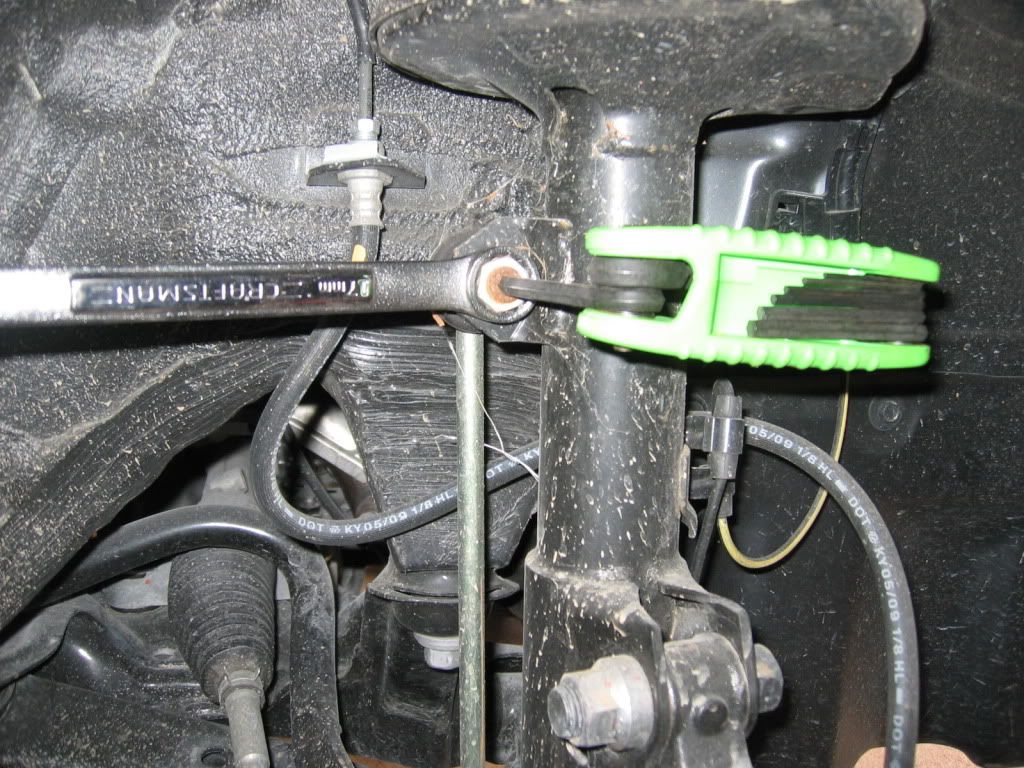
Remove the nut on the sway bar linkage using 14mm wrench with optional 6mm hex key if needed.
![Image]()
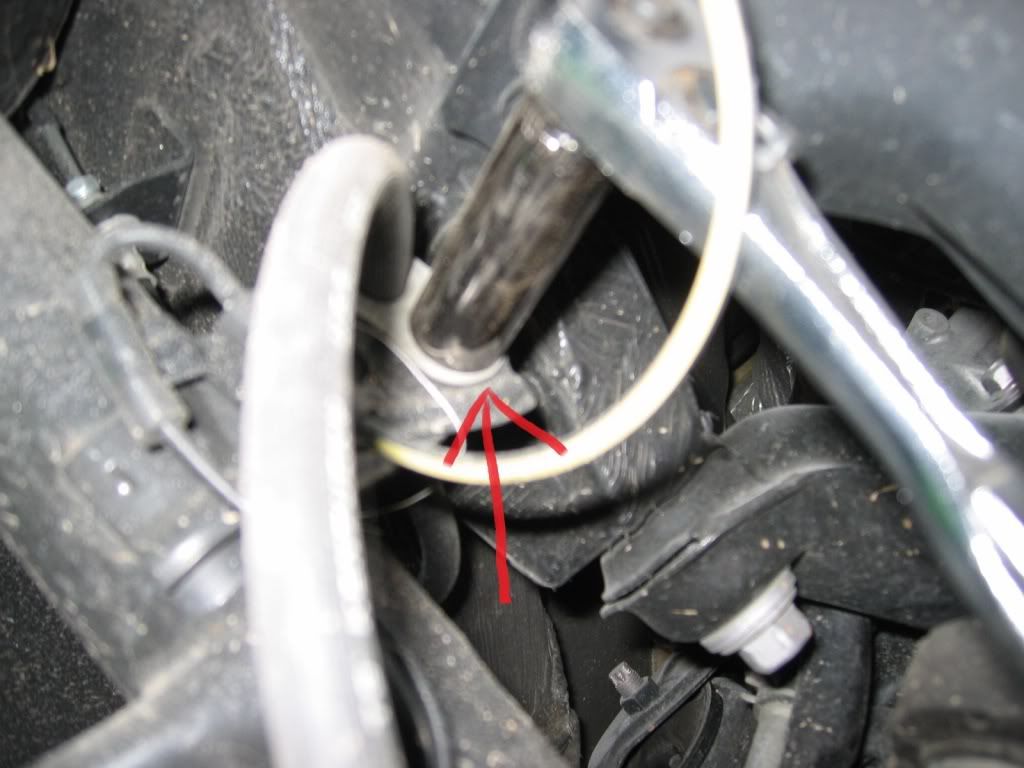
Remove bolt using 14 mm socket on the brake line/wire.
![Image]()
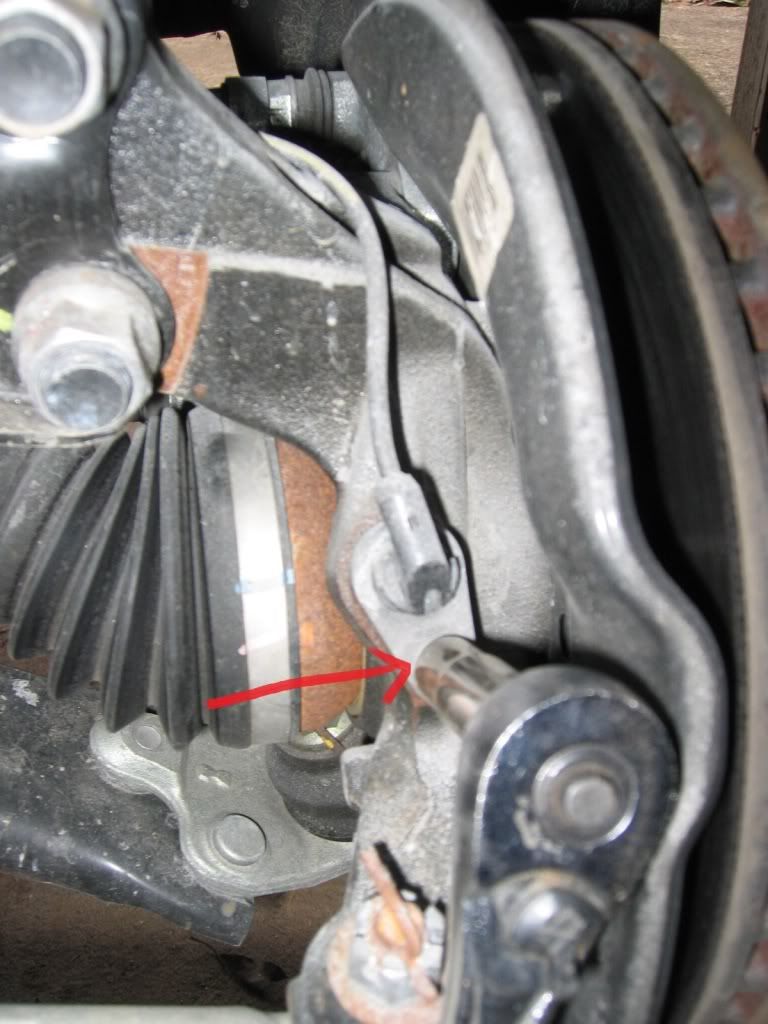
Remove bold on the sensor wire using 10 mm socket.
![Image]()
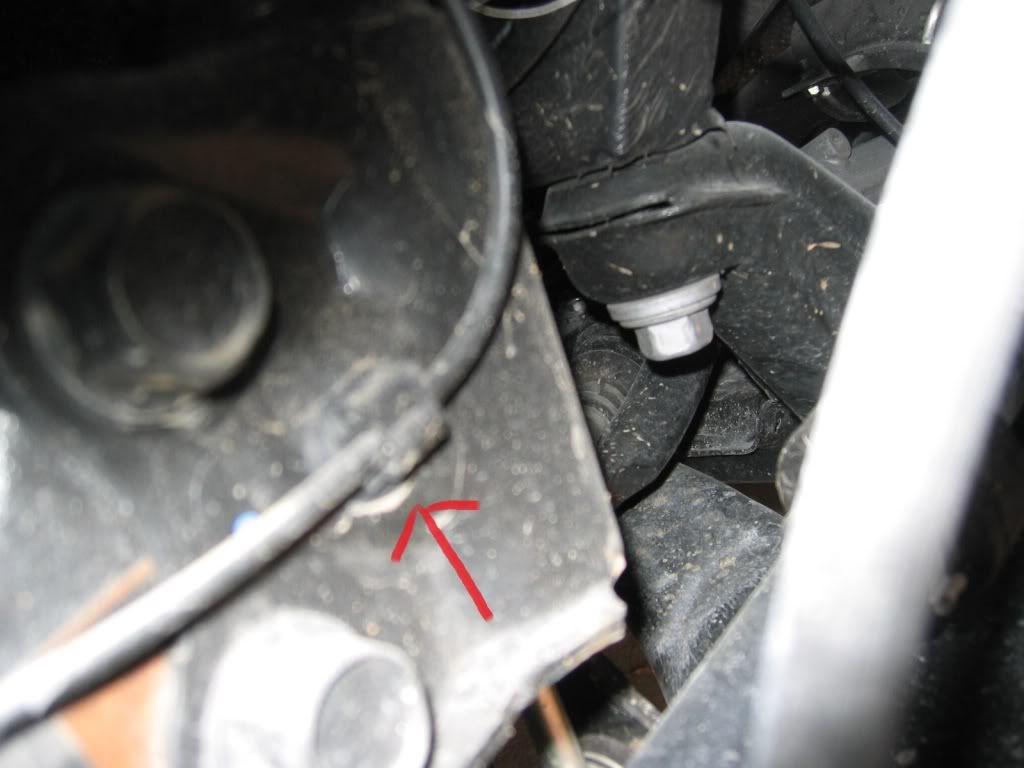
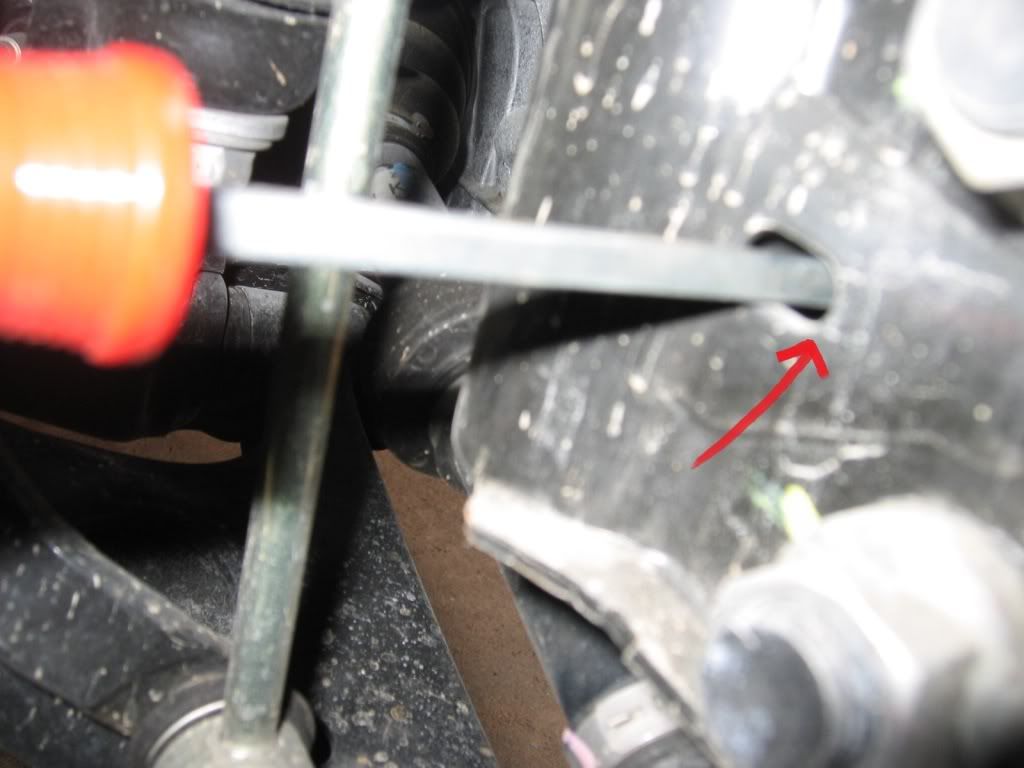
Remove plastic wire clip on strut carefully or use a flathead screwdriver on opposite end utilizing the hole to access the clip to release as the picture indicates.
![Image]()
![Image]()
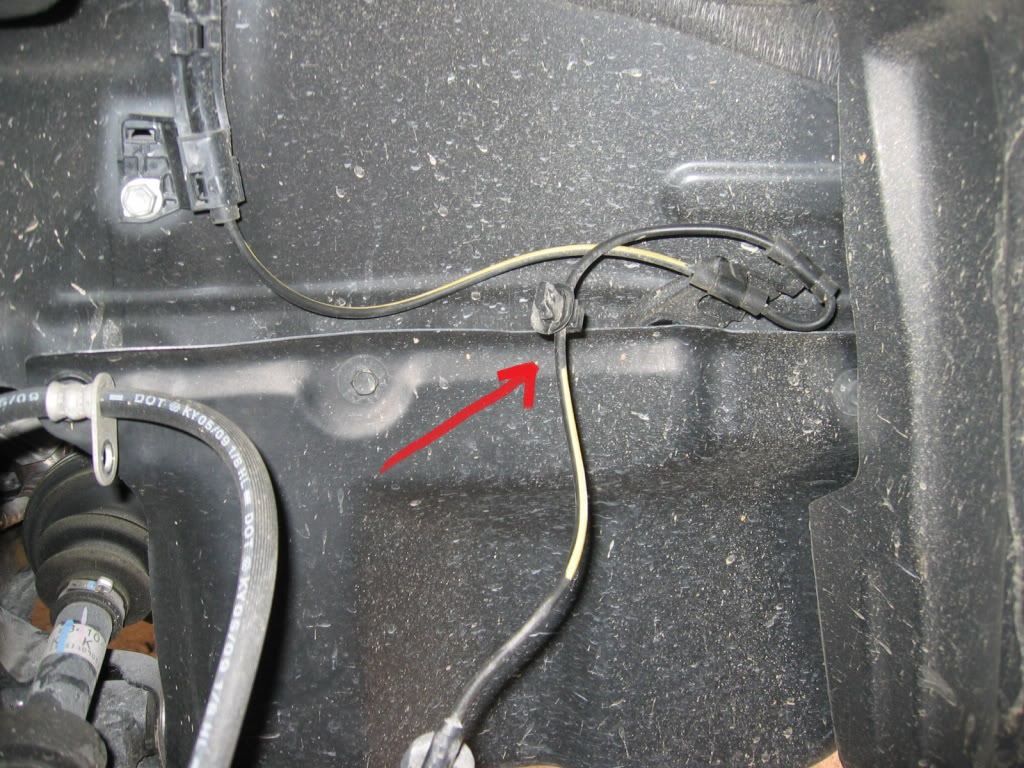
When the wire is completely loosen from strut, place on side to keep it from damage.
![Image]()
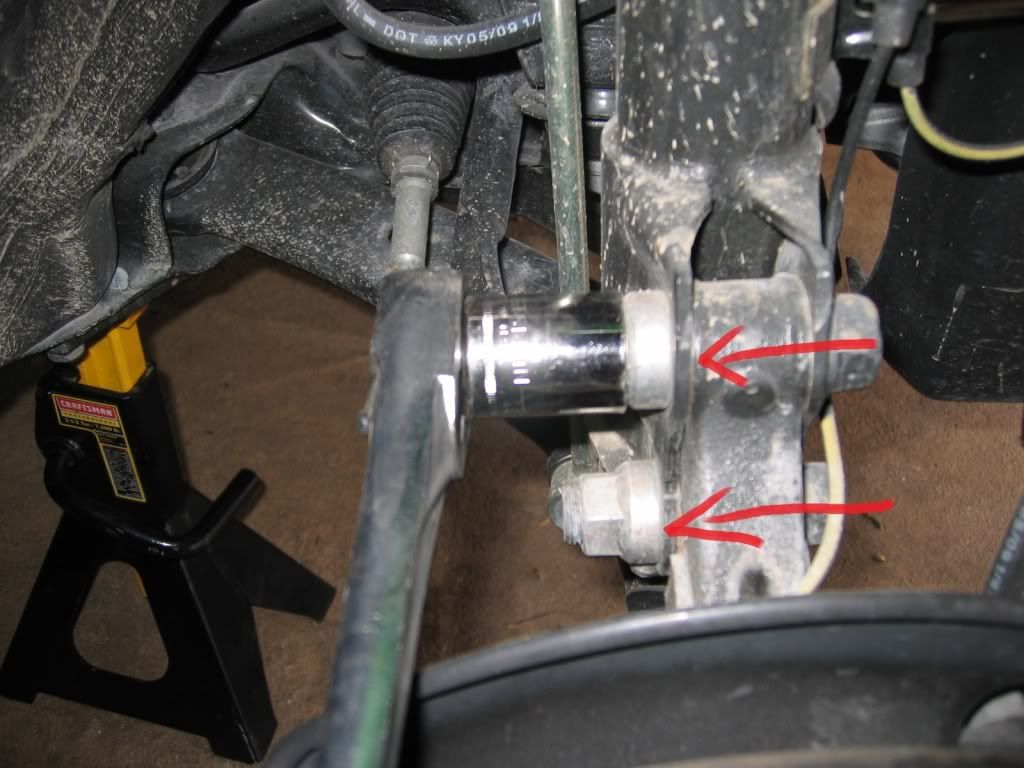
Remove the 2 nuts on the base of the strut. Use a pipe for leverage if need
ed. Take caution not to damage your fender wells since it will require extra effort to break it loose.
![Image]()
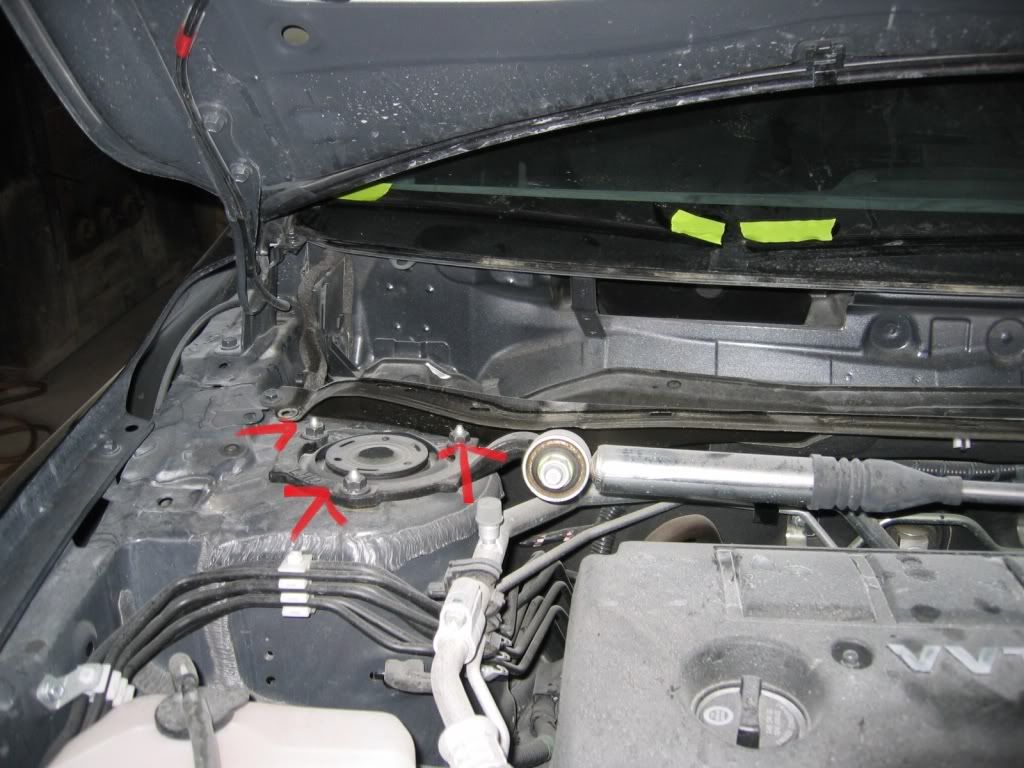
When all nuts, bolts and wire are removed proceed on top of tower. Remove 3 nuts on the strut tower on each side. You can choose to loosen the nut on the strut or perform it later. This is also the best time to add the front strut brace when you reassemble the strut later. Remove strut carefully under the vehicle.
![Image]()
![Image]()
Remove dust cover on strut. Keep it in clean area.
![Image]()
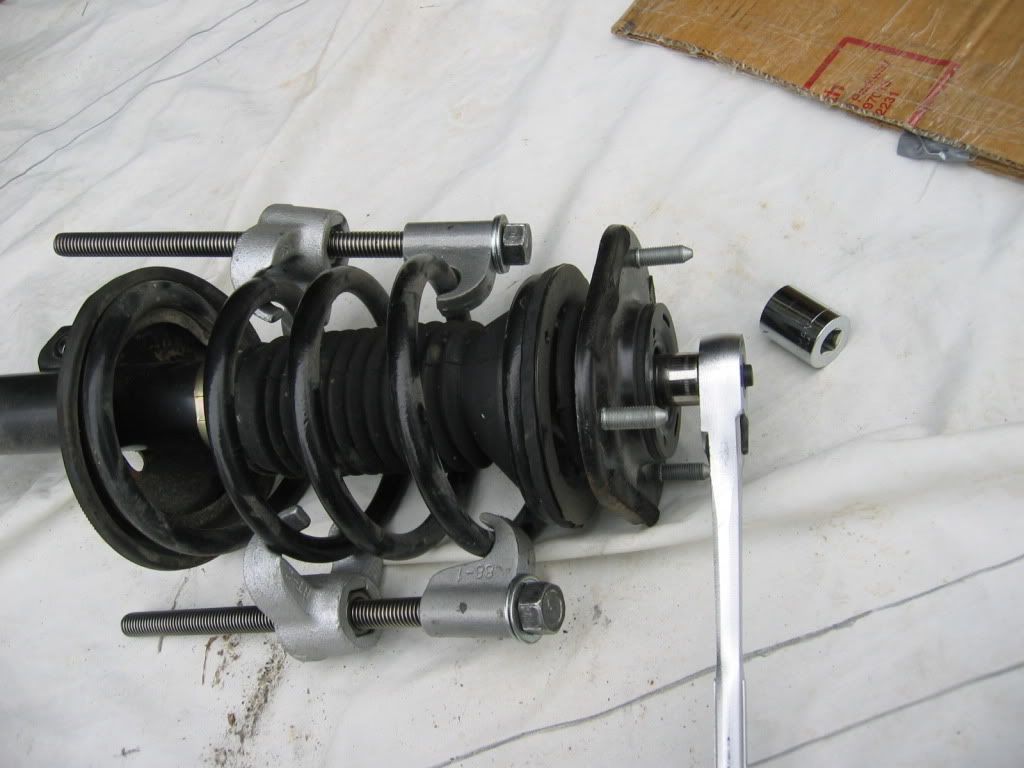
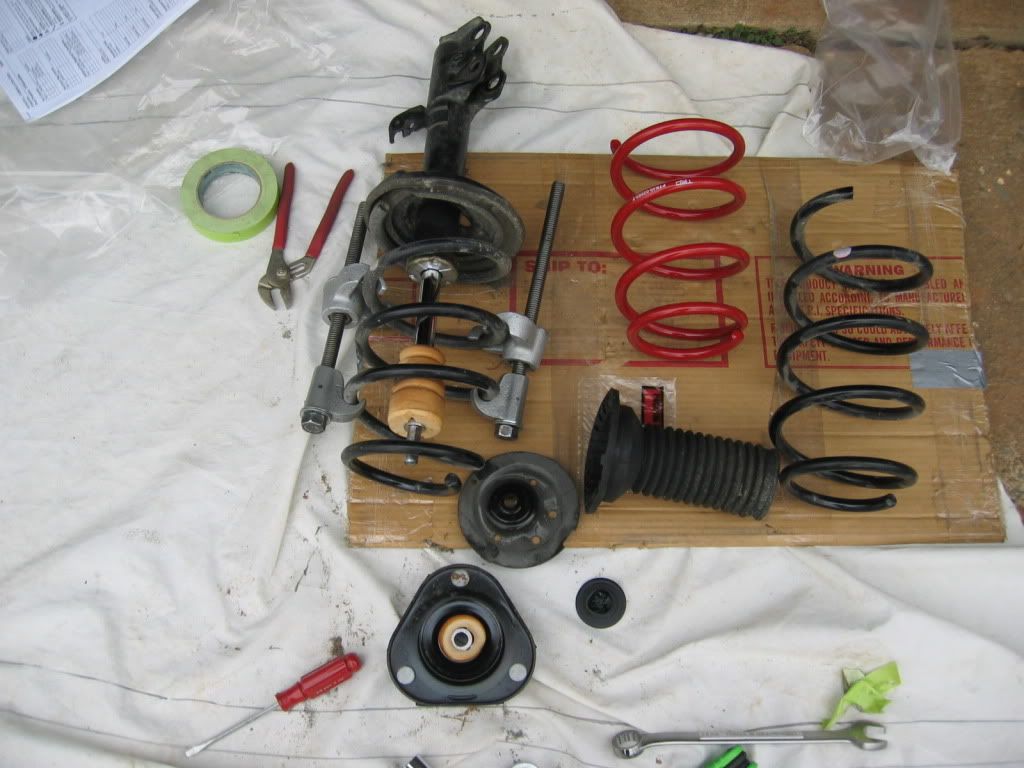
Clamp coil spring with proper tool. Tools may vary, please read the proper use.
![Image]()
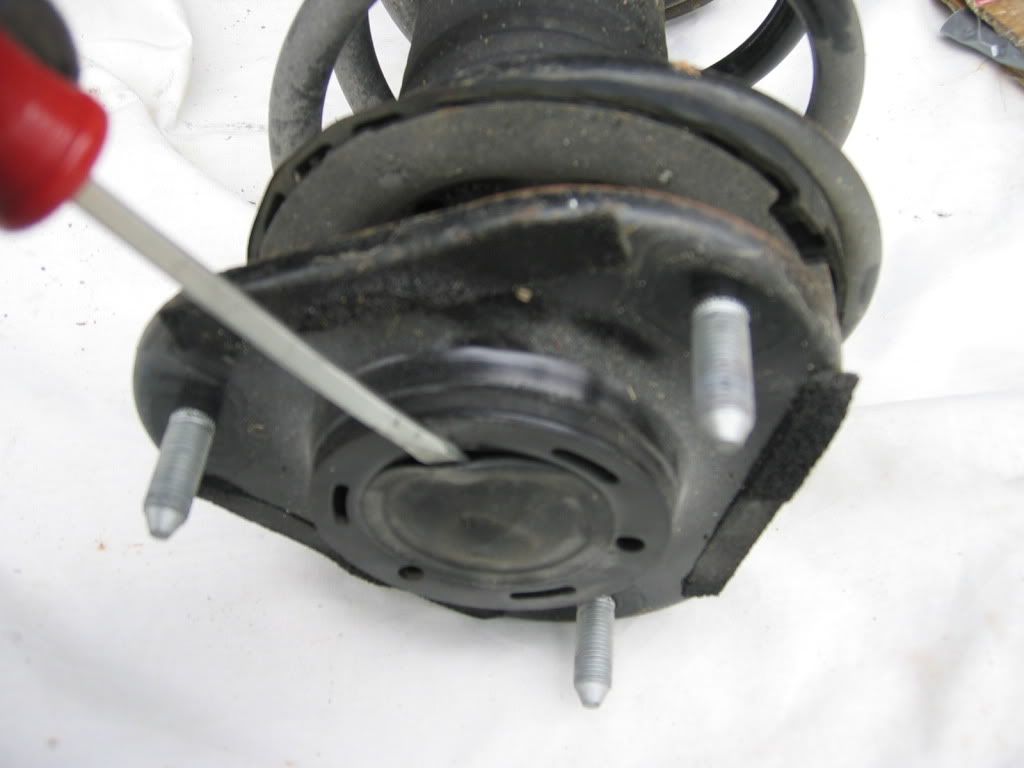
Place a screwdriver on a hole to keep strut in place as you loosen the nut. Keep all moving parts clean area as you disassemble the strut.
![Image]()
![Image]()
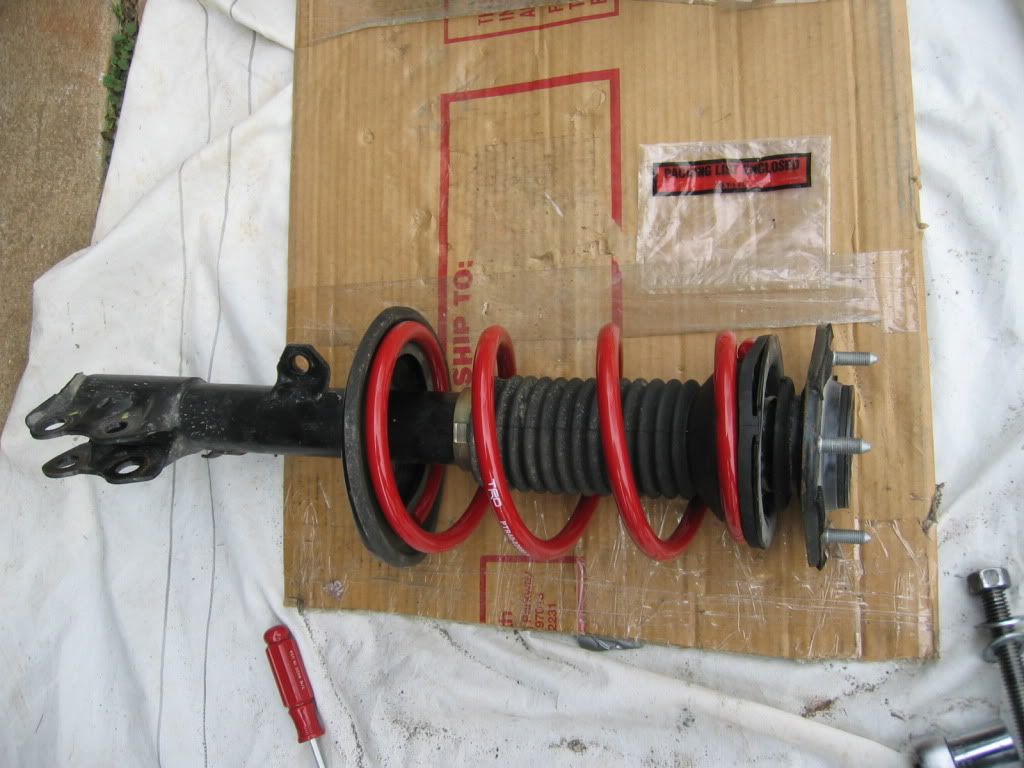
Reassemble parts properly as indicated by instruction. Since most lowered coil spring is shorter, clamping slightly or sometimes not necessary. Please do so accordingly.
![Image]()
Reinstall strut in reverse order by installing the 3 nut on top of the tower. As stated this is the best time to install the Front Strut Brace. Install all nut and bolts as indicated using proper torque. Make sure to install wire sensor without twisting to reduce the likely hood of damage. Make sure to check the center nut on top of the strut after you install the wheels and place the car off the jack on its own weight. You can proceed to install the windshield cowl and windshield wiper as your last step.
Good luck and be safe.
Difficulty level 1 (easy) – 5 (hard)
1 (easy) = some instructions on TRD is not necessary but please use your own judgment.
Use proper tools for the application and proper safety precautions.
Read all instruction provided or look it up on-line.
Loosen lug nuts on front wheels and jack up the front of vehicle. Secure with stands and remove front wheels.
Open the front hood to remove nut covers on windshield wipers with screwdriver as indicated.
(Optional) you can take a marker to place a line as reference for installation or use tape to mark your wipers.
Using 14mm socket remove nut from wiper. Take care when removing wipers from gear bolt. Gently rock it back and forth until loosen, and then pull up slowly. You might want to use a protective cover on hood to avoid scratches.
Remove 2 plastic fasteners on each end under the hood on the windshield cowl. press the center down carefully with a srewdriver. you will hear a clcik which will release it easy
Starting on the corner of the plastic cowl gently pull up until the clips release as you work toward the center. The cowl will be in 2 half just work on each ends. Yellow arrow indicates other half on picture.
After cowl removal it should look like this. You can remove the rest of the windshield parts and cover if desired but not really necessary.
Remove the nut on the sway bar linkage using 14mm wrench with optional 6mm hex key if needed.
Remove bolt using 14 mm socket on the brake line/wire.
Remove bold on the sensor wire using 10 mm socket.
Remove plastic wire clip on strut carefully or use a flathead screwdriver on opposite end utilizing the hole to access the clip to release as the picture indicates.
When the wire is completely loosen from strut, place on side to keep it from damage.
Remove the 2 nuts on the base of the strut. Use a pipe for leverage if need
ed. Take caution not to damage your fender wells since it will require extra effort to break it loose.
When all nuts, bolts and wire are removed proceed on top of tower. Remove 3 nuts on the strut tower on each side. You can choose to loosen the nut on the strut or perform it later. This is also the best time to add the front strut brace when you reassemble the strut later. Remove strut carefully under the vehicle.

Remove dust cover on strut. Keep it in clean area.
Clamp coil spring with proper tool. Tools may vary, please read the proper use.
Place a screwdriver on a hole to keep strut in place as you loosen the nut. Keep all moving parts clean area as you disassemble the strut.
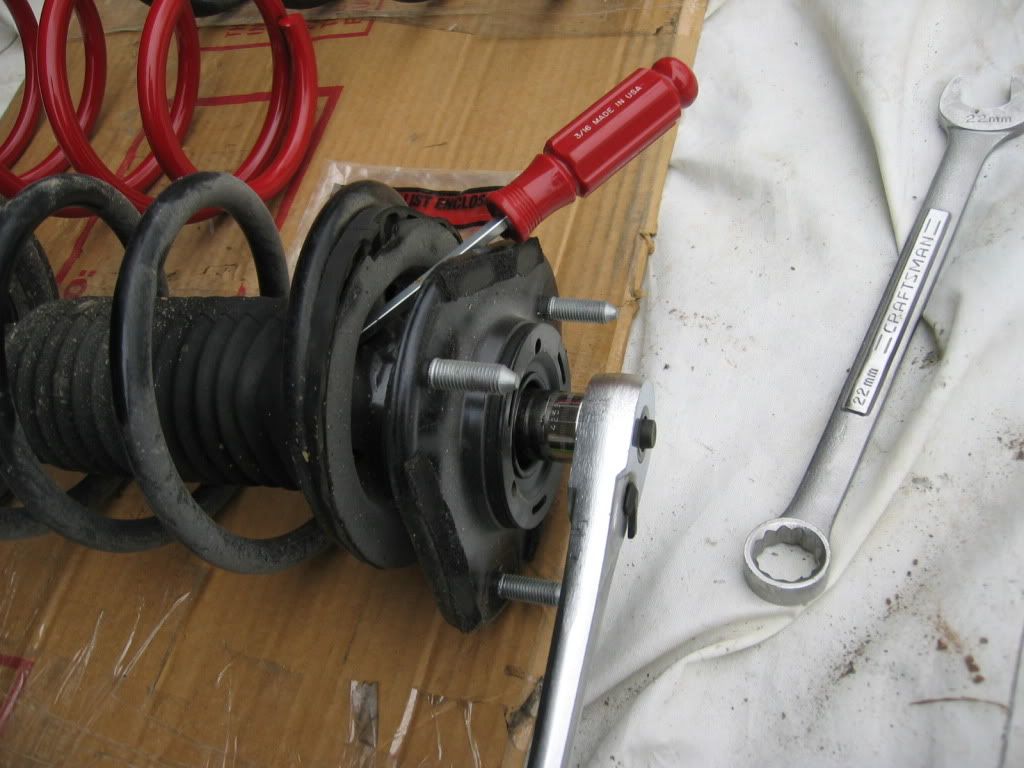
Reassemble parts properly as indicated by instruction. Since most lowered coil spring is shorter, clamping slightly or sometimes not necessary. Please do so accordingly.
Reinstall strut in reverse order by installing the 3 nut on top of the tower. As stated this is the best time to install the Front Strut Brace. Install all nut and bolts as indicated using proper torque. Make sure to install wire sensor without twisting to reduce the likely hood of damage. Make sure to check the center nut on top of the strut after you install the wheels and place the car off the jack on its own weight. You can proceed to install the windshield cowl and windshield wiper as your last step.
Good luck and be safe.


