

For those who need some guidance, here are the steps to replace the downstream oxygen sensor on the Gen 9 Corolla:
Caution: Toyota Nation and I are not responsible for your careless mishaps: Use common sense and be careful not to burn yourself on the hot exhaust pipe. I worked on mine when it was cold. Use jackstands and rear wheel chocks (don't rely on a jack by itself).
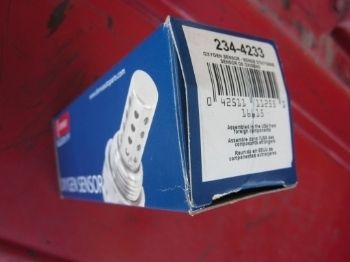
For the love of all that is good and proper in the world, use a Denso or Toyota sensor. There have been some reports of Bosch and some other brand sensors not working well with the Toyota system.
Here's the Denso sensor I used:
Here are three tools that you can try. A short, offset O2 sensor socket, a deep 02 sensor socket, and a flare nut wrench (22 mm). I had the best luck with the short offset socket and therefore recommend that particular type:
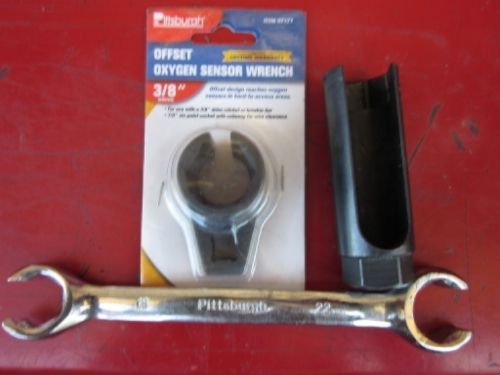
EDIT (May 2018): Here's another tool that I just now realized works. You can use a 22 mm box end wrench since it is big enough for the connector to go through:
![Image]()
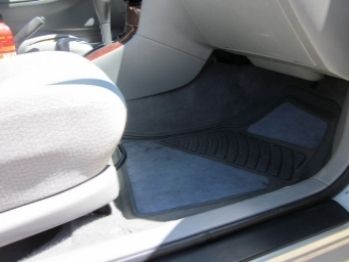
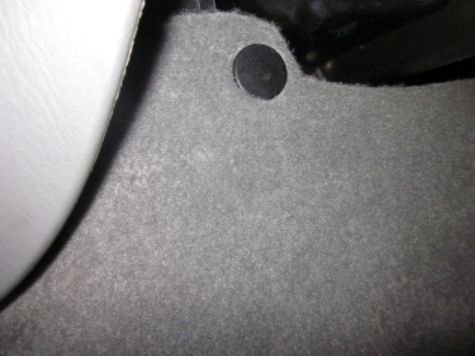
Here is where the downstream 02 sensor connects inside the car. It's the left side of the passenger kick panel:
Remove the plastic fastener that goes in this hole and set aside to use again. Mine was missing:
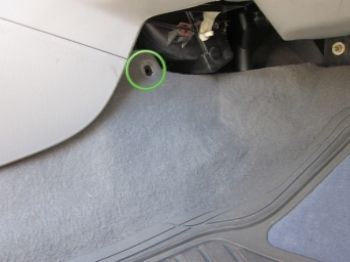
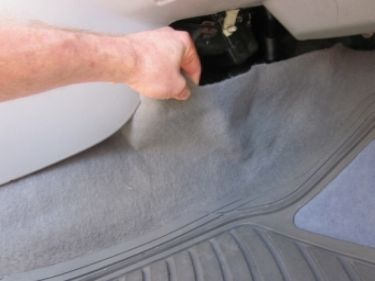
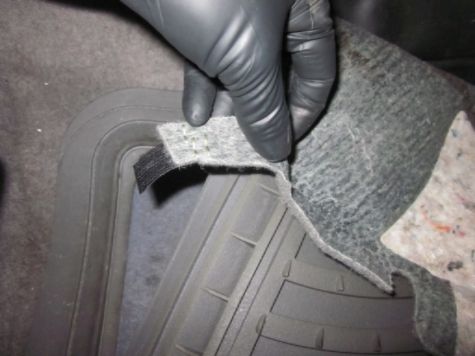
Pull the carpeting down:
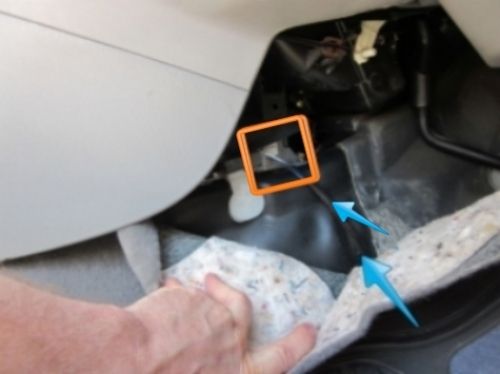
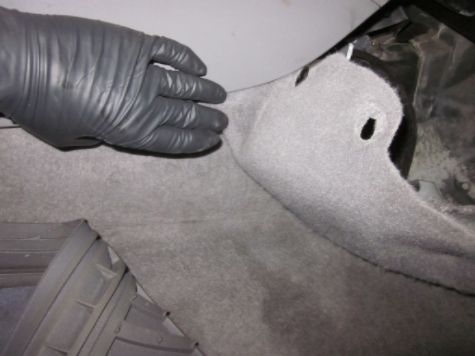
Pull it down until it looks like this. The Blue arrows point to the sensor wire going up from underneath the car and to the connector (orange square):
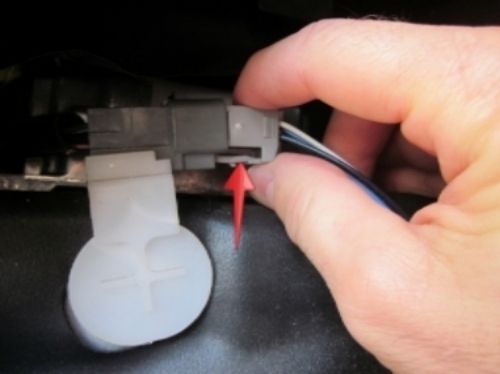
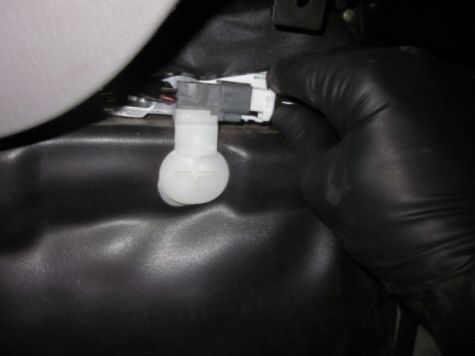
Here's a closeup of the connector. Push up on this clip (red arrow) and slide the connector out to the right:
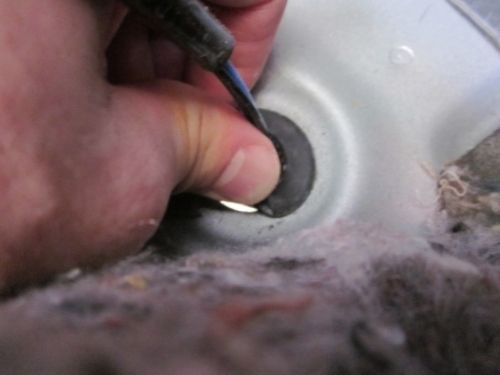
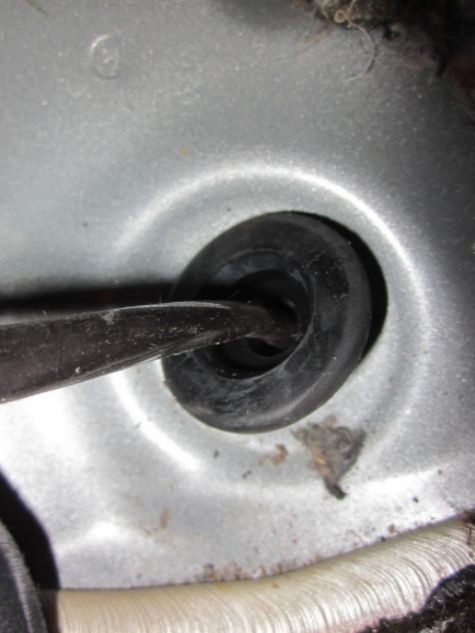
Follow the wire down to the floor pan and find the rubber grommet and pull it up and out:
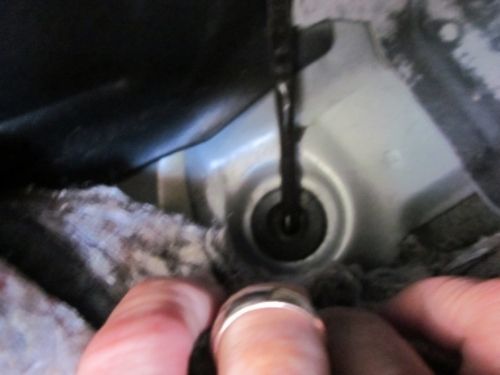
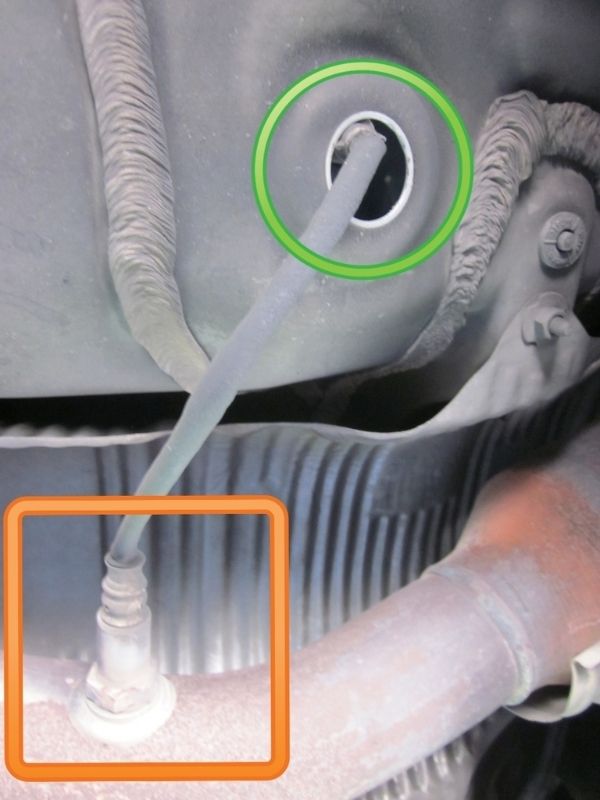
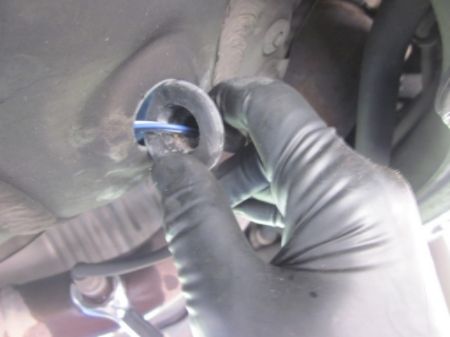
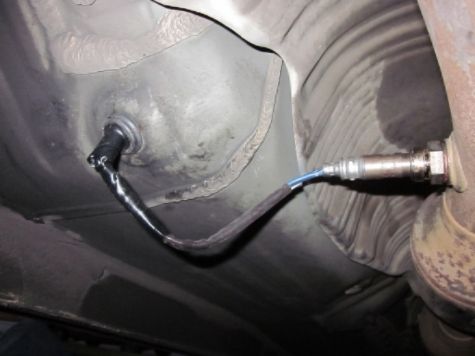
This is what it will look like under the car. Looking up you will see the hole (green circle) and the oxygen sensor bolted into the exhaust pipe (orange square):
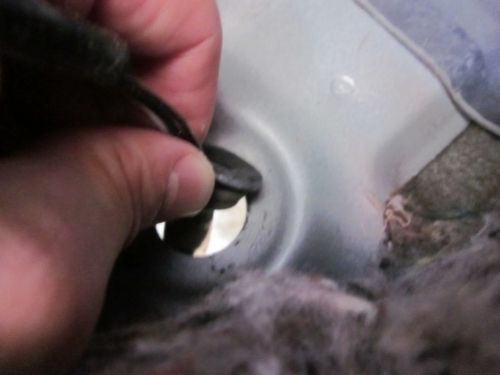
From inside the cabin, squeeze the grommet at opposite ends of the circumference and shove it sideways partially through the hole. Now crawl underneath the car right below this hole and pull out the grommet downwards (or you could simply shove it all the way through from inside the cabin):
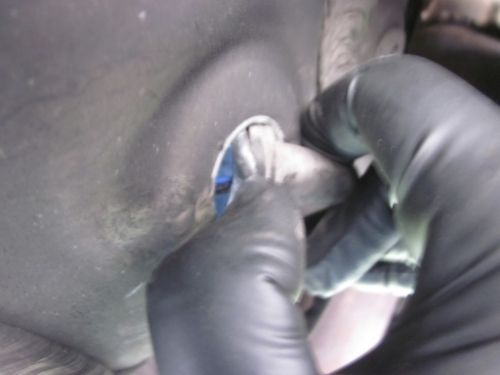
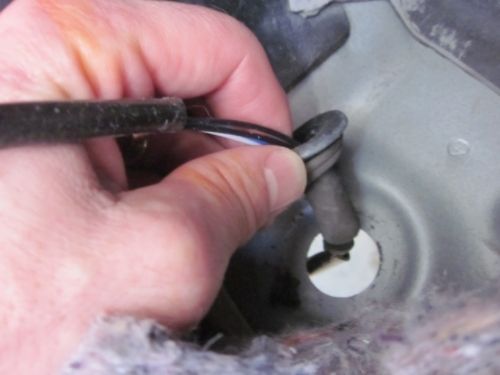
Then pull the wire and connector down and out:
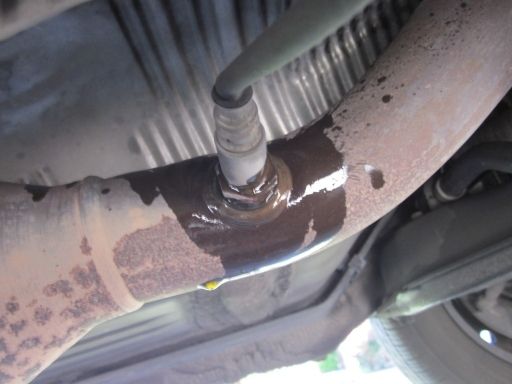
Get some penetrating lubricant. I'm using PB Blaster here. Just one quick spray on the threads of the O2 sensor and let it soak in for a few minutes:
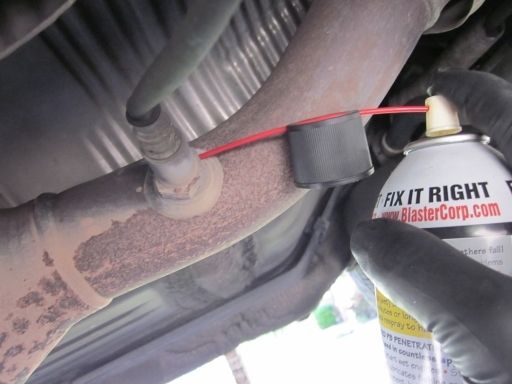
One tiny little spray and it spread all over like this:
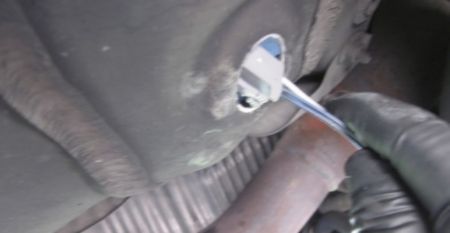
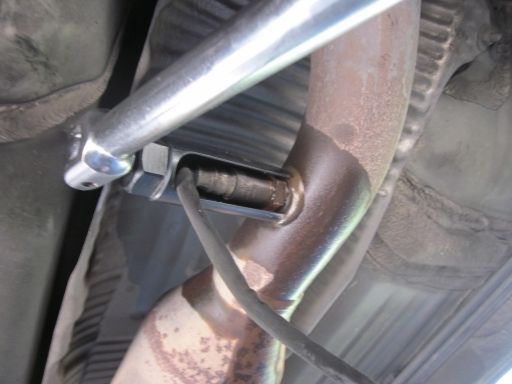
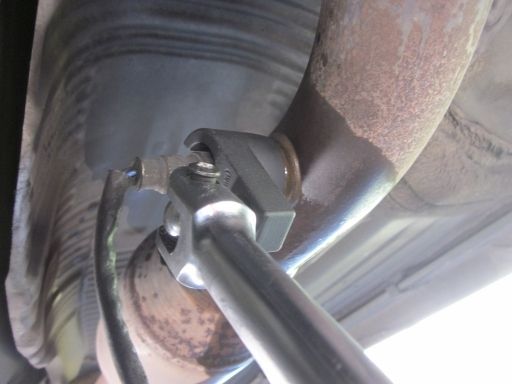
Here's where you will use any of the tools for removing the 02 sensor. I started with the 22 mm flare nut wrench. It has a notch, which allows you to fit it over the wire or skinny part of the sensor to put it on:

Caution: These 02 sensors tend to get stuck in there, so sometimes a lot of force is needed to break it loose. Remember that your car is on jackstands, so don't be so sudden with the force you use, or you could, in theory, knock the car right off the stands. Just use smooth.......movements. Sorry.
I tried to loosen it (counterclockwise, of course), but it wouldn't budge. It's not a very long wrench, so it doesn't give you a lot of leverage. Also, I'm not a big or muscular guy and my shoulder is injured and I just wasn't getting anywhere, so I got the long 02 socket wrench and used a breaker bar for leverage:
Problem with this long 02 socket is that it flexes at the end where it grabs onto the sensor nut. When you try to turn it, the size expands and it loosens its hold on the nut. It did work, though, and it just barely cracked it loose, but slightly stripped the nut at the same time. An idea I found is to use a screw clamp and put it on the end of the tool and clamp it tight, so that it won't flex as much. You can try this if you want. At this point I went back to the flare nut wrench, which has a very good grip, but I could only turn it with a lot of force, so I decided to go with the third tool. This is the short, offset 02 sensor socket. It doesn't flex like the long one, and it worked (with the breaker bar) to turn the sensor out.:
It was tight almost the whole time turning it out. My advice is to use PB Blaster or whatever penetrating lubricant you want the night before to really let it soak in. If you're in a rusty area, you might want to use PB Blaster or equivalent several times over 2-3 days in advance. EDIT: I now own a MAPP gas torch and I recommend using that (or a propane torch) on the O2 sensor if it is resisting being turned out. If you used PB Blaster, or some other product, you'll want to clean that off first before using the MAPP or Propane torch because it is flamable and will light up.
Turn out the sensor:
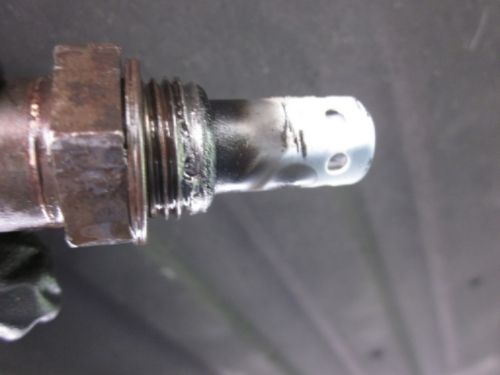
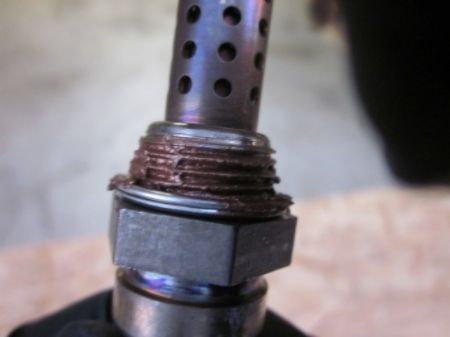
This is why it was hard to turn, even after it was first loosened. After turning out the sensor, I noticed part of the thread on the sensor was stripped:
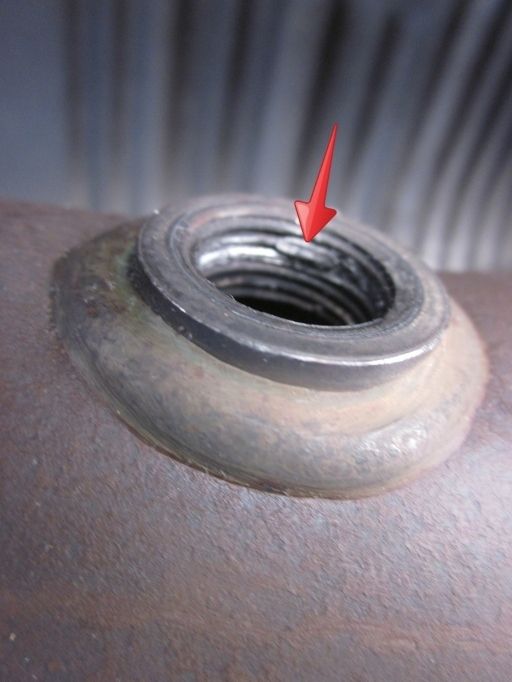
Here is the exhaust pipe sensor hole. You can see it stripped in one spot (shown by the red arrow):
The threads were still good enough to screw in the new sensor. I wanted to use a tap threader and clean it up, but my tap/die set doesn't have this size. If you need to re-thread yours, the proper size is M18 X 1.50. I decided to take a gamble and just try to thread in the new sensor. It was OK. Ideally I should have tried to buy a M18 X 1.50 tap to clean it up.
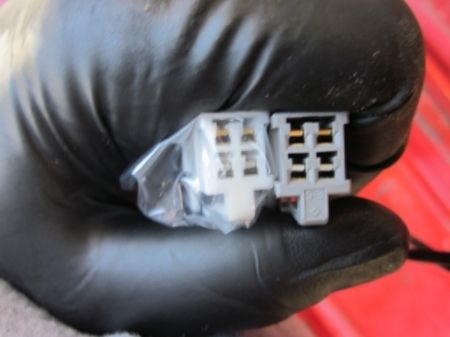
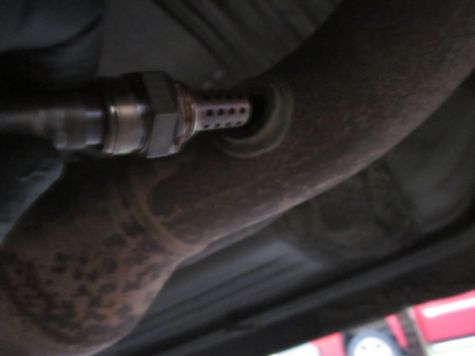
Before taking the new sensor out of its sealed bag, I compared it side by side with the old sensor to make sure the threads were the same and the connectors were the same:
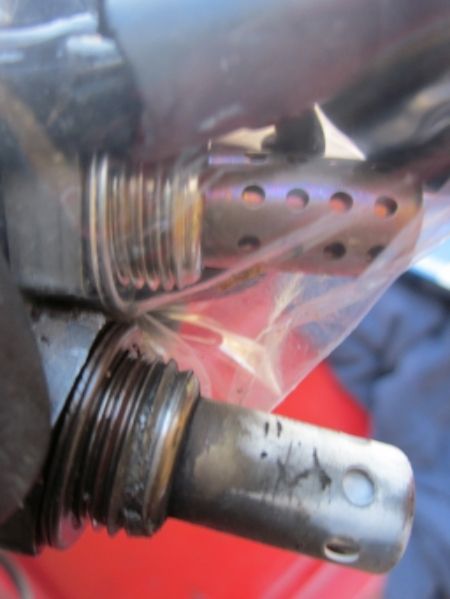
You'll notice that the new sensor tip looks different than the old one. The new one has many more holes. Don't worry, this is not a mistake. This is the correct part and is supposed to look like this:

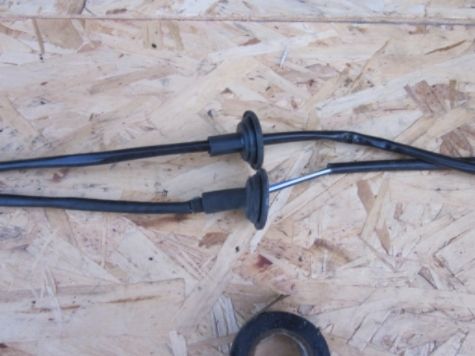
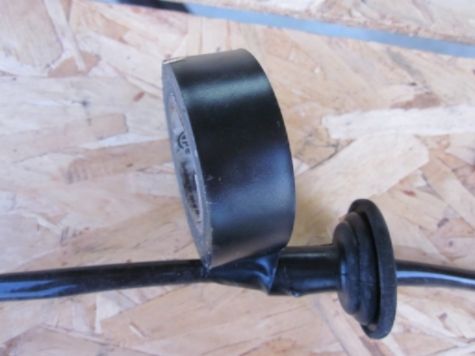
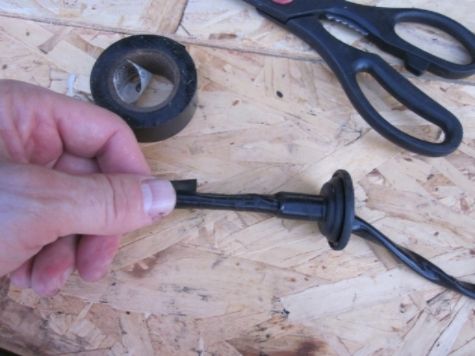
The new sensor comes with a new rubber boot that is not secured. You will need to secure the boot to the wire using electrician's rubber tape or similar product. First, line up the sensors:
Then lay the sensor wires side by side and line up the rubber boot/grommets. Tape the rubber boot so that it is positioned in the same location on its wire as the old sensor boot is on its wire:
The sensor comes with this small tube of anti-seize grease. You don't need to use too much, and make sure you get it ONLY on the threads, because you don't want this stuff on the sensor itself:

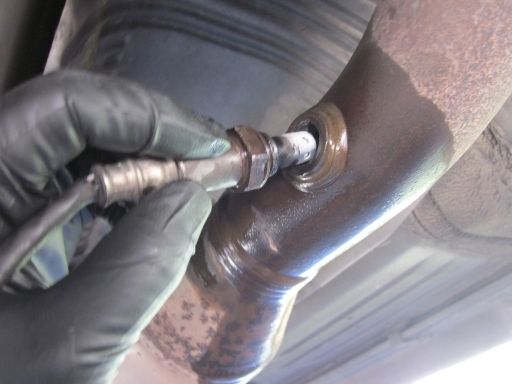
Turn the new sensor into the threaded hole:
You will need one of the 02 sensor tools to tighten it. I tightened it just a little more than snug against the washer after it was fully seated.
Push the connector up and through the hole and into the cabin. Then, squeeze the circumference of the new rubber boot and shove it in sideways completely through the hole:

It should look like this and be pushed all the way through:
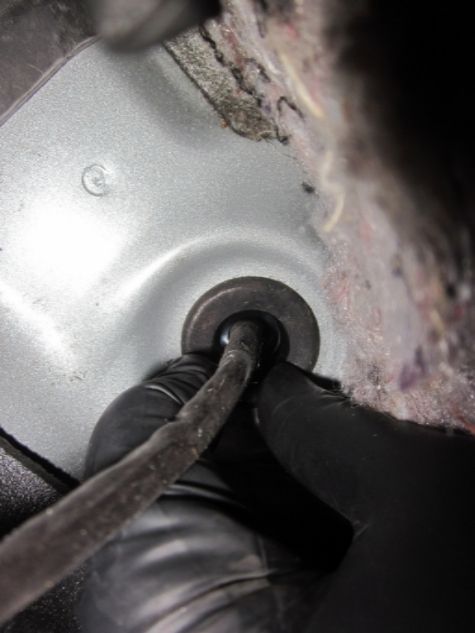
Go to the cabin and you will see the grommet. It will be loose:
You need to push it down firmly around the circumference so that it seals flush against the body of the car:
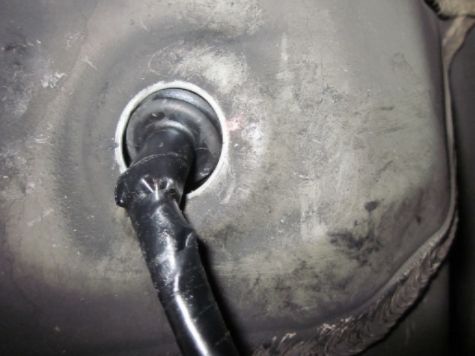
This is what it will look like under the car. Look closely at the grommet in this photo below and make sure yours looks like this. This is correctly sealed:
![Image]()
Plug in the connector until it clicks:
You may notice this velcro tag on the carpeting:
When you put the carpet back into position tucked under the plastic kickpanel, you may wonder to what this velcro tag connects/sticks. I couldn't figure it out so I just tucked the carpet into place and didn't worry about it.
Later, at the junkyard, I found a Gen 9 Corolla and took another look and realized that this tag connects to its counterpart, which is a tag on the driver's side carpeting. They stick together exactly in the middle of the car and pull against each other so the carpet is tight at both sides. Do this if you want everything to be perfect and if you can get your hands in there (I don't have a photo of this, sorry).
Next, tuck the carpet back in under the plastic at the passenger left kickpanel. Keep tucking it in until it looks smooth and in proper position:
I got a new connector from the junkyard, which let me have it for free:
Start up the car and make sure everything runs normally.
Congratulations! You have successfully replaced your downstream (B1S2) oxygen sensor.
Caution: Toyota Nation and I are not responsible for your careless mishaps: Use common sense and be careful not to burn yourself on the hot exhaust pipe. I worked on mine when it was cold. Use jackstands and rear wheel chocks (don't rely on a jack by itself).
For the love of all that is good and proper in the world, use a Denso or Toyota sensor. There have been some reports of Bosch and some other brand sensors not working well with the Toyota system.
Here's the Denso sensor I used:

Here are three tools that you can try. A short, offset O2 sensor socket, a deep 02 sensor socket, and a flare nut wrench (22 mm). I had the best luck with the short offset socket and therefore recommend that particular type:

EDIT (May 2018): Here's another tool that I just now realized works. You can use a 22 mm box end wrench since it is big enough for the connector to go through:

Here is where the downstream 02 sensor connects inside the car. It's the left side of the passenger kick panel:

Remove the plastic fastener that goes in this hole and set aside to use again. Mine was missing:

Pull the carpeting down:

Pull it down until it looks like this. The Blue arrows point to the sensor wire going up from underneath the car and to the connector (orange square):

Here's a closeup of the connector. Push up on this clip (red arrow) and slide the connector out to the right:

Follow the wire down to the floor pan and find the rubber grommet and pull it up and out:


This is what it will look like under the car. Looking up you will see the hole (green circle) and the oxygen sensor bolted into the exhaust pipe (orange square):

From inside the cabin, squeeze the grommet at opposite ends of the circumference and shove it sideways partially through the hole. Now crawl underneath the car right below this hole and pull out the grommet downwards (or you could simply shove it all the way through from inside the cabin):


Then pull the wire and connector down and out:

Get some penetrating lubricant. I'm using PB Blaster here. Just one quick spray on the threads of the O2 sensor and let it soak in for a few minutes:

One tiny little spray and it spread all over like this:

Here's where you will use any of the tools for removing the 02 sensor. I started with the 22 mm flare nut wrench. It has a notch, which allows you to fit it over the wire or skinny part of the sensor to put it on:

Caution: These 02 sensors tend to get stuck in there, so sometimes a lot of force is needed to break it loose. Remember that your car is on jackstands, so don't be so sudden with the force you use, or you could, in theory, knock the car right off the stands. Just use smooth.......movements. Sorry.
I tried to loosen it (counterclockwise, of course), but it wouldn't budge. It's not a very long wrench, so it doesn't give you a lot of leverage. Also, I'm not a big or muscular guy and my shoulder is injured and I just wasn't getting anywhere, so I got the long 02 socket wrench and used a breaker bar for leverage:

Problem with this long 02 socket is that it flexes at the end where it grabs onto the sensor nut. When you try to turn it, the size expands and it loosens its hold on the nut. It did work, though, and it just barely cracked it loose, but slightly stripped the nut at the same time. An idea I found is to use a screw clamp and put it on the end of the tool and clamp it tight, so that it won't flex as much. You can try this if you want. At this point I went back to the flare nut wrench, which has a very good grip, but I could only turn it with a lot of force, so I decided to go with the third tool. This is the short, offset 02 sensor socket. It doesn't flex like the long one, and it worked (with the breaker bar) to turn the sensor out.:

It was tight almost the whole time turning it out. My advice is to use PB Blaster or whatever penetrating lubricant you want the night before to really let it soak in. If you're in a rusty area, you might want to use PB Blaster or equivalent several times over 2-3 days in advance. EDIT: I now own a MAPP gas torch and I recommend using that (or a propane torch) on the O2 sensor if it is resisting being turned out. If you used PB Blaster, or some other product, you'll want to clean that off first before using the MAPP or Propane torch because it is flamable and will light up.
Turn out the sensor:

This is why it was hard to turn, even after it was first loosened. After turning out the sensor, I noticed part of the thread on the sensor was stripped:

Here is the exhaust pipe sensor hole. You can see it stripped in one spot (shown by the red arrow):

The threads were still good enough to screw in the new sensor. I wanted to use a tap threader and clean it up, but my tap/die set doesn't have this size. If you need to re-thread yours, the proper size is M18 X 1.50. I decided to take a gamble and just try to thread in the new sensor. It was OK. Ideally I should have tried to buy a M18 X 1.50 tap to clean it up.
Before taking the new sensor out of its sealed bag, I compared it side by side with the old sensor to make sure the threads were the same and the connectors were the same:


You'll notice that the new sensor tip looks different than the old one. The new one has many more holes. Don't worry, this is not a mistake. This is the correct part and is supposed to look like this:

The new sensor comes with a new rubber boot that is not secured. You will need to secure the boot to the wire using electrician's rubber tape or similar product. First, line up the sensors:
Then lay the sensor wires side by side and line up the rubber boot/grommets. Tape the rubber boot so that it is positioned in the same location on its wire as the old sensor boot is on its wire:


The sensor comes with this small tube of anti-seize grease. You don't need to use too much, and make sure you get it ONLY on the threads, because you don't want this stuff on the sensor itself:


Turn the new sensor into the threaded hole:

You will need one of the 02 sensor tools to tighten it. I tightened it just a little more than snug against the washer after it was fully seated.
Push the connector up and through the hole and into the cabin. Then, squeeze the circumference of the new rubber boot and shove it in sideways completely through the hole:

It should look like this and be pushed all the way through:

Go to the cabin and you will see the grommet. It will be loose:

You need to push it down firmly around the circumference so that it seals flush against the body of the car:

This is what it will look like under the car. Look closely at the grommet in this photo below and make sure yours looks like this. This is correctly sealed:


Plug in the connector until it clicks:

You may notice this velcro tag on the carpeting:

When you put the carpet back into position tucked under the plastic kickpanel, you may wonder to what this velcro tag connects/sticks. I couldn't figure it out so I just tucked the carpet into place and didn't worry about it.
Later, at the junkyard, I found a Gen 9 Corolla and took another look and realized that this tag connects to its counterpart, which is a tag on the driver's side carpeting. They stick together exactly in the middle of the car and pull against each other so the carpet is tight at both sides. Do this if you want everything to be perfect and if you can get your hands in there (I don't have a photo of this, sorry).
Next, tuck the carpet back in under the plastic at the passenger left kickpanel. Keep tucking it in until it looks smooth and in proper position:

I got a new connector from the junkyard, which let me have it for free:

Start up the car and make sure everything runs normally.
Congratulations! You have successfully replaced your downstream (B1S2) oxygen sensor.


