

The rubber bushings on these were worn out so much that I kept hearing a clunk on the first time I hit the brakes in the morning and going over railroad ties was unsettling. Not only just noise and comfort issues, but I was losing the crisp turn in handling I remember this car was capable of everytime I made a sharp corner. Getting new front control arms fixed all these issues.
Tools needed:
19MM socket wrench
17MM socket wrench
12MM socket wrench
14MM socket wrench
Allen wrench
Prybar
Jackstands
Wheel Chock
Instructions:
1) Remove wheel and jack up the whole front end of the car on jackstands so you relieve pressure off the front sway bar on both sides. Be sure to chock the wheels.
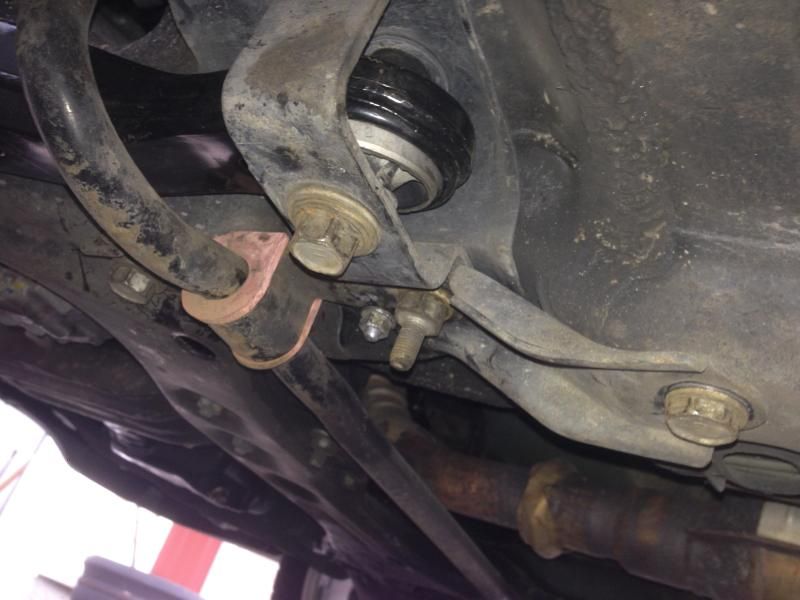
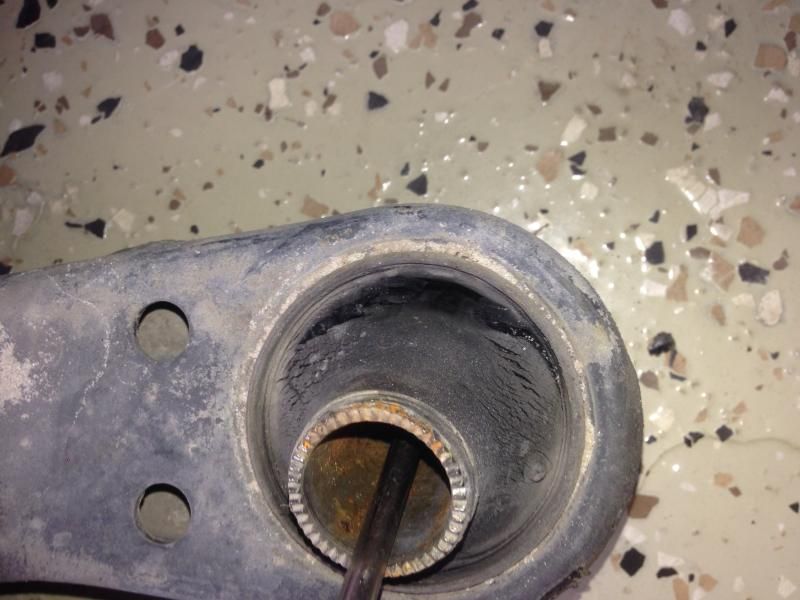
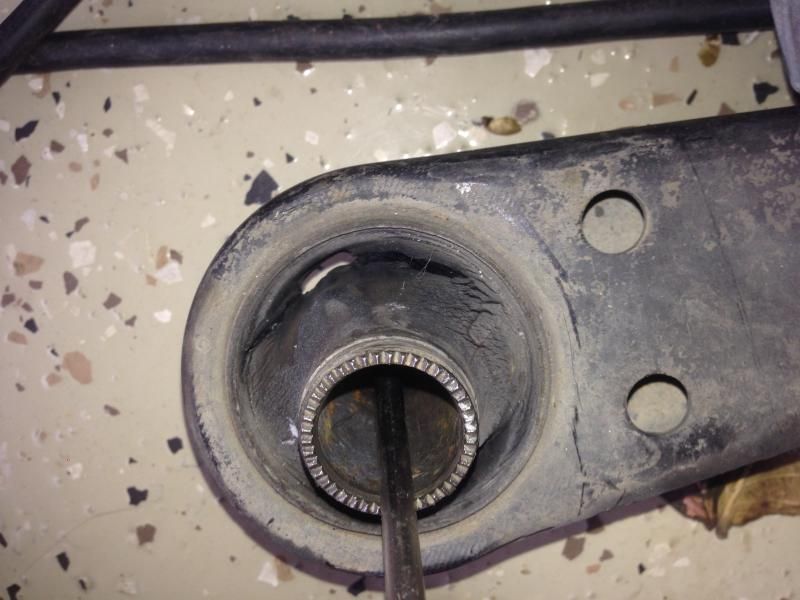
2) Use your 17MM wrench to remove 2 nuts and 1 bolt from the control arm here to detach the ball joint. Use the prybar to separate the ball joint from the control arm.

3) Remove the end links between the sway bar and the control arm. You may have to use the Allen wrench to hold the bolt in the center of the nut if it spins on you.

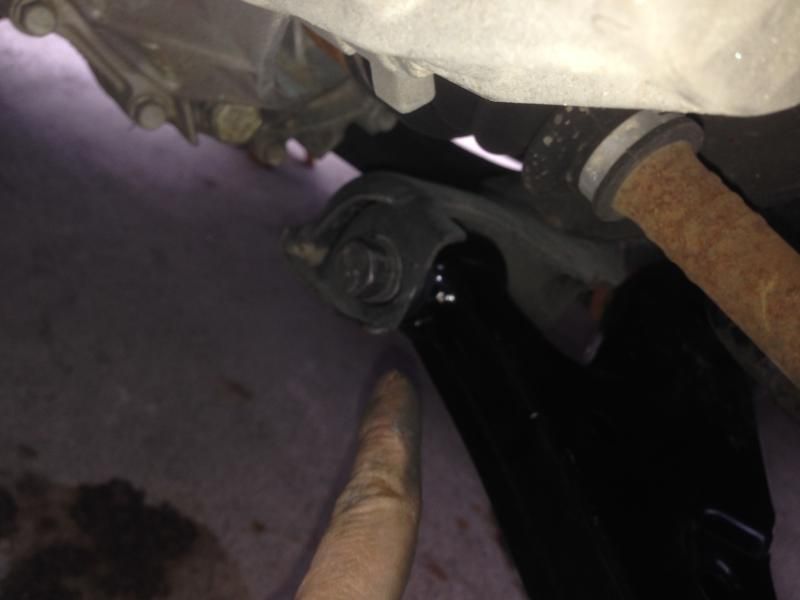
4) Remove the front pivot bolt on the control arm using a 19MM wrench. Note that this is on a manual transmission car so the bolt comes out easy. If this was an automatic, you would need to put a block of wood under the transmission then carefully jack up the block of wood with a floor jack to make clearance for the bolt.
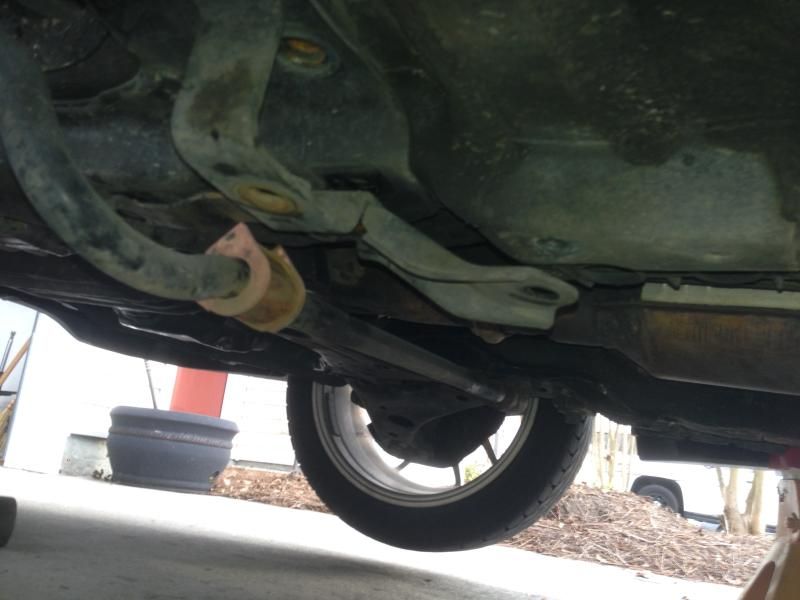
5) Remove the brackets holding the sway bar on the side of the control arm that you're working on.
6) The sway bar bracket should drop and you can carefully yank out the old control arm by rocking back and forth.
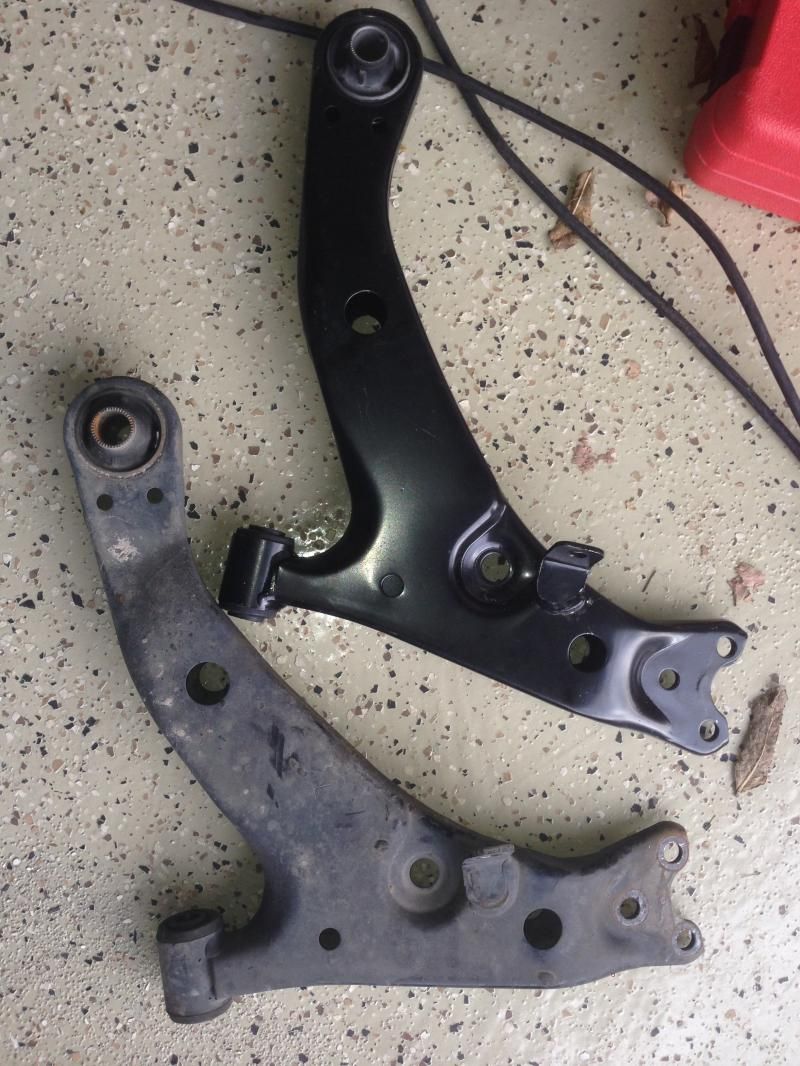
7) Here you see the old arm and new arm. Check out the old rubber bushing making the clunking noise and bad handling.
8) Put the new control arm in and reverse the steps to install. Tip: you will want to put the pivot bolt in first and then install the control arm as straight as you can so you don't have to fight the position for the bolt angle when installing the control arm into the sway bar bracket. If you hear clunking, you may have to retighten the bolts as the arm settles once the car is off the jackstands.
That's it! You can repeat for the control arm on the other side. We don't need an alignment because we didn't disconnect the struts or the tie rod to the steering rack. So enjoy your refreshed handling Corolla!
Tools needed:
19MM socket wrench
17MM socket wrench
12MM socket wrench
14MM socket wrench
Allen wrench
Prybar
Jackstands
Wheel Chock
Instructions:
1) Remove wheel and jack up the whole front end of the car on jackstands so you relieve pressure off the front sway bar on both sides. Be sure to chock the wheels.
2) Use your 17MM wrench to remove 2 nuts and 1 bolt from the control arm here to detach the ball joint. Use the prybar to separate the ball joint from the control arm.

3) Remove the end links between the sway bar and the control arm. You may have to use the Allen wrench to hold the bolt in the center of the nut if it spins on you.

4) Remove the front pivot bolt on the control arm using a 19MM wrench. Note that this is on a manual transmission car so the bolt comes out easy. If this was an automatic, you would need to put a block of wood under the transmission then carefully jack up the block of wood with a floor jack to make clearance for the bolt.

5) Remove the brackets holding the sway bar on the side of the control arm that you're working on.

6) The sway bar bracket should drop and you can carefully yank out the old control arm by rocking back and forth.

7) Here you see the old arm and new arm. Check out the old rubber bushing making the clunking noise and bad handling.


8) Put the new control arm in and reverse the steps to install. Tip: you will want to put the pivot bolt in first and then install the control arm as straight as you can so you don't have to fight the position for the bolt angle when installing the control arm into the sway bar bracket. If you hear clunking, you may have to retighten the bolts as the arm settles once the car is off the jackstands.
That's it! You can repeat for the control arm on the other side. We don't need an alignment because we didn't disconnect the struts or the tie rod to the steering rack. So enjoy your refreshed handling Corolla!


