

I posted an early version of this at the tail end of Luc's post of June 12 about Diode Dynamic's fog lamps. I'm re-entering it here in case you are looking for help on how to locate and replace the Flasher Relay (Turn Signal relay) on the 2nd Gen.
Oh, it's a peach.
I read the TN posts on the subject and looked at the YouTubes prior to attempting this but...
Nobody tells you about the little mouse hole and the magical screwdriver.
I thought I'd throw the relay in to see how it works as had a few minutes free time. How hard could that be?
Well let me tell you.....hard. (Not really, just incredibly fiddly.)
I looked at Diode Dynamics' instructional video on the YouTube on how to install the Smart Tap relay. When it comes to the 2nd Gen Highlander that vid is wholly misleading. Not Diode Dynamics' fault, it is the HL that is the problem!
They show you how to identify the location of the flasher relay by engaging the turn signal and listening and feeling for the clicking. After about 10 minutes of that I could not see nor put even a finger on the relay up under the dash. Oh, I could hear it but that's about it.
I pulled up more vid's and read Sweeney's post. Holy cripes, I almost sent the thing back. The relay is buried on top of the fuse block way up under the dash.
Not 'til I found the attached video did I decide to dive in. It took about three hours of blindly fooling about to install. But I did it. Impossible....nearly.
If you have the need to locate and pull the 2nd Gen Highlander's flasher relay then please read what I have for you below. With the knowledge contained it will take only about 25 minutes! First watch the video:
2010 Toyota Highlander turn signal relay location (2nd Gen) - YouTube
Tools pictured below:

Magical screwdriver: The slot on the underside of the Toyota flasher relay is 5mm wide. You can see the slot in the video at 1:50 minute mark, it looks like a little mouse hole below the relay body. I happened to have a longish screw-holder screwdriver, I'm sure a plain style will work just as well. It worked the first try. Press the tip into the slot. And push to release the flasher relay from its pedestal mount. Magical. Why am I bringing this up now? 'Cause it's important! You'll see why. Flasher relay shown upside down.

Steps:
Yes, you need to start way down there as the plastic panels overlap. You can't take your socks off without first removing your shoes.
1. 1-2 min. Pull the driver's door plastic threshold strip. A nylon trim tool works nicely to get under the threshold starting aft and working forward. The piece is held by friction clips only. On mine the weather strip was sort of stuck to the plastic. Some care and finagling got it free.
2. 1 min. Remove the left kick panel at the foot brake. One plastic nut on the floor then one friction clip at the door jamb. Pull smartly.
3. 3 min. Loosen the lower bottom plastic panel below the steering column. Two 10mm bolts. One at the door jamb side and an identical one way to the right. Tug the panel off its
The airbag panel stays in place.
4. 2 min. Unbolt the metal dash support that spans across the fuse block, and it pull back slightly about two inches or so. Two 10mm bolts. Again, it won't come out all the way. Flex and bungee as above.
Now you can see the fuse block.
5. 3 min. Release the fuse block. I disconnected the battery at this point. Safer. Three 10mm nuts. A couple of 4-inch extensions come in handy here. Now reach in there and pull the fuse block towards you off its mounting studs about 1.5 inches
Now you can see the flasher relay on top of the fuse block. Tan with black 5-conductor cable attached.
Leave the cable connected for now. I fooled with it for an hour trying to disconnect it only to find it is impossible at this juncture.
Read on.
6. 1 min. Press your magical screwdriver into the mouse hole to un-clip the flasher relay from its pedestal perch. Then you can reach around and grasp it. It slides off towards the front of the car. Yay!
7. 1 min. Roll the relay out towards you. In hand now, un-clip the cable and replace the relay.
8. 12 min. Reinstall pieces in reverse order.
Done.
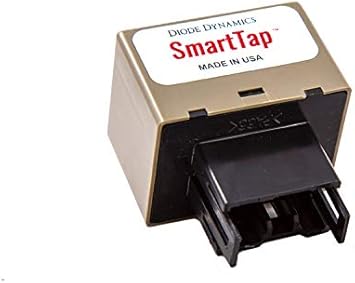
The Smart Tap relay works fine per Diode Dynamics' claims, if I have any issues I'll follow up. Yeah it's pricy but I like it.
Diode Dynamics link: SmartTap CF18 LED Flasher Module
Also available on Amazon:
Amazon.com: Diode Dynamics SmartTap CF18 LED Flasher Module : Home & Kitchen
Shop Amazon for Diode Dynamics SmartTap CF18 LED Flasher Module and find millions of items, delivered faster than ever.
www.amazon.com
Credit to fysho31.
The post has more useful photos on the 2nd page bottom.
Credit to TK54175.
Thanks!


