Toyota Forum banner

How to Add Foam to Avalon Seat Bottom 3.0

1 reading
24K views 23 replies 11 participants last post by  Pezata  
#1 ·
I have previously posted how to add foam to the underside and on top of the seat bottom cushion, the latter being most effective. With additional foam installed on top of the seat bottom cushion, I was at the point where front seat bottom comfort was good in my 2013 TAH but I felt that it could be better, like the seats in my prior Town Car, Crown Vics and Buicks. I always knew that there is a design problem with the seat bottom but until now I had been reluctant to fully address it.

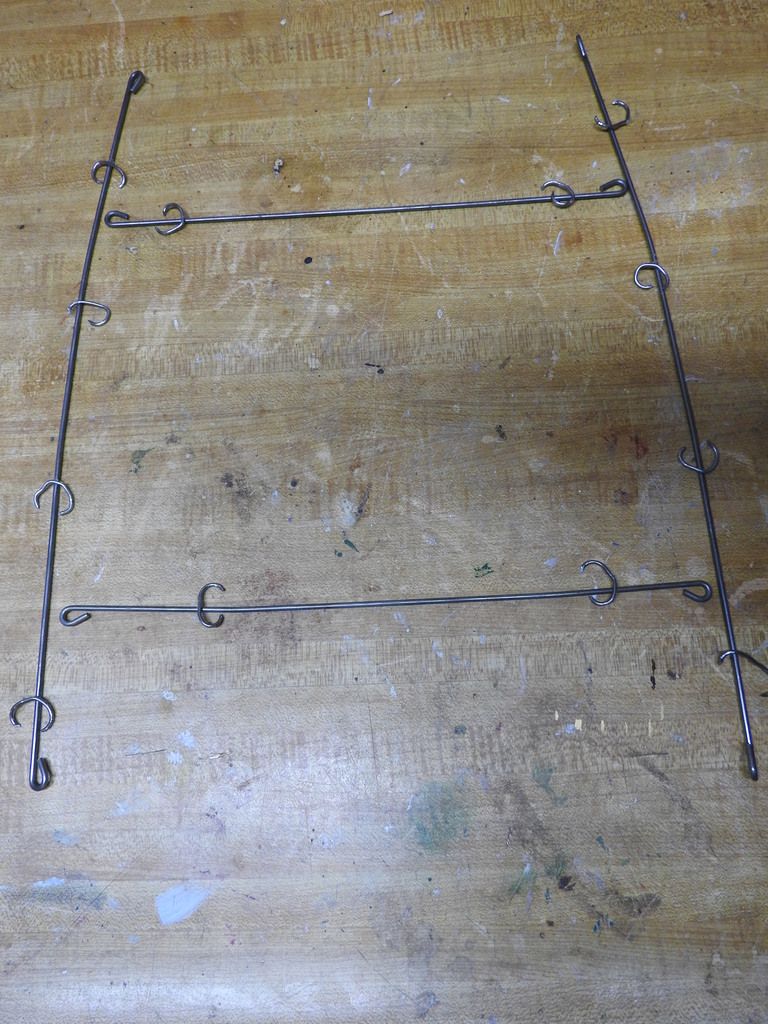
The first problem is the wires that are attached to the seat cover and held down in the grooves between the sections by hog rings. Some members of this forum have referred to this as the "bar" they feel; however, there is no bar, but these wires that feel like a bar. Below is a picture of the wires. I should have placed the wires back in the grooves of the seat and taken a picture so you can see them in place. Just picture them in the grooves of the seat with the bottom of the picture corresponding to the front edge of the seat bottom. The horizontal wire at the top of the picture is the one that people say they feel like a bar. The location of this wire and groove is exactly where my butt makes contact with the seat. The second problem is the seat sections themselves which cause me to sit in the groove between the back two sections, rather than in the middle of a section.


Having decided that the seat wires and grooves must go, I gathered all my DIY courage and did the following:

Removed all the seat wires and hog rings from the seat bottom leaving what you see in the below picture.


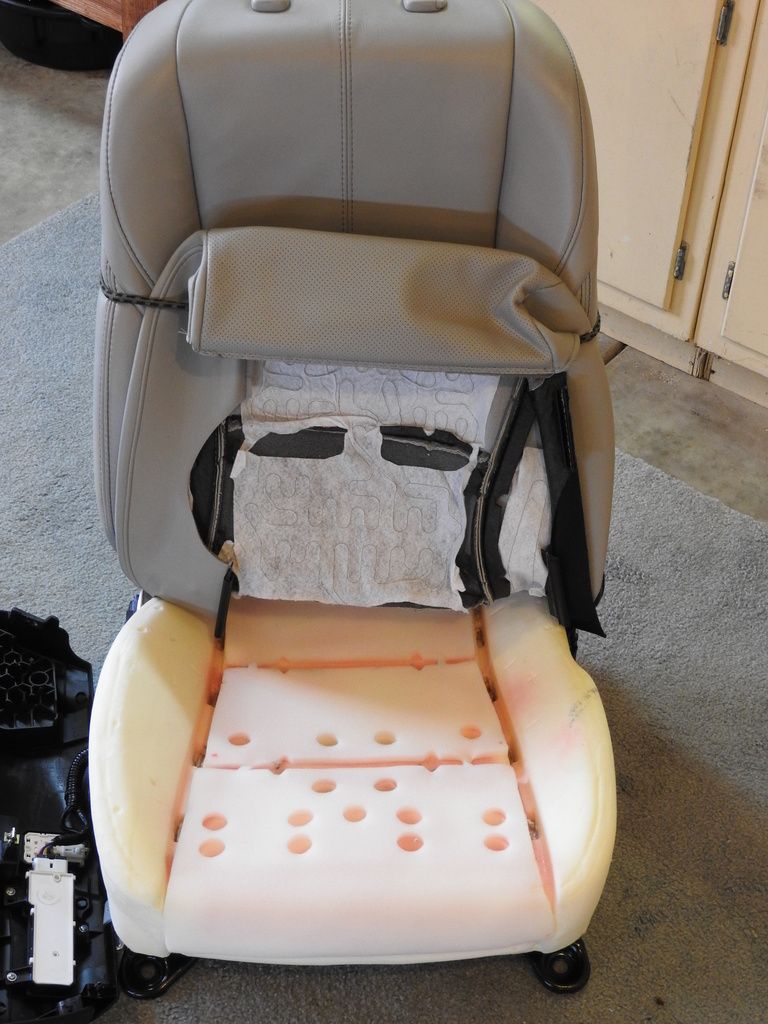
Cut one piece of one inch foam the same size as the area between the bolsters and installed it per the below picture.


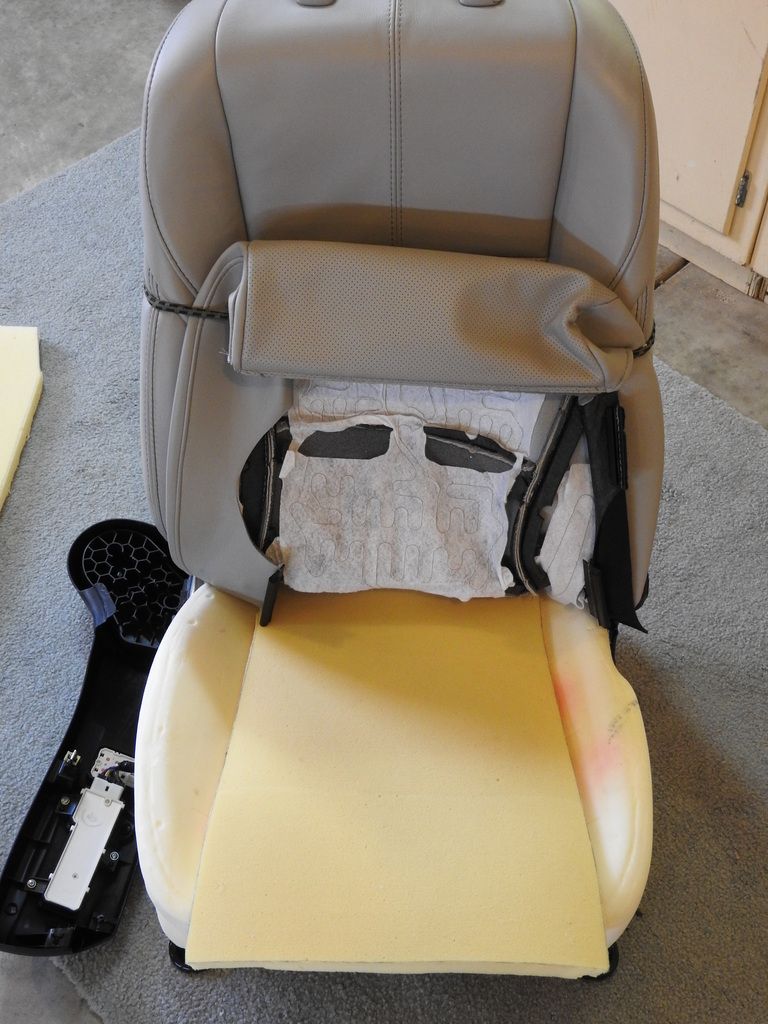
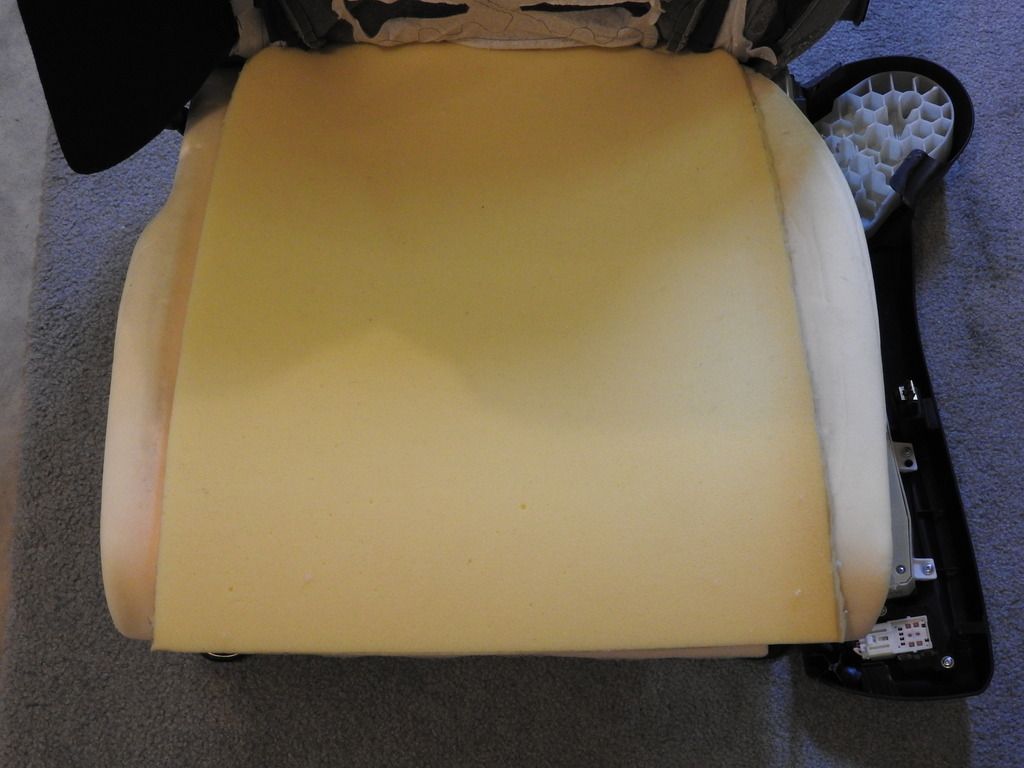
Cut a larger piece of one inch foam and placed it on top of the first piece per the below picture.


Reinstalled the seat cover. Below is a picture of the completed seat.


What a huge difference! I finally have a seat bottom that is 100% comfortable for me and my wife. The only adjustments I might make in the future when the foam needs to be rejuvenated is to try 1 ½ inches of foam, as two inches is probably ½ inch more than needed.

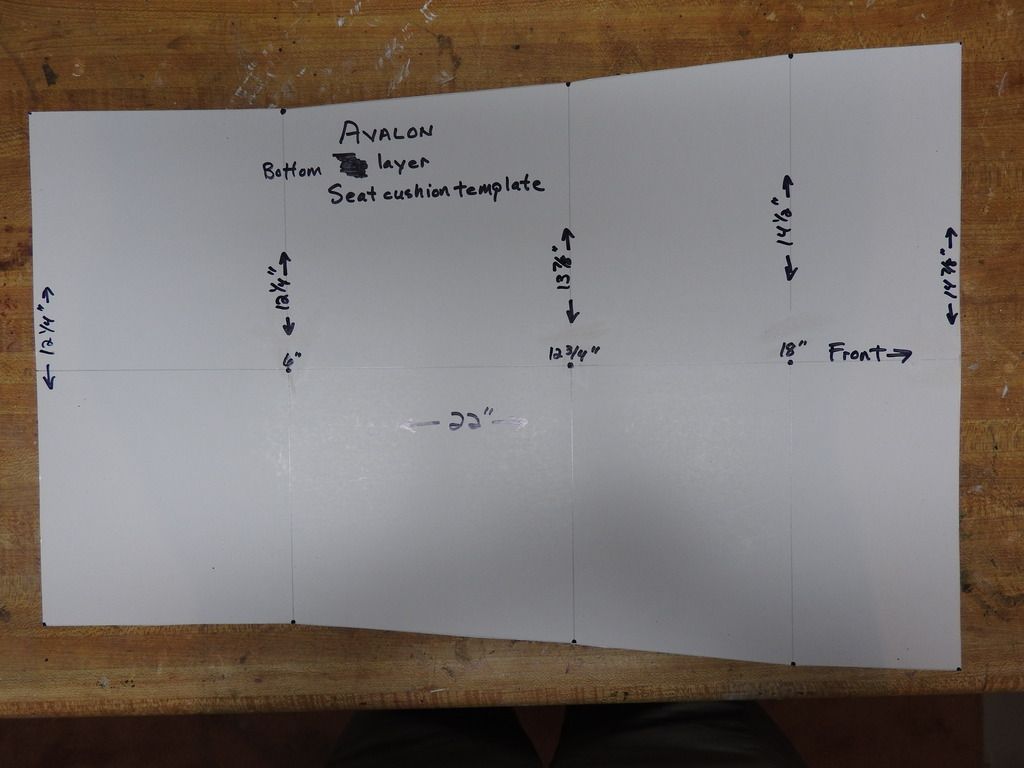
Below are pictures of the templates I used to cut the foam pieces.


#3 ·
I removed the wires and did not reinstall them.

Because the foam is against foam, cut to fill the entire space and held by the seat cover it has not and will not migrate.

They are the Hybrid Limited ventilated seats. Covering over the vent holes results in not being able to use the ventilation function, but I don't like ventilation so that does not bother me. The seat heater is unaffected, which I do like.
 
#4 · (Edited)
I had my passenger seat fixed at a local upholstery shop about 5 months ago but didn't get a chance to take pictures. Today I finally had the driver's seat redone and had them give me the old pieces that were removed so I could show them here.

The OEM foam that sits on the metal seat pan is low density white foam with lots of air holes for the ventilation, the new blue foam is 1" high density with the ventilation holes in the same places. In addition, the shop reshaped the stiff side bolsters so they are now topped with 1" blue foam instead of the urethane molded foam.
The new driver seat feels MUCH better. All wires and hog rings are in place, just like OEM. Both seats look and work just like when it came from the factory, except for being plumper.
I was charged $100 per seat for this work and took about 1.5 hours for the first seat and 1 hour for the second (practice!).

(Many thanks to Den49 for the leadership on this)

Here is the side by side comparison between the white OEM foam and new blue foam, with a ruler for sizes.

Image


Image


One of the old foam pieces that was removed alongside a piece of the new foam material.

Image


Image
 
#5 ·
I guess I wouldn't know seat comfort unless it snuck up and bit me on the... oh, wait. I can't complain since I don't have much basis to compare between what a plush car seat should feel like compared to what it does. My wife's 2015 Pathfinder has some really nice seats, but I just attribute that to Nissan vs Toyota.

I know you don't care for the ventilation feature, so this question is really directed toward others who may be interested in your modification and have removed their seats. Is there a way I can upgrade/modify the ventilation in the seats to make it work better? Is there a blower motor down there that just needs to be replaced or something else I can do? The seat heater works, but the ventilation sucks big time. I almost never notice it and when the Florida sun is baking I'd really appreciate being able to cool myself rather than sweating all over hot leather.
 
#7 · (Edited)
The upholster shaved off about 1/2" of the side bolsters urethane foam and glued in pieces of the 1" blue foam, then shaped those to fit the seat cover a little tighter.
Before this, the OEM side bolsters hit me in the hips and I was constantly squirming to find a comfortable seating position. The center of these seats is 13" wide, which means the hips of people my size are riding on the side bolsters. Some folks don't mind that but I do.
Now the center of the seat is higher with the new foam and the side bolsters are slightly softer. You described it well, the sides 'blend' with the seat a bit more and my behind fits better.
There is still enough 'cup' to the seat for hard cornering (LOL) but as the sides are a bit softer now you just sink in some.
It was a very good modification for my wife and I, after all, she was the first to complain about this issue.
Otherwise, we like the car more and more all the time. It only has 6,200 miles on it.
:smile:

BTW, the passenger seat was totally removed when they modded it a few months ago. Today they left the drivers seat assembly in place and just released the bottom seat cover and took the bottom seat foam pan out. This took a young, agile person who knew what she was doing.
 
#10 ·
Did anyone tried replacing the form it self? Part number 71512-07020

Toyota Part No.: 71512-07020

PAD, FR SEAT CUSHION


This part fits this location on your vehicle:

  • Driver Side
This part fits the following vehicle options:

  • Production Date: 10/2012-10/2015
  • Fitting Vehicle Options: AVX40, GSX40.. LIMD
 
#14 · (Edited)
This is an update and what I believe is my final and successful iteration to adding additional foam to my 2013 TAHL front seat bottoms. I did this back in April, 2018 to both the driver and passenger seats and have had enough time to be sure that I am happy with the outcome. I know this looks like and is a radical alteration of the original seat. I took me years and all the previous iterations to realize that the hard foam padding has to come out in order to make these seats as comfortable as I want and now have.

The key differences between this and my previous iterations are:

1) I used a high grade one inch foam called Qualux. Qualux is far superior to other so-called high density foam from craft stores, etc that is too soft and wears out after a year or two of use. Qualux is what high end car and boat upholsterers use. Qualux provides both comfort and support that should last the life of the car. I don't recall the exact price, but it cost me around $50.00 for enough one inch Qualux to do one seat. I purchased the Qualux at the Baltimore store of:

http://www.house-of-foam.com/index.php?main_page=index&cPath=54&zenid=5g7kun657jqo4uls3hrjrdf506

2) I removed all the wires and the three hard padded sections of the seat bottom that you see below. The front two pads are glued in and can be pulled out fairly easily. The rear pad has to be cut out carefully not to cut any seat heater wires.


This is what remains of the seat bottom after the pads are cut out.


I filled-in the voids in the seat bottom, added a short piece of Qualux to raise the level of the rear sitting area and a piece of half inch foam in front of the Qualux to smooth out the transition to the front edge of the seat.


Next is a layer of Qualux to fill in the area between the bolsters.


Finally, a top layer of Qualux that covers the entire top of the seat, including the hard bolsters.


Below is a picture of the pieces of foam I used. The shapes and sizes are different than the templates provided previously in this and prior posts. Obviously, the middle layer is cut to fill the space inside the bolsters. The shape of the top layer will vary depending on whether you want to cover the bolsters, which I recommend. Simply cut the top layer to match the shape of the seat. The yellow is one inch Qualux. The green is half inch ordinary high density foam.


This is a side view of the finished passenger seat. Notice the increased thickness.


This is a front view of the finished passenger seat.

 
#15 ·
Add 2 inch form to the seat cover

Rather than adding form to the seat itself, I added 2 inch form to my seat cover. Cut a little out from the both sides so it almost feel flat.

After I bough MY Avalon in 2015, my left leg starts feel pain. At first I don't know the reason. After 1 year or so I realized it is because the Avalon seat. My leg pain disappeared after I added 2 inch form to my seat cover.

I drive Avalons since 1990s. I do notice the new Avalon did something for cost saving. For example, the plastic protection at the both rear sides in my 1996 Avalon is honeycomb, it is a flat plastic plate in the new Avalon.
 
#16 ·
For those that don't have the skill/desire to tackle this, you can take this info to a good upholstery shop. Armed with an image of what needs to be done, you'll know if the shop will be willing to tackle the job.

My dealership referred me to a shop that came up with a similar solution, and charged me $100. So far, so good, but I won't know HOW good until the swelling in my recently replaced right hip is resolved. We'll be putting 5500 miles on the car in July, so I'll know then how good this solution is!

The shop found it curious that the padding in the driver's seat seems to be different than the passenger seat. Is that true? (they didn't disassemble, they just felt a difference!)
 
#18 ·
saneesh81: Teocal's, 5260 Trail Lake Drive, FW, 76133 Phone: 817 423 0355. Ask for Alfonso. It's a rather grubby little shop (defunct gas station) but they seem to do good work.

It's not perfect. For whatever reason, I still feel a (softer) lateral ridge that presses on my...my...ahem...prostate. I don't have a lot of upper leg padding, so it might just be my shape that doesn't fit.

I might have to resort to a cushion that has a cutout for the space between the butt cheeks.

Sheesh...never thought I'd be writing such graphic stuff on an auto forum site...
 
#22 · (Edited)
For the 12 its about $175. and I think it would be good enough for anyone up to 250 -300. They for sure had American builds in mind then. Not so much in 2013.
I do like the price of using 1 inch ....for real high density foam.... over our worn base. Qualux foam rubber cushions and mattresses

The pics of the stock seat foam on a ventilated limited look like something made for fishers price or dollar general. I have tried them. Didnt like them at all and that lasted only 5 minutes. Not made for a big and tall American Man.
 
#23 ·
For the 12 its about $175. and I think it would be good enough for anyone up to 250 -300. They for sure had American builds in mind then. Not so much in 2013.
I do like the price of using 1 inch ....for real high density foam.... over our worn base. Qualux foam rubber cushions and mattresses
This where I bought my foam. The high density foam is called Qualux, much better and longer lasting than the typical foam in a craft or fabric store.