

Here is my write up on how to change the color of your steering wheel controls.
Tools needed:
10mm Socket setup
Small flat blade screwdriver
Medium Phillips screwdriver
T-30 Hex driver
Soldering iron
Solder sucker
Solder
Needle nose pliers or tweezers
3 SLT-773 LED's in the color of your choice (same LED's as the gauge cluster)
***If you do not know how to solder or properly remove soldered components do not attempt this, serious damage could occur. I am not responsible for any damage, you are taking the fate of your stereo controls into your own hands.***
First, disconnect your battery using the 10mm socket setup.
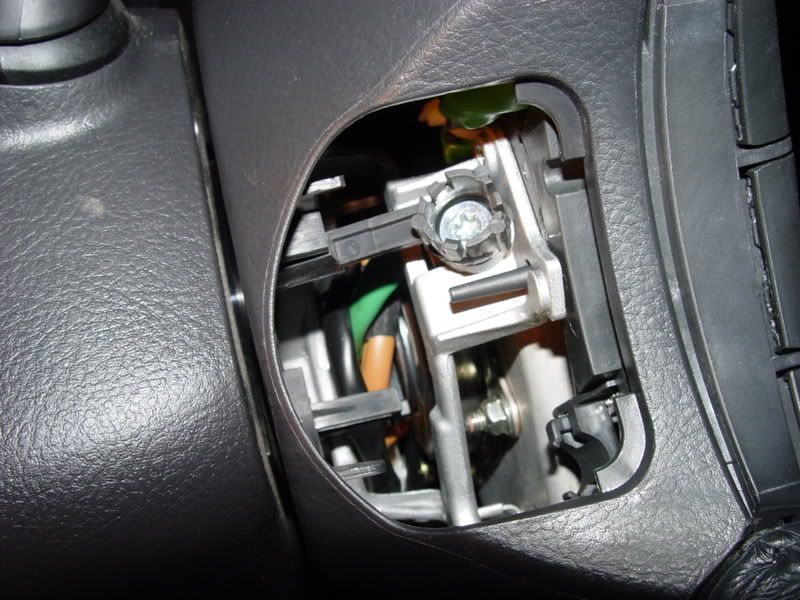
Next, using the small flat blade screw driver pop off the little covers on the side of the steering wheel.
![Image]()
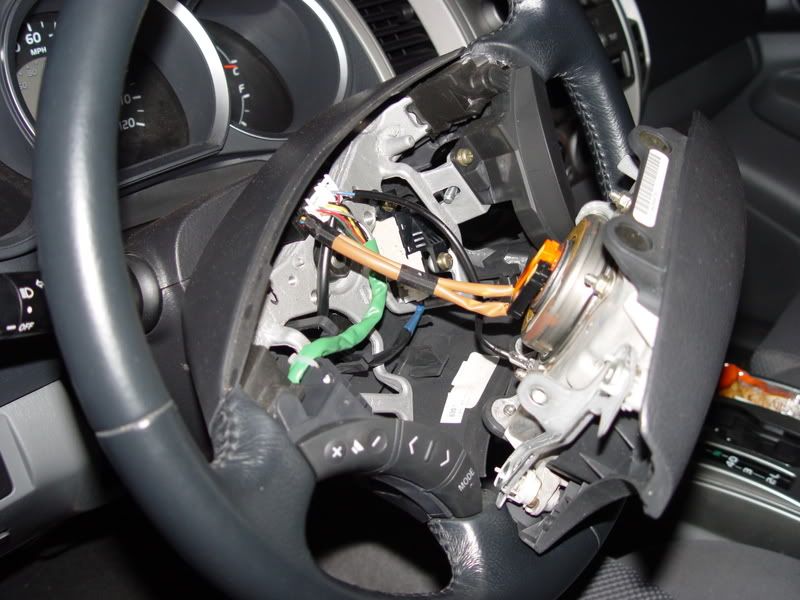
Now you can use the T-30 Hex driver to remove the two T-30 Hex bolts. These are the bolts that hold the airbag in. Once you have loosened these two bolts completely you can pull the airbag away from the steering wheel. You can just let it hang and do not need to disconnect it.
![Image]()
Now you should be able to see the entire control unit. There is one Phillips screw holding the control unit to the wheel. Remove this screw and pull the unit away from the wheel. Cut the zip-tie that is holding the cable to the control unit and disconnect the cable.
![Image]()
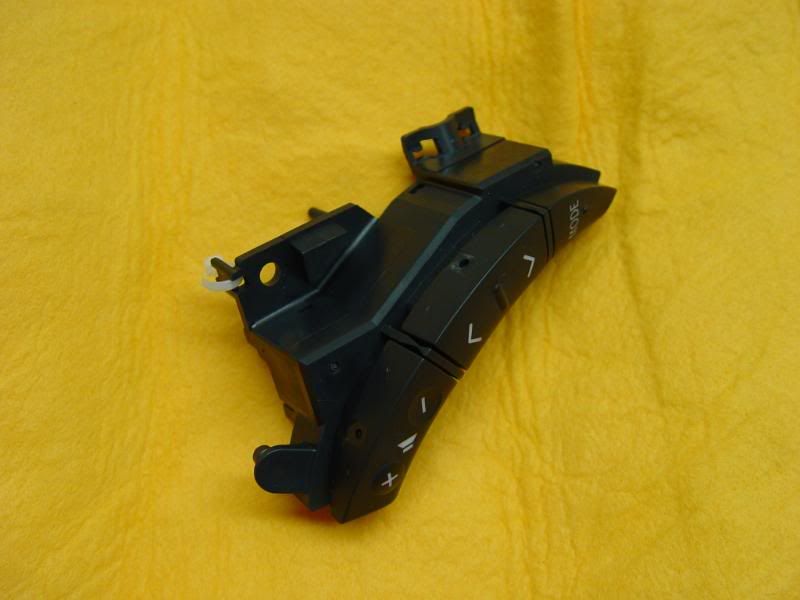
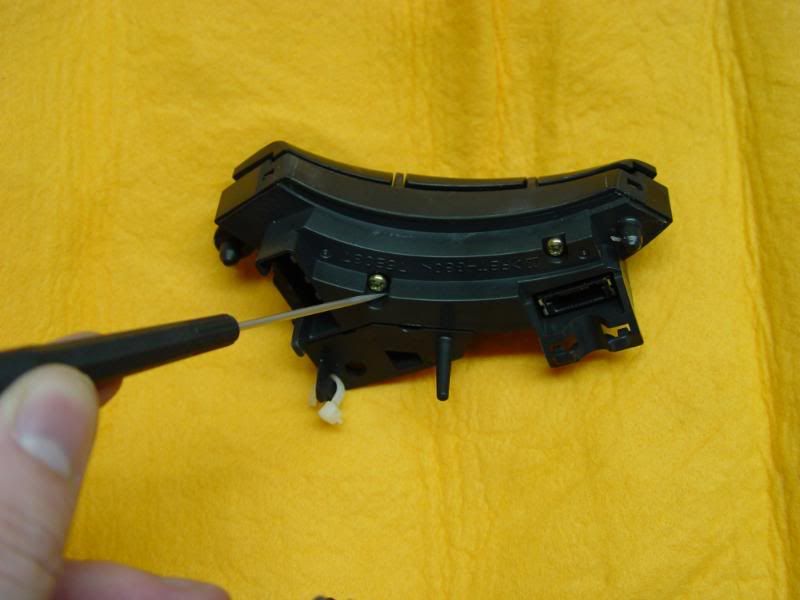
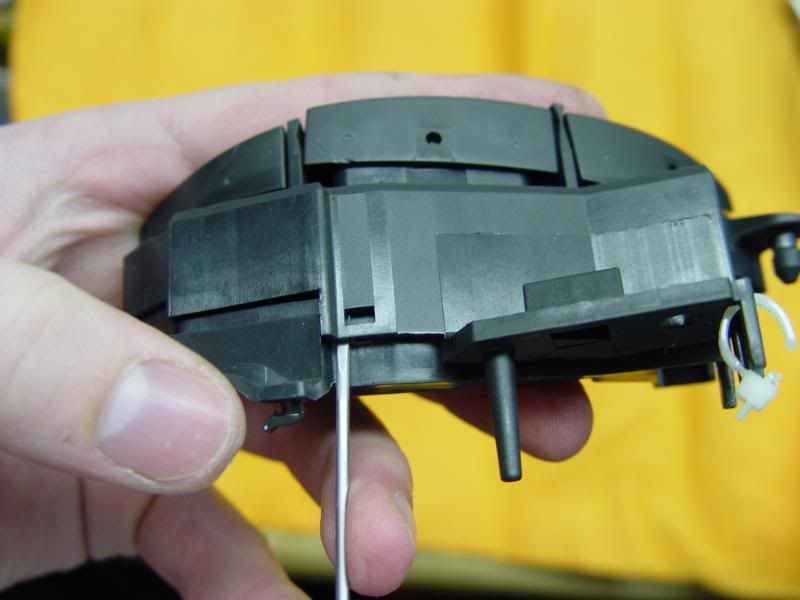
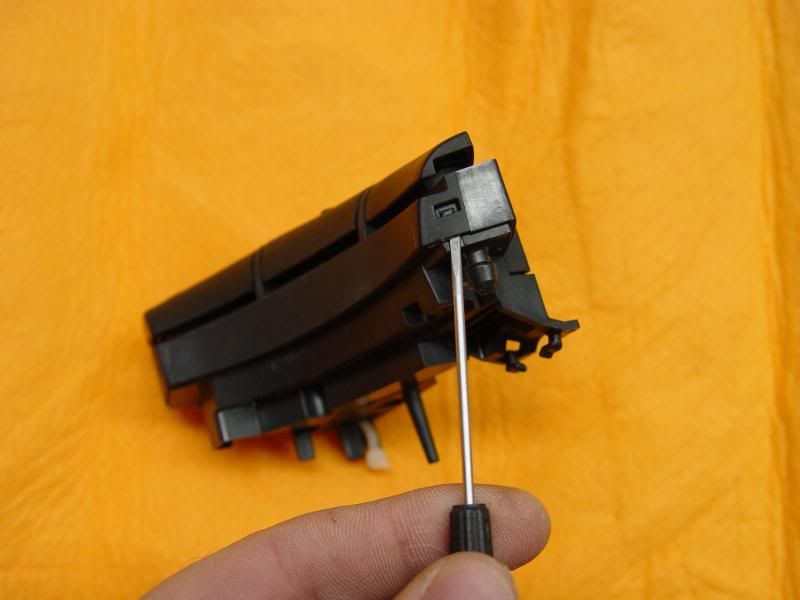
You can now take the unit to a bench to disassemble it. There are two Phillips screws and 4 clips that hold the unit together. Remove the two screws and pry the two halves apart. It is easier to start with the two clips on the back towards the center and work your way to the outer two.
![Image]()
![Image]()
![Image]()
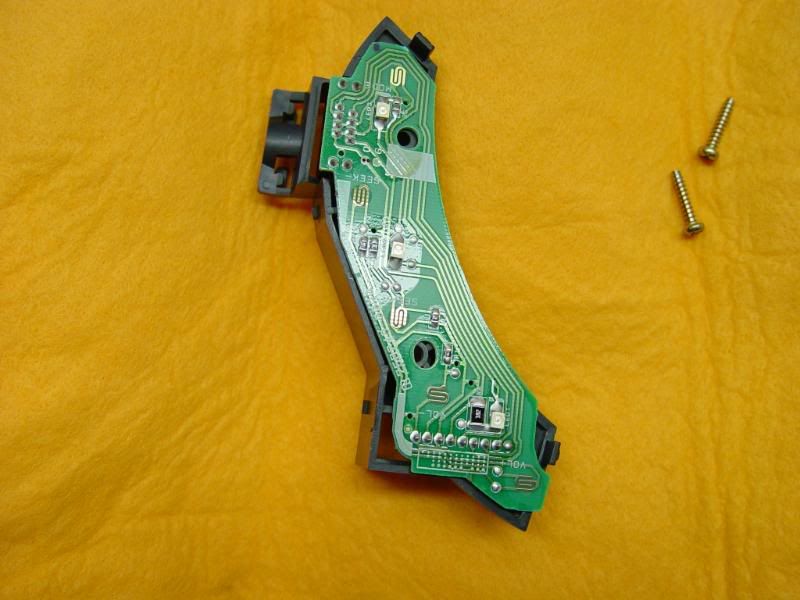
Once you separate the two halves the PCB will come right out. Take note of the direction of the LED's, the triangular notch that is missing is the cathode side. Make sure you place your new LED's in the same direction.
![Image]()
Unsolder the old LED's, tin your pads and solder in the new LED's. When you are ready to reassemble the control unit, place the PCB in the button side first and then put the back on.
![Image]()
Snap the two pieces together and install the screws. You can now reassemble the truck and test it out.
![Image]()
Good luck and enjoy!
Tools needed:
10mm Socket setup
Small flat blade screwdriver
Medium Phillips screwdriver
T-30 Hex driver
Soldering iron
Solder sucker
Solder
Needle nose pliers or tweezers
3 SLT-773 LED's in the color of your choice (same LED's as the gauge cluster)
***If you do not know how to solder or properly remove soldered components do not attempt this, serious damage could occur. I am not responsible for any damage, you are taking the fate of your stereo controls into your own hands.***
First, disconnect your battery using the 10mm socket setup.
Next, using the small flat blade screw driver pop off the little covers on the side of the steering wheel.
Now you can use the T-30 Hex driver to remove the two T-30 Hex bolts. These are the bolts that hold the airbag in. Once you have loosened these two bolts completely you can pull the airbag away from the steering wheel. You can just let it hang and do not need to disconnect it.
Now you should be able to see the entire control unit. There is one Phillips screw holding the control unit to the wheel. Remove this screw and pull the unit away from the wheel. Cut the zip-tie that is holding the cable to the control unit and disconnect the cable.
You can now take the unit to a bench to disassemble it. There are two Phillips screws and 4 clips that hold the unit together. Remove the two screws and pry the two halves apart. It is easier to start with the two clips on the back towards the center and work your way to the outer two.
Once you separate the two halves the PCB will come right out. Take note of the direction of the LED's, the triangular notch that is missing is the cathode side. Make sure you place your new LED's in the same direction.
Unsolder the old LED's, tin your pads and solder in the new LED's. When you are ready to reassemble the control unit, place the PCB in the button side first and then put the back on.

Snap the two pieces together and install the screws. You can now reassemble the truck and test it out.

Good luck and enjoy!
")


