

Greetings! Didn't see this one on the DIY section so I figured I would take pics while changing out fuel tanks. Not really a bad job - but just like anything else, there can be unforseen obstacles to overcome like snapping off one of the strap bolts!
![Image]()
First and foremost - try to drain whatever fuel is left inside the tank - it will make life much easier! I thought since I had a hole in mine that all the gas was gone, but it turns out there was between 2 -3 gallons left which made for a dangerous and *stinky* swap! I put down an old towel to try to contain the spill, which is better than letting the gas run all over the pavement. Should you have a leaky tank - this is common sense but I'll say it anyway - keep all sources of ignition away from the gas! Try to use non-sparking tools if possible and make an extra effort to watch metal-on-metal contact when removing bolts, nuts, etc.
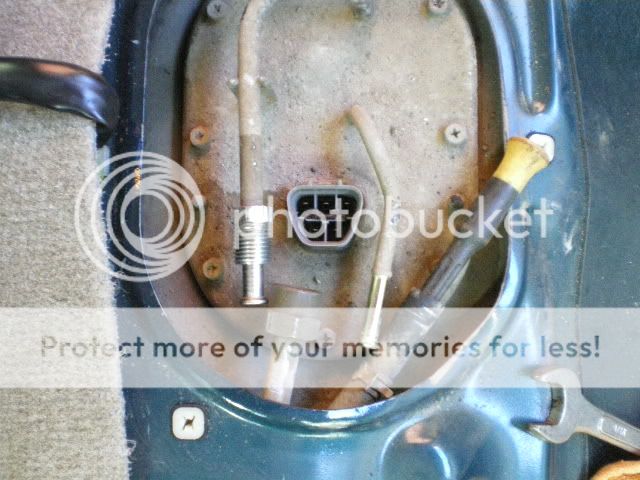
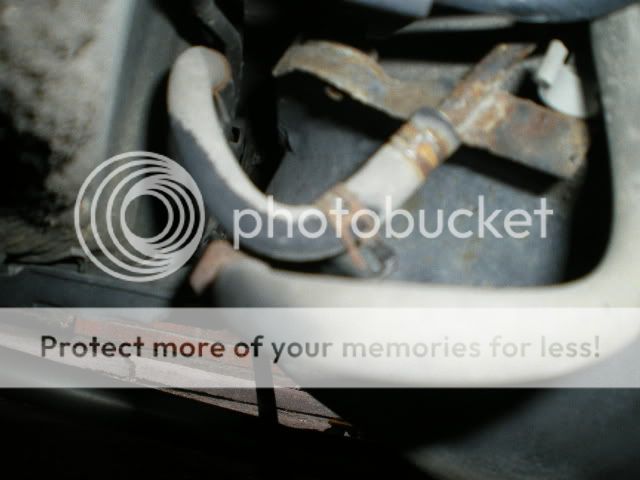
Once you have as much gas as possible removed it's time to take out the backseat and disconnect the supply line. Press the tab on the 5-pronged plug (mine is a 1996 Gen3, others may be similar) and remove it - easy...
![Image]()
Next remove the fuel supply line; the large nut is 19mm and the small one is 14mm I believe. I removed the small line *on the right* but it turns out you don't have to - it runs into the top of the tank (maybe it's a return line?)
![Image]()
It never hurts to plug the line so that fuel doesn't go everywhere. I loathe nothing more than to walk into the house smelling like gasoline - maybe when I was 16 or 17 it was cool - but now I feggin' hate it! After this is done it's time to secure the car on jackstands and get down to the meat and potatoes of the job.
First task under the car is to unhinge the exhaust pipe - I have an aftermarket exhuast system (whose workmanship sucks by the way - performance is good, though). I simply cut a couple of the rubber biscuits and forced the others to come off - I need a new exhaust workup anyway...Once you get the pipe out of the way push it over to the passenger's side - be careful and don't damage an oxygen sensor or anything like that!
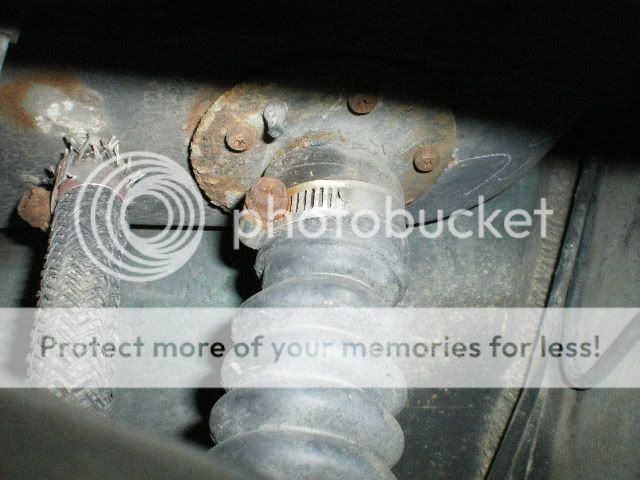
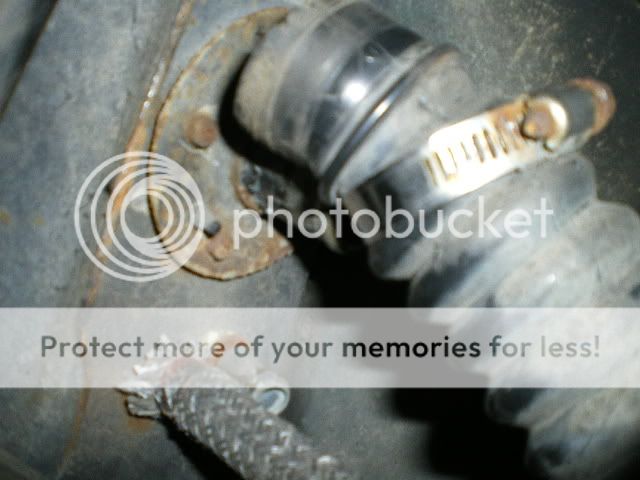
Next is to remove the filler neck-to-tank rubber hose and vent tube. Mine is 15 years old this year - don't expect the rubber to be very compliant and supple after 319000 miles cause it won't be! It may take some choice words and threats of violence, but it will eventually come loose. Worst case scenario you'll have to go to the parts store and either buy an OEM replacement or simply match the inside diameter of the old hose to a new piece and cut to length - again, nothing really very complicated here...
![Image]()
![Image]()
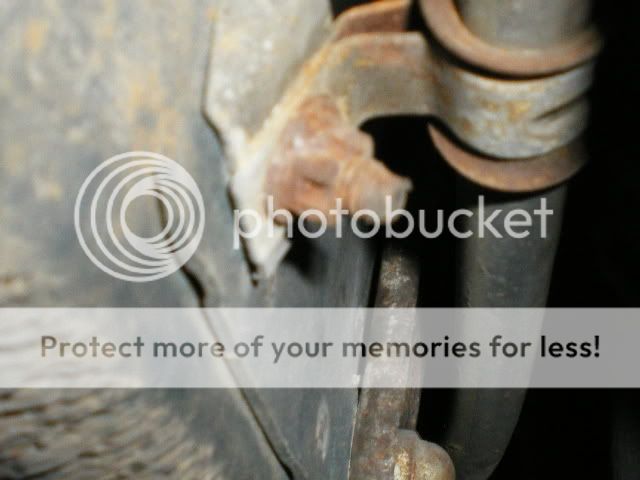
After these have been wrestled off (mine were a bitch lemme tell ya!), next step is to remove the vent line (?) from the rear center part of the tank on top - piece of cake. Then comes the brake line on the front driver's side of the tank. Access the two 10mm nuts holding the line on underneath the rear passenger door (for a Coupe it's just forward of the rear driver's side tire)
![Image]()
Once you get the two 10mm nuts off it should hang like this: Notice the puddle of aromatic hydrocarbons which made this job *SO MUCH* fun!
![Image]()
There is one more line to remove while you are at that part of the car - it runs almost parallel with the brake line just removed:
![Image]()
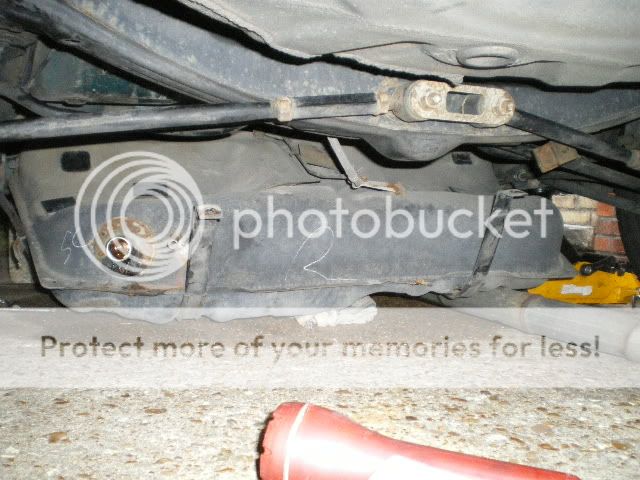
Now comes the most ardurous part of the job: Removing the fuel tank straps. You will want to place something under the tank or wedge a long shaft between the rear suspension components and the tank so it won't come tumbling down on your head! These two 14mm bolts *WILL BE RUSTY* so use PB Blaster or at least WD-40 first. That's why one of mine snapped off...radio edit...if you live in the Salt or Rust Belt God help you...this is the biggest bitch of the removal. If you break one, you will have to drill and tap a new hole or somehow extract the old bolt - either way, preparation is the best weapon for these bolts. Provided they come out without any trouble, you are then ready to drop the tank:
![Image]()
Pull the tank towards the rear of the vehicle and check your work - there shouldn't be any remaining lines to disconnect but sometimes the straps will stick to the tank since they have some kind of rubber coating. Use a screwdriver and pry between the tank and the strap if this happens
If you are replacing tanks it's best to set both tanks next to each other and swap out hardware, pump, and lines while it's easiest to access everything.
Hope this helps and good luck :chug:

First and foremost - try to drain whatever fuel is left inside the tank - it will make life much easier! I thought since I had a hole in mine that all the gas was gone, but it turns out there was between 2 -3 gallons left which made for a dangerous and *stinky* swap! I put down an old towel to try to contain the spill, which is better than letting the gas run all over the pavement. Should you have a leaky tank - this is common sense but I'll say it anyway - keep all sources of ignition away from the gas! Try to use non-sparking tools if possible and make an extra effort to watch metal-on-metal contact when removing bolts, nuts, etc.
Once you have as much gas as possible removed it's time to take out the backseat and disconnect the supply line. Press the tab on the 5-pronged plug (mine is a 1996 Gen3, others may be similar) and remove it - easy...

Next remove the fuel supply line; the large nut is 19mm and the small one is 14mm I believe. I removed the small line *on the right* but it turns out you don't have to - it runs into the top of the tank (maybe it's a return line?)
It never hurts to plug the line so that fuel doesn't go everywhere. I loathe nothing more than to walk into the house smelling like gasoline - maybe when I was 16 or 17 it was cool - but now I feggin' hate it! After this is done it's time to secure the car on jackstands and get down to the meat and potatoes of the job.
First task under the car is to unhinge the exhaust pipe - I have an aftermarket exhuast system (whose workmanship sucks by the way - performance is good, though). I simply cut a couple of the rubber biscuits and forced the others to come off - I need a new exhaust workup anyway...Once you get the pipe out of the way push it over to the passenger's side - be careful and don't damage an oxygen sensor or anything like that!
Next is to remove the filler neck-to-tank rubber hose and vent tube. Mine is 15 years old this year - don't expect the rubber to be very compliant and supple after 319000 miles cause it won't be! It may take some choice words and threats of violence, but it will eventually come loose. Worst case scenario you'll have to go to the parts store and either buy an OEM replacement or simply match the inside diameter of the old hose to a new piece and cut to length - again, nothing really very complicated here...
After these have been wrestled off (mine were a bitch lemme tell ya!), next step is to remove the vent line (?) from the rear center part of the tank on top - piece of cake. Then comes the brake line on the front driver's side of the tank. Access the two 10mm nuts holding the line on underneath the rear passenger door (for a Coupe it's just forward of the rear driver's side tire)
Once you get the two 10mm nuts off it should hang like this: Notice the puddle of aromatic hydrocarbons which made this job *SO MUCH* fun!

There is one more line to remove while you are at that part of the car - it runs almost parallel with the brake line just removed:
Now comes the most ardurous part of the job: Removing the fuel tank straps. You will want to place something under the tank or wedge a long shaft between the rear suspension components and the tank so it won't come tumbling down on your head! These two 14mm bolts *WILL BE RUSTY* so use PB Blaster or at least WD-40 first. That's why one of mine snapped off...radio edit...if you live in the Salt or Rust Belt God help you...this is the biggest bitch of the removal. If you break one, you will have to drill and tap a new hole or somehow extract the old bolt - either way, preparation is the best weapon for these bolts. Provided they come out without any trouble, you are then ready to drop the tank:
Pull the tank towards the rear of the vehicle and check your work - there shouldn't be any remaining lines to disconnect but sometimes the straps will stick to the tank since they have some kind of rubber coating. Use a screwdriver and pry between the tank and the strap if this happens
If you are replacing tanks it's best to set both tanks next to each other and swap out hardware, pump, and lines while it's easiest to access everything.
Hope this helps and good luck :chug:


