Toyota Forum banner

Auto trans gear selector not working: Fix with photos

2 reading
42K views 16 replies 6 participants last post by  adubtoyota  
#1 · (Edited)
Skip to post #11 to see the DIY with photos, but read the first posts to understand the symptoms.

2004 Corolla LE 285K miles. I drove to work this morning with no problems at all. I just got off work and got into my Corolla and started it up, but when I moved the gear selector into reverse, I noticed it slipped into R without any resistance at all. Engine revs up but the tranny won't engage. I moved gear selector to D, N, 2, L etc., and none of them will respond. I do still have to step on the brake to get it out of Park, but with the others the gear selector just slides so easily with no resistance (which is not normal). The little orange indicator does move into each position, btw. Any ideas what's wrong?
 
#4 ·
I just discovered that although I can put the gear selector in Neutral, the car still can not roll by pushing it, which means it is stuck in Park regardless of what gear the selector is in. I'm getting my car towed to my house so I can jack it up and get a light and look around for the cable/linkage connection and also the connection at the gear selector.
 
#5 · (Edited)
OK, got my car towed. The linkage at the transmission right behind the radiator is fine. The tow truck driver showed me how to move the linkage by hand to get it in the gear you want. The brake has to be depressed while you pull up on the linkage and you can move it into R, N, D, etc. I was able to drive the car into my garage from the street. I'm thinking the gear selector linkage is broken or the cable snapped somewhere in between. Not going to be looking at it tonight. Good thing I have an old 1987 Toyota pickup to use tomorrow so I can go to work. I'll let you all know what I find. Anyone else can pipe in with ideas, as I've never done this repair before.
 
#7 ·
Yeah, once it was towed home, I tried it and I made sure to have the E-brake on really tight and I used wheel chocks. I put a rod between the brake pedal and the seat to engage the brake so it would move out of Park when I pulled on the linkage. I've never replaced a shift cable assembly, so it might take me some time (if that's what it is).
 
#9 ·
It took me a while to get the tow from San Antonio to the outer suburbs in an adjacent county where I live and come home and have dinner. I have to get up early in the morning, so I'm not doing anything further tonight. Hopefully tomorrow. Thank goodness I have my old truck as a backup.

Yes, I will post any photos if I can. Thanks very much!
 
#10 ·
  • Like
Reactions: John Anthony
#11 · (Edited by Moderator)
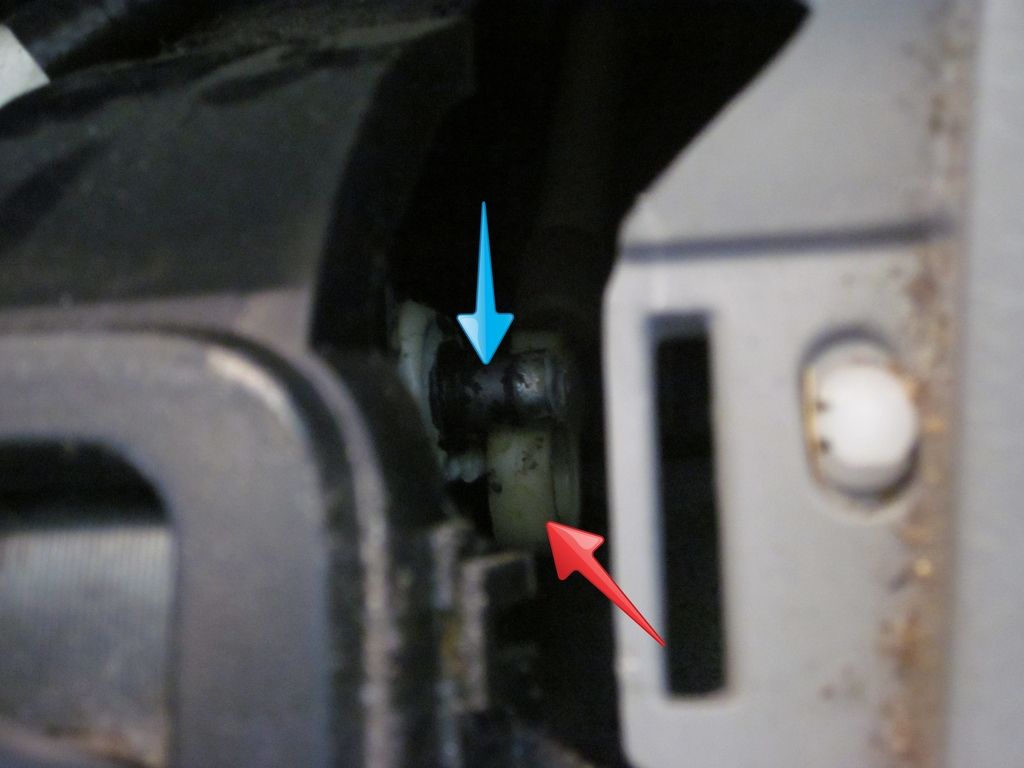
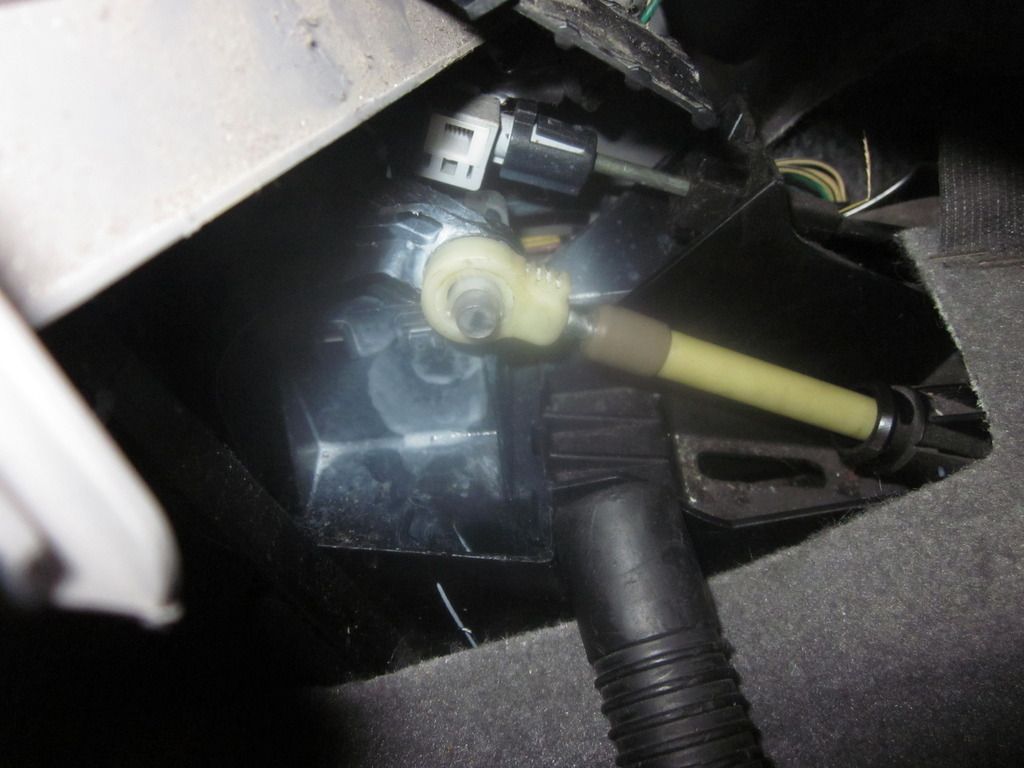
Well, I popped off the top console bezel and found that the shift cable assembly has come apart from that pin. There is a plastic bushing type object that holds it in place, but it's all worn off. The red arrow points to the plastic eyelet that is connected to the shift cable that goes all the way to the front of the car to operate the trans lever. The blue arrow points to the pin (or whatever it's called) on which the eyelet should be residing. The smeared black stuff is what's left of the plastic grommet or bushing clip that holds the eyelet to the pin. Here's the photo:


Looks like I'll be getting some clips at the hardware store tonight to get this back together. I'll let you all know how it goes. Gotta go back to my job now.

Skip to post #14 to continue the DIY with photos.
 
#13 ·
#14 · (Edited)
How I fixed the gear selector cable linkage

I fixed this for $1.93, which is probably about $300 cheaper than your friendly neighborhood Toyota dealer would charge to do this. Toyota WILL NOT sell just this small plastic grommet/clip retainer without you also buying the complete cable assembly for upwards of $250.

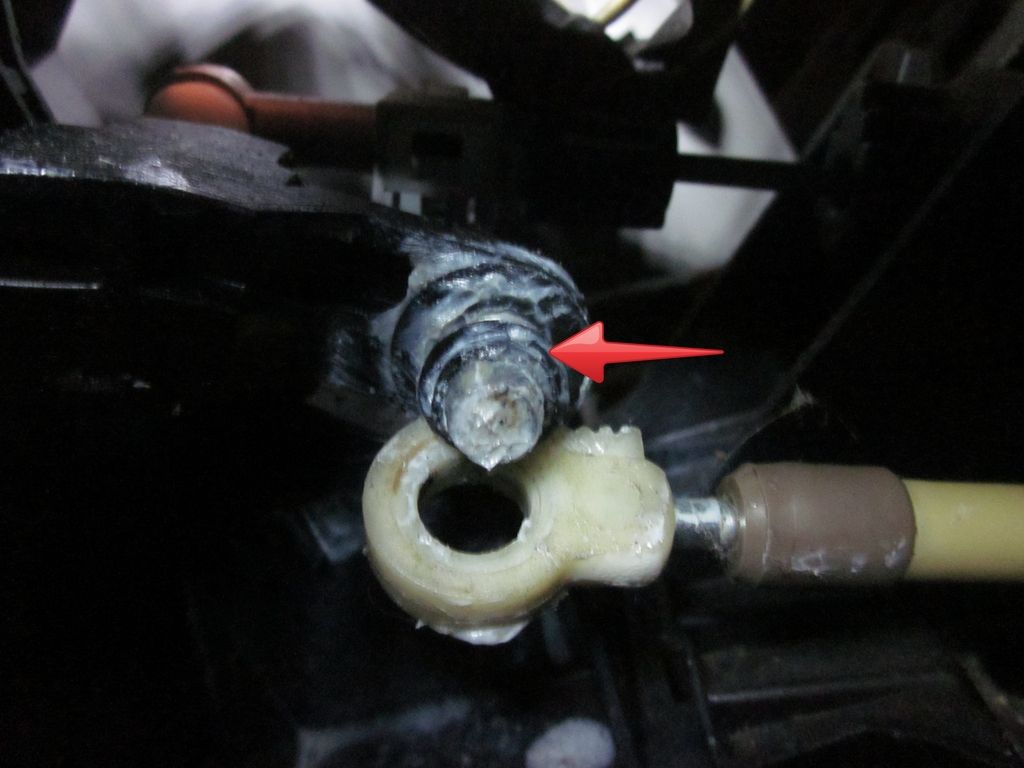
Here's what was left of the grommet/clip. It's suppposed to be longer with some kind of end that keeps the eyelet on the gear selector pin. The red arrow is pointing to it:


As you can see it's all worn away:


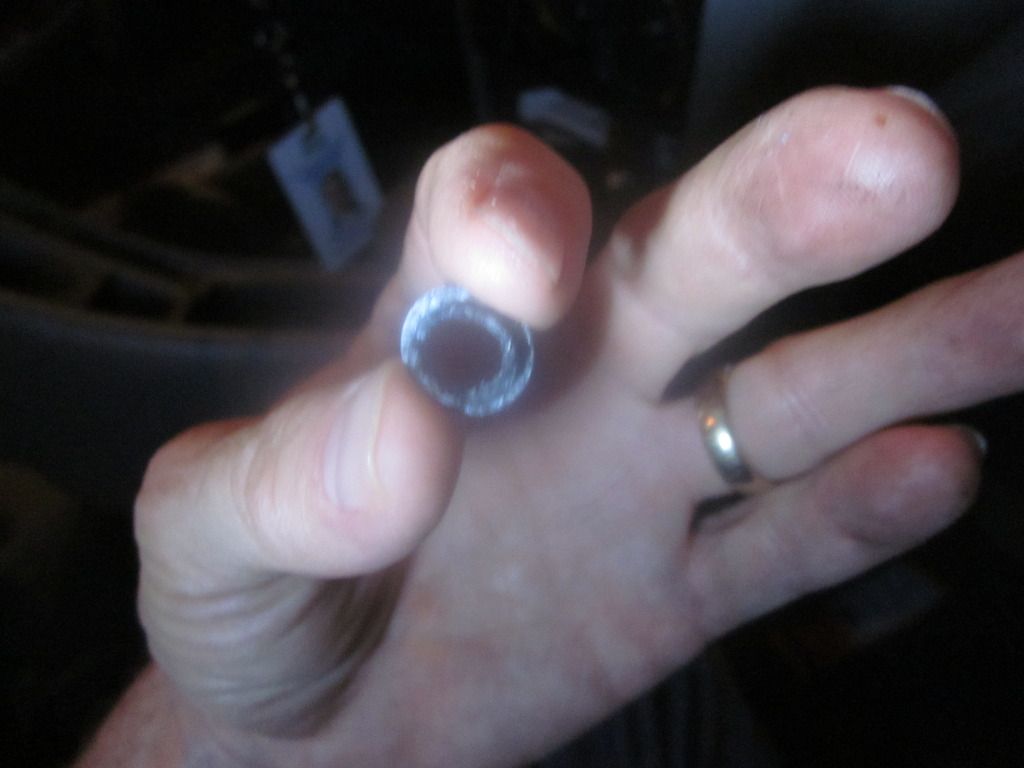
The repair thread (originally by Daboa) that Hardtopte72 posted/copied onto this thread uses a small piece of 3/8" vinyl tubing cut at one side to go around the pin. The tubing that I had was much too thick, so the eyelet would not fit around it:

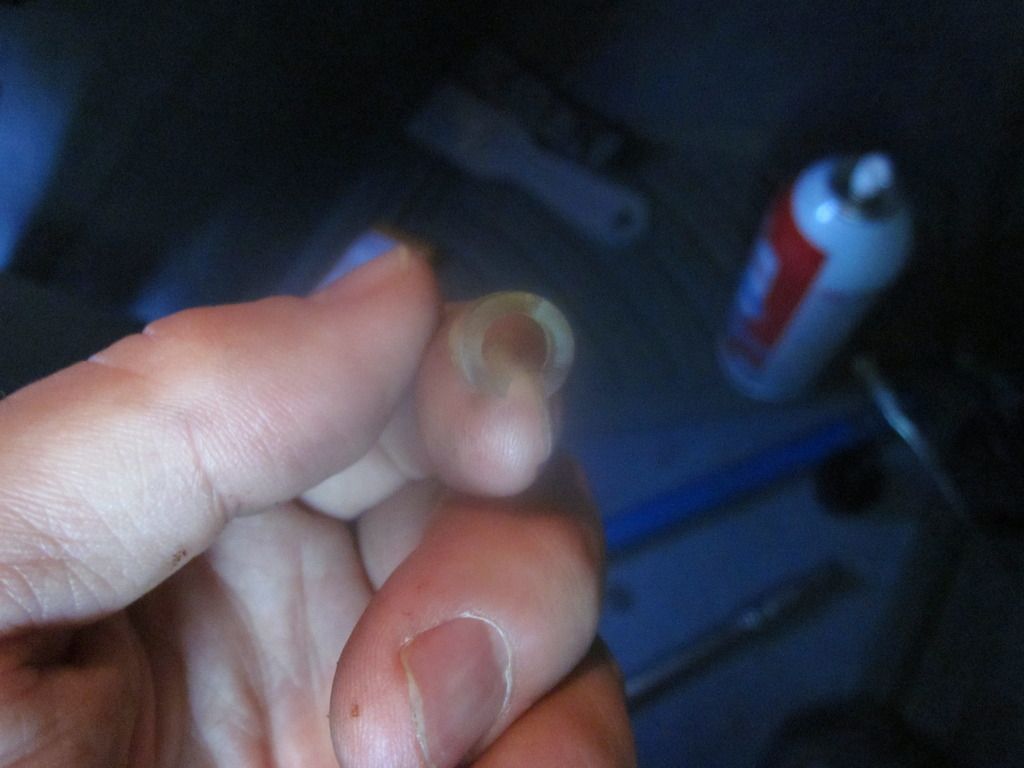
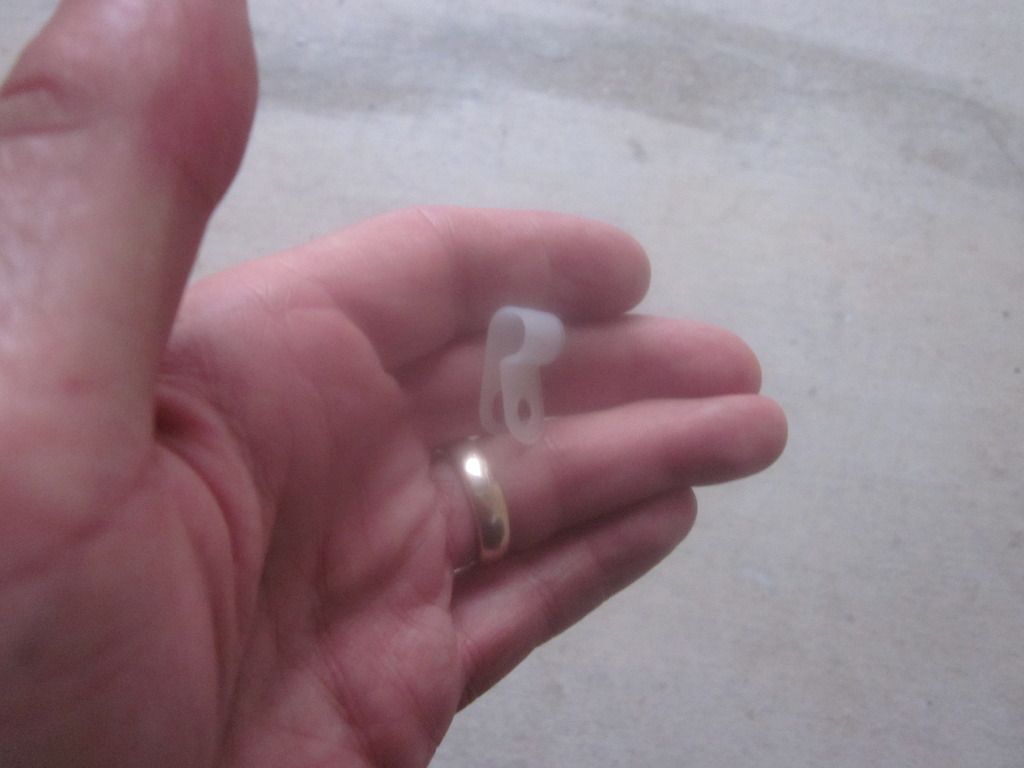
So I used a nylon clamp that came with a zip tie:


I snipped off the tabs to make it look like this:

I also snipped it so it wasn't so wide and I put it on the pin and then put the eylet on it. It fit well, not too tight, but it takes up the space:

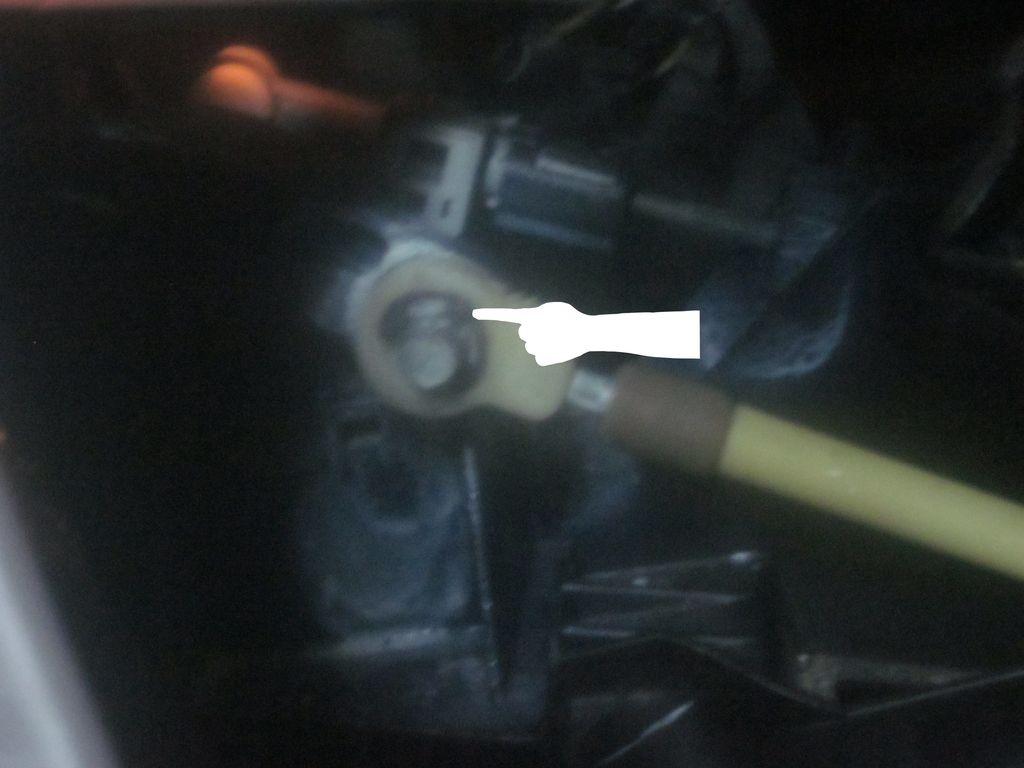
Next I put a 5/16" E-clip in between the eyelet with the nylon spacer and the thicker part of the outside tip of the pin. It took me a while, but I forced it on with a needle nose pliers. The white finger is pointing to the e-clip:


Lastly, I hammered on a 5/16" axle cap nut to hold it all in place:
Image


EDIT: July 2019. I just did this job again on my buddy's Corolla. Using a small C-clamp to press the axle cap nut on is a lot easier than hammering it on. It can slip off the contact points of the C-clamp, so put a piece of cloth, piece of rubber, or piece of paper towel on the contact points of the clamp and it won't slip so easily.

Thanks to forum member Daboa, who was the one who posted the original thread with photos and the ideas to fix this problem. Thanks again to CorollaCharlie for diagnosing a cable linkage problem and to Hardtopte72 who had this exact problem on his car and posted on this thread the link to the first thread that Daboa started.
 
#15 ·
The addition of that cap at the end is a really nice touch. Good to see you got it fixed and offered the readers another in-depth look at this problem.

I am going to add both to the DIY sticky!