

So my intermittent P0031 check engine light for a failing primary A/F sensor heater, finally became a permanent check engine light. After checking the sensor’s heater circuit resistance, it was just out of spec (3.5 ohms vs. 1.8-3.4 ohms). So I decided to make a DIY for replacement of this sensor.
This DIY was performed on a 2005 Corolla 1ZZFE and will be identical for all 2003-2008 Corolla, Matrix, and Pontiac Vibe models with a 1ZZFE engine. Additionally, this DIY should apply similarly to 2003-2006 Matrix XRS and Pontiac Vibe GT and 2005-2006 Corolla XRS models.
Total time spent, including time to take pictures was around 40 minutes. It should take the average person 15-20 minutes for this job, not including time spent for the penetrating lubricant to work (if applicable).
Disclaimer: Myself or Toyotanation are not responsible for any damage or injury that may result from use of the DIY. Automotive maintenance and repair should be performed by qualified technicians. This DIY is for informational purposes, use it at your own risk.
Note: 2003-2004 FWD models and 2003-2006 AWD models use a “Narrow Band” Oxygen Sensor, while 2005-2008 FWD Models use a “Wide Band” Air Fuel Ratio Sensor. The 2003-2006 AWD models use the same "Narrow Band" sensor for all years, which is different from the 2003-2004 FWD and 2005-2008 FWD. These different sensors are not interchangeable and you must use the correct year and drivetrain specific sensor. The procedure is identical, regardless of the year or drivetrain.
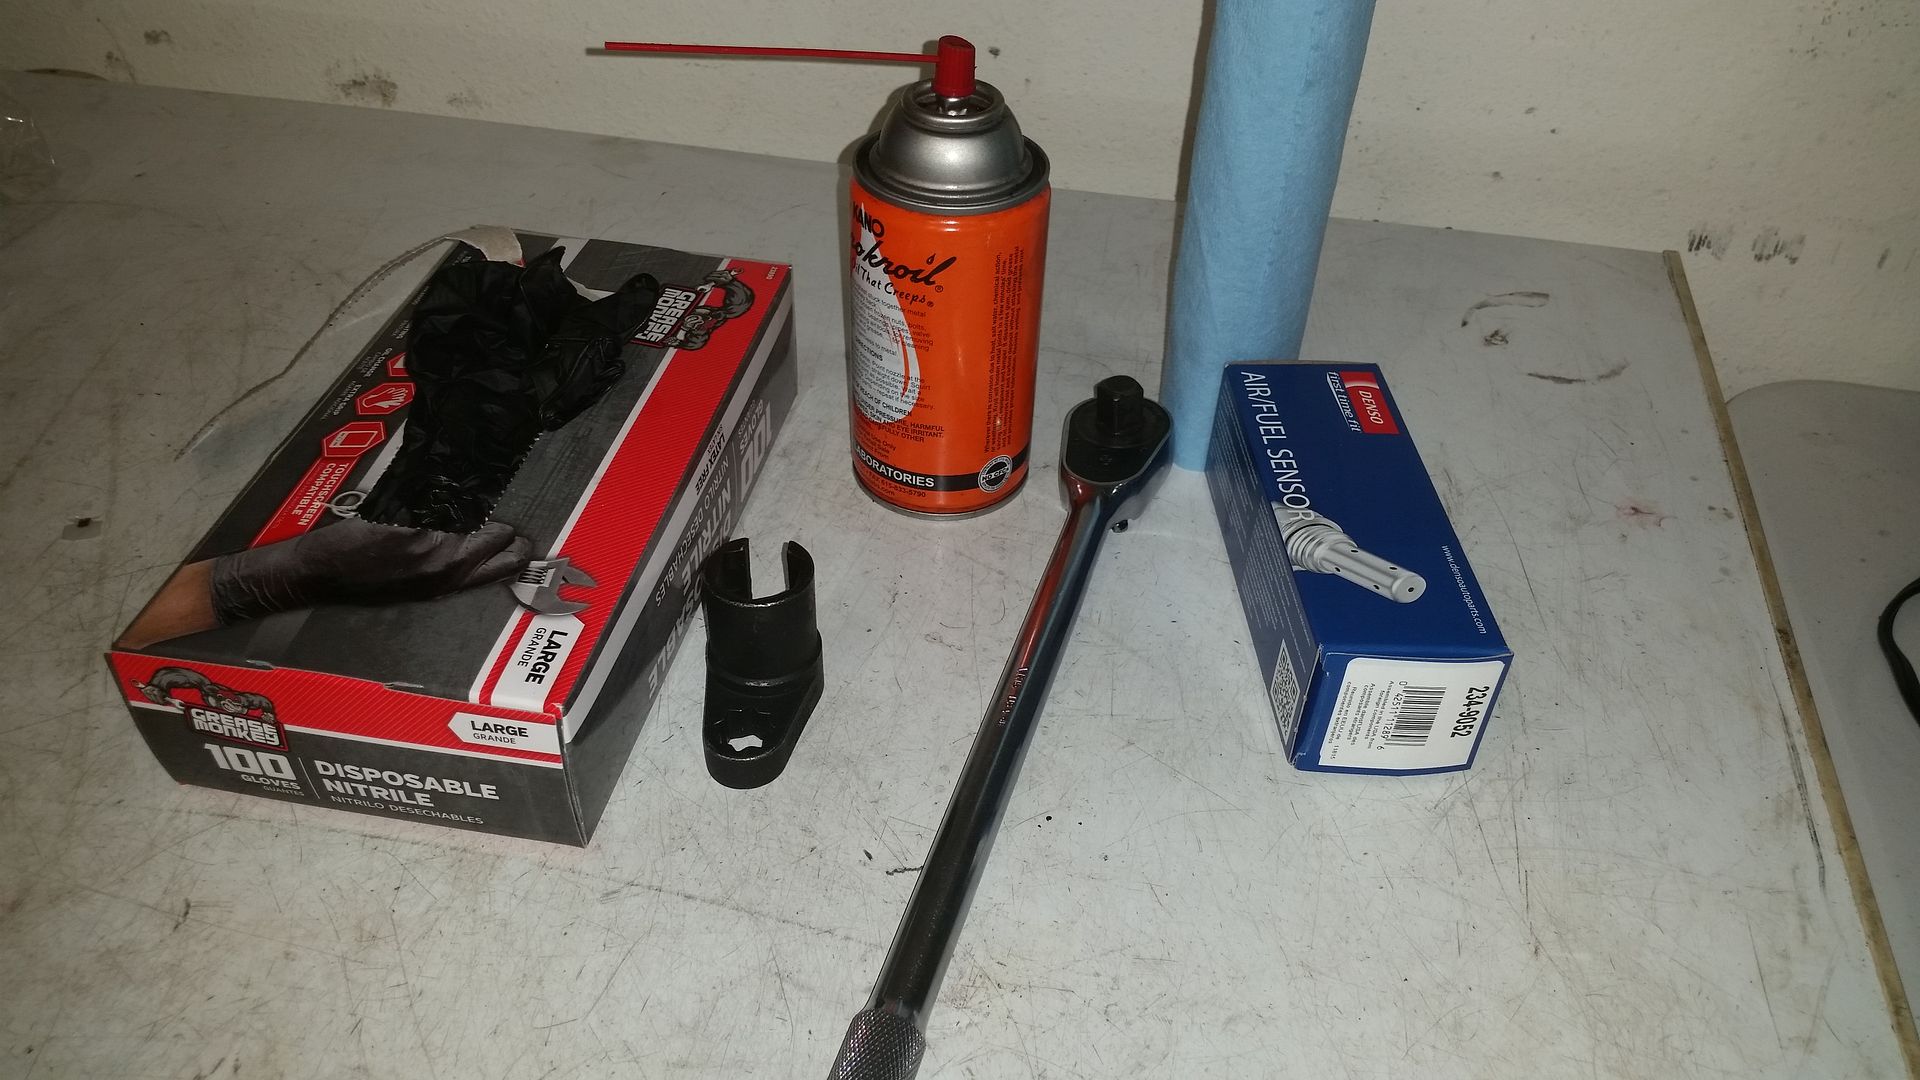
Tools and Parts needed:
1/2 inch Drive Ratchet
1/2 inch Drive 22mm or 7/8 Inch Oxygen Sensor Socket
Small/Pocket Flathead Screwdriver
Penetrating Spray (PB Blaster or similar)
Gloves
Rags or towels
Digital Multimeter (optional but needs to measure resistance)
Part numbers:
OEM Toyota (Denso) -
2003-2004 1ZZFE Corolla, Matrix, Pontiac Vibe FWD - 89465-13030
2005-2008 1ZZFE Corolla, Matrix, Pontiac Vibe FWD - 89467-12010 or 89467-02020
2003-2006 Matrix and Pontiac Vibe AWD - 89467-12010
Denso Aftermarket (Same exact sensor as OEM) -
2003-2004 1ZZFE Corolla, Matrix, Pontiac Vibe FWD - 234-4800
2005-2008 1ZZFE Corolla, Matrix, Pontiac Vibe FWD - 234-9052
2003-2006 Matrix and Pontiac Vibe AWD - 234-4801
Warning: A hot engine can cause burns. Be sure the vehicle is cool before attempting this repair.
1. Park your car on a level surface, shut the engine off, and open the hood.

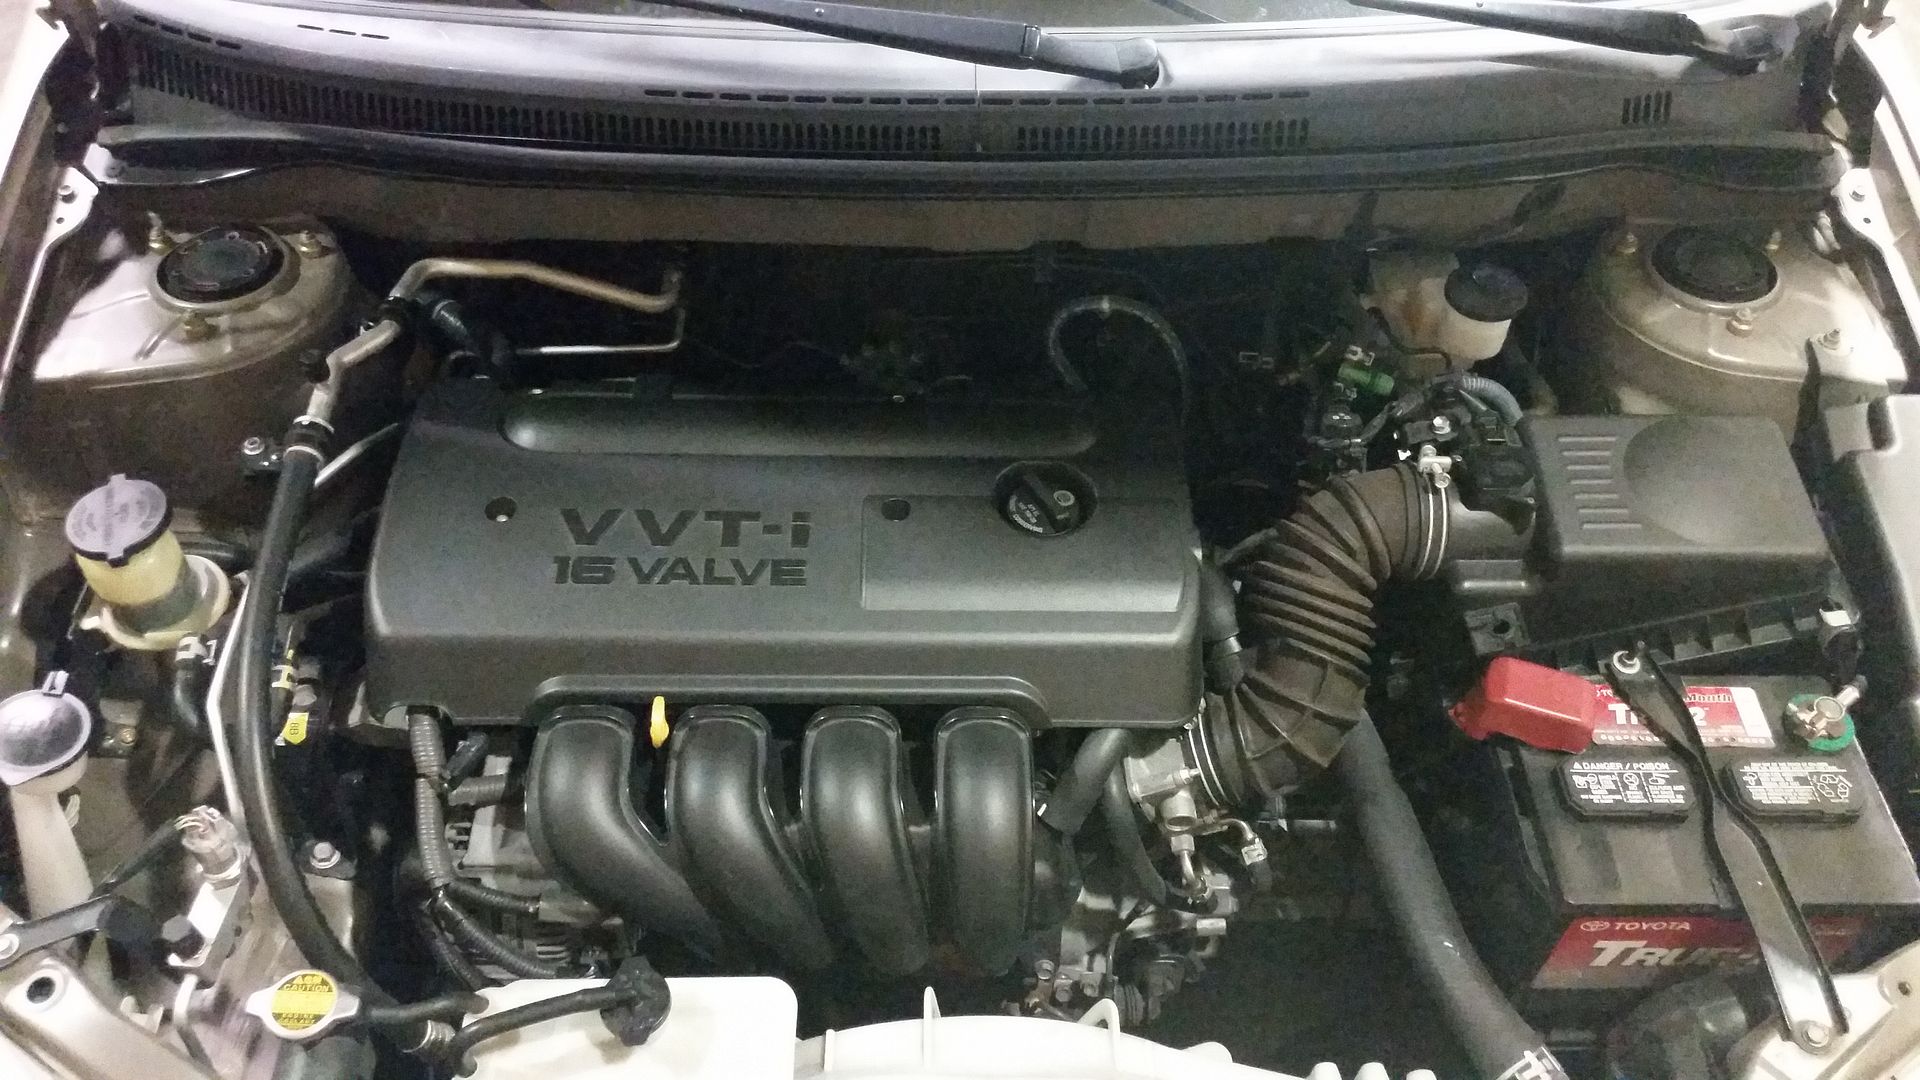
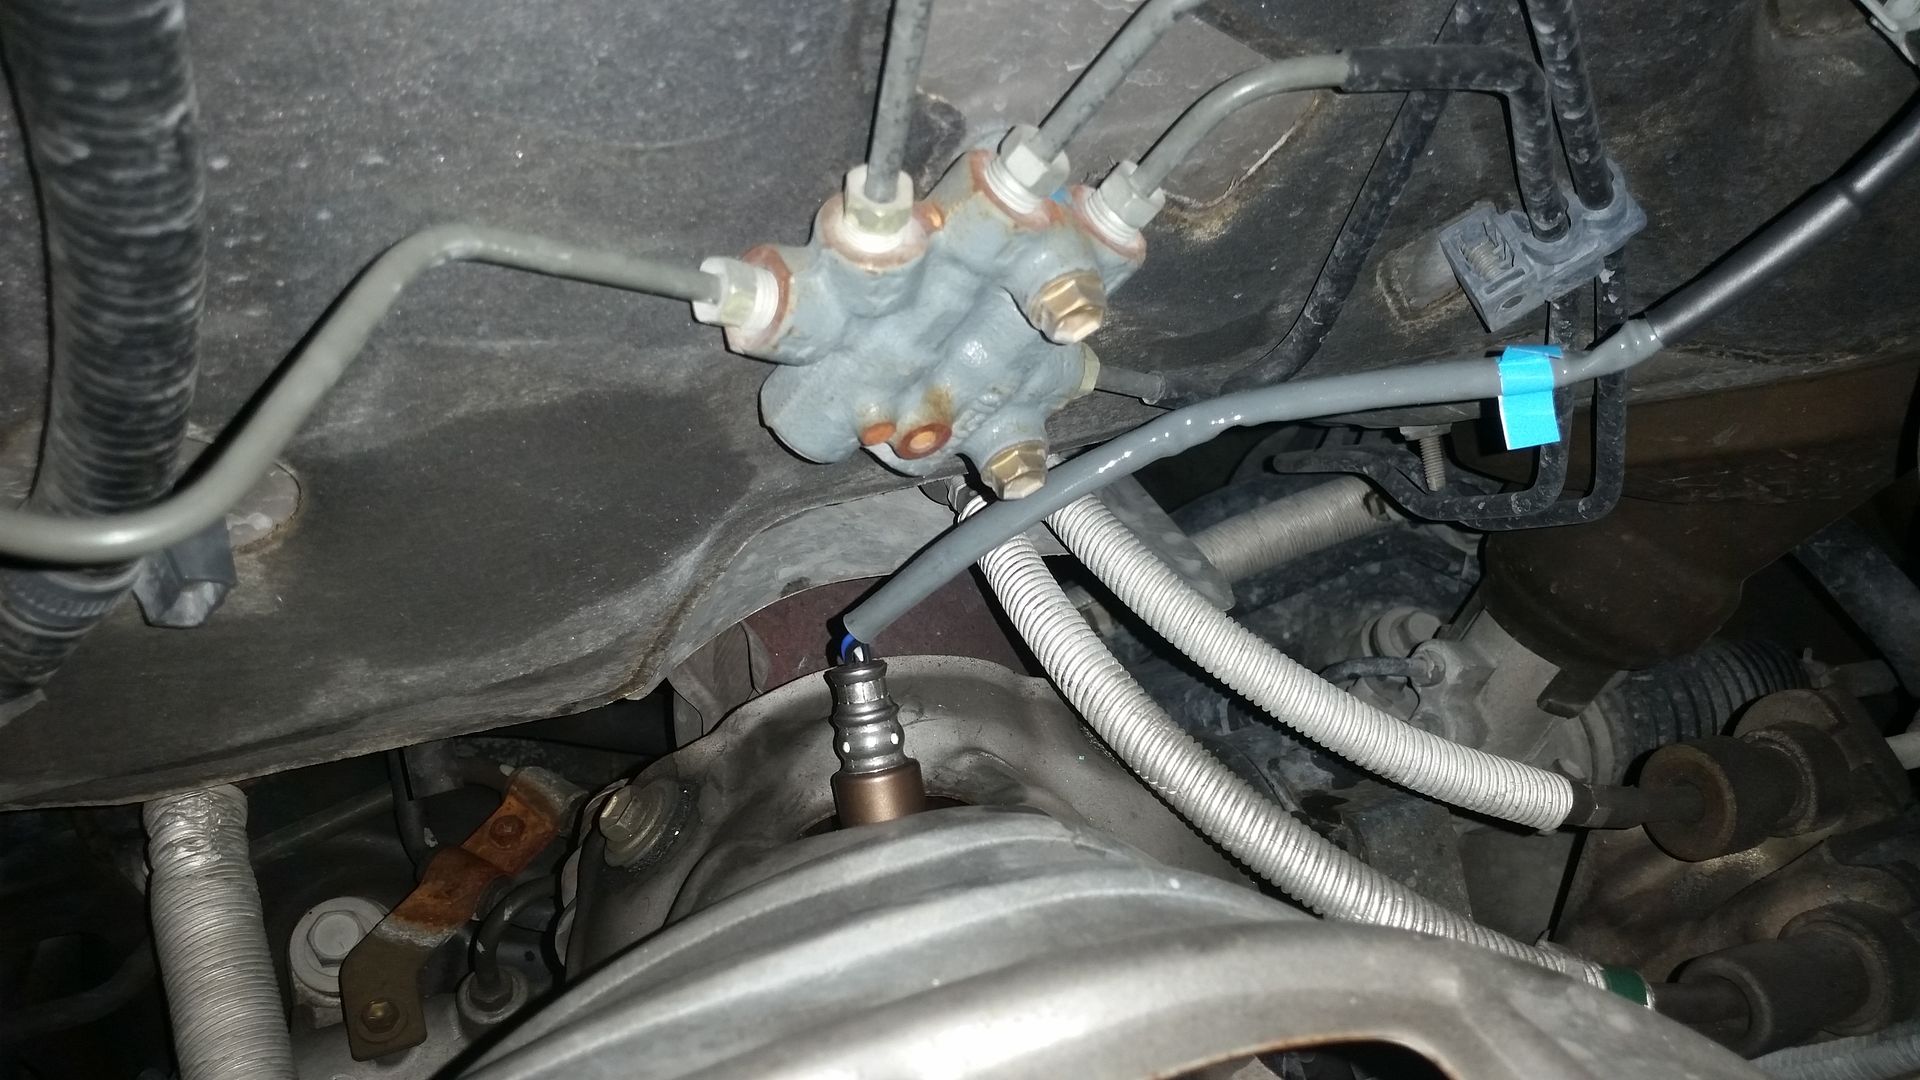
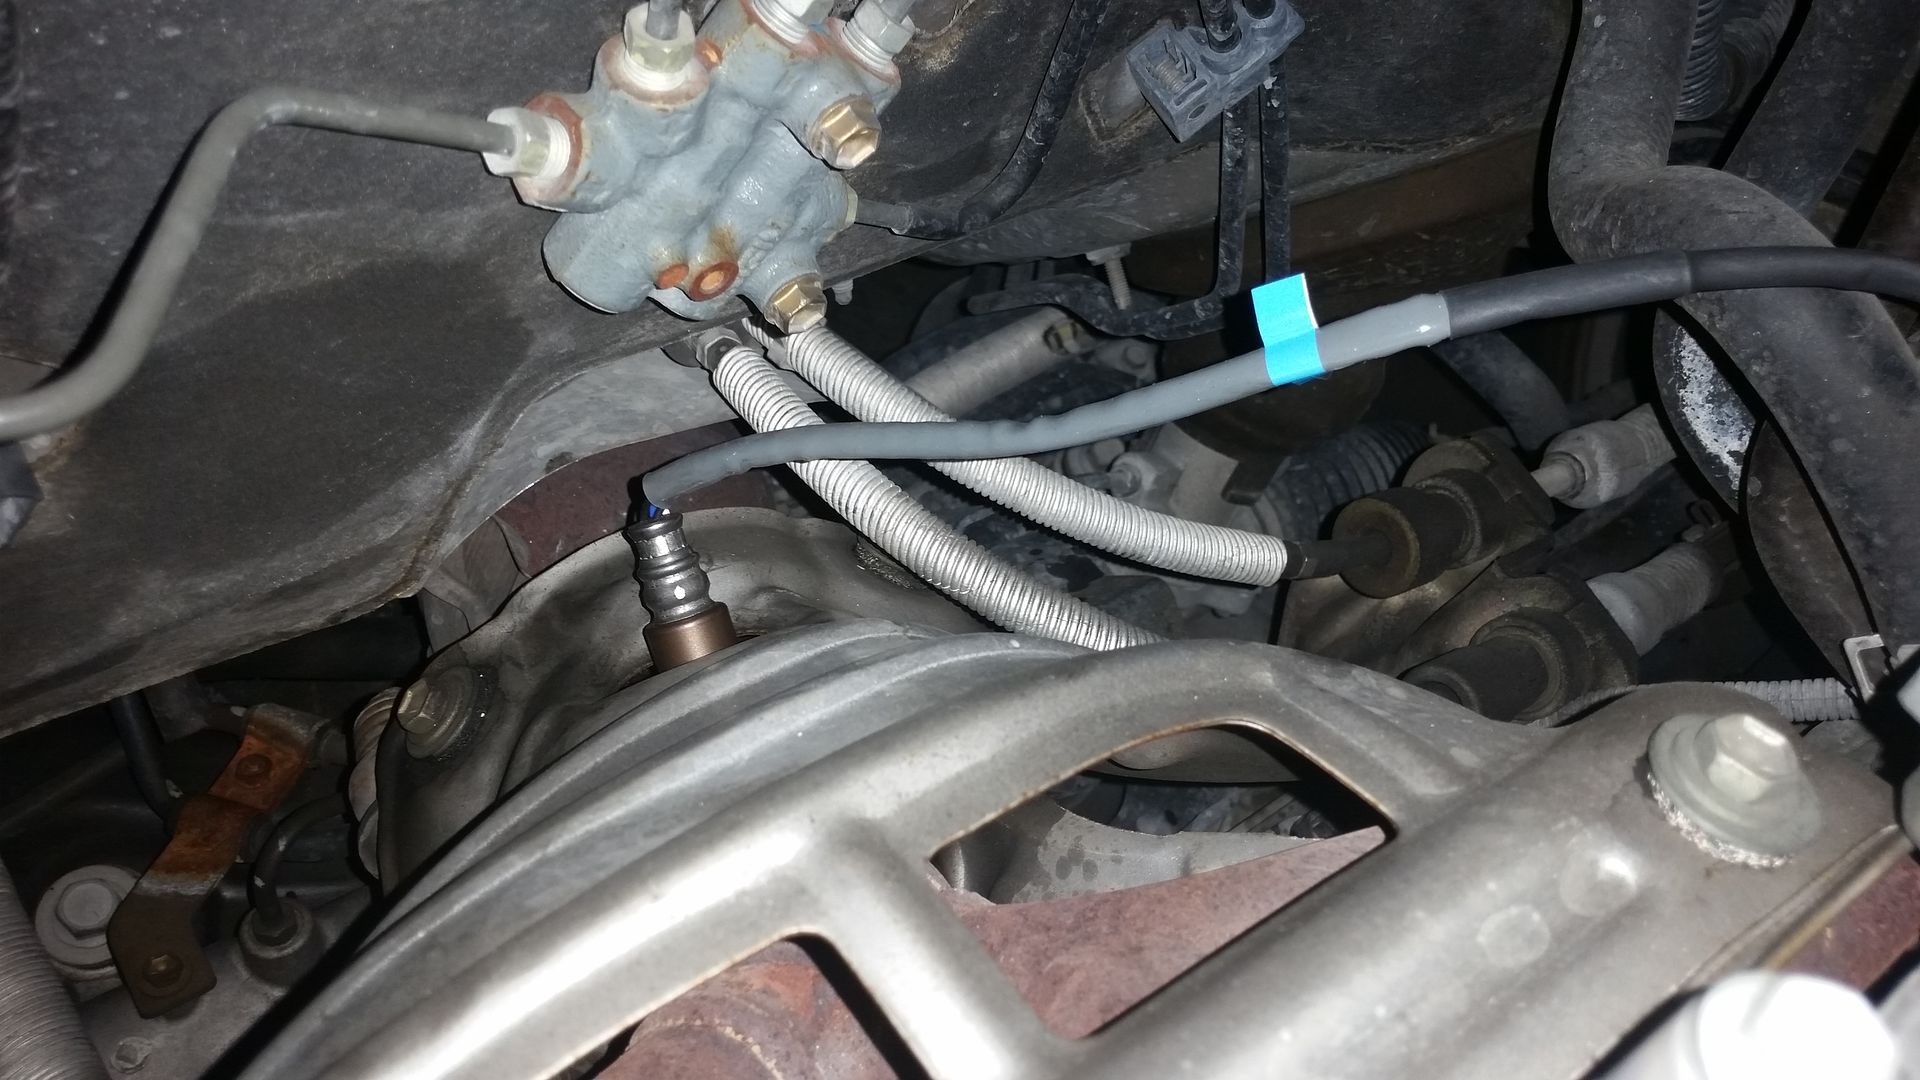
2. Locate the oxygen sensor on the exhaust manifold.

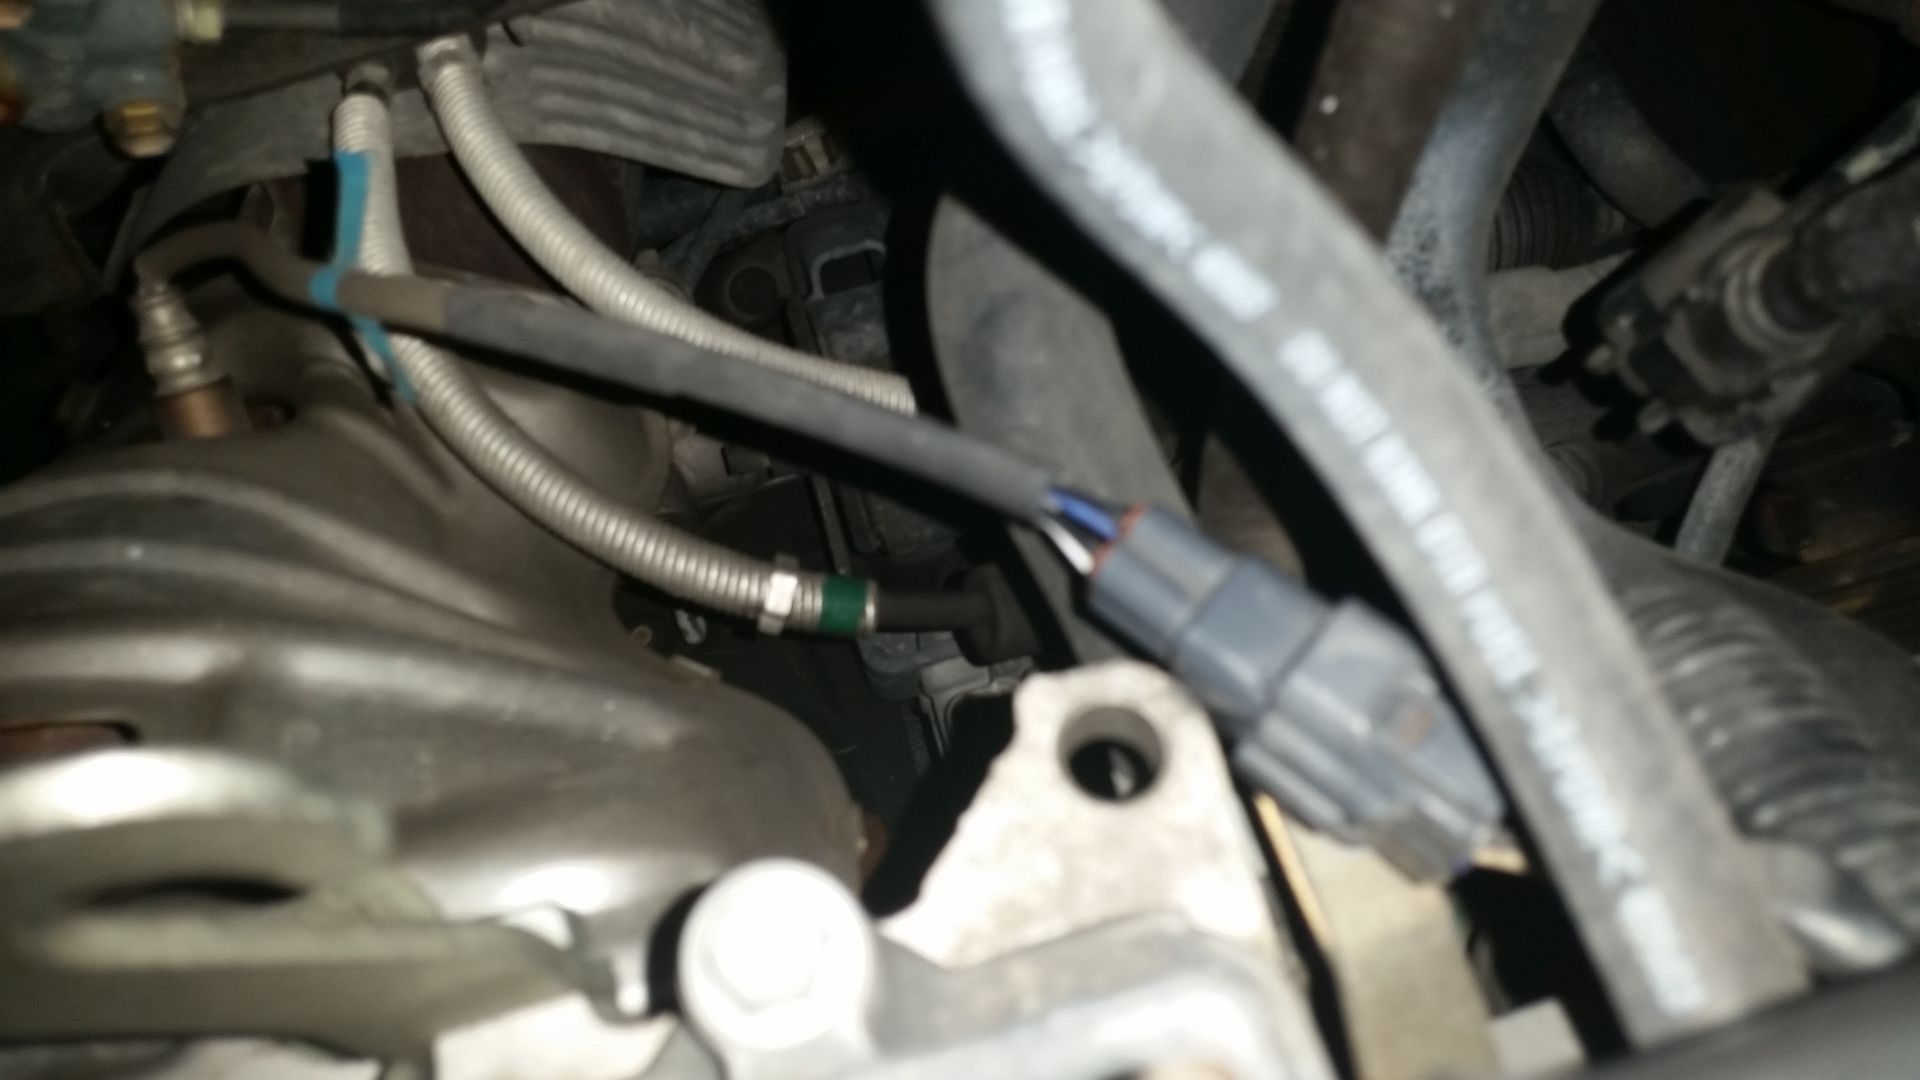

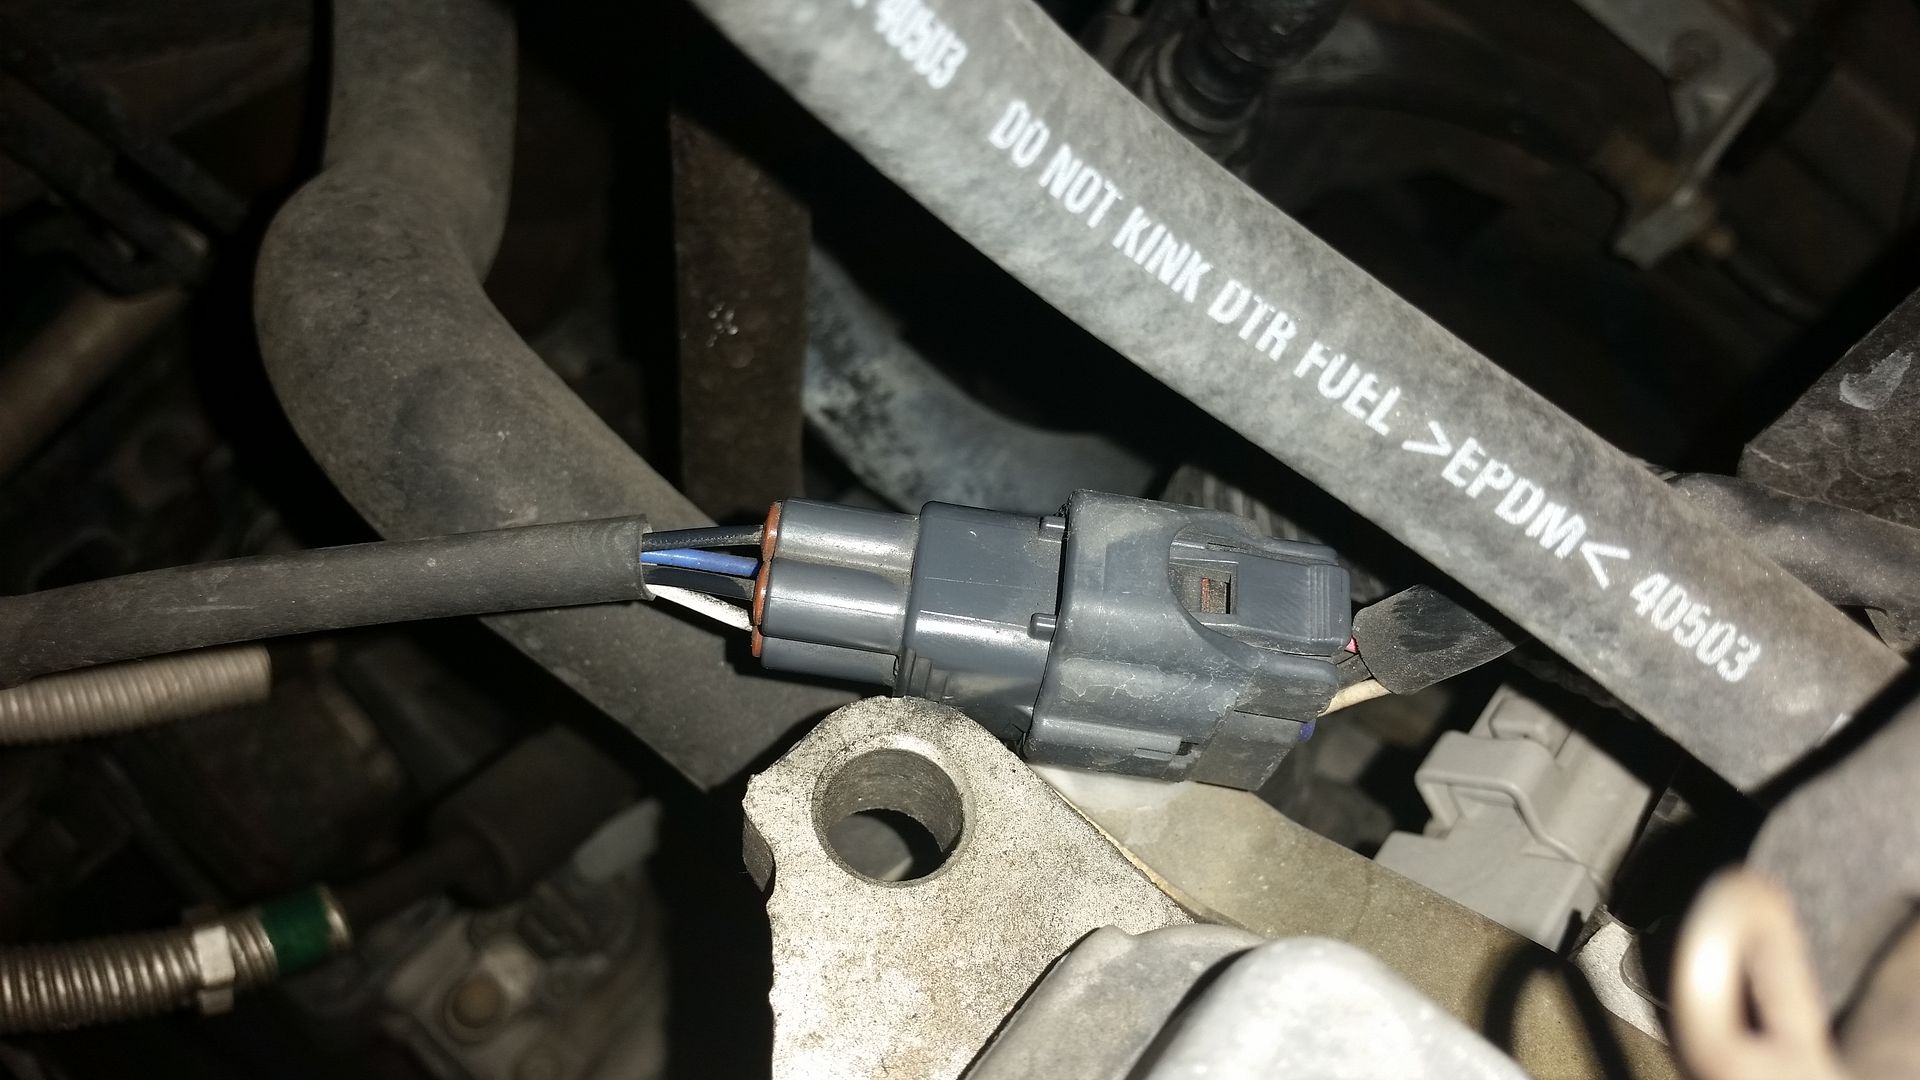
3. Remove the AF/O2 sensor connector. Using your hands or small flathead screwdriver, depress the center of the AF/O2 sensor connector.
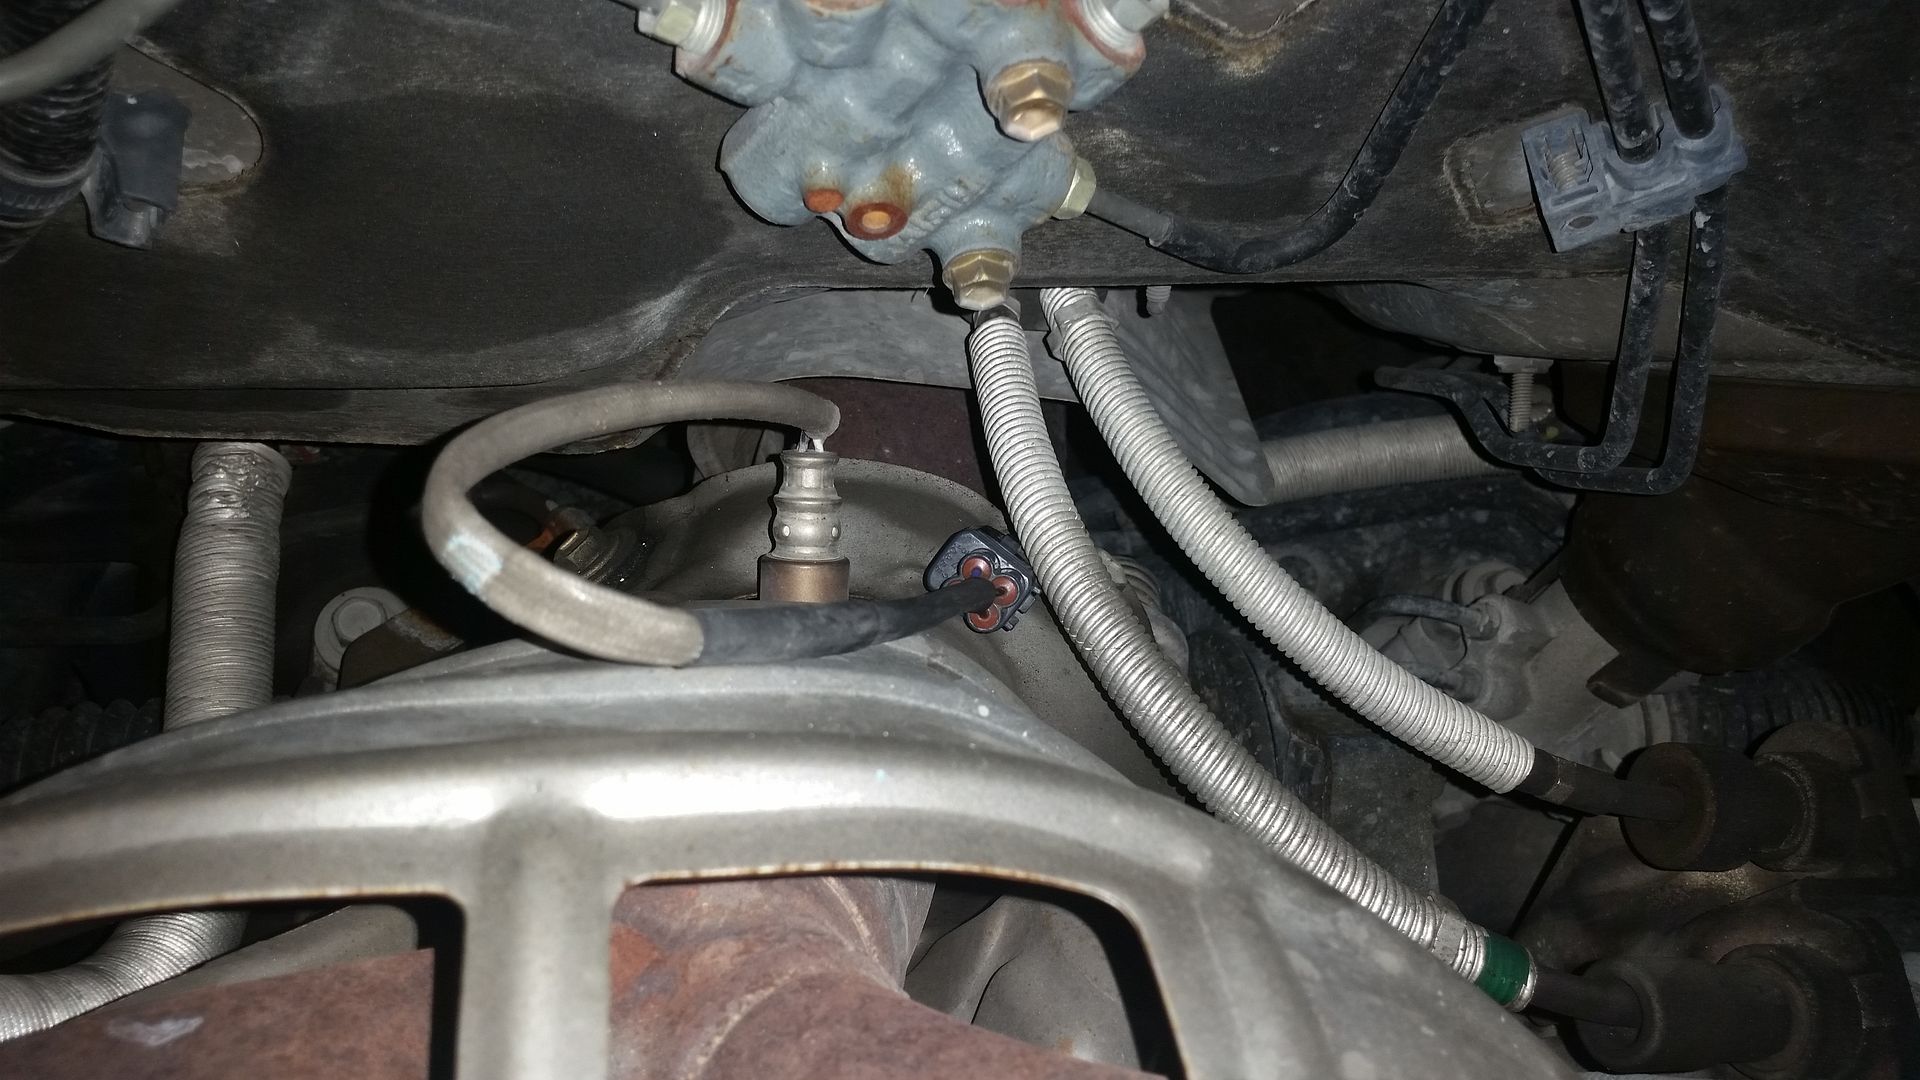
4. Apply penetrating lubricant to the sensor threads. Apply your penetrating lubricant onto the threads of the exhaust manifold where the old sensor is located.
Note: Only apply enough to get on the threads. Since you don’t have a good view of the threads, you don’t want a large amount of penetrating lubricant on the exhaust pipe.
Note: After several minutes, hours, or days (depending on your specific location eg: rust belt states) prepare to remove the sensor. For my car, I waited maybe 5 minutes and the sensor came right out. I have worked on other cars where the sensor was so seized, it stripped the threads and had to be retapped.

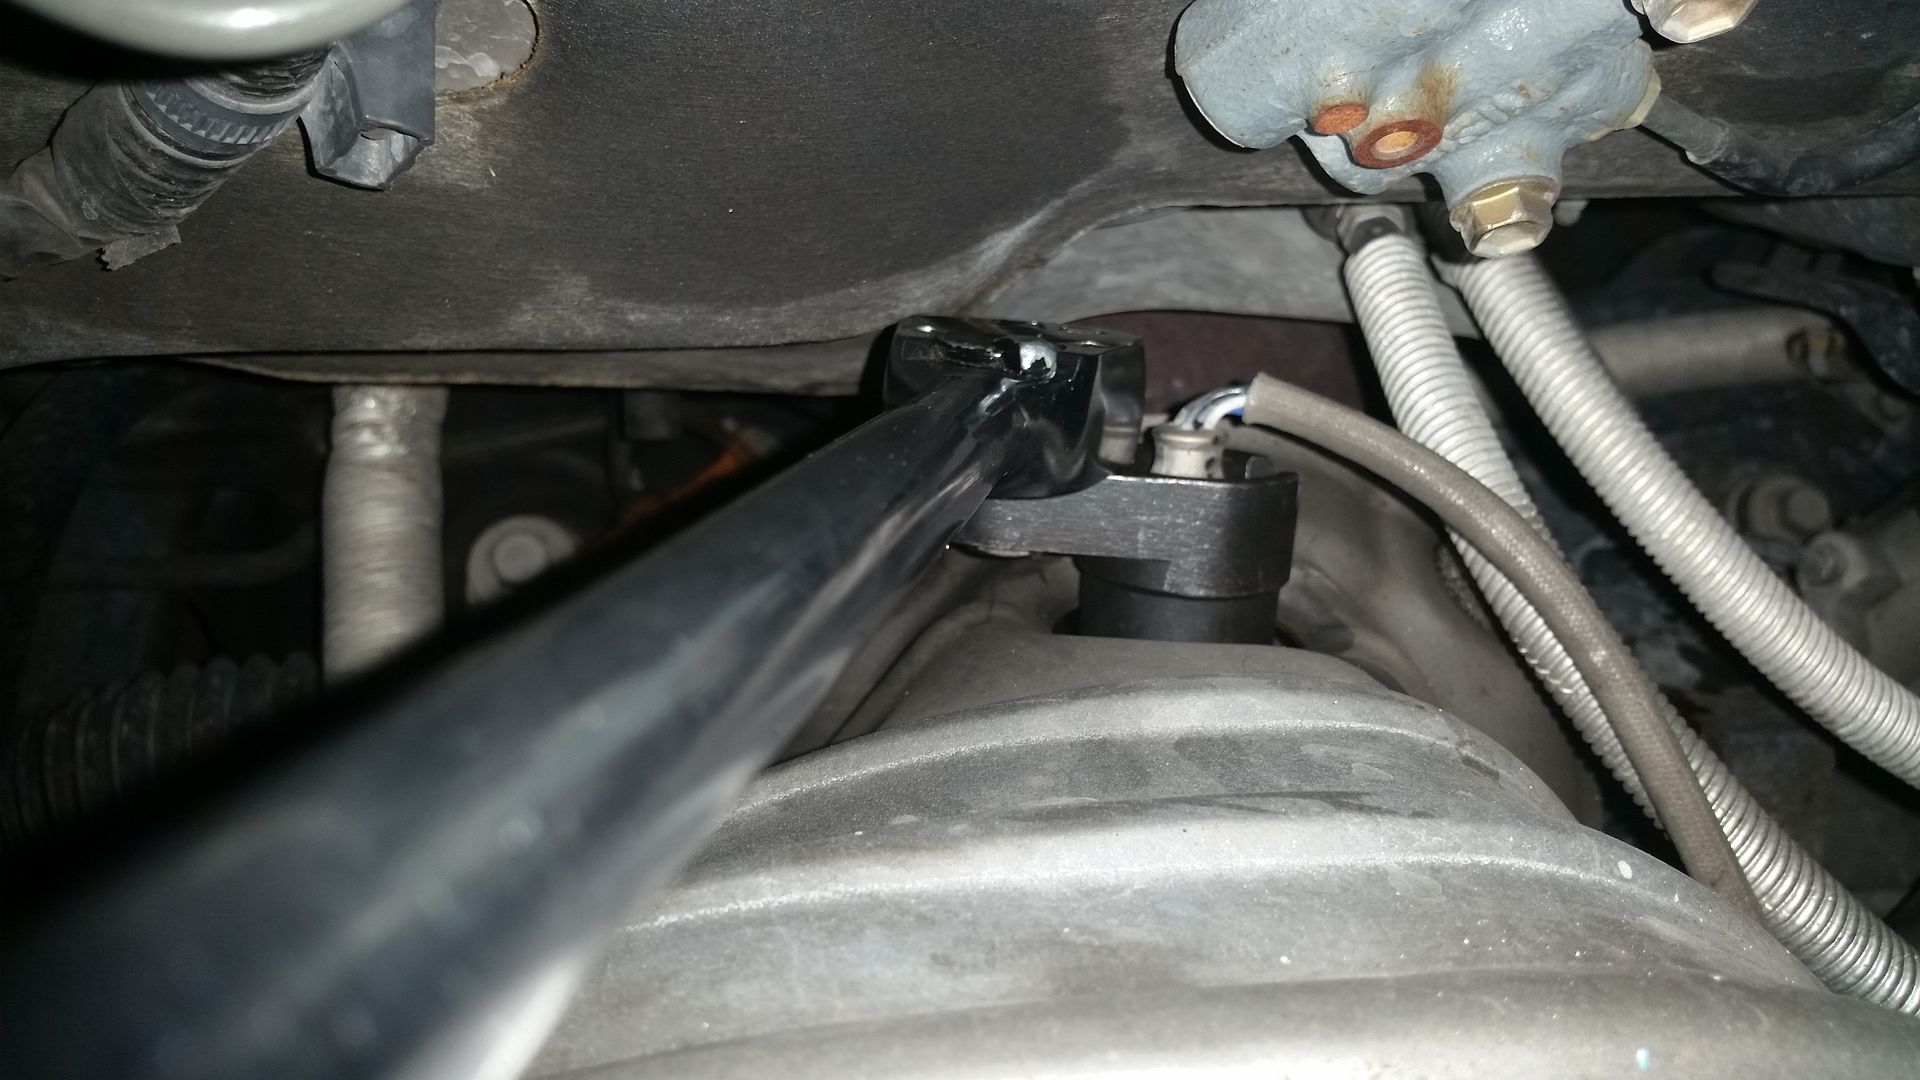
5. Remove the AF/O2 sensor. Place your special 22mm or 7/8 inch oxygen sensor socket over the oxygen sensor in a way that you can attach your ratchet (ratchet portion towards you). Using your ½ inch drive ratchet, loosen the sensor from the manifold. Once the sensor is loose, use your hands to remove it all of the way and remove it from the vehicle.

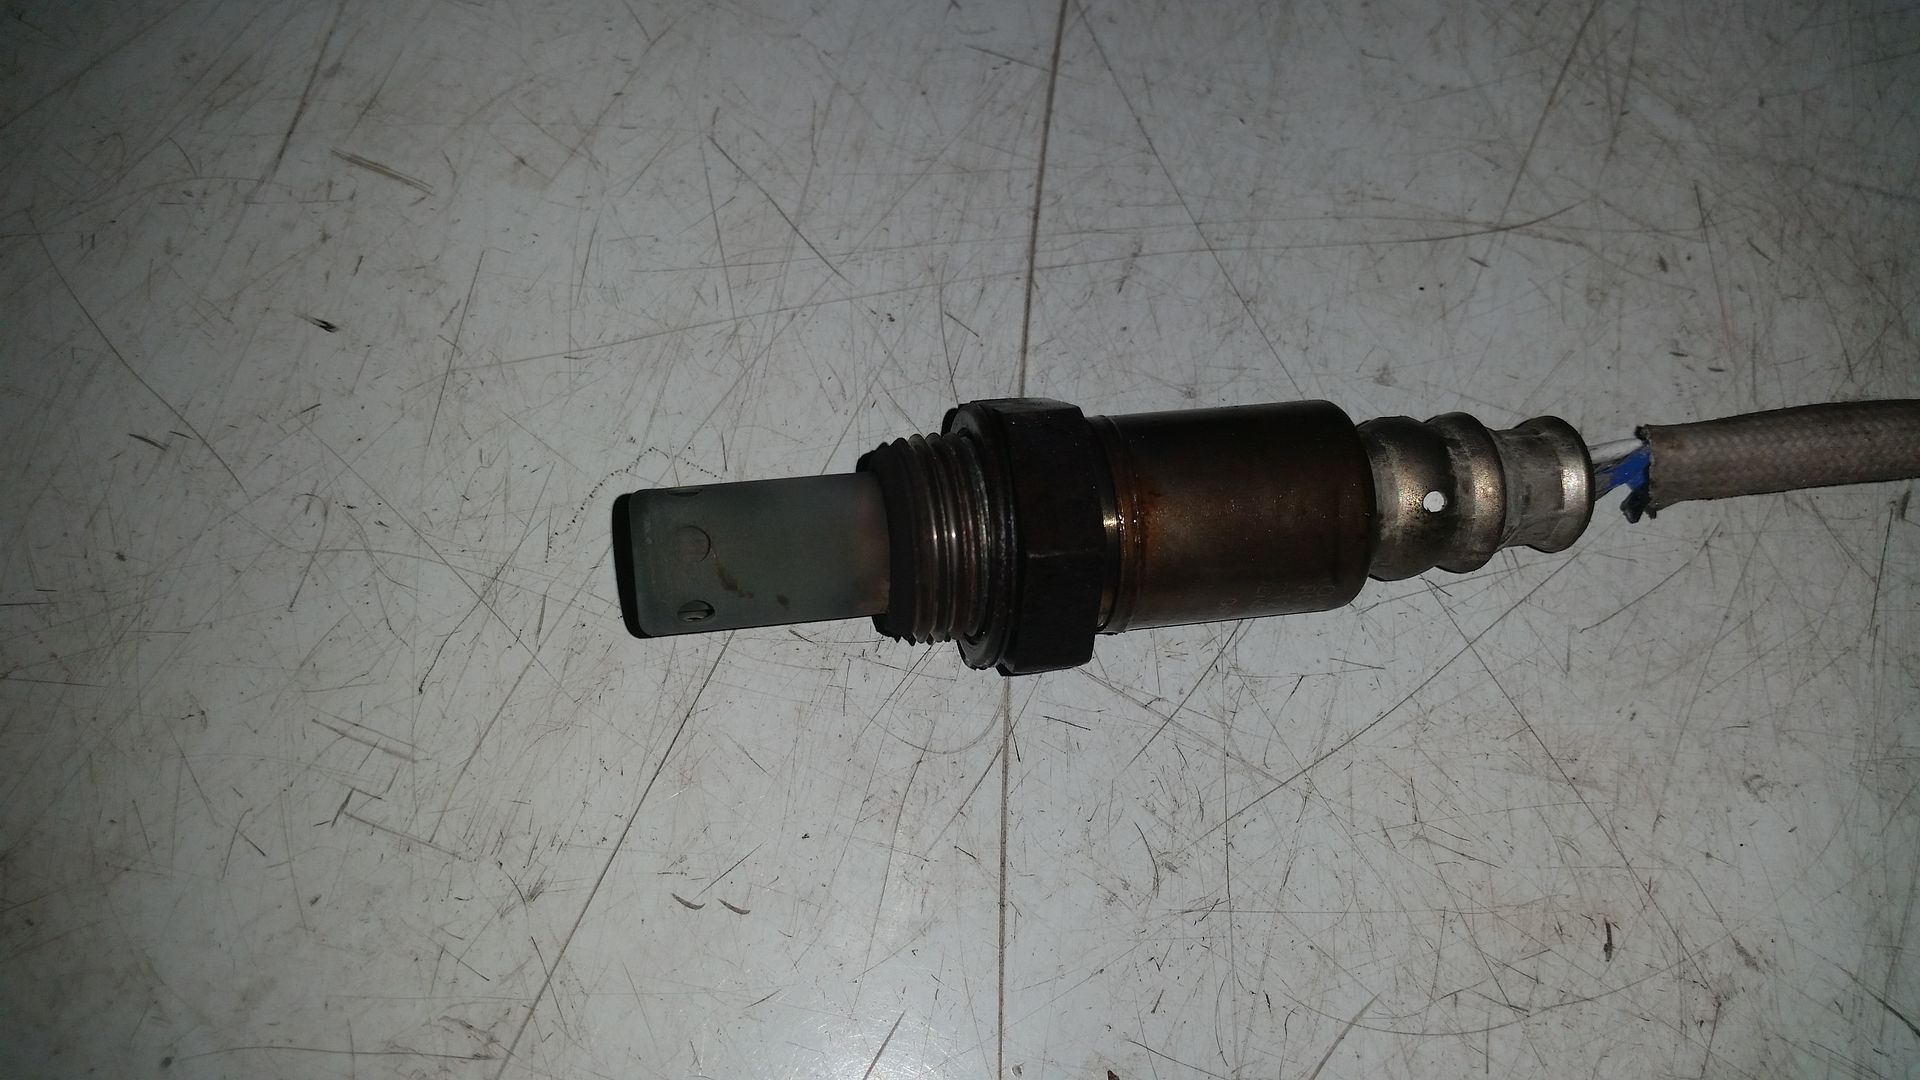
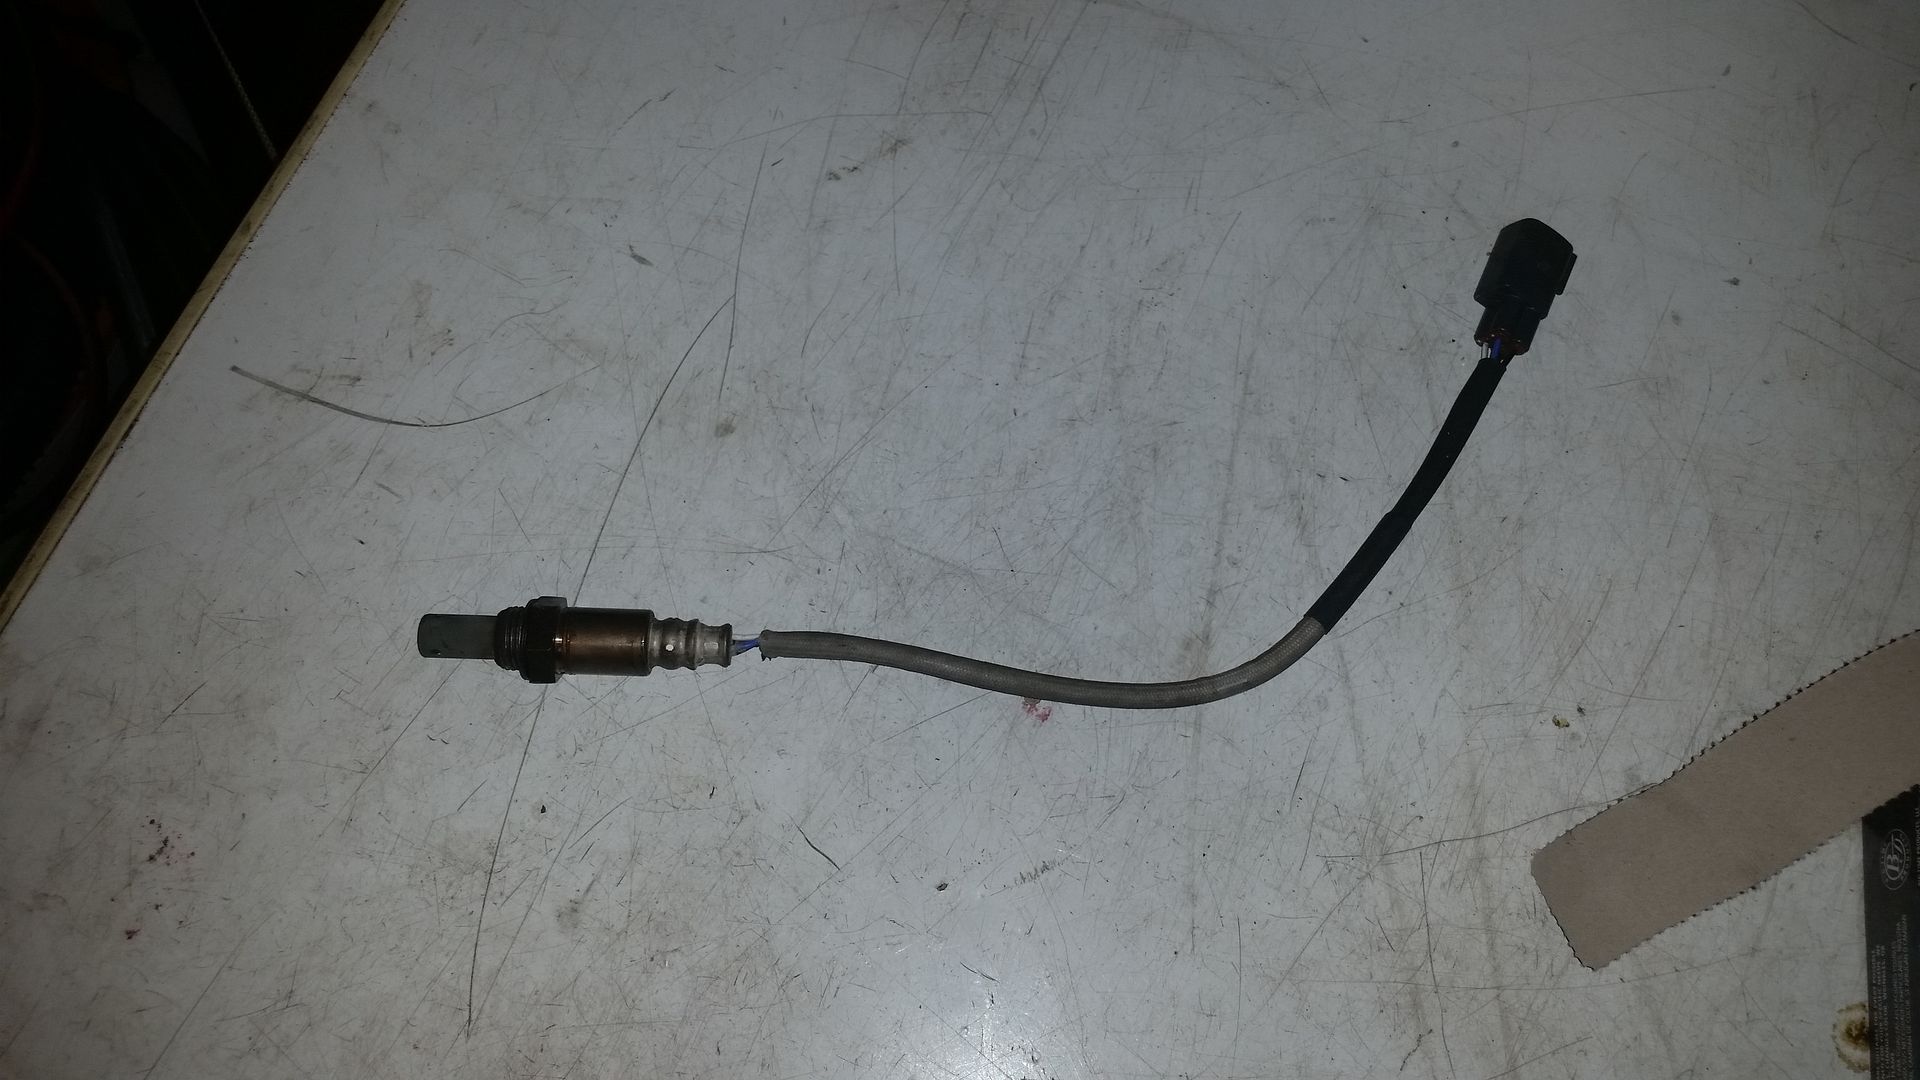
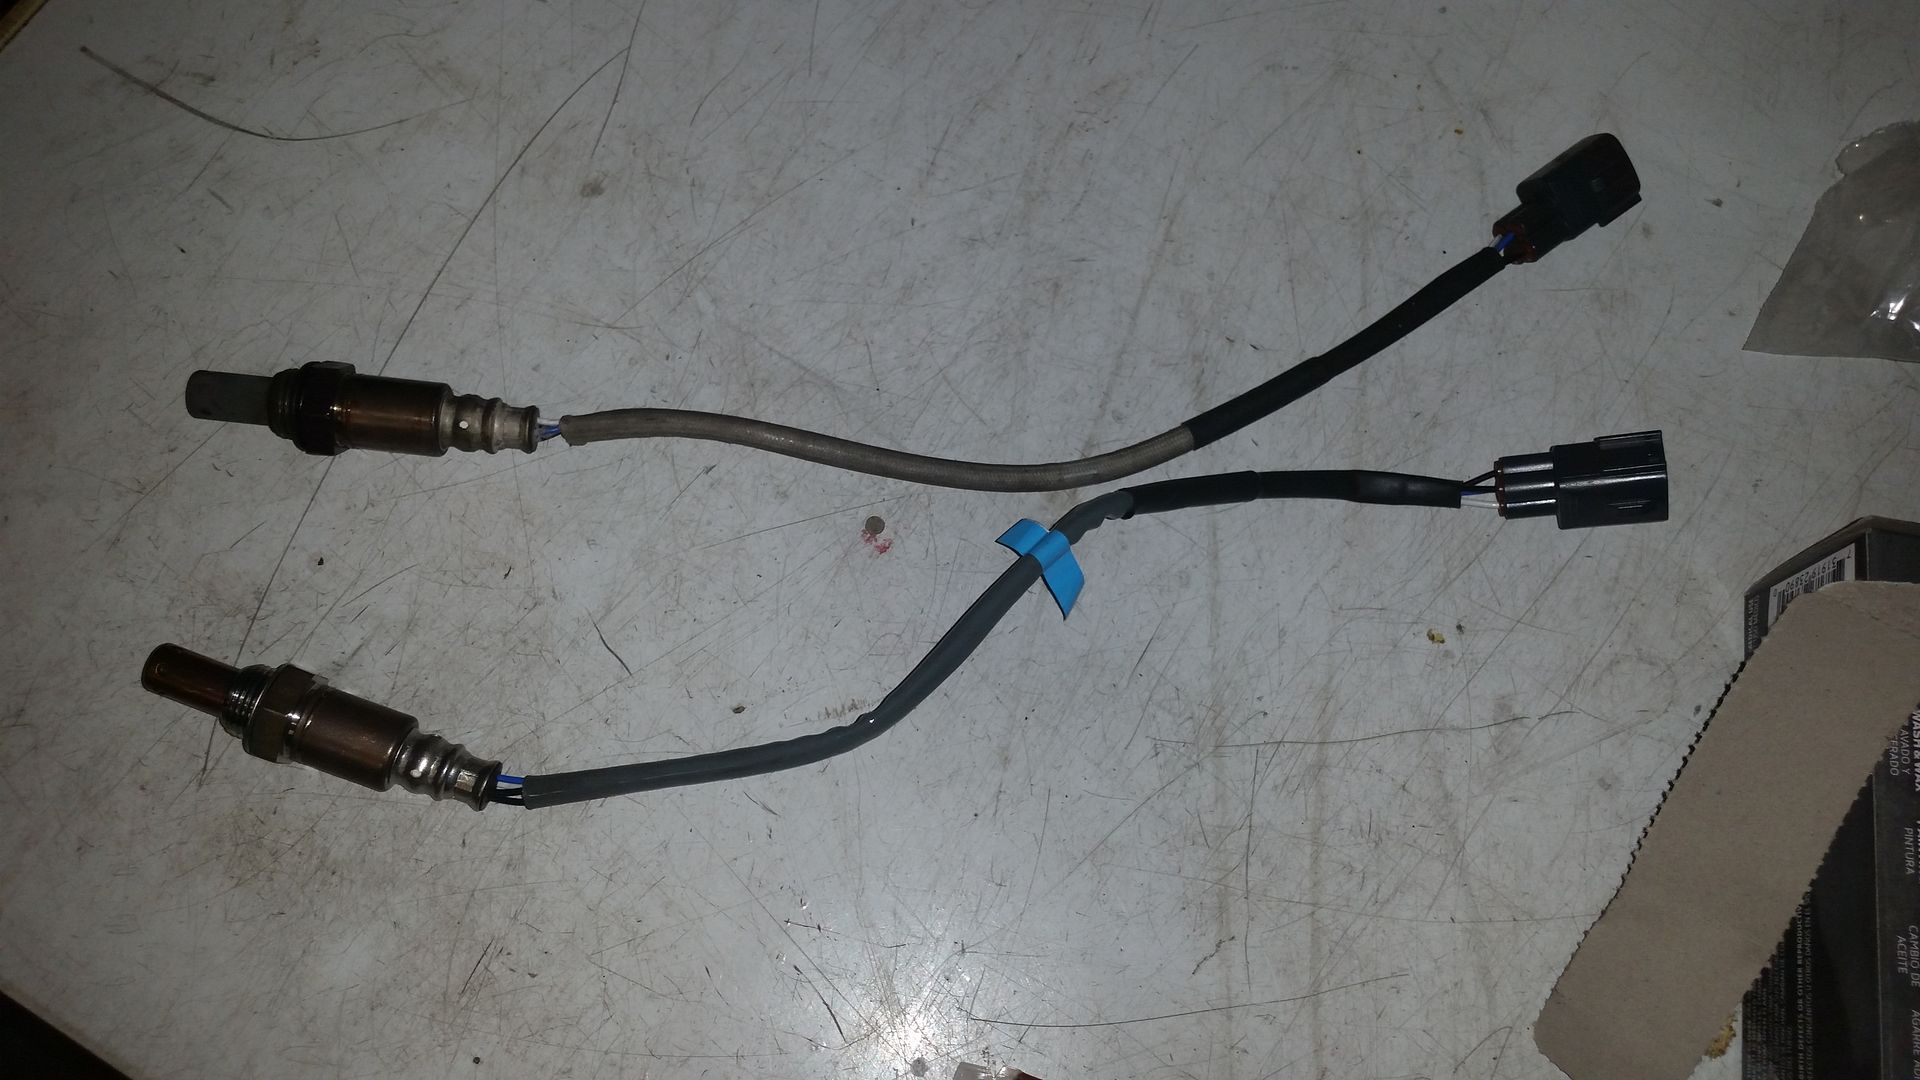
6. Inspect your new sensor (optional). Once removed, compare the old sensor side by side with the new sensor to verify they are the same. Using your digital multimeter set to measure resistance (ohms), check the resistance value of the heater circuit of the AF/O2 sensor and verify the sensor is good before install.
2003-2004 FWD models and 2003-2006 AWD models: 5-16 ohms at 68°F
2005-2008 models: 1.8-3.4 ohms at 68°F
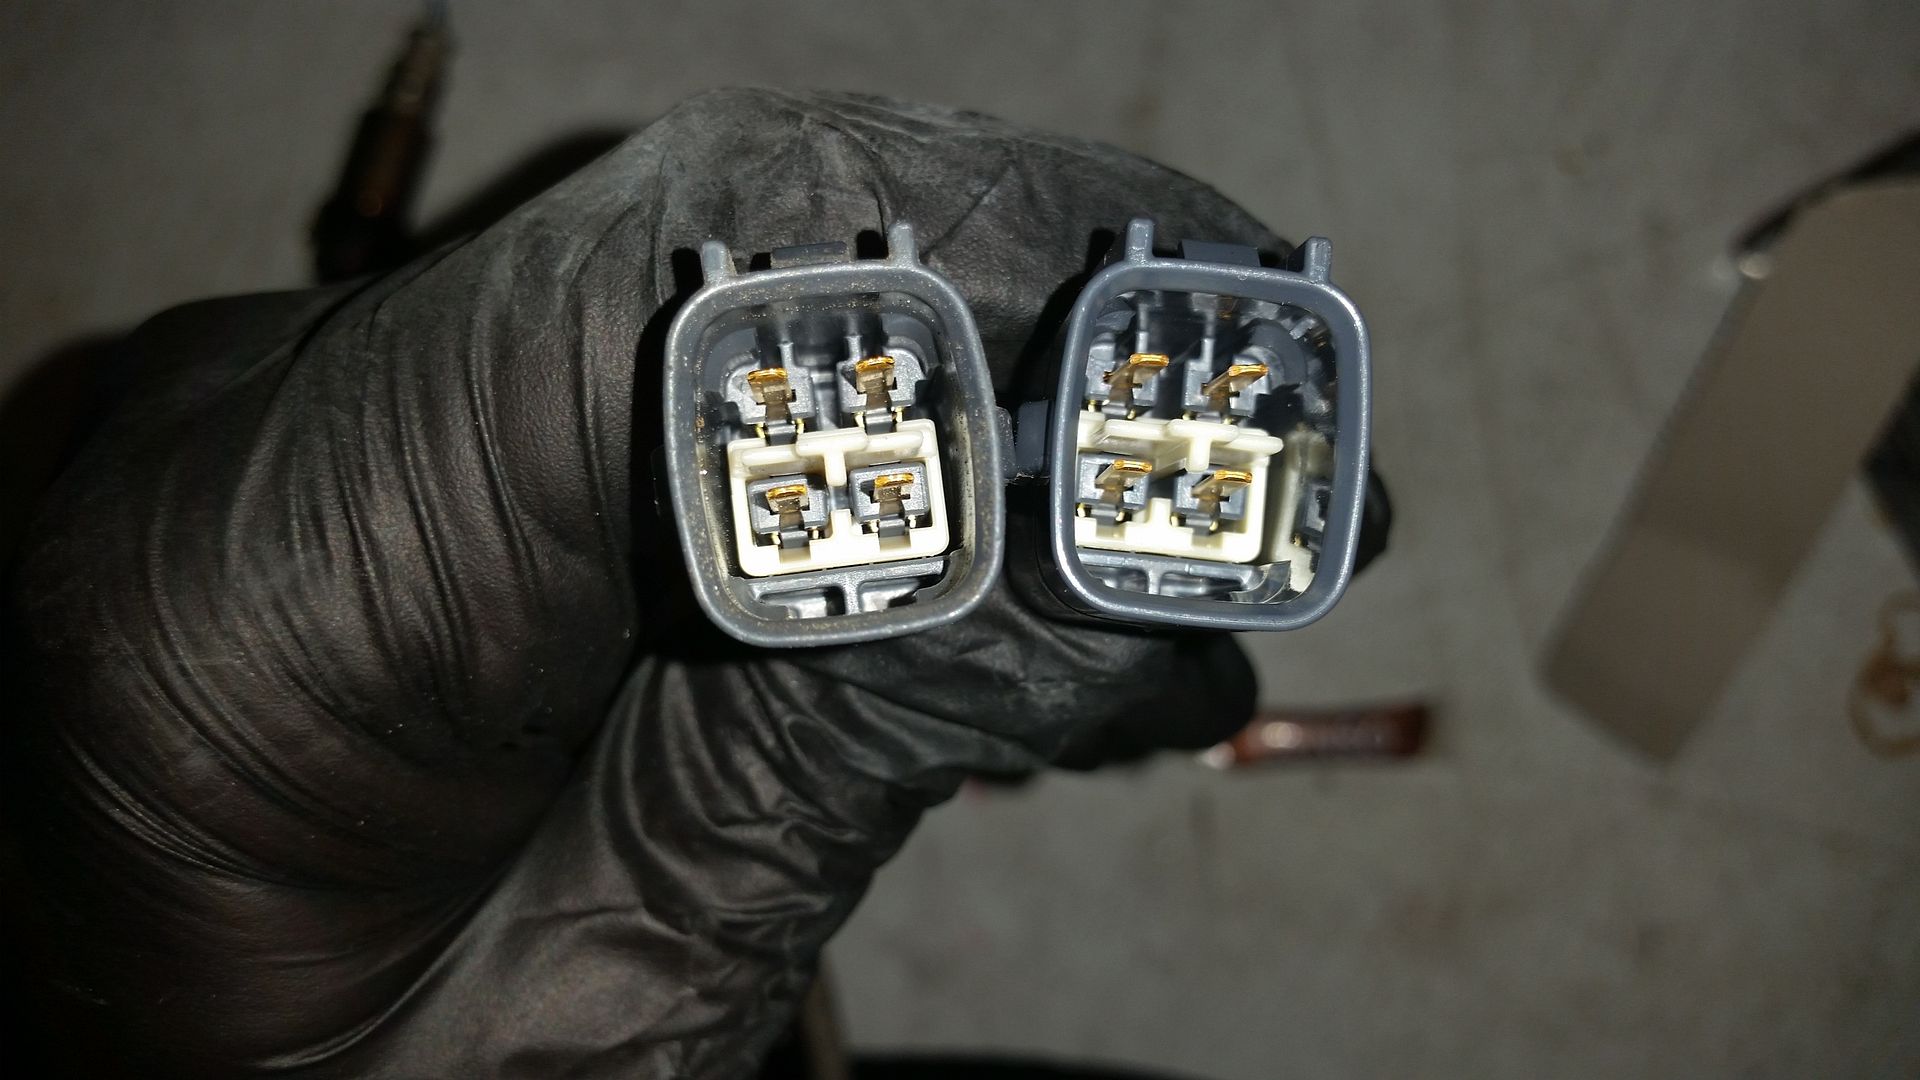
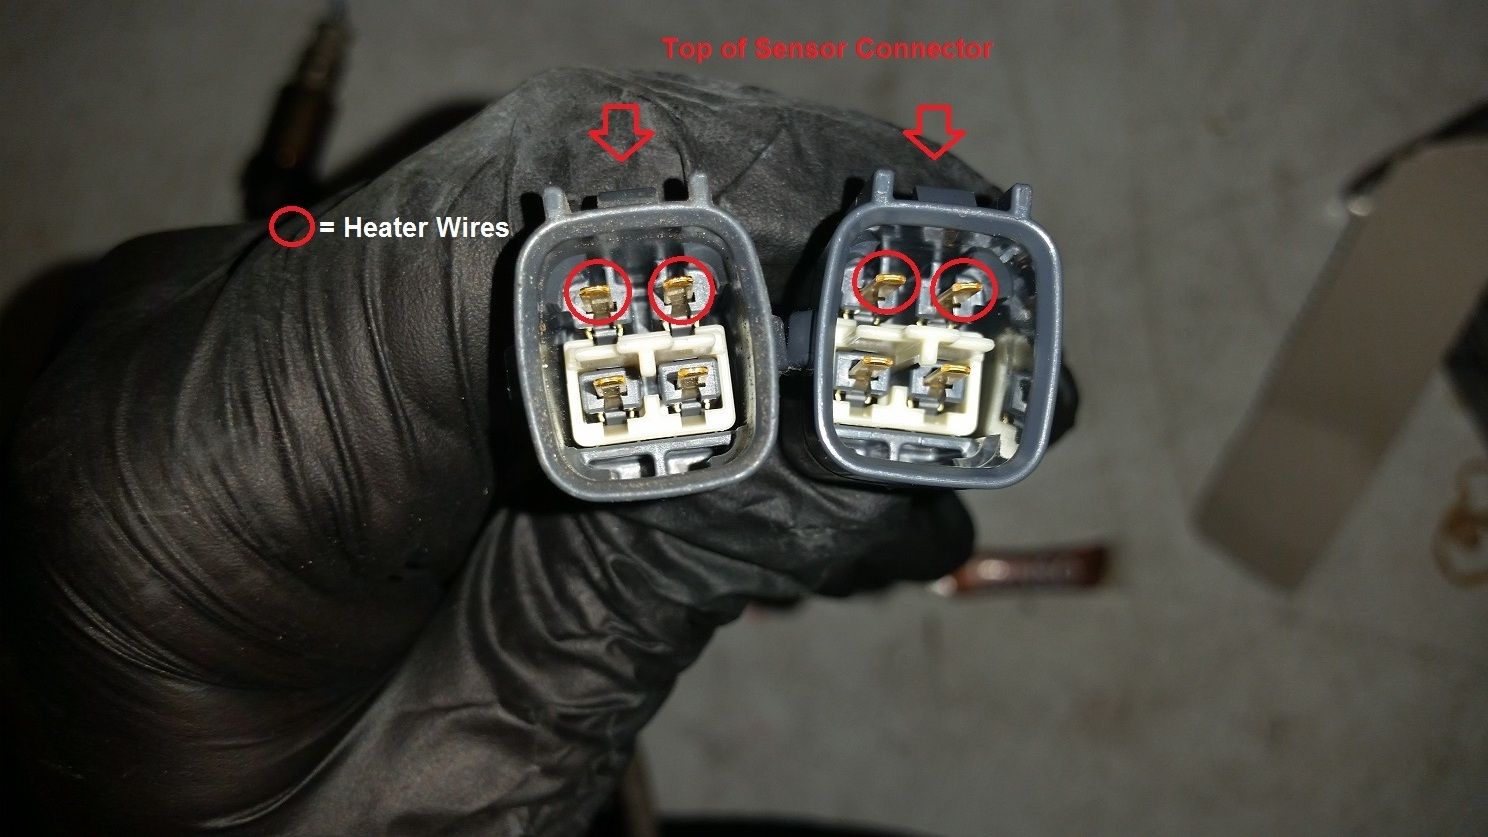
Note: The heater wires are the two black wires located at the top of the connector.

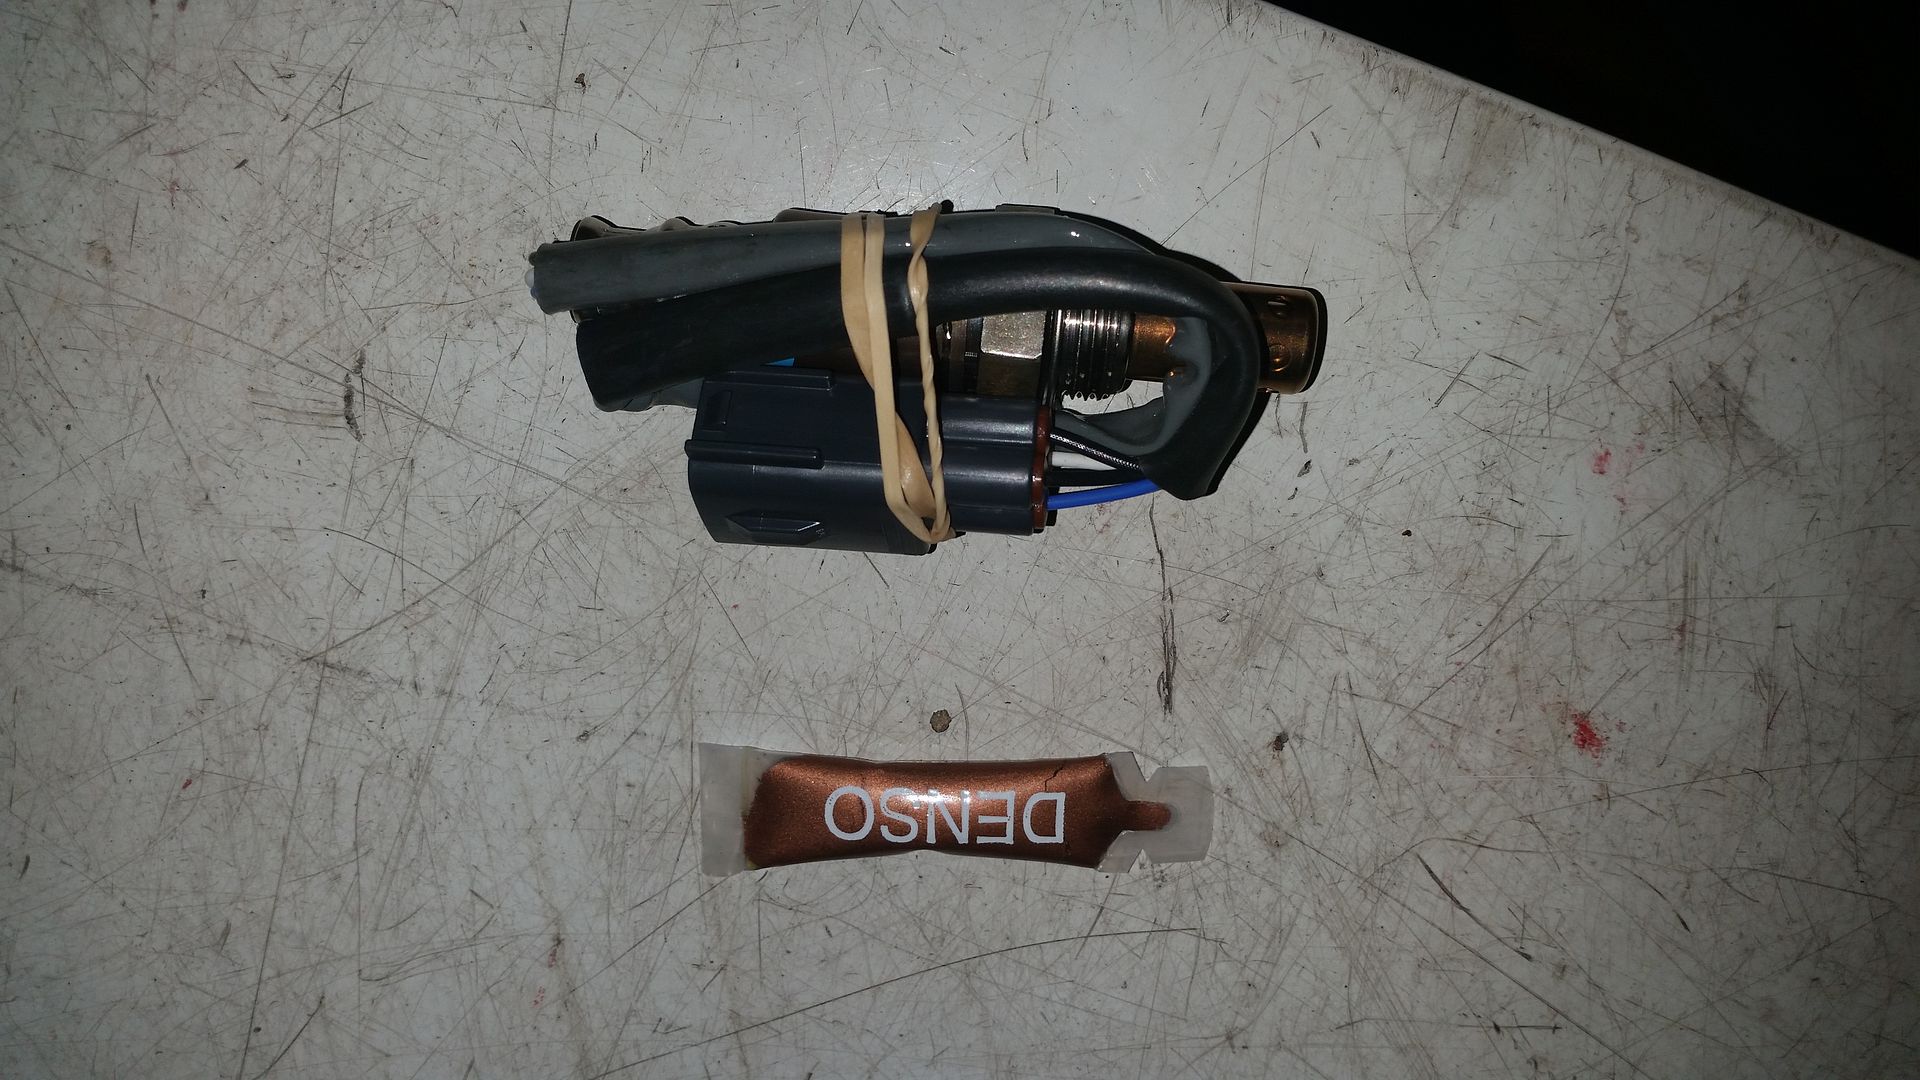
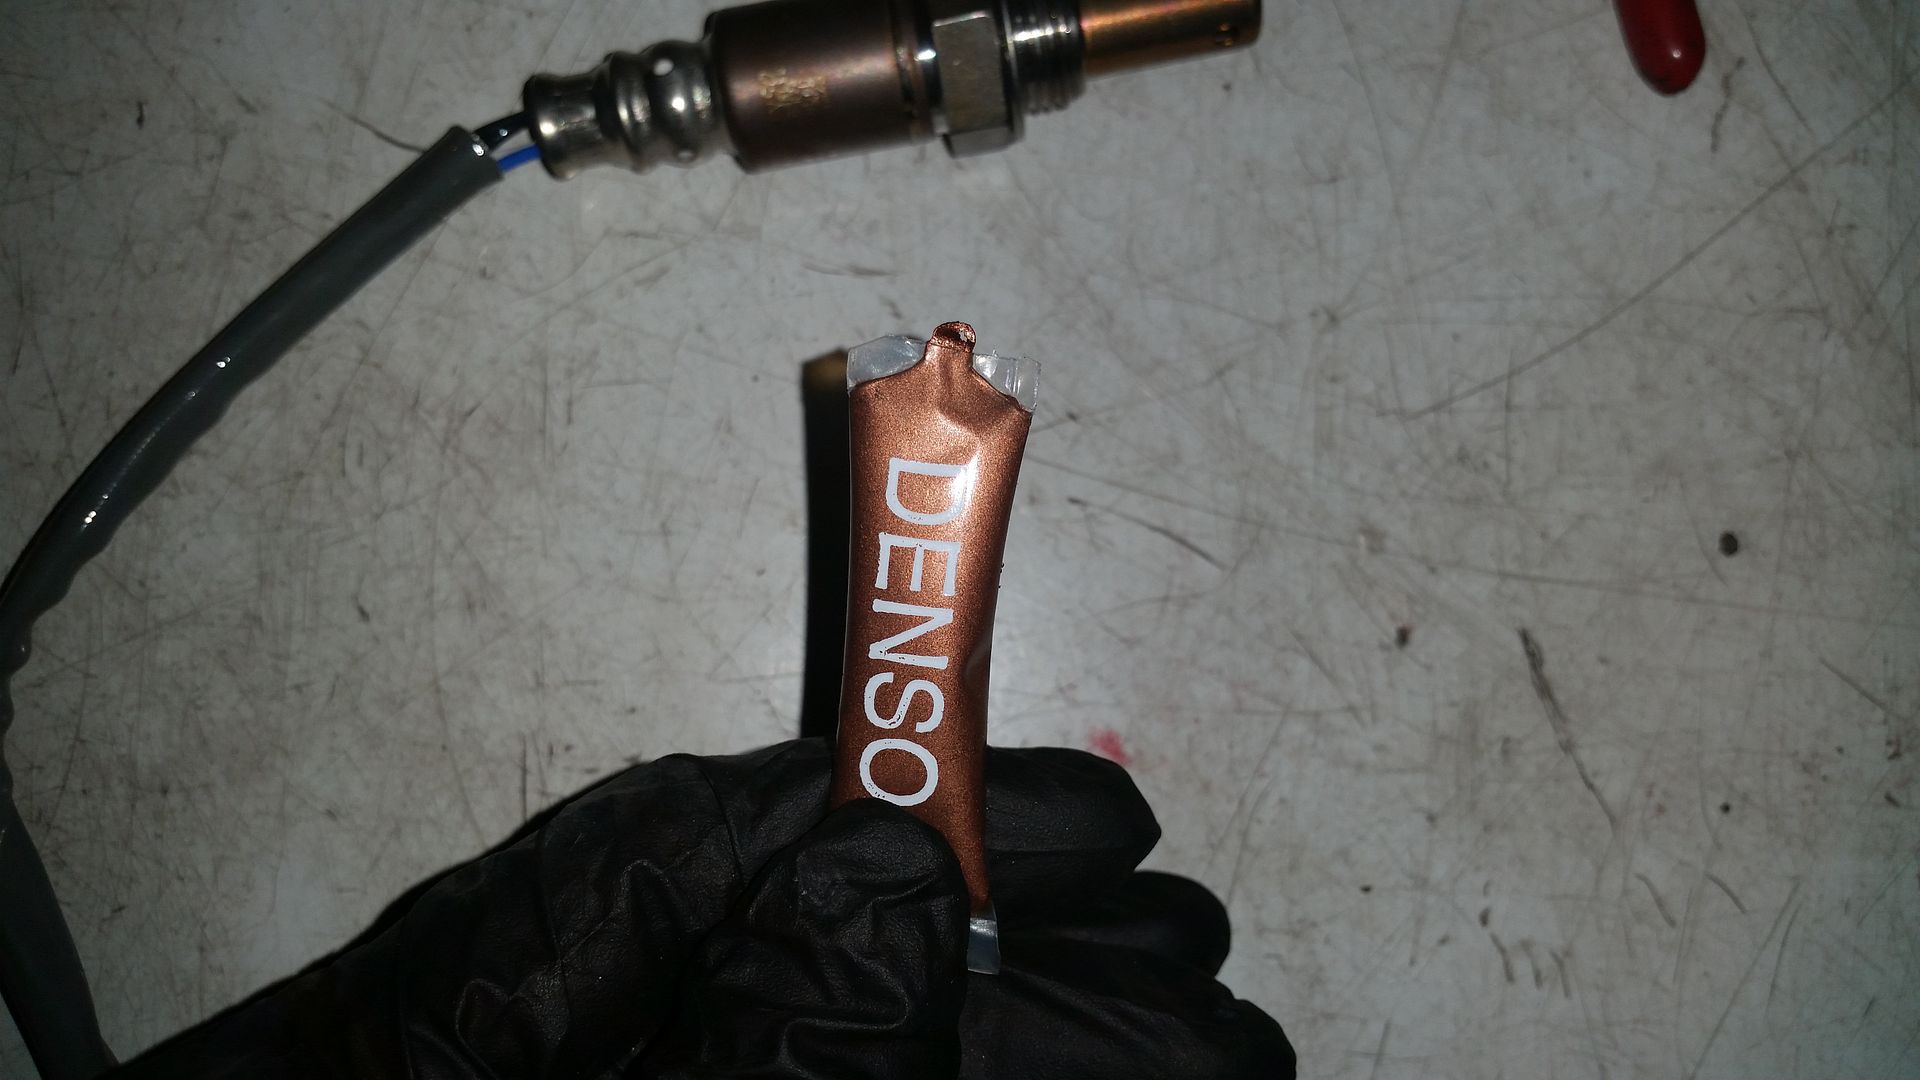
7. Prep the new sensor for install. Using the supplied anti-seize in the sensor package, carefully apply a small amount to the threads of the new sensor.
Caution: DO NOT get any anti-seize on the sensor body of the sensor head. Damage to the sensor may result.

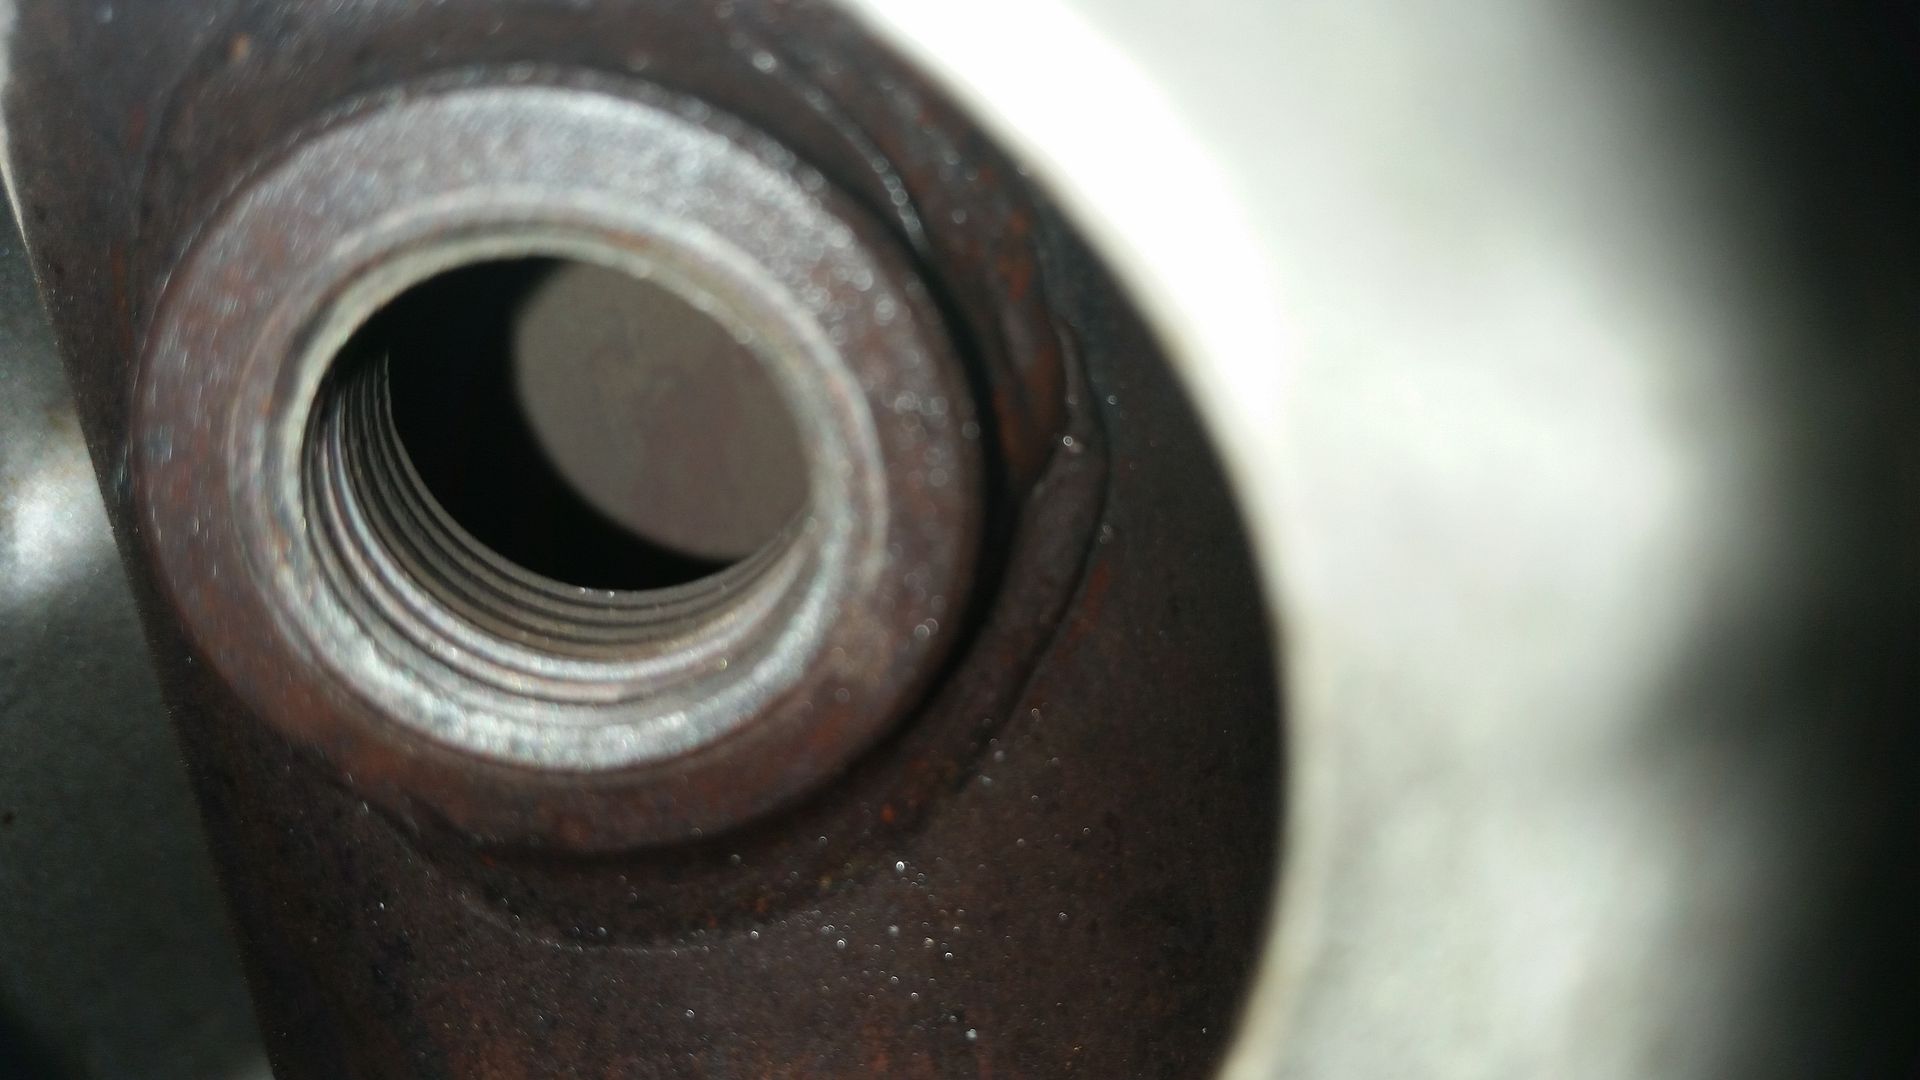
8. Install the new sensor. Inspect the sensor hole to make sure it isn't damaged. With the sensor connector disconnected and while holding the wire with one hand, thread the sensor into the manifold with the other hand while making sure to keep the wire from becoming tangled in the heat shield or becoming twisted. Once the sensor is hand tight, using your ½ inch drive ratchet and 22mm or 7/8 inch oxygen sensor socket, tighten the AF/O2 sensor into the manifold. Reconnect the AF/O2 sensor connector making sure it clicks into place.

9. Start the engine and check for any unusual noise, rough running, or check engine lights.
10. Go for a test drive and verify everything operates as designed.
Enjoy your work! While this job is relatively inexpensive, you may save hundreds of dollars doing it yourself.
Hope this helps!
This DIY was performed on a 2005 Corolla 1ZZFE and will be identical for all 2003-2008 Corolla, Matrix, and Pontiac Vibe models with a 1ZZFE engine. Additionally, this DIY should apply similarly to 2003-2006 Matrix XRS and Pontiac Vibe GT and 2005-2006 Corolla XRS models.
Total time spent, including time to take pictures was around 40 minutes. It should take the average person 15-20 minutes for this job, not including time spent for the penetrating lubricant to work (if applicable).
Disclaimer: Myself or Toyotanation are not responsible for any damage or injury that may result from use of the DIY. Automotive maintenance and repair should be performed by qualified technicians. This DIY is for informational purposes, use it at your own risk.
Note: 2003-2004 FWD models and 2003-2006 AWD models use a “Narrow Band” Oxygen Sensor, while 2005-2008 FWD Models use a “Wide Band” Air Fuel Ratio Sensor. The 2003-2006 AWD models use the same "Narrow Band" sensor for all years, which is different from the 2003-2004 FWD and 2005-2008 FWD. These different sensors are not interchangeable and you must use the correct year and drivetrain specific sensor. The procedure is identical, regardless of the year or drivetrain.
Tools and Parts needed:
1/2 inch Drive Ratchet
1/2 inch Drive 22mm or 7/8 Inch Oxygen Sensor Socket
Small/Pocket Flathead Screwdriver
Penetrating Spray (PB Blaster or similar)
Gloves
Rags or towels
Digital Multimeter (optional but needs to measure resistance)

Part numbers:
OEM Toyota (Denso) -
2003-2004 1ZZFE Corolla, Matrix, Pontiac Vibe FWD - 89465-13030
2005-2008 1ZZFE Corolla, Matrix, Pontiac Vibe FWD - 89467-12010 or 89467-02020
2003-2006 Matrix and Pontiac Vibe AWD - 89467-12010
Denso Aftermarket (Same exact sensor as OEM) -
2003-2004 1ZZFE Corolla, Matrix, Pontiac Vibe FWD - 234-4800
2005-2008 1ZZFE Corolla, Matrix, Pontiac Vibe FWD - 234-9052
2003-2006 Matrix and Pontiac Vibe AWD - 234-4801
Warning: A hot engine can cause burns. Be sure the vehicle is cool before attempting this repair.
1. Park your car on a level surface, shut the engine off, and open the hood.


2. Locate the oxygen sensor on the exhaust manifold.


3. Remove the AF/O2 sensor connector. Using your hands or small flathead screwdriver, depress the center of the AF/O2 sensor connector.


4. Apply penetrating lubricant to the sensor threads. Apply your penetrating lubricant onto the threads of the exhaust manifold where the old sensor is located.
Note: Only apply enough to get on the threads. Since you don’t have a good view of the threads, you don’t want a large amount of penetrating lubricant on the exhaust pipe.
Note: After several minutes, hours, or days (depending on your specific location eg: rust belt states) prepare to remove the sensor. For my car, I waited maybe 5 minutes and the sensor came right out. I have worked on other cars where the sensor was so seized, it stripped the threads and had to be retapped.

5. Remove the AF/O2 sensor. Place your special 22mm or 7/8 inch oxygen sensor socket over the oxygen sensor in a way that you can attach your ratchet (ratchet portion towards you). Using your ½ inch drive ratchet, loosen the sensor from the manifold. Once the sensor is loose, use your hands to remove it all of the way and remove it from the vehicle.


6. Inspect your new sensor (optional). Once removed, compare the old sensor side by side with the new sensor to verify they are the same. Using your digital multimeter set to measure resistance (ohms), check the resistance value of the heater circuit of the AF/O2 sensor and verify the sensor is good before install.
2003-2004 FWD models and 2003-2006 AWD models: 5-16 ohms at 68°F
2005-2008 models: 1.8-3.4 ohms at 68°F
Note: The heater wires are the two black wires located at the top of the connector.


7. Prep the new sensor for install. Using the supplied anti-seize in the sensor package, carefully apply a small amount to the threads of the new sensor.
Caution: DO NOT get any anti-seize on the sensor body of the sensor head. Damage to the sensor may result.


8. Install the new sensor. Inspect the sensor hole to make sure it isn't damaged. With the sensor connector disconnected and while holding the wire with one hand, thread the sensor into the manifold with the other hand while making sure to keep the wire from becoming tangled in the heat shield or becoming twisted. Once the sensor is hand tight, using your ½ inch drive ratchet and 22mm or 7/8 inch oxygen sensor socket, tighten the AF/O2 sensor into the manifold. Reconnect the AF/O2 sensor connector making sure it clicks into place.


9. Start the engine and check for any unusual noise, rough running, or check engine lights.
10. Go for a test drive and verify everything operates as designed.
Enjoy your work! While this job is relatively inexpensive, you may save hundreds of dollars doing it yourself.
Hope this helps!


