I know I said I would do this awhile ago, but I just now finally got around to it. Took about 1 hour. Paid about $35 in parts for the line and gaskets from TRDSparks
Anyway here goes:
Parts Needed:
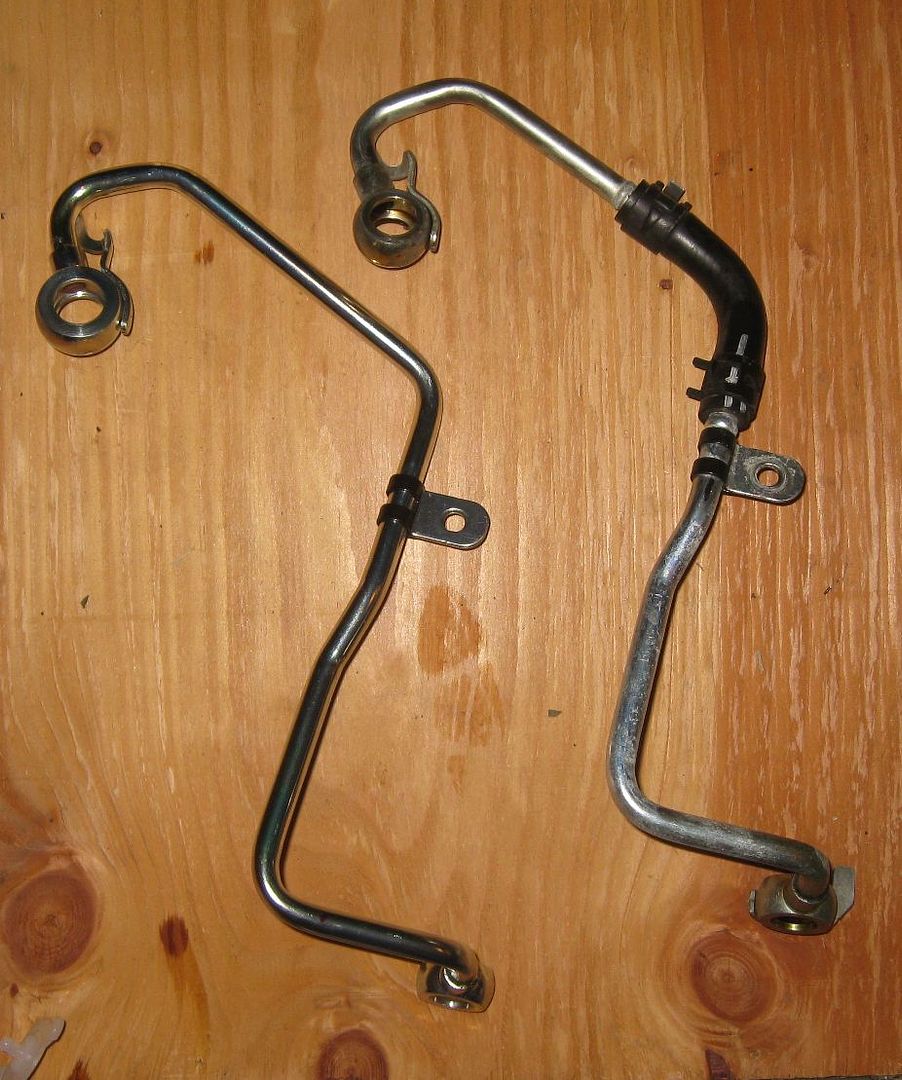
1x New All Metal Oil Line - P/N 15772-31030
2x Gaskets for upper union - P/N 90430-16012
1x Gasket for lower union - P/N 90430-16016
Tools Needed:
Ratchet (I used 3/8")
10mm socket
12mm socket
14mm socket
17mm socket
3" extension for Rachet
Torque Wrench (optional, only if you like to follow torque specs on bolts)
Jack Stands
Jack
Lots of paper towels or shop towels to pick up oil
-----------------------
Optional:
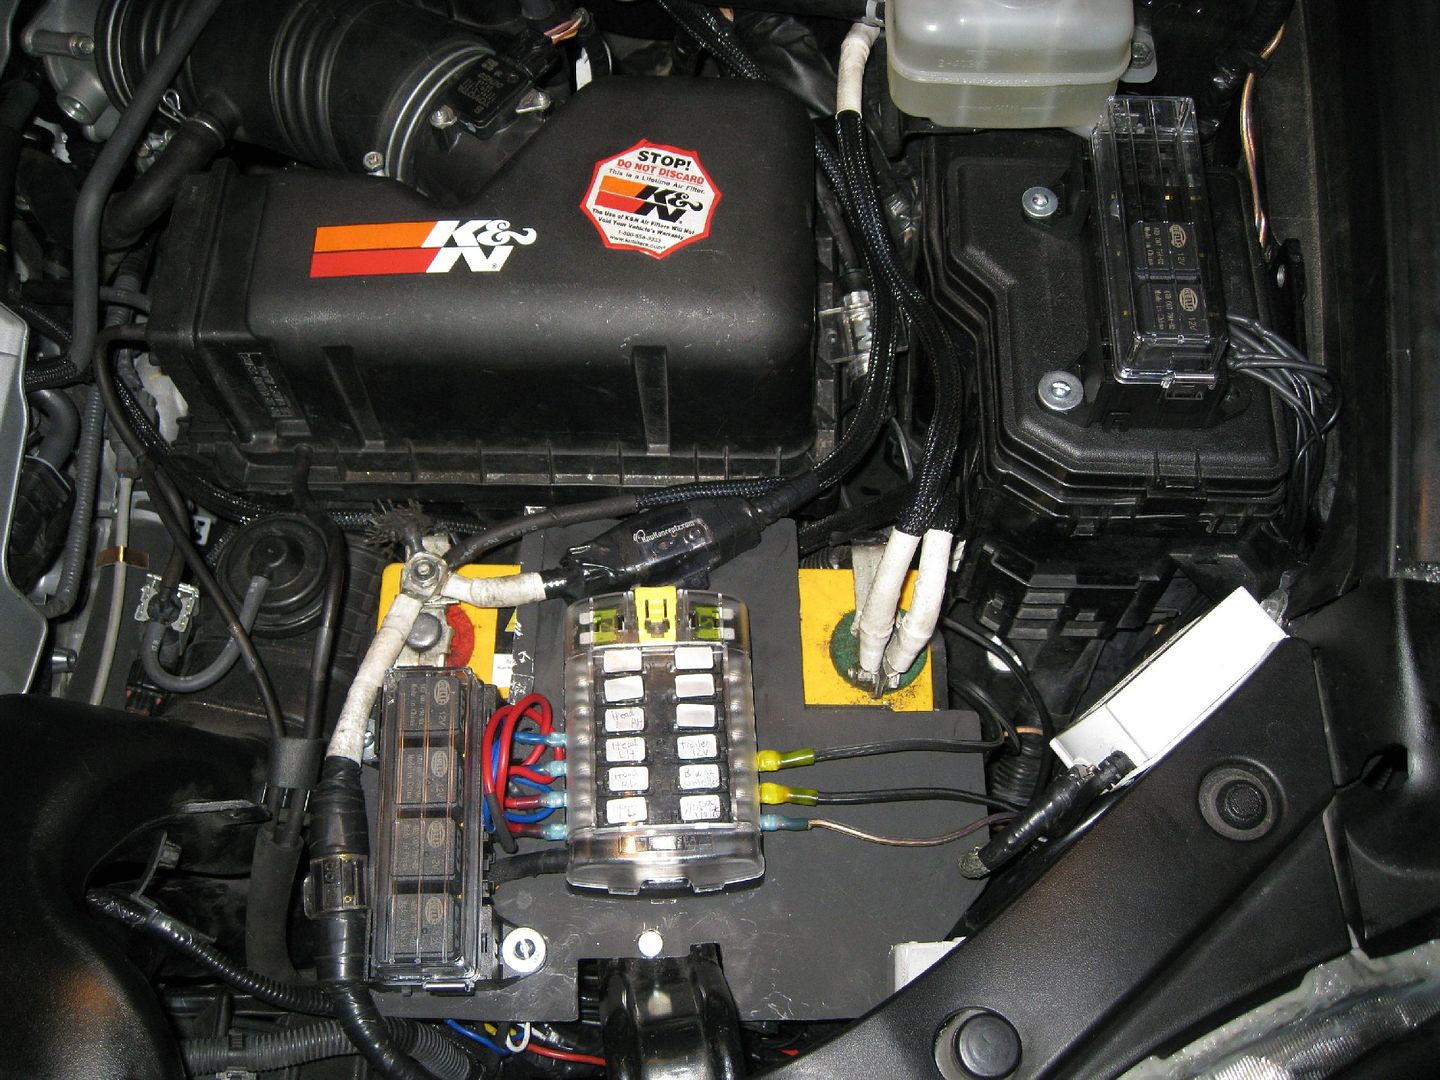
1) You need to get to the fuel pump relay. The idea is to use the starter once you finish to "prime" the engine by getting oil through the line before you turn the engine over. The relay is in the driver side engine relay box. You need to remove both covers on the box.
Take the top cover off and you will see this:
![Image]()
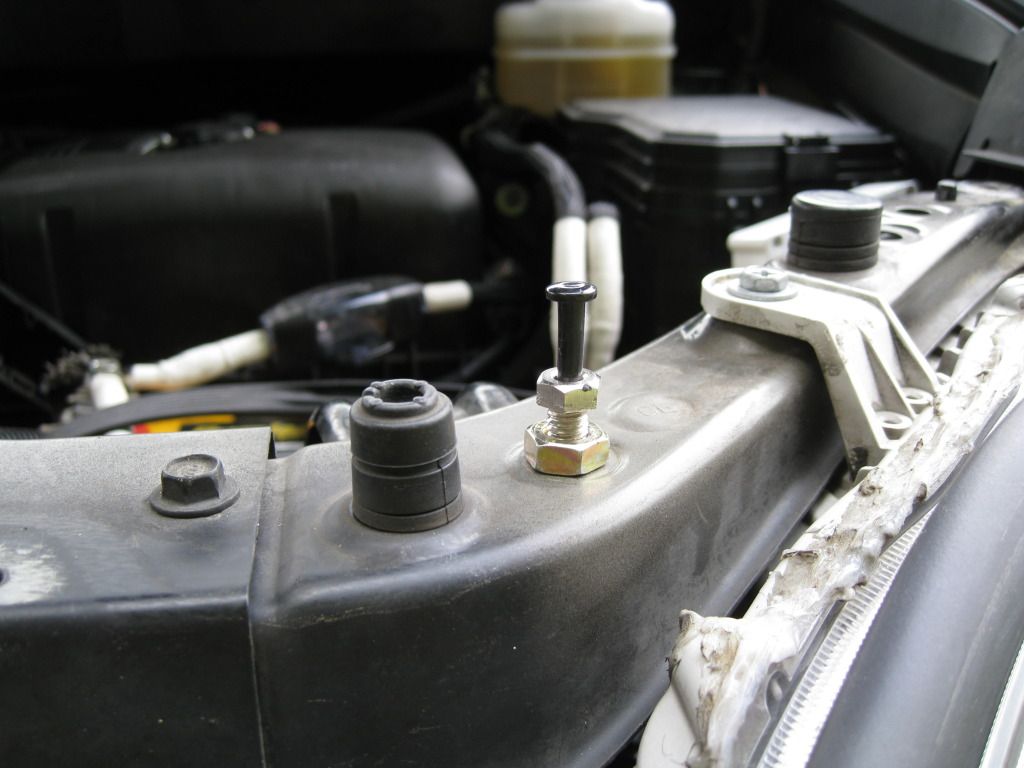
Now, you need to remove the next cover. The yellow tabs hold it in place. Unfortunately, I couldn't get it off with the brake fluid tank in place. So that came off.
To remove the tank:
![Image]()
Remove the 10mm bolt and the plug, and the tank is free of the bracket.
![Image]()
The bracket is held to the strut tower with 2 10mm bolts. I've snapped the head off one in the past over-torquing it so there is only 1 in my pic.
Now just pull back on the relay box cover and it will be free.
2) Start the car, then pull the fuel pump relay to stall the engine.
![Image]()
Its the brown one. Once the engine stalls try to start it and make sure it can't start.
3) Removing the top engine mount. Now you might be able to get to the line with this in place but it will be difficult. Do yourself a favor, take the 3 extra minutes and remove it.
![Image]()
The yellow bolts are 14mm and the red 2 nuts are 12mm
Once you do that you will have lots of room to work.
![Image]()
Required:
![Image]()
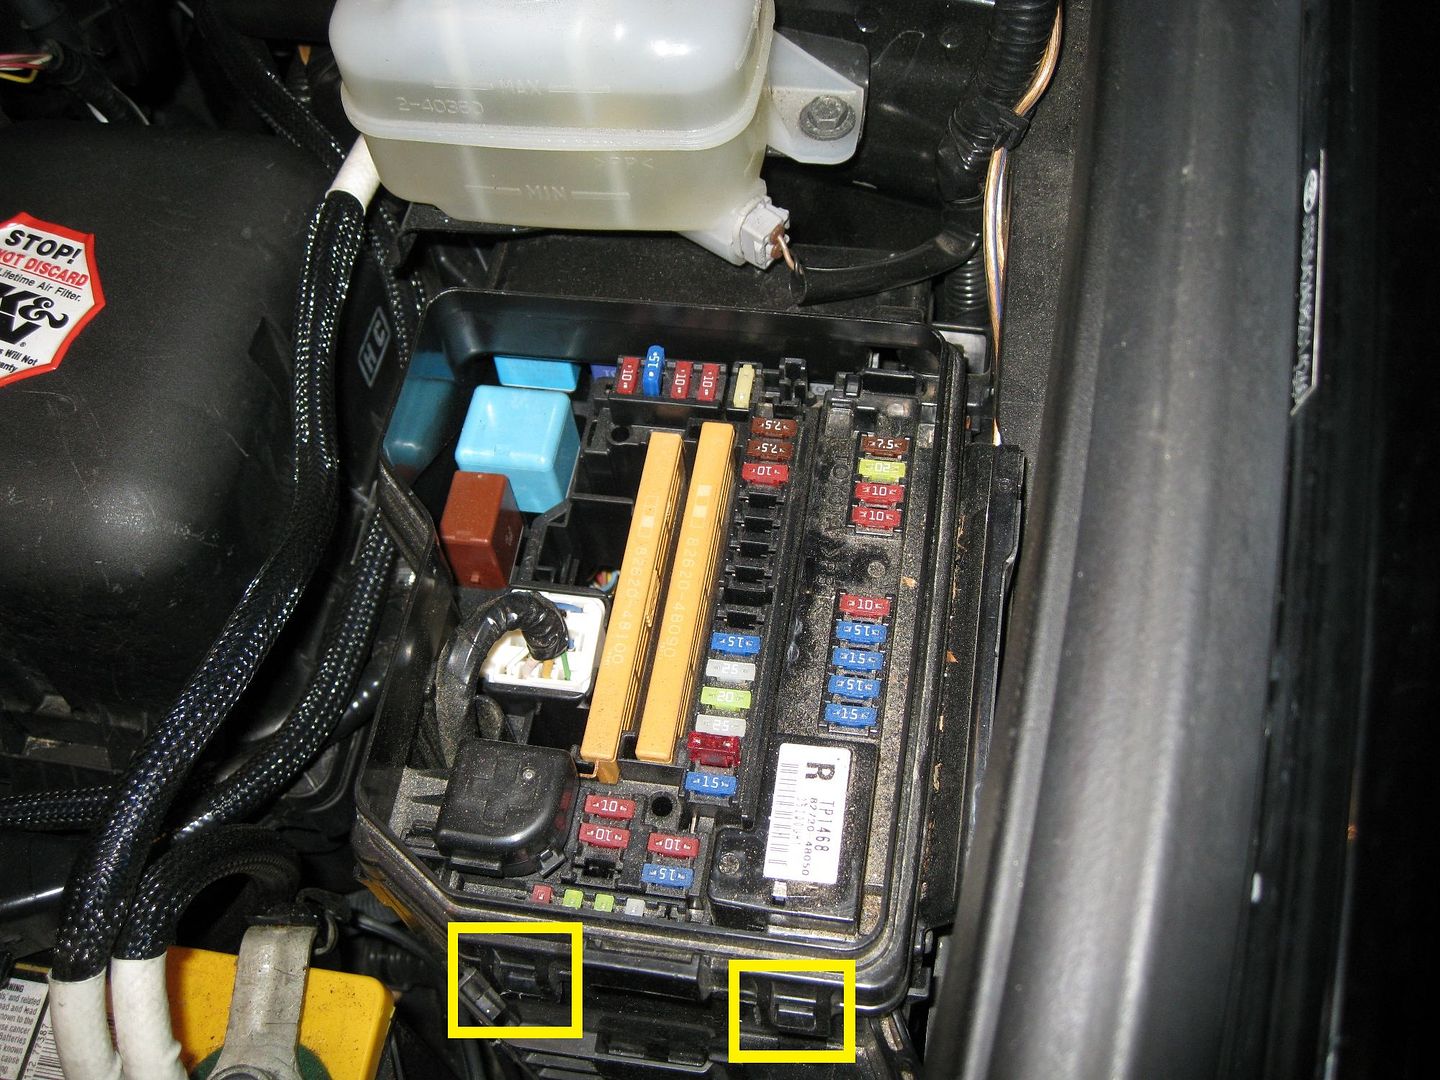
1) Now there SHOULD be a cover over the line on the front side of the engine, but it appears when the dealer performed the recall, the tech decided to keep the cover. It wasn't installed. It is held in with 2 10mm bolts, they are shown below in yellow.
![Image]()
The red bolt is the 10mm bolt that holds the line to the engine, it needs to go once you get the cover off.
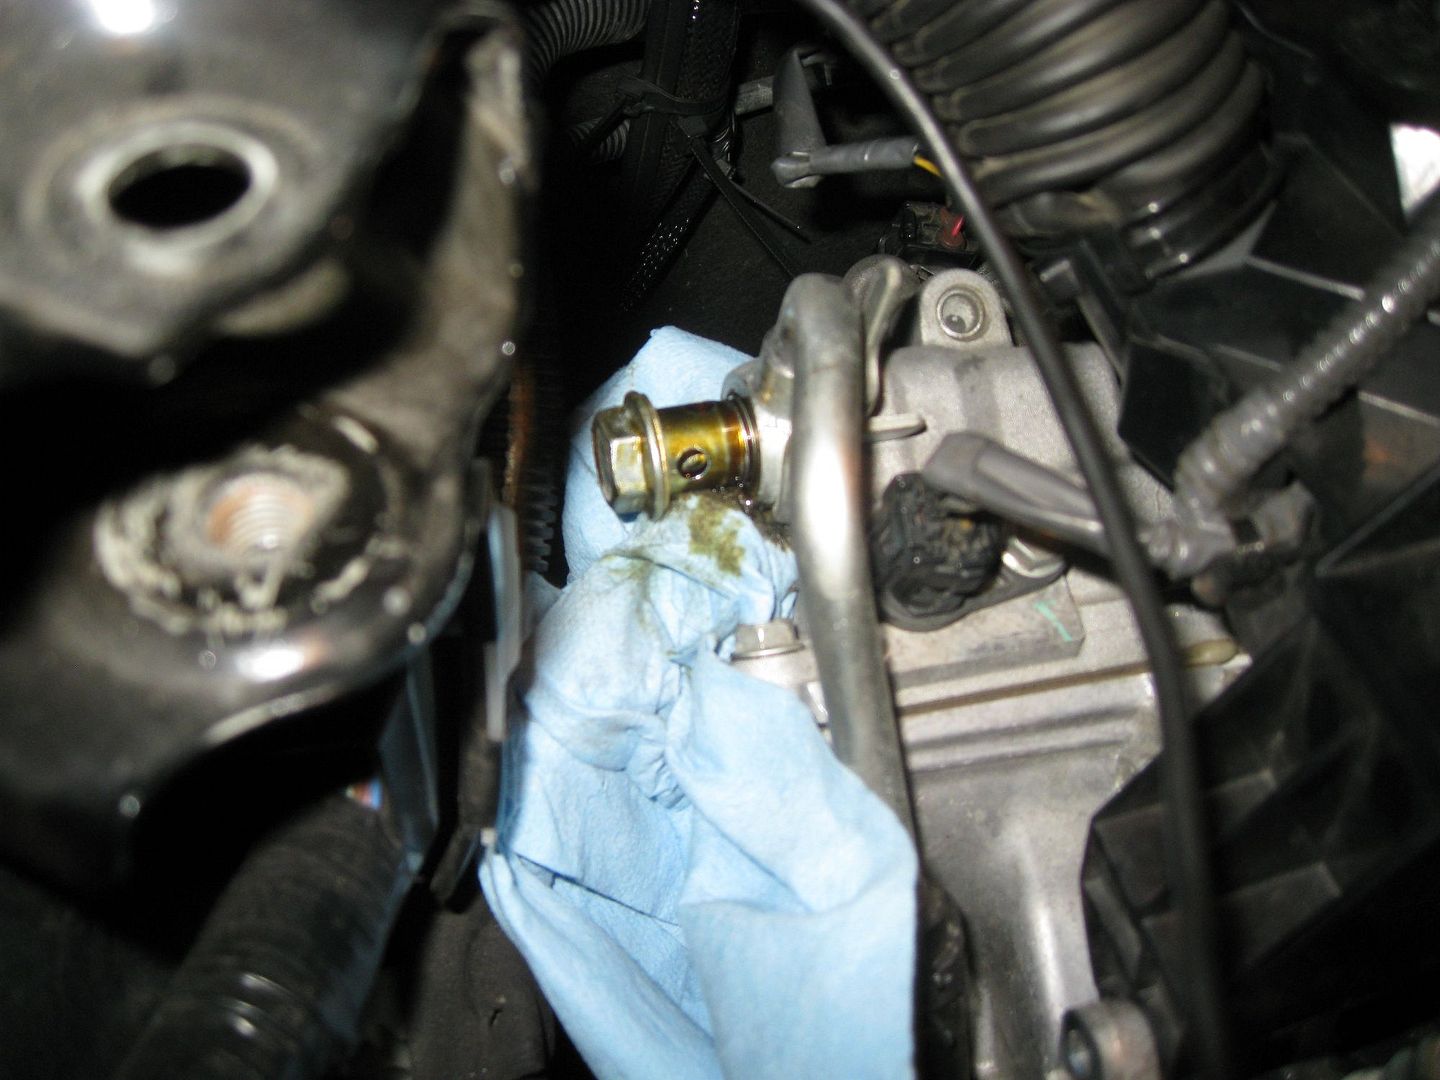
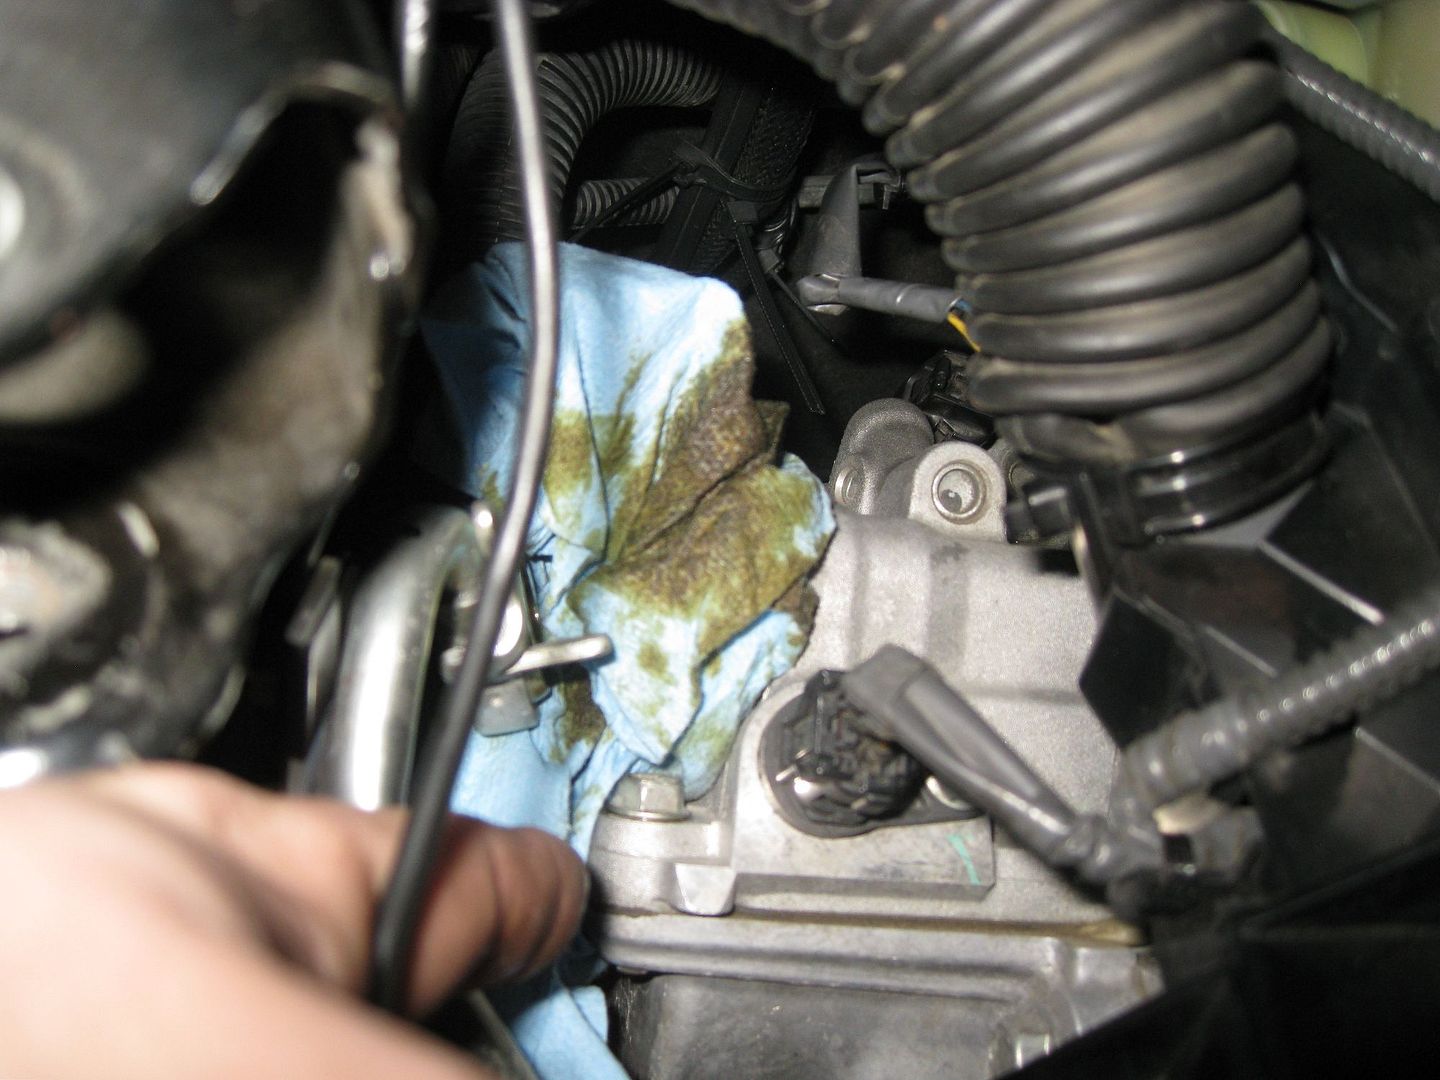
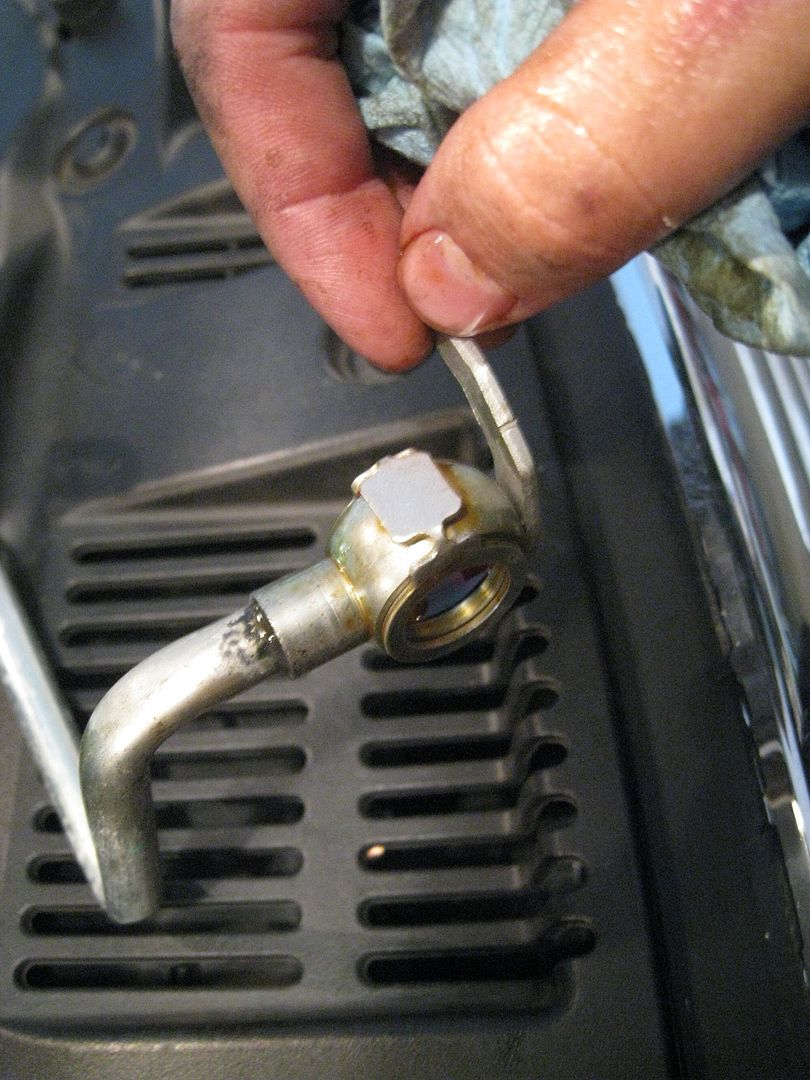
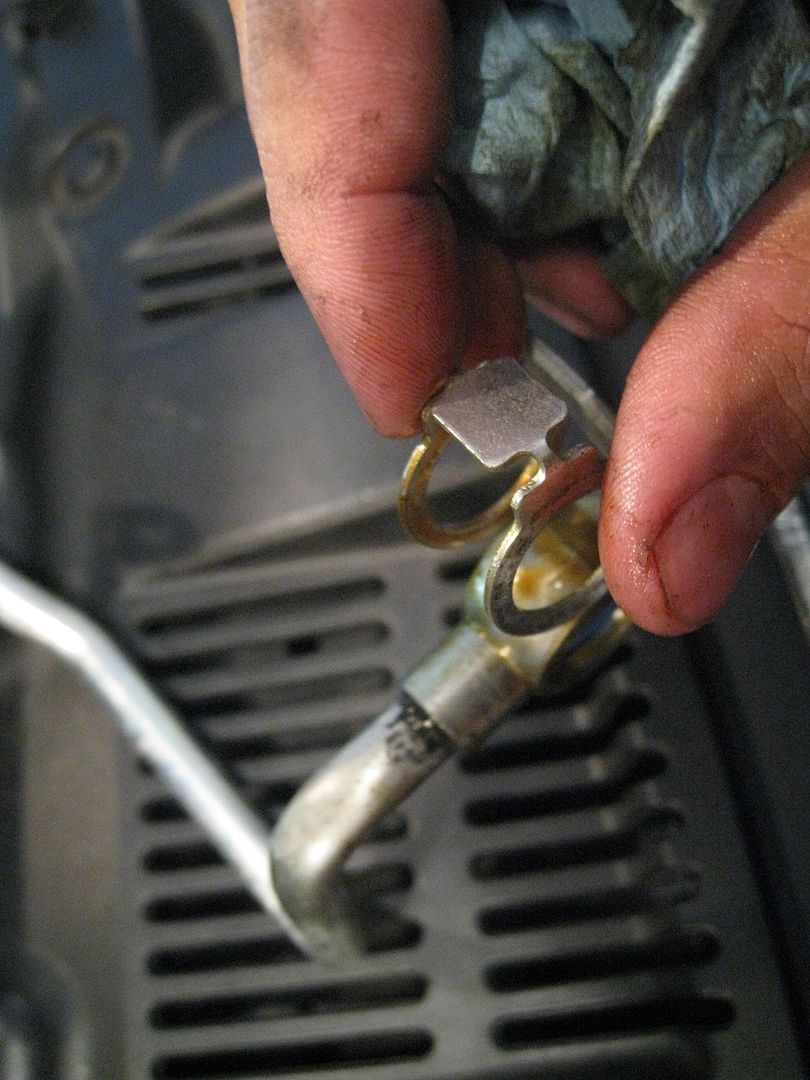
2) Now go up to the union, its a 17mm bolt, it will be on tight. Make sure you have some kind of rag on the bottom of it, because oil WILL come out.
![Image]()
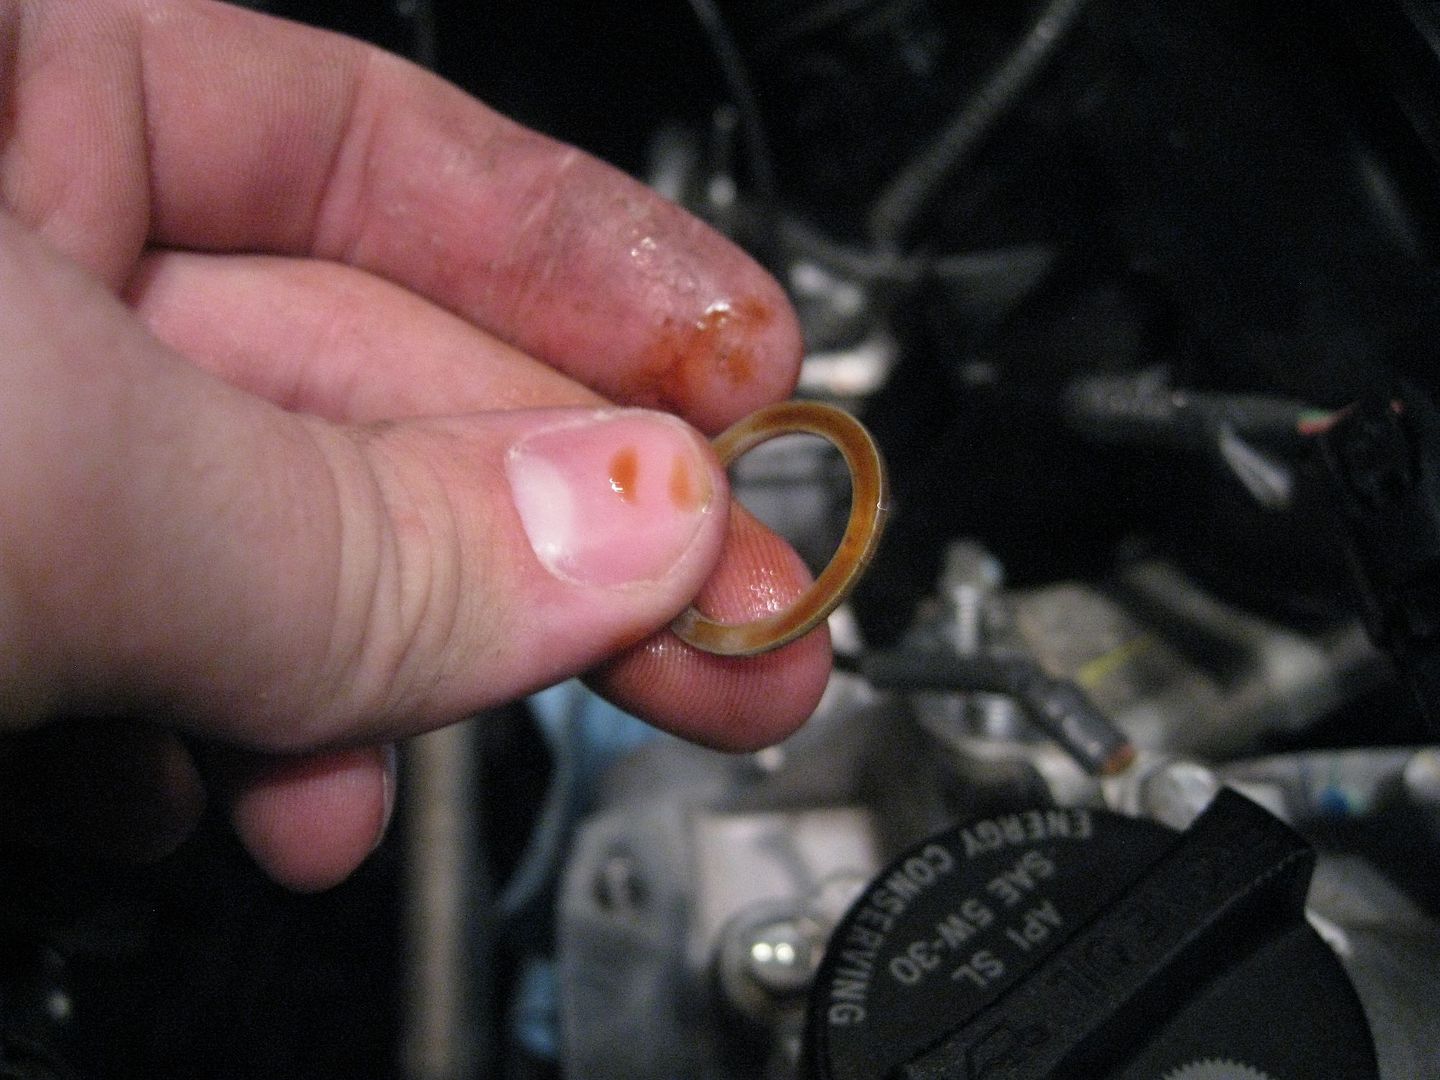
Between the oil line and the engine, there is a metal crush gasket, make sure you remove that.
![Image]()
3) Now prep the union bolt for reinstall. First off make sure you remove the gasket that sits between the bolt and oil line.
![Image]()
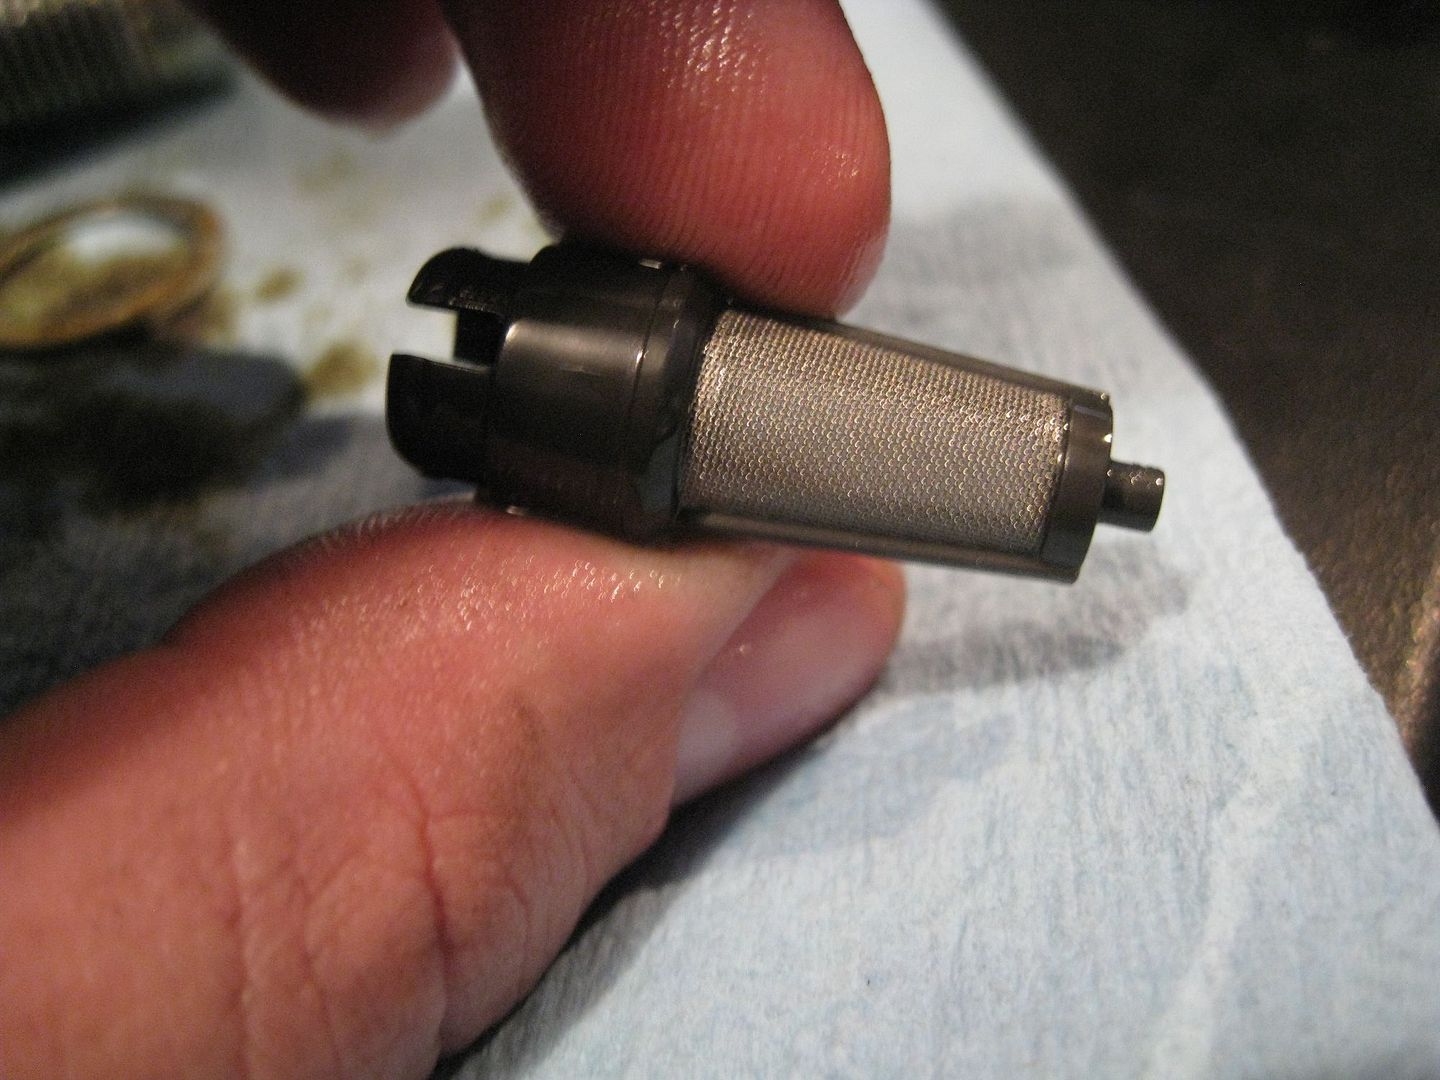
Then the front metal mesh filter just pops off.
![Image]()
I took the opportunity to clean the filter. I used brake cleaner, and since the oil flows from the inside->out, make sure you spray from the outside->in to get the particulates out.
![Image]()
Then I just stuffed the rags into the hole to stop any oil from coming out/keep stuff out of the engine/VVT-I oil valves
![Image]()
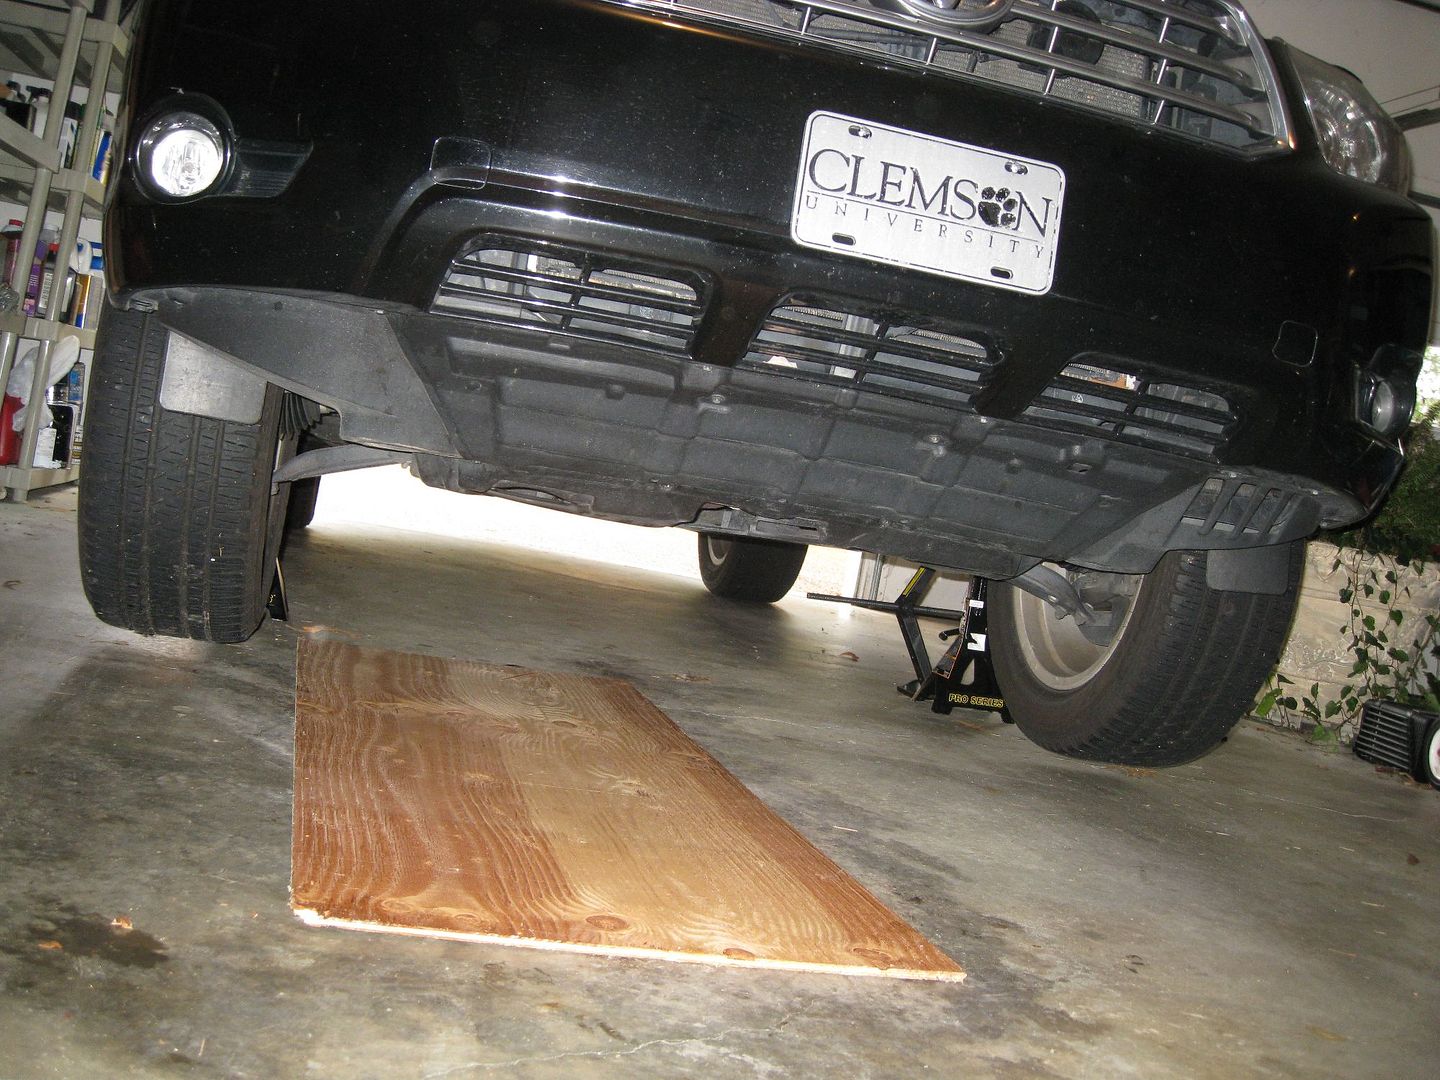
4) Jack up the car. Now you may be able to get at it from the passenger wheel area if you remove the tire, but it will be tight. I just jacked up both sides of the car and got at it from underneath.
![Image]()
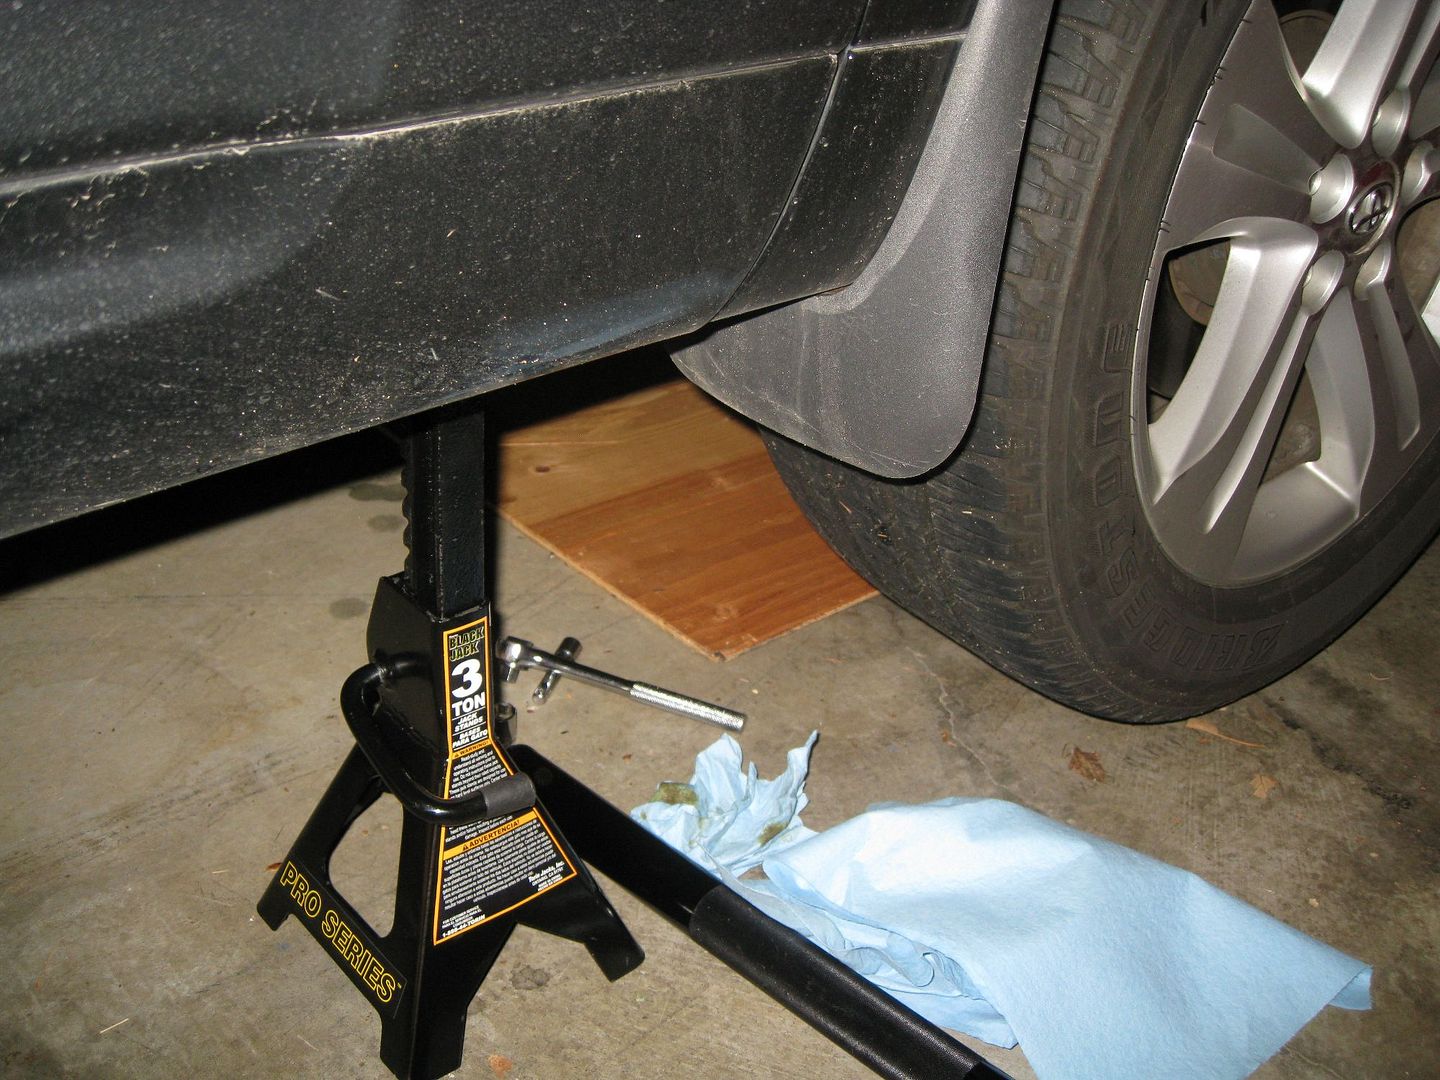
I found that having the tires 1-2" off the ground was barely enough room to work under the car.
![Image]()
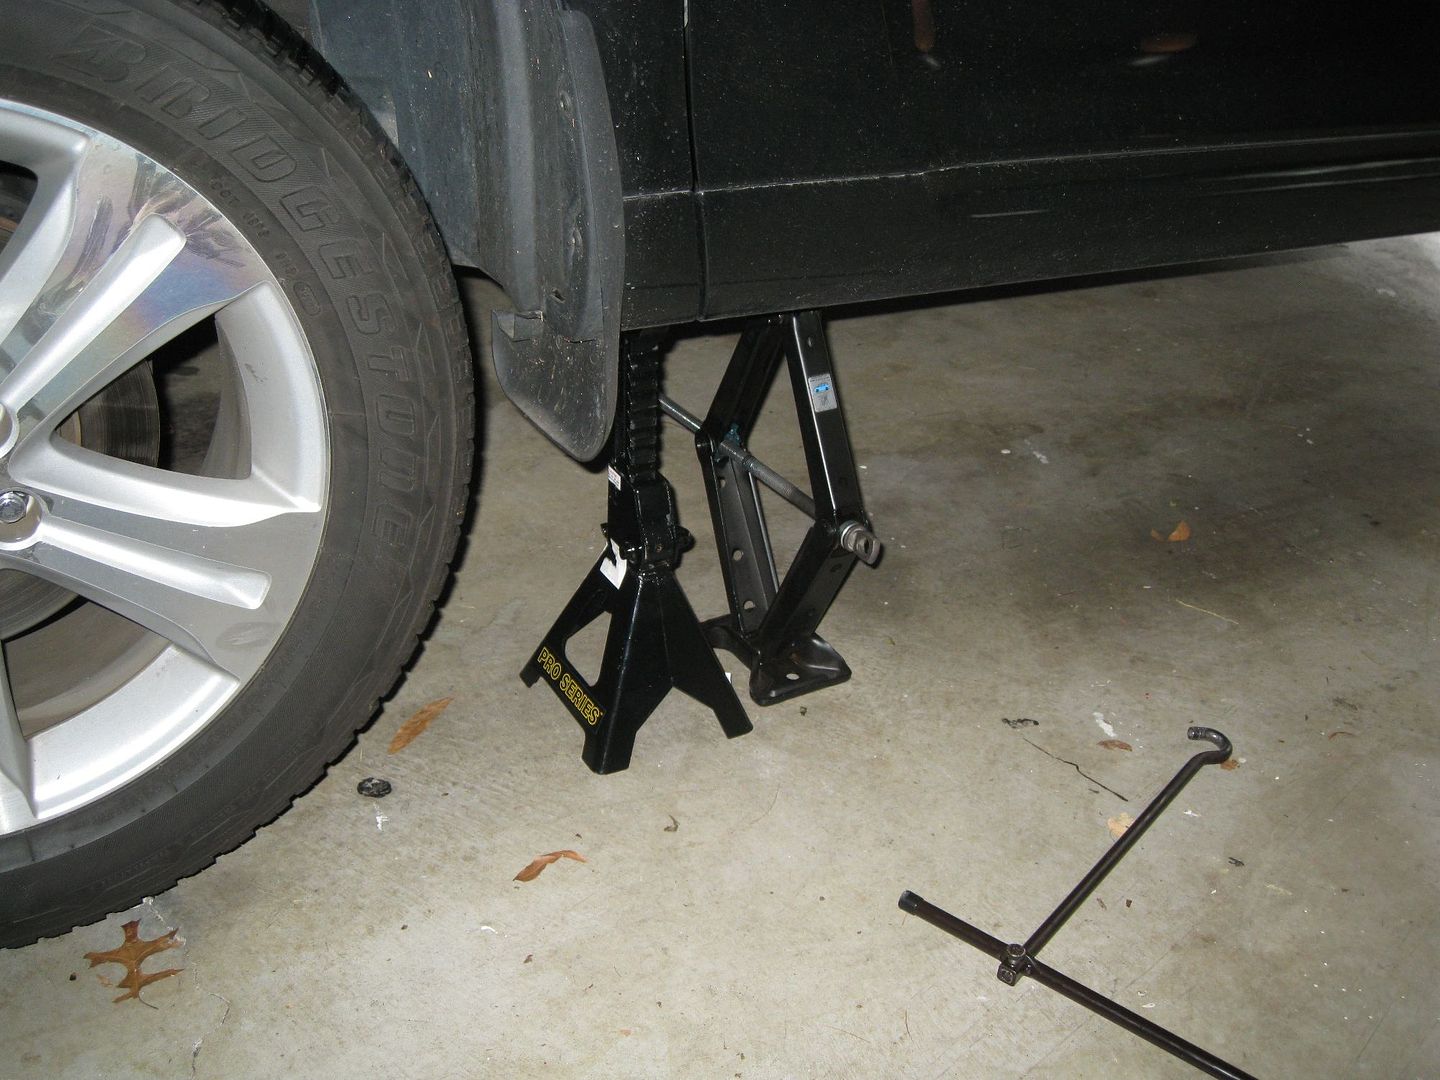
And please, if you get under the car, be sure to use jack-stands, don't leave it sitting on the jack...
![Image]()
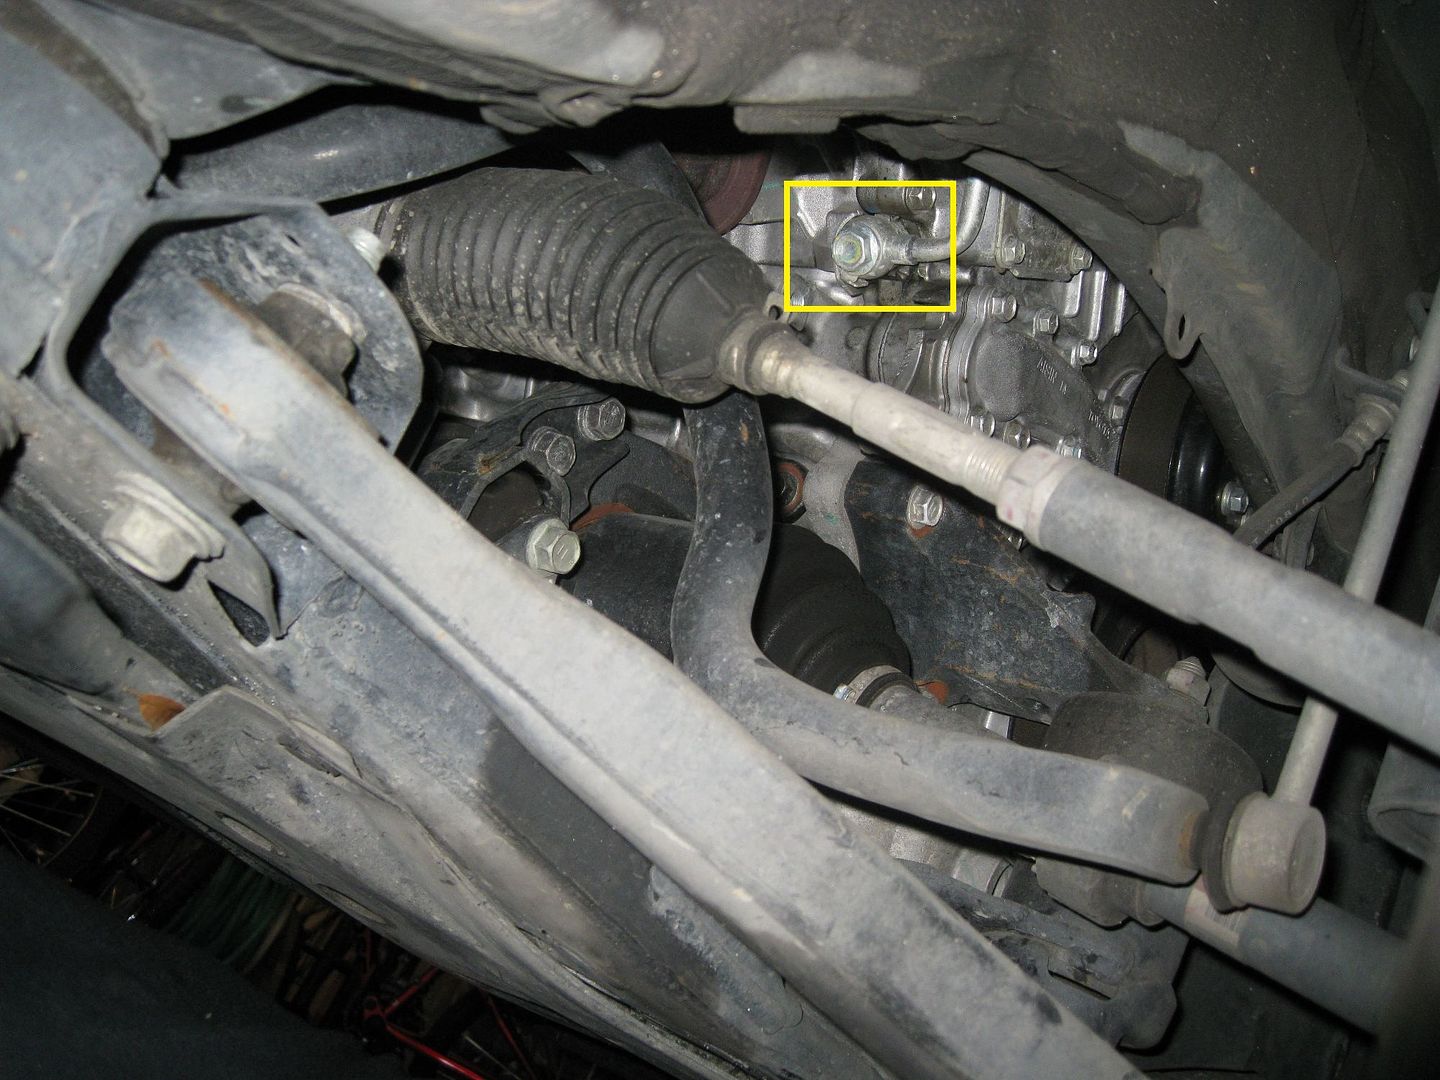
Now I got at it from behind the passenger control arm, around the tie rod area. Basically where the wood board ended below
![Image]()
The pic below is looking from the inside of the tire. its where I reached in to get to the bolt
![Image]()
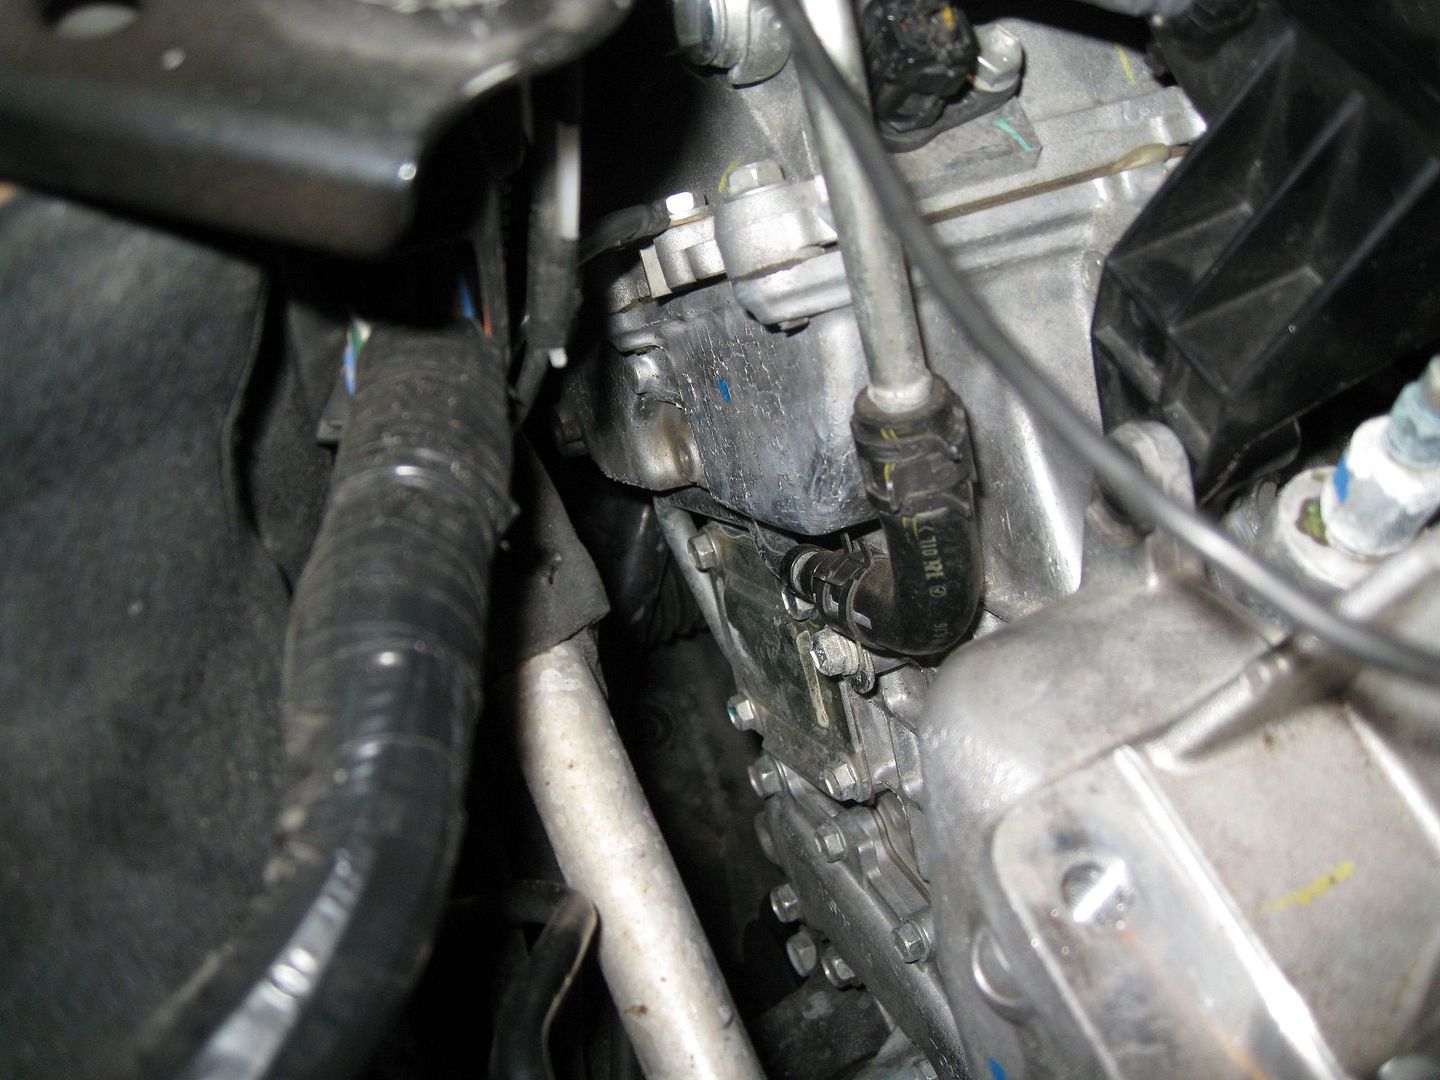
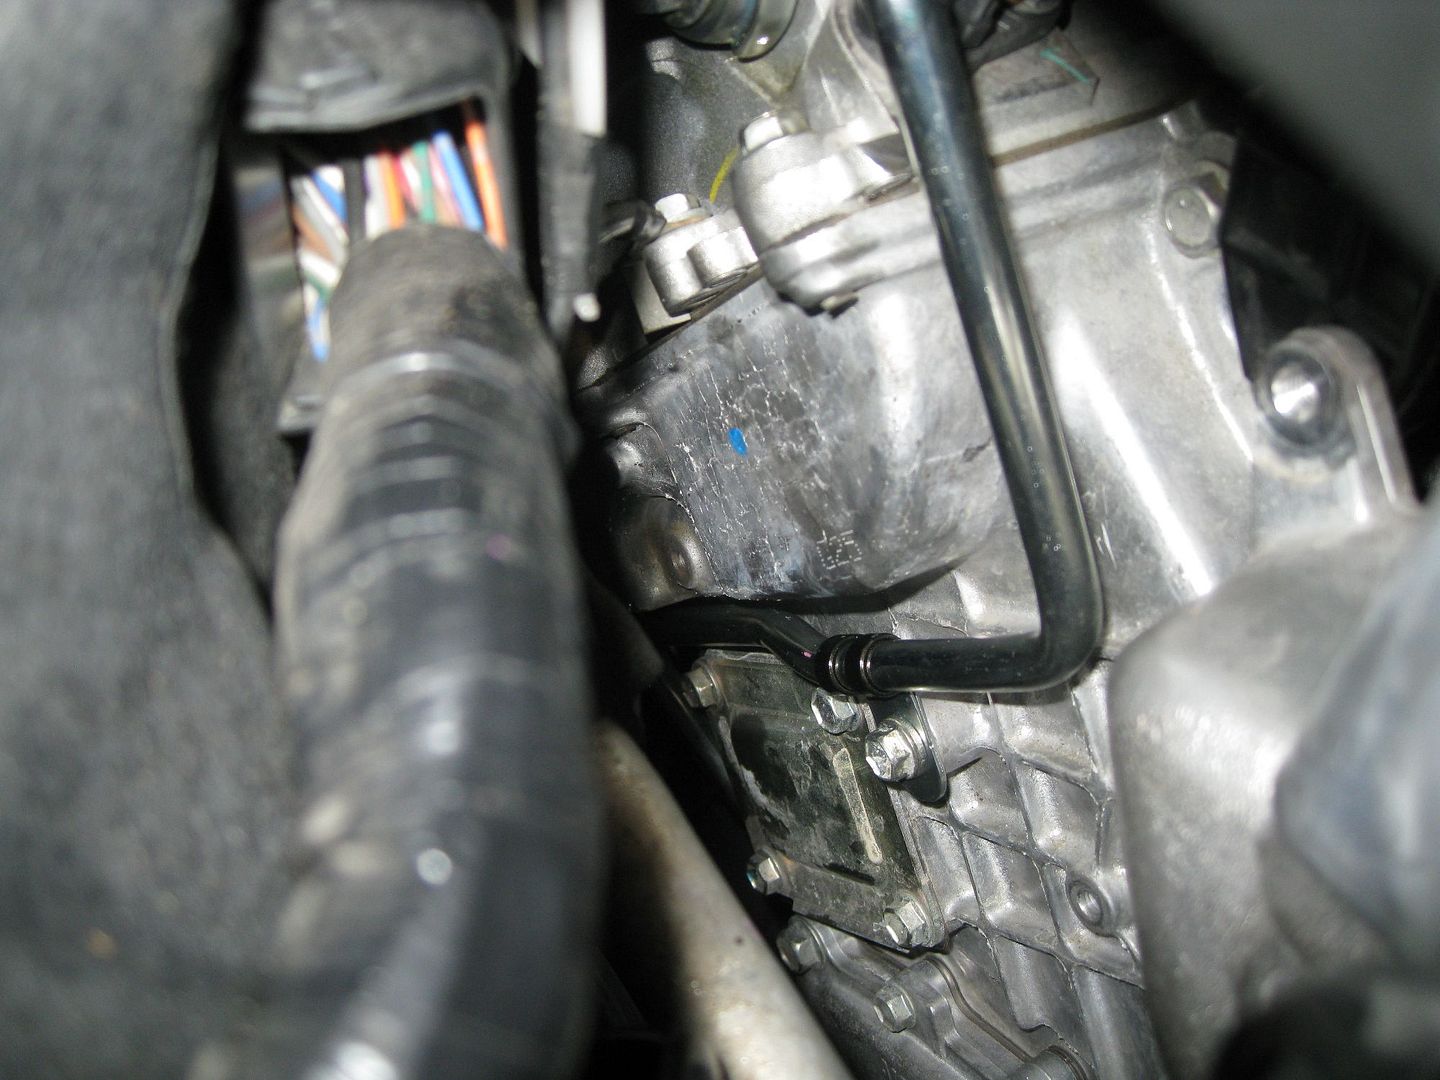
5) Remove the lower union. Again, stuff rags under the bolt, this one dropped a whole lot of oil. You will have ~3-4" travel on a ratchet, so this one is a lot harder to get the torque on it to break it free. I actually had to get a pipe to add on the ratchet to get a little more force. Again its 17mm.
![Image]()
Now the lower gasket is a bit different. Its not 2 ring gaskets. Make sure you pay attention how it goes on the pipe so you put the new gasket on the new pipe correctly.
![Image]()
![Image]()
At this point, the pipe is free.
![Image]()
6) Now just do the reverse to re-install the new line. I suggest you start with the top union and get that finger tight. For the top, make sure the filter is on the end of the bolt correctly, and you have a ring gasket on each side of the pipe. Then install the bottom union finger tight, making sure the gasket is installed correctly. Then re-install the 10mm bolt that holds the pipe to the engine. Now its time to toque everything down. For those who don't use torque wrenches, go to town on the unions, the 10mm bolt just needs to be snug. The official torque ratings are 48ftlbs for the unions and 7ftlbs for the 10mm bolt.
You should be looking at this now:
![Image]()
7) Now re-install the timing cover. The 2 bolts are 53inlbs...so just snug
8) Now you need to re-install the engine mount.
![Image]()
The yellow bolts (14mm) are 28ftbs and the red nuts (12mm) are 17ftlbs.
Optional:
1) If you removed the fuel pump relay, crank the engine for awhile to get the oil flowing through that pipe. That way you don't starve the top of the engine for a few seconds. Check the oil level and add oil if necessary. I don't know if its needed or not, I changed the oil when I did this. Re-install the relay and brake fluid tank, then start the car.
9) Let the engine warm up, then rev to 3k rpm and hold it there for a few minutes. You need to get the oil pressure up and check for leaking at the unions. If none, your done :thumbsup:
Anyway here goes:
Parts Needed:
1x New All Metal Oil Line - P/N 15772-31030
2x Gaskets for upper union - P/N 90430-16012
1x Gasket for lower union - P/N 90430-16016
Tools Needed:
Ratchet (I used 3/8")
10mm socket
12mm socket
14mm socket
17mm socket
3" extension for Rachet
Torque Wrench (optional, only if you like to follow torque specs on bolts)
Jack Stands
Jack
Lots of paper towels or shop towels to pick up oil
-----------------------
Optional:
1) You need to get to the fuel pump relay. The idea is to use the starter once you finish to "prime" the engine by getting oil through the line before you turn the engine over. The relay is in the driver side engine relay box. You need to remove both covers on the box.
Take the top cover off and you will see this:
Now, you need to remove the next cover. The yellow tabs hold it in place. Unfortunately, I couldn't get it off with the brake fluid tank in place. So that came off.
To remove the tank:
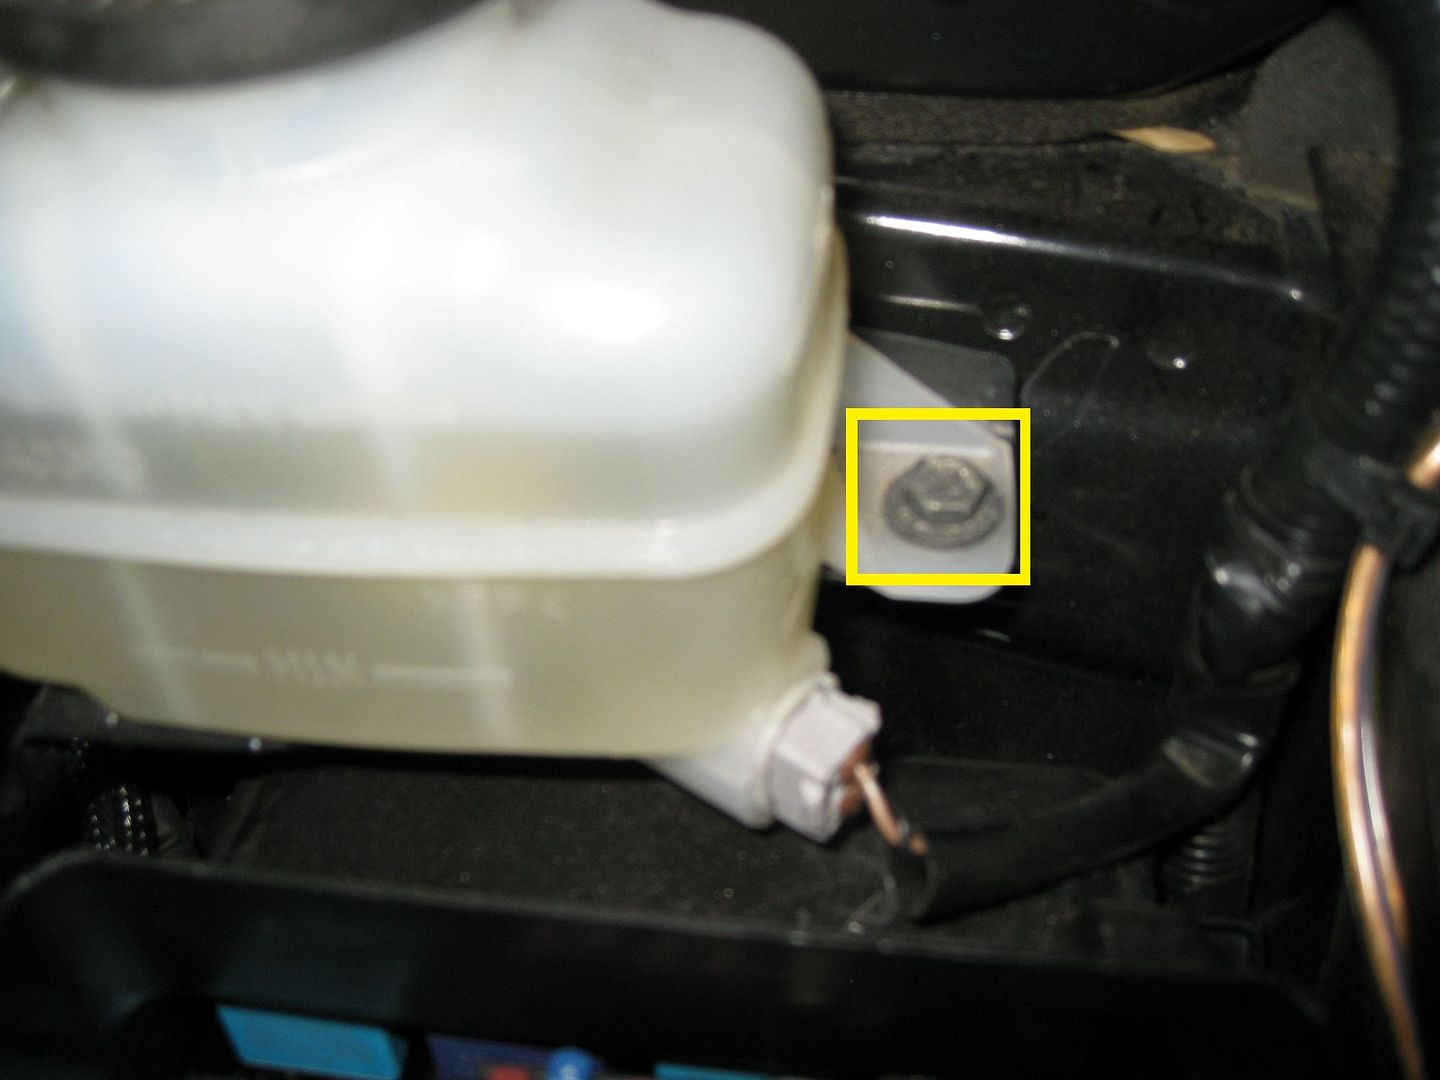
Remove the 10mm bolt and the plug, and the tank is free of the bracket.
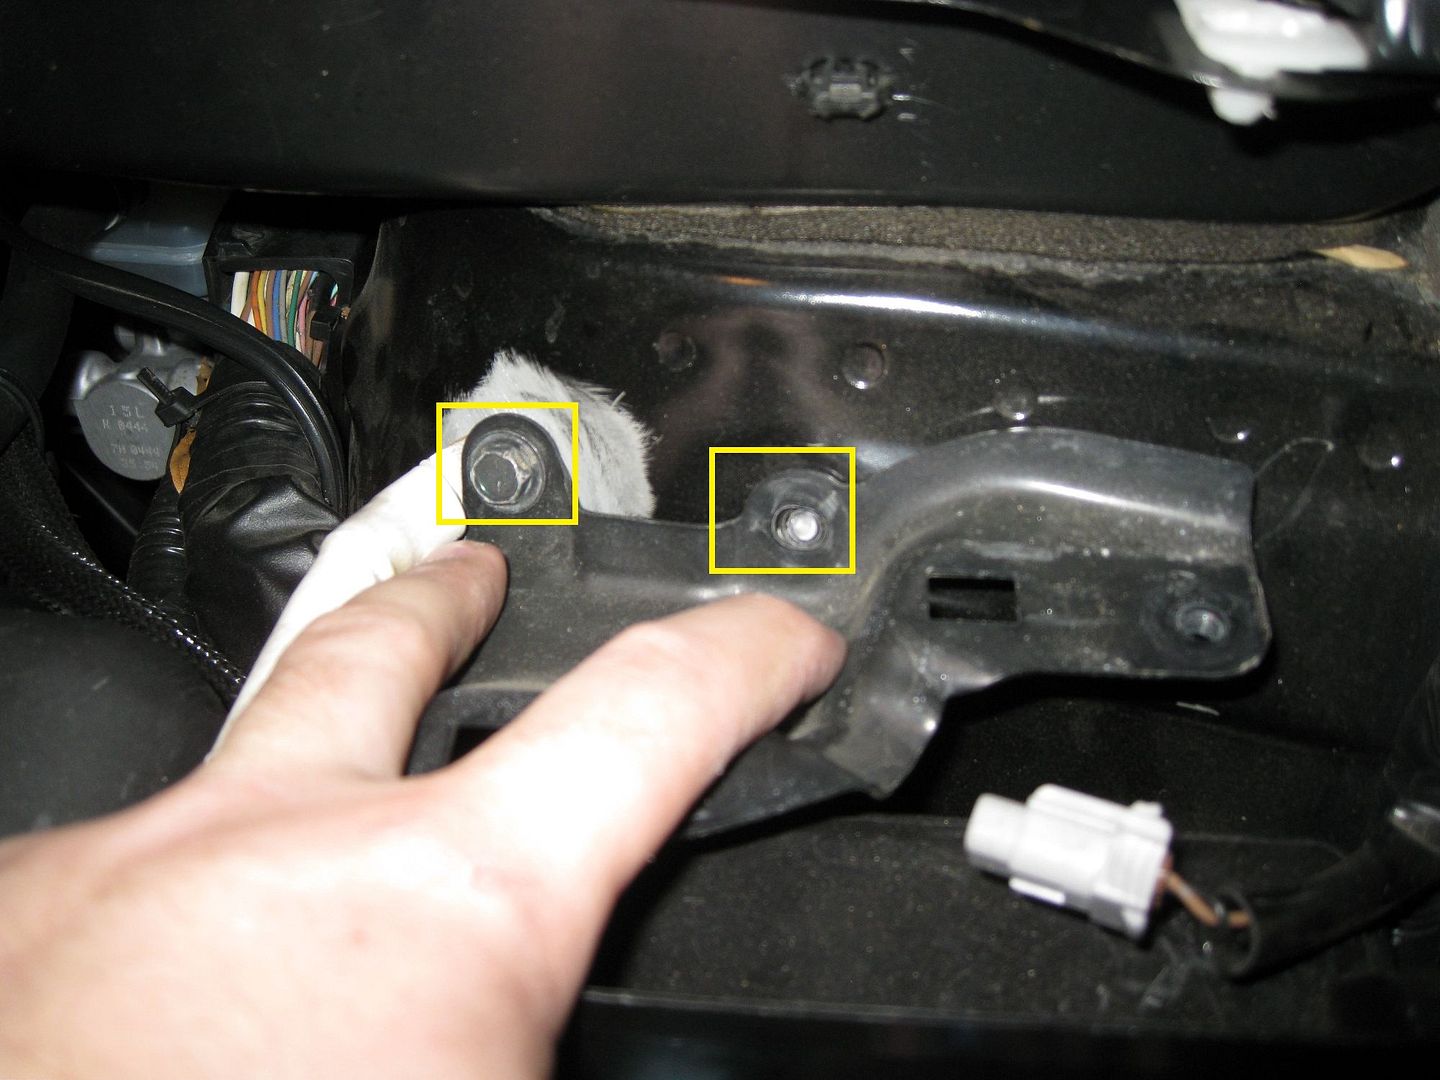
The bracket is held to the strut tower with 2 10mm bolts. I've snapped the head off one in the past over-torquing it so there is only 1 in my pic.
Now just pull back on the relay box cover and it will be free.
2) Start the car, then pull the fuel pump relay to stall the engine.
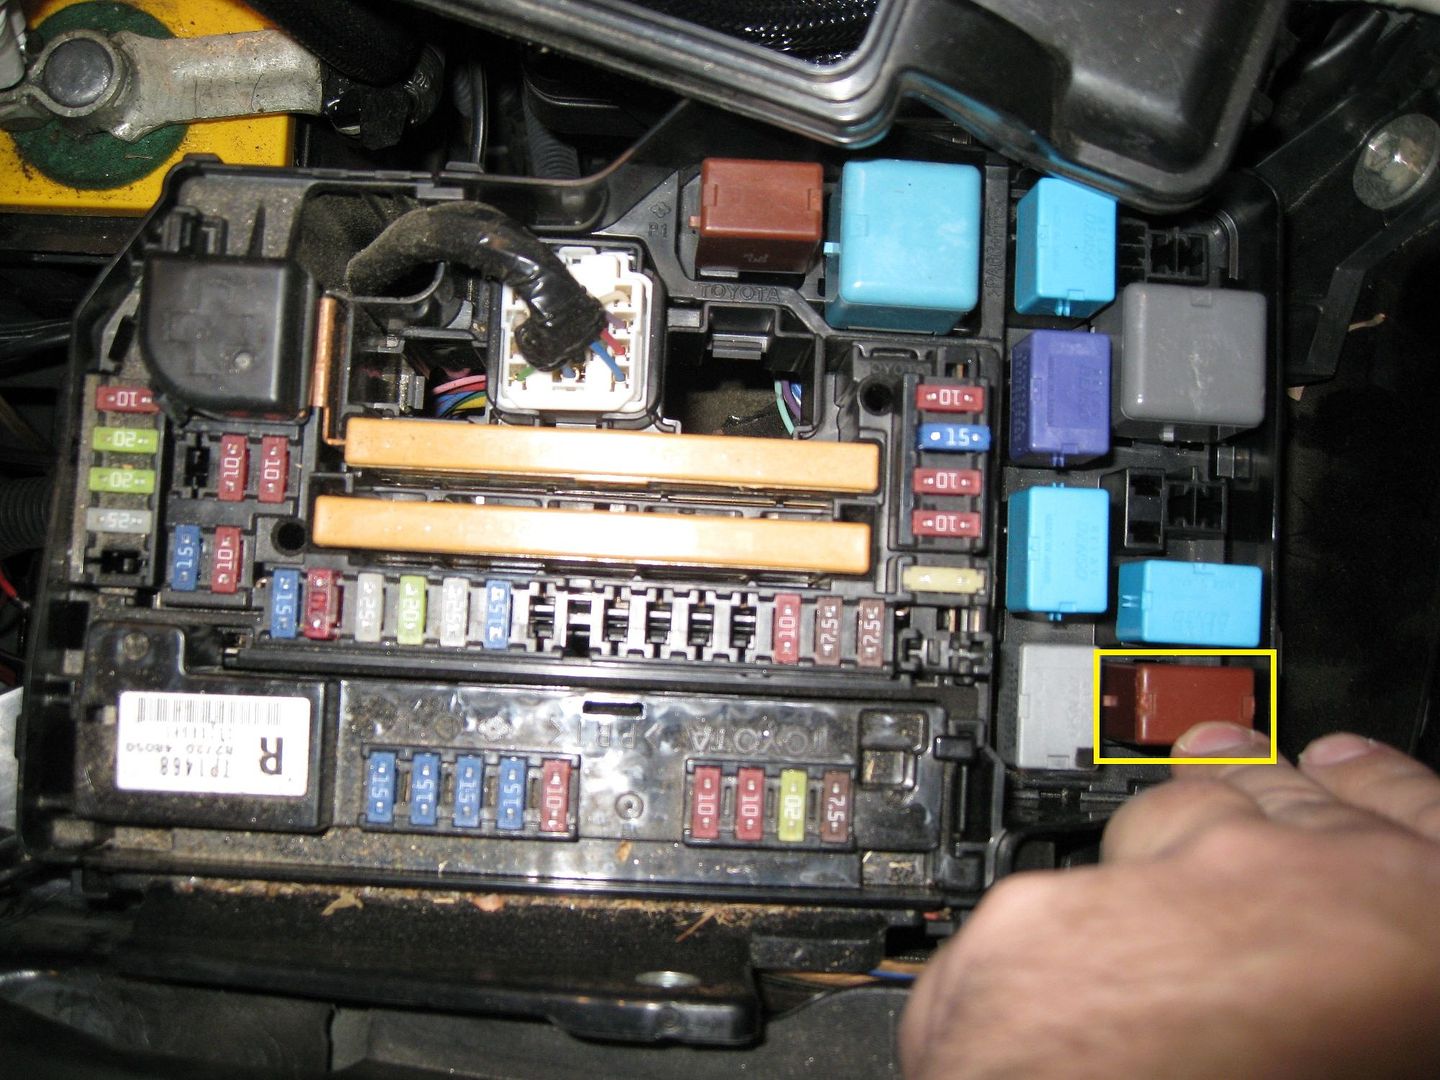
Its the brown one. Once the engine stalls try to start it and make sure it can't start.
3) Removing the top engine mount. Now you might be able to get to the line with this in place but it will be difficult. Do yourself a favor, take the 3 extra minutes and remove it.

The yellow bolts are 14mm and the red 2 nuts are 12mm
Once you do that you will have lots of room to work.
Required:
1) Now there SHOULD be a cover over the line on the front side of the engine, but it appears when the dealer performed the recall, the tech decided to keep the cover. It wasn't installed. It is held in with 2 10mm bolts, they are shown below in yellow.
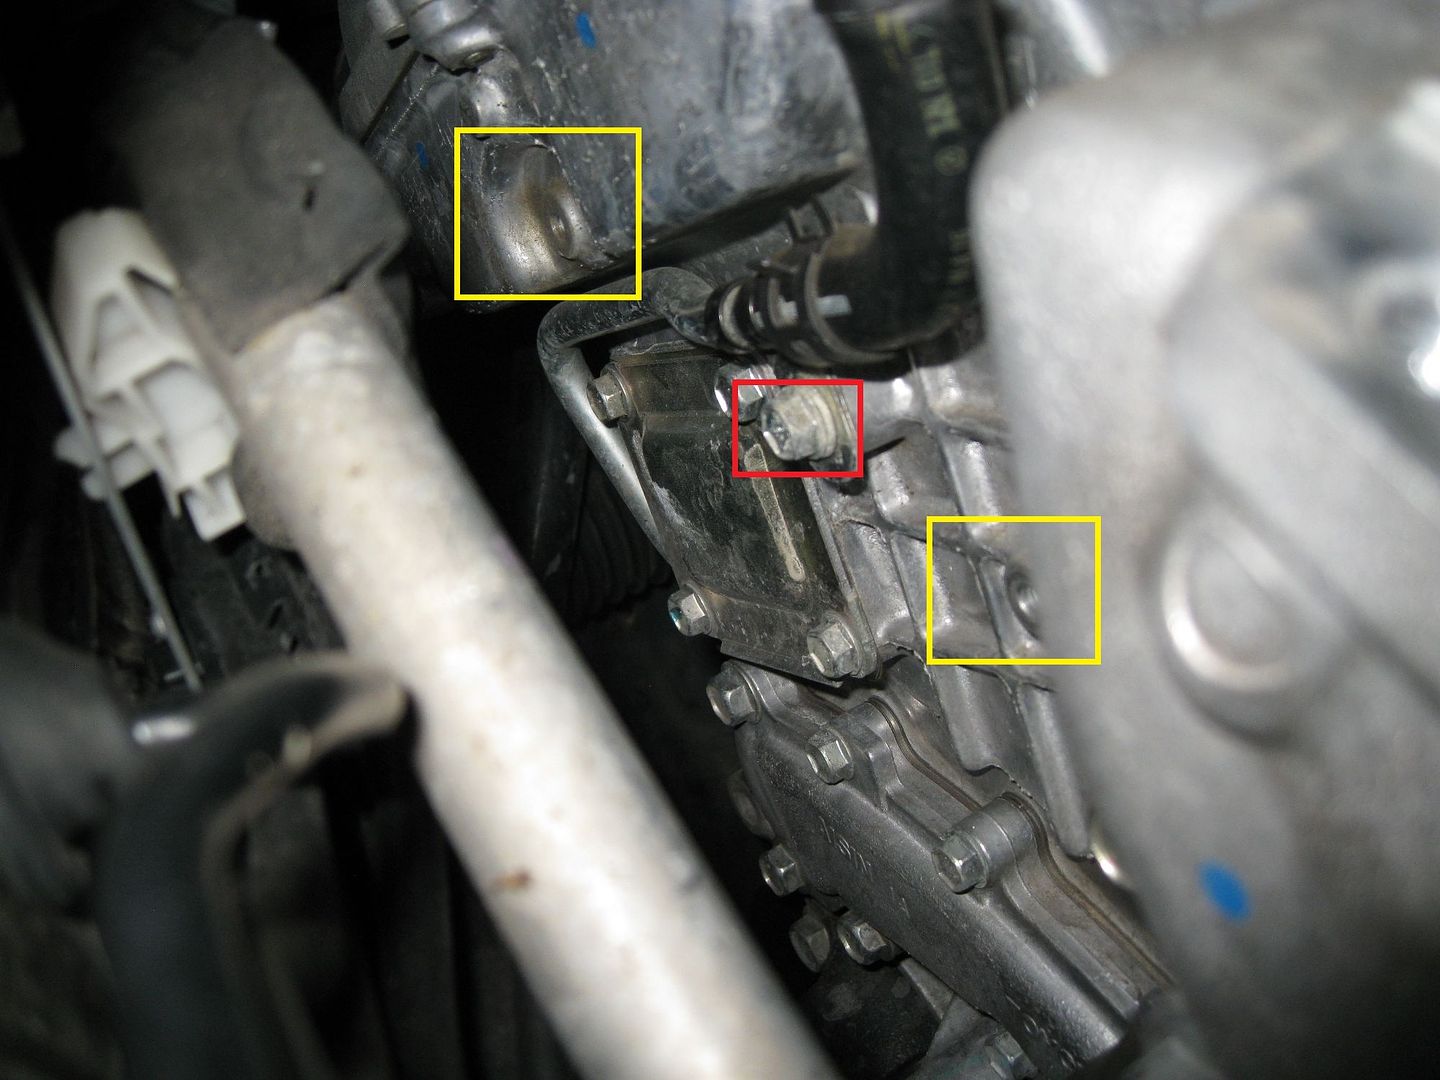
The red bolt is the 10mm bolt that holds the line to the engine, it needs to go once you get the cover off.
2) Now go up to the union, its a 17mm bolt, it will be on tight. Make sure you have some kind of rag on the bottom of it, because oil WILL come out.
Between the oil line and the engine, there is a metal crush gasket, make sure you remove that.
3) Now prep the union bolt for reinstall. First off make sure you remove the gasket that sits between the bolt and oil line.

Then the front metal mesh filter just pops off.
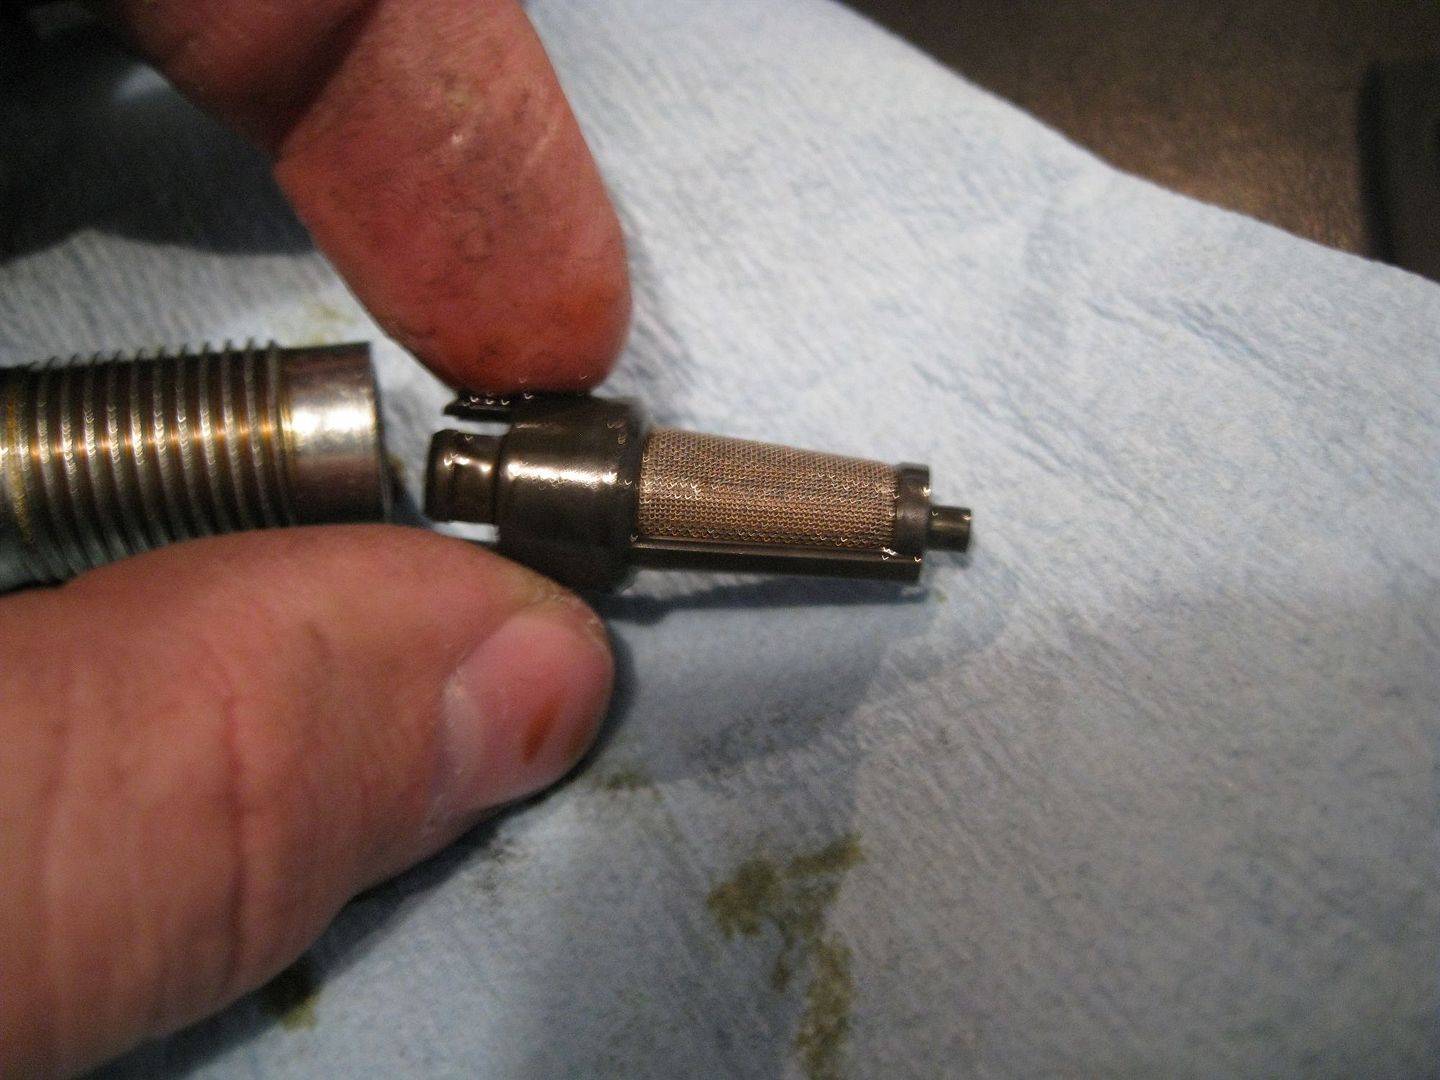
I took the opportunity to clean the filter. I used brake cleaner, and since the oil flows from the inside->out, make sure you spray from the outside->in to get the particulates out.
Then I just stuffed the rags into the hole to stop any oil from coming out/keep stuff out of the engine/VVT-I oil valves
4) Jack up the car. Now you may be able to get at it from the passenger wheel area if you remove the tire, but it will be tight. I just jacked up both sides of the car and got at it from underneath.
I found that having the tires 1-2" off the ground was barely enough room to work under the car.
And please, if you get under the car, be sure to use jack-stands, don't leave it sitting on the jack...
Now I got at it from behind the passenger control arm, around the tie rod area. Basically where the wood board ended below
The pic below is looking from the inside of the tire. its where I reached in to get to the bolt
5) Remove the lower union. Again, stuff rags under the bolt, this one dropped a whole lot of oil. You will have ~3-4" travel on a ratchet, so this one is a lot harder to get the torque on it to break it free. I actually had to get a pipe to add on the ratchet to get a little more force. Again its 17mm.

Now the lower gasket is a bit different. Its not 2 ring gaskets. Make sure you pay attention how it goes on the pipe so you put the new gasket on the new pipe correctly.
At this point, the pipe is free.
6) Now just do the reverse to re-install the new line. I suggest you start with the top union and get that finger tight. For the top, make sure the filter is on the end of the bolt correctly, and you have a ring gasket on each side of the pipe. Then install the bottom union finger tight, making sure the gasket is installed correctly. Then re-install the 10mm bolt that holds the pipe to the engine. Now its time to toque everything down. For those who don't use torque wrenches, go to town on the unions, the 10mm bolt just needs to be snug. The official torque ratings are 48ftlbs for the unions and 7ftlbs for the 10mm bolt.
You should be looking at this now:
7) Now re-install the timing cover. The 2 bolts are 53inlbs...so just snug
8) Now you need to re-install the engine mount.
The yellow bolts (14mm) are 28ftbs and the red nuts (12mm) are 17ftlbs.
Optional:
1) If you removed the fuel pump relay, crank the engine for awhile to get the oil flowing through that pipe. That way you don't starve the top of the engine for a few seconds. Check the oil level and add oil if necessary. I don't know if its needed or not, I changed the oil when I did this. Re-install the relay and brake fluid tank, then start the car.
9) Let the engine warm up, then rev to 3k rpm and hold it there for a few minutes. You need to get the oil pressure up and check for leaking at the unions. If none, your done :thumbsup: