Toyota Forum banner

UPDATE: My own DIY Clear Headlights Camry Gen 3

4.2K views 23 replies 12 participants last post by  iovaykind  
#1 ·
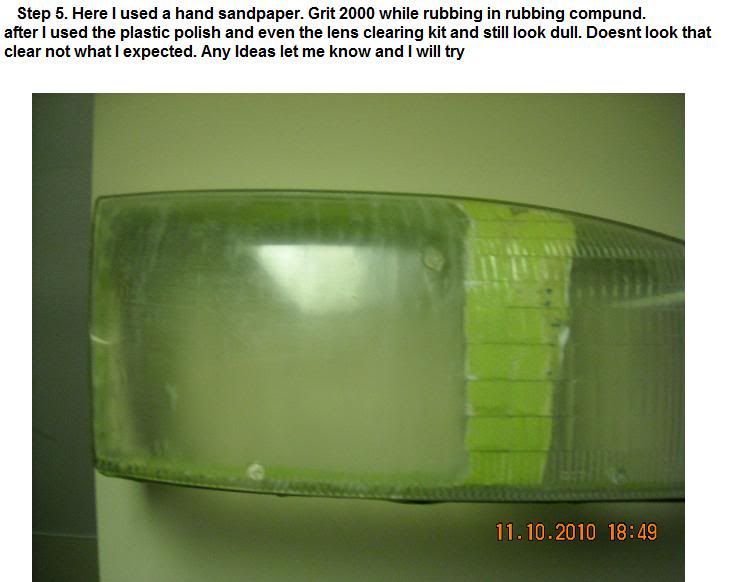
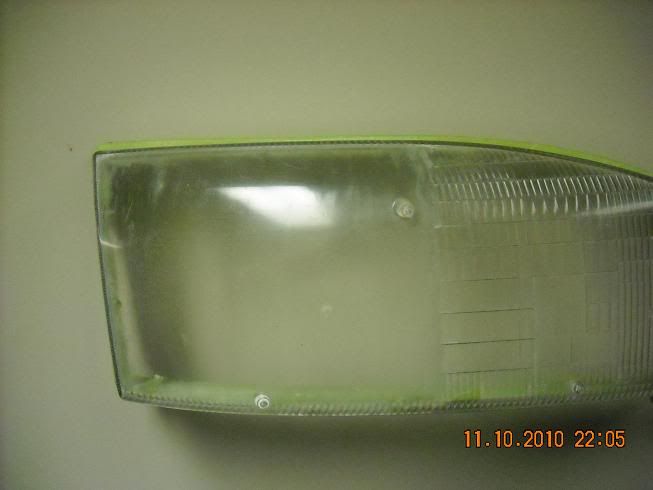
Now being that I work from home and get bored alot I decided to make an attempt of making some clear headlight. But not easy at all and feel like Im missing something from making them look better then there now any help from anyone please.

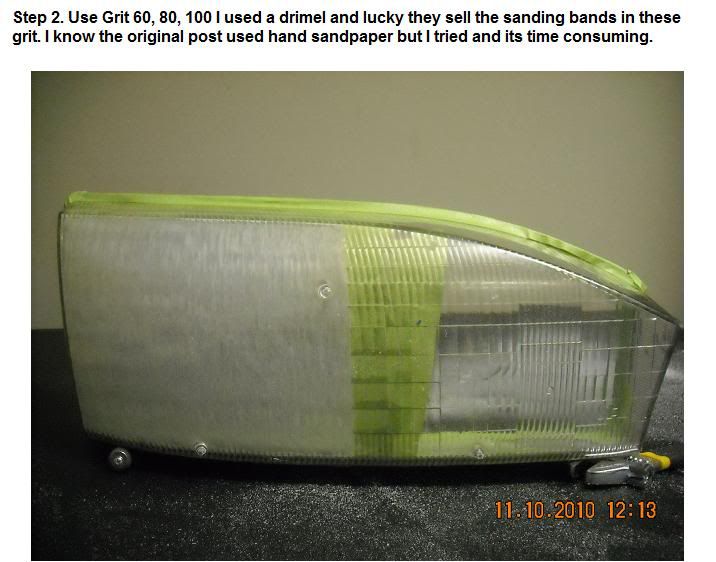
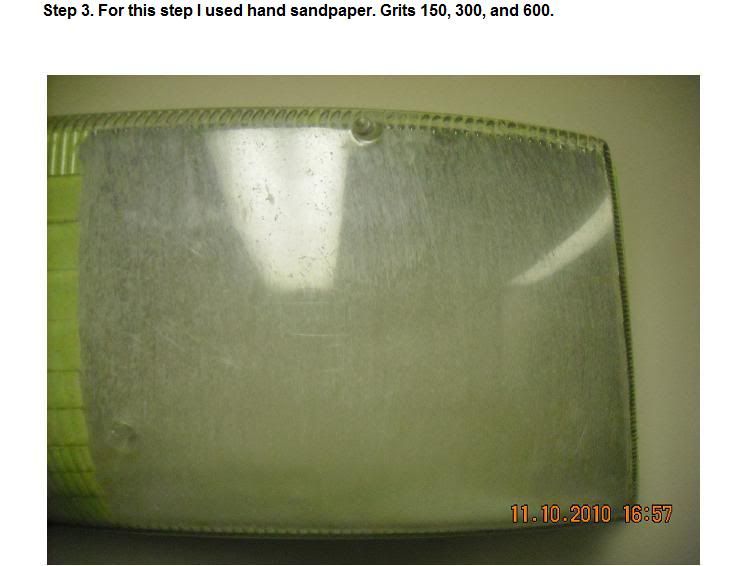
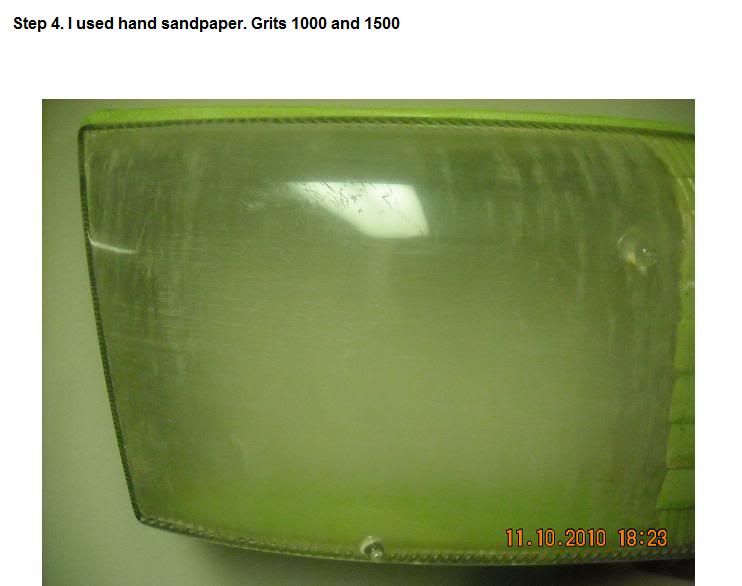
And I followed the grit sizes. From the ORIGINAL DYI.


Image


Image


Image


Image


Image
 
#3 ·
I can't be certain, but I think over time UV light from the sun breaks down the plastic through and through - so sanding the lenses down WILL HELP, but in the long run you will just have to perform the same task again.

Again, I have no proof to back this up - just a theory
 
#5 · (Edited)
Back up to WET 1000 grit. Soak the sand paper for 15 minutes or so and keep the area and paper WET throughout the sanding process. Repeat with WET 2000 grit. Then move into an abrasive compound. NEVER heard of anyone using a rubbing compound WITH sandpaper before...

Also, I wish I could have warned you. Shaving off those little stud things on the outside on the lense make it look like poop. :(

edit: Be sure to CLEAN (soap+water) the lights between sanding stages.


Nope. It's JUST exterior oxidation. He want to sand the outer face of the lense too though.
 
#7 ·
Yeah.. I don't recommend doing it but since you already started.. wet sand like other people are telling you.. yours looks better than mine already, just wet sand.. don't listen to people who say spray paint a clear coat on it cause that's what messed mine up. Over a few months though, the lens will yellow..mine did. That actually doesn't look half bad.. you can check out my progress on my cardomain page.. page 5.
 
#11 ·
ah noobs :lol:

i remember doing this a long time ago. before the depo clears.
the trick is to take your time. you have too many deep scratches in the lense.
you still have some sanding to do then they will be reallt clear.

from where you are now i would go back to 600-800grit until the entire area is uniform from edge to edge.
then use the 1000 and then 1500 then 2000 all wet. you should be fine then. but remember you need it to be uniform.
 
#15 ·
It's okay! We're here to learn. In a nutshell....

Each time you switch grits on sand paper to a higher number, your INCREASING the amount of time it takes to smooth out the material. The lower the grit number, the faster it'll smooth things out. BUT, only until a certain point. That's why you switch to a higher grit. Think of it as making smaller and smaller mountains as you step up the grit numbers. You wouldn't flatten out a mountain of dirt with a shovel, right? You'd use a tractor. :) The same is true inversely... you wouldn't use a tractor to move a handful of dirt.

The biggest thing... TAKE YOUR TIME. Really, and I really mean this. Because it took me forever in my life to understand how big of a deal it is with things like this.... TAKE YOUR TIME. :lol:
 
#18 ·
He's gonna be using projectors, so no problem with that. If this turns out well it'll look great! I never liked seeing the ribs from the reflector of the DEPOs after putting projectors in.

OP, hopefully you'll have more patience than I did :lol::facepalm:
 
#20 ·
#23 ·
Call companies like TYC or whoever makes the OEM lenses and see if you can talk to someone about the manufacturing process. If plastics like that are sealed/coated or not.