

I couldnt find this anywhere so I thought Id throw in a little contribution to the (hopefully) stickies.
I just changed the filter at 21k. It woulda been 20k but I was in the middle of a roadtrip. :grin:
Its really simple but just in case someone wants a walk-through with pictures. I just went in blindly so here ya go....
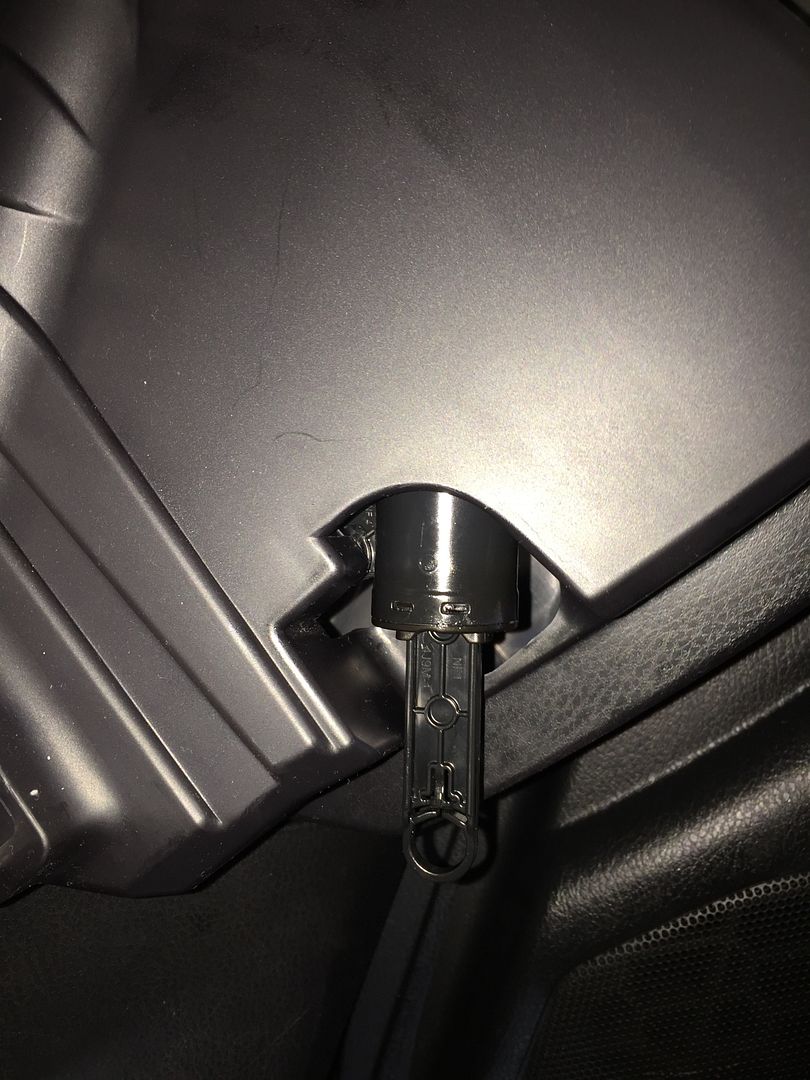
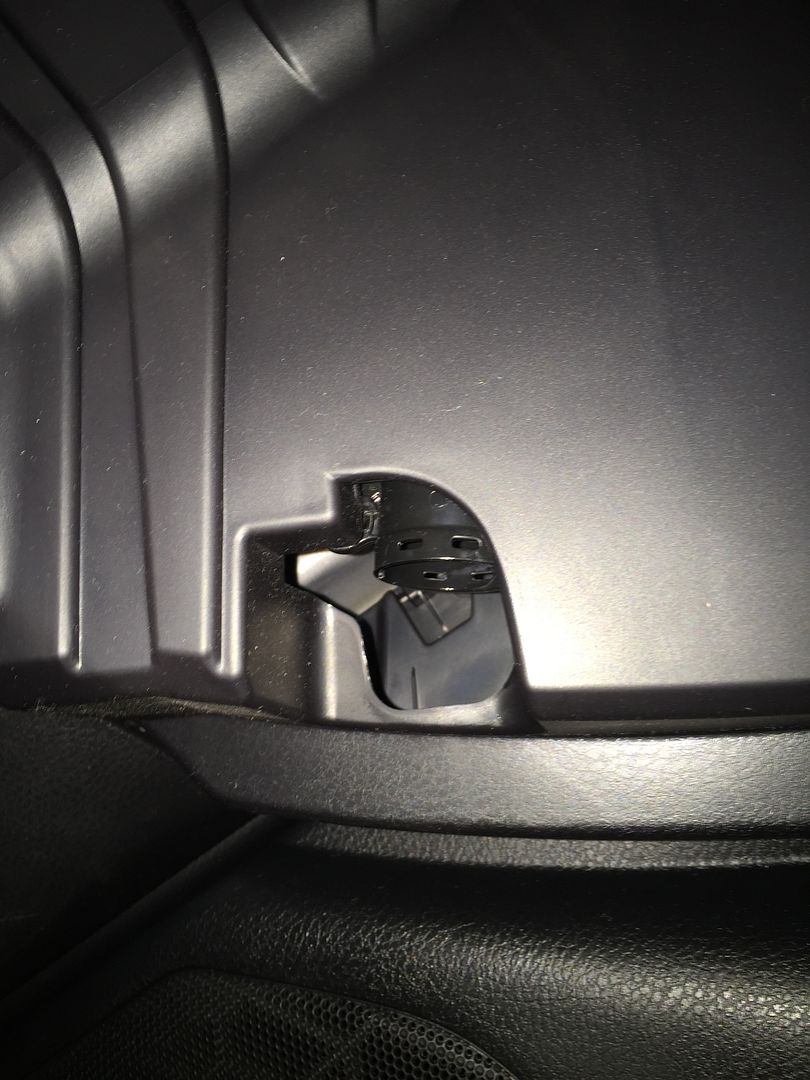
Open the glove compartment and look on the right side of the compartment and you will find the "plunger" mechanism. You'll see why I call it that in a bit. I guess you could call it the shock if you want. This is it here;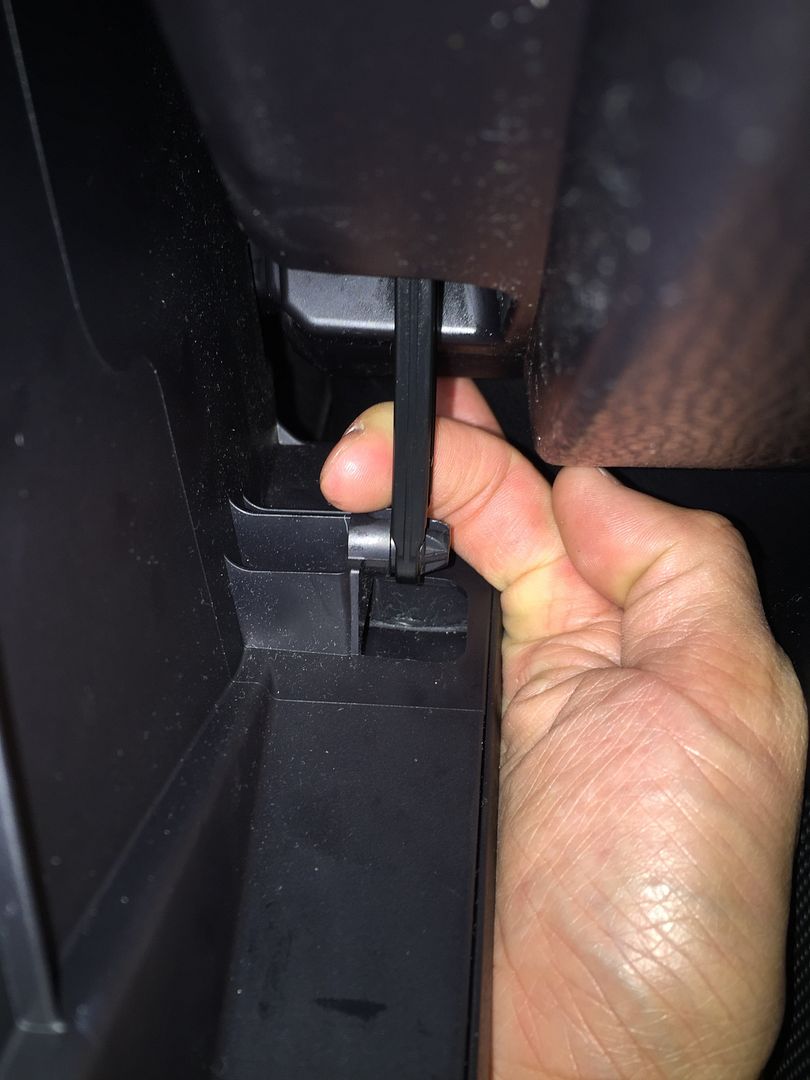
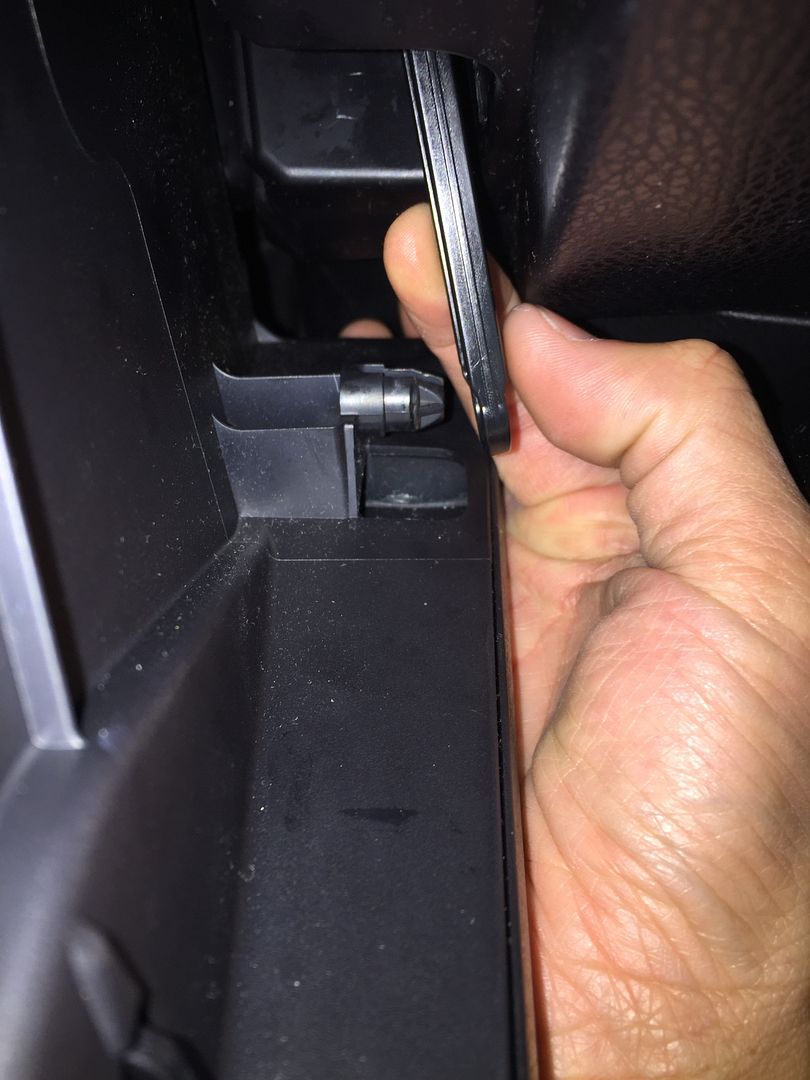
Pull/pry/pop it outwards towards the passenger door.
Now press the sides of the upper area of the compartment INWARDS so the retaining pieces pop inwards and allows you to fully remove the compartment.
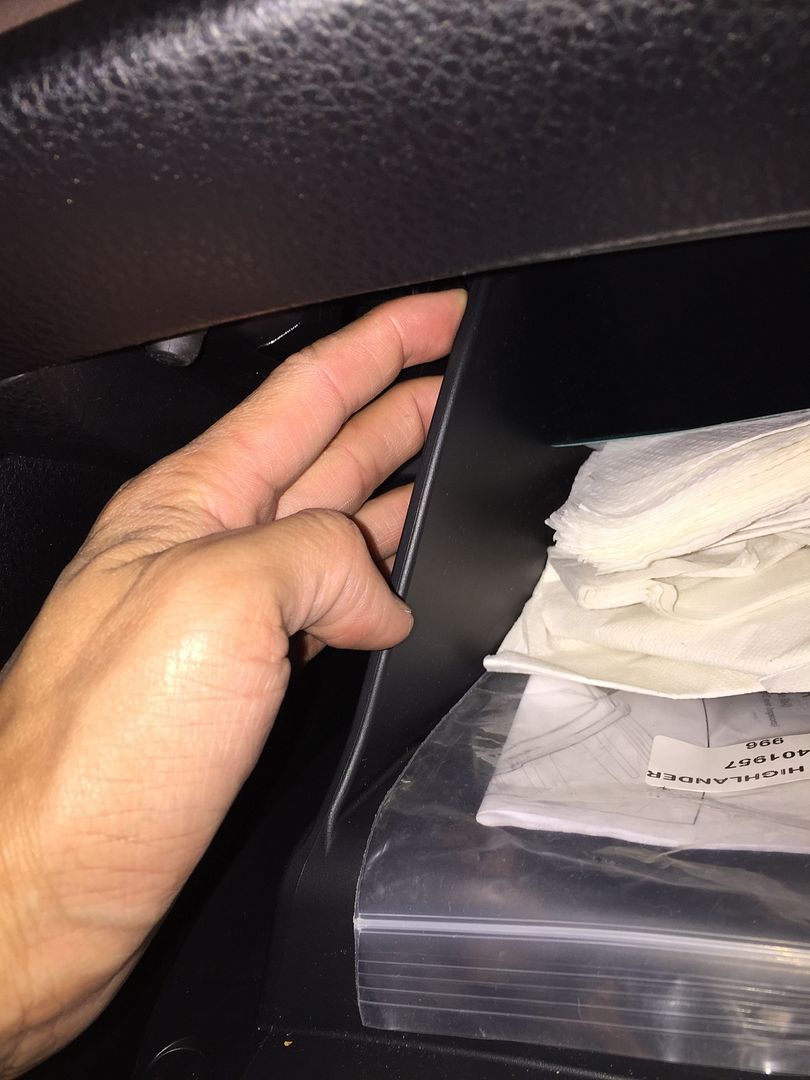
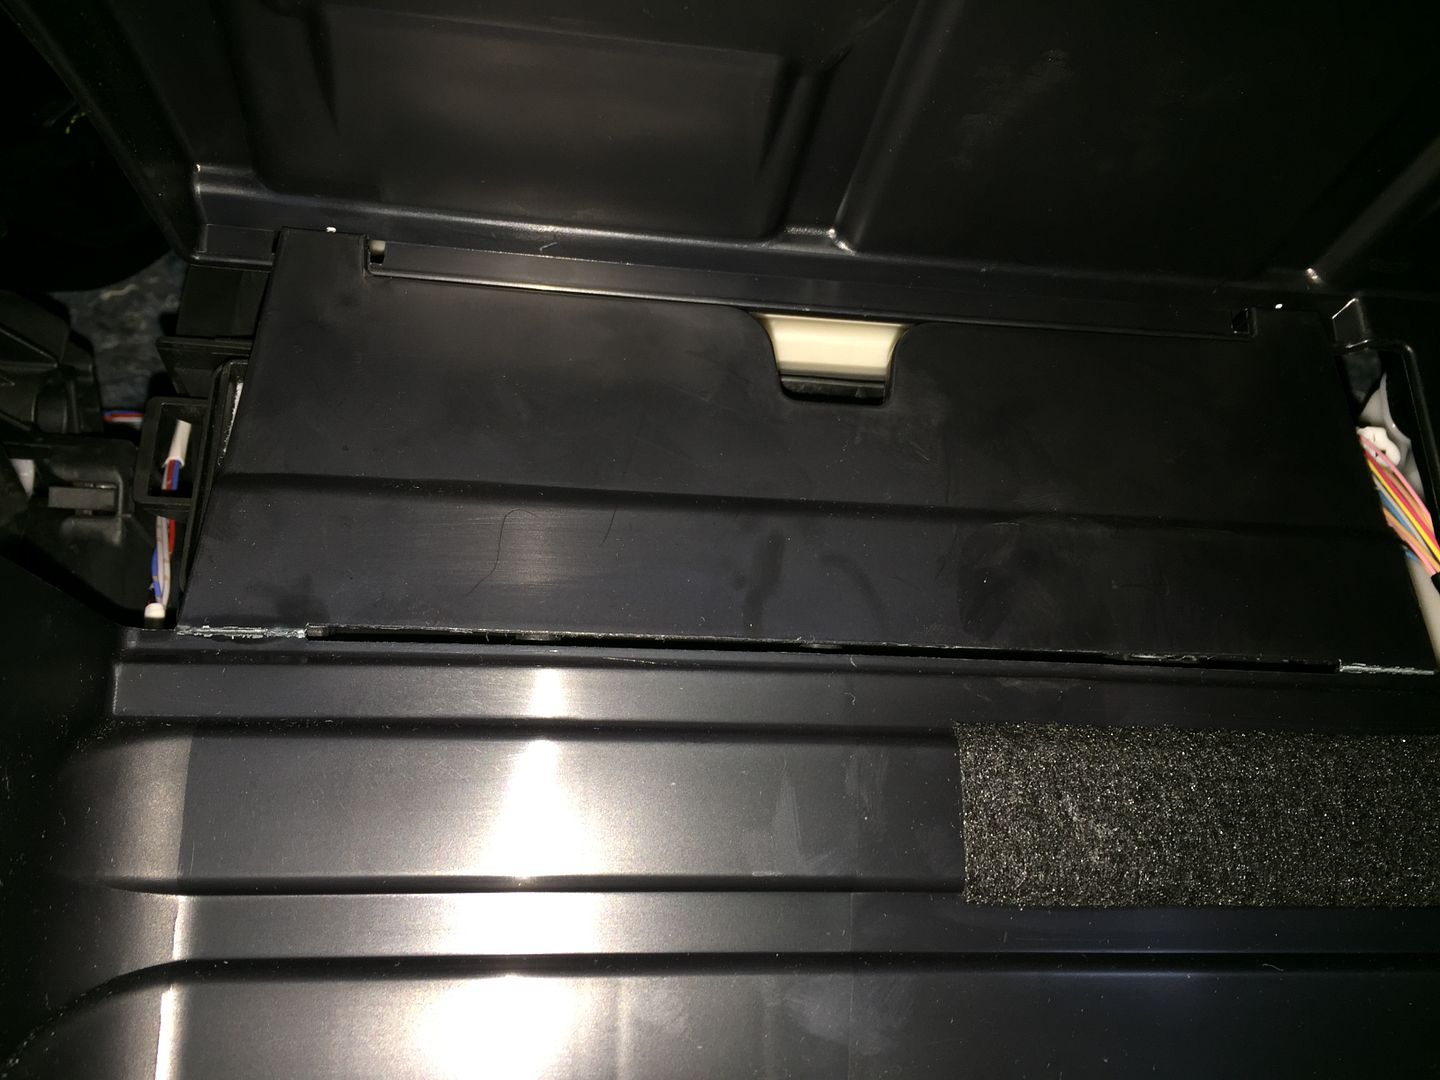
Set aside the compartment and when you look inside where the compartment originally was, you'll see the filter unit. The small opening in the middle is where you're going to tug to open.
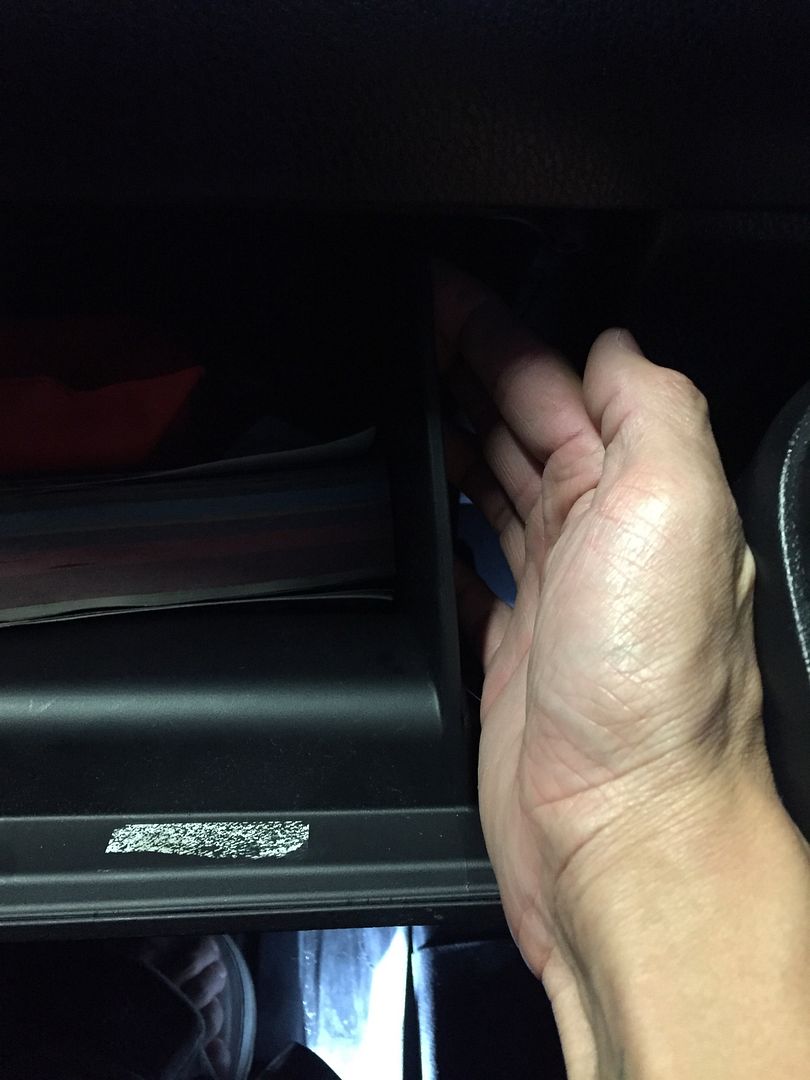
Then it will look like this....
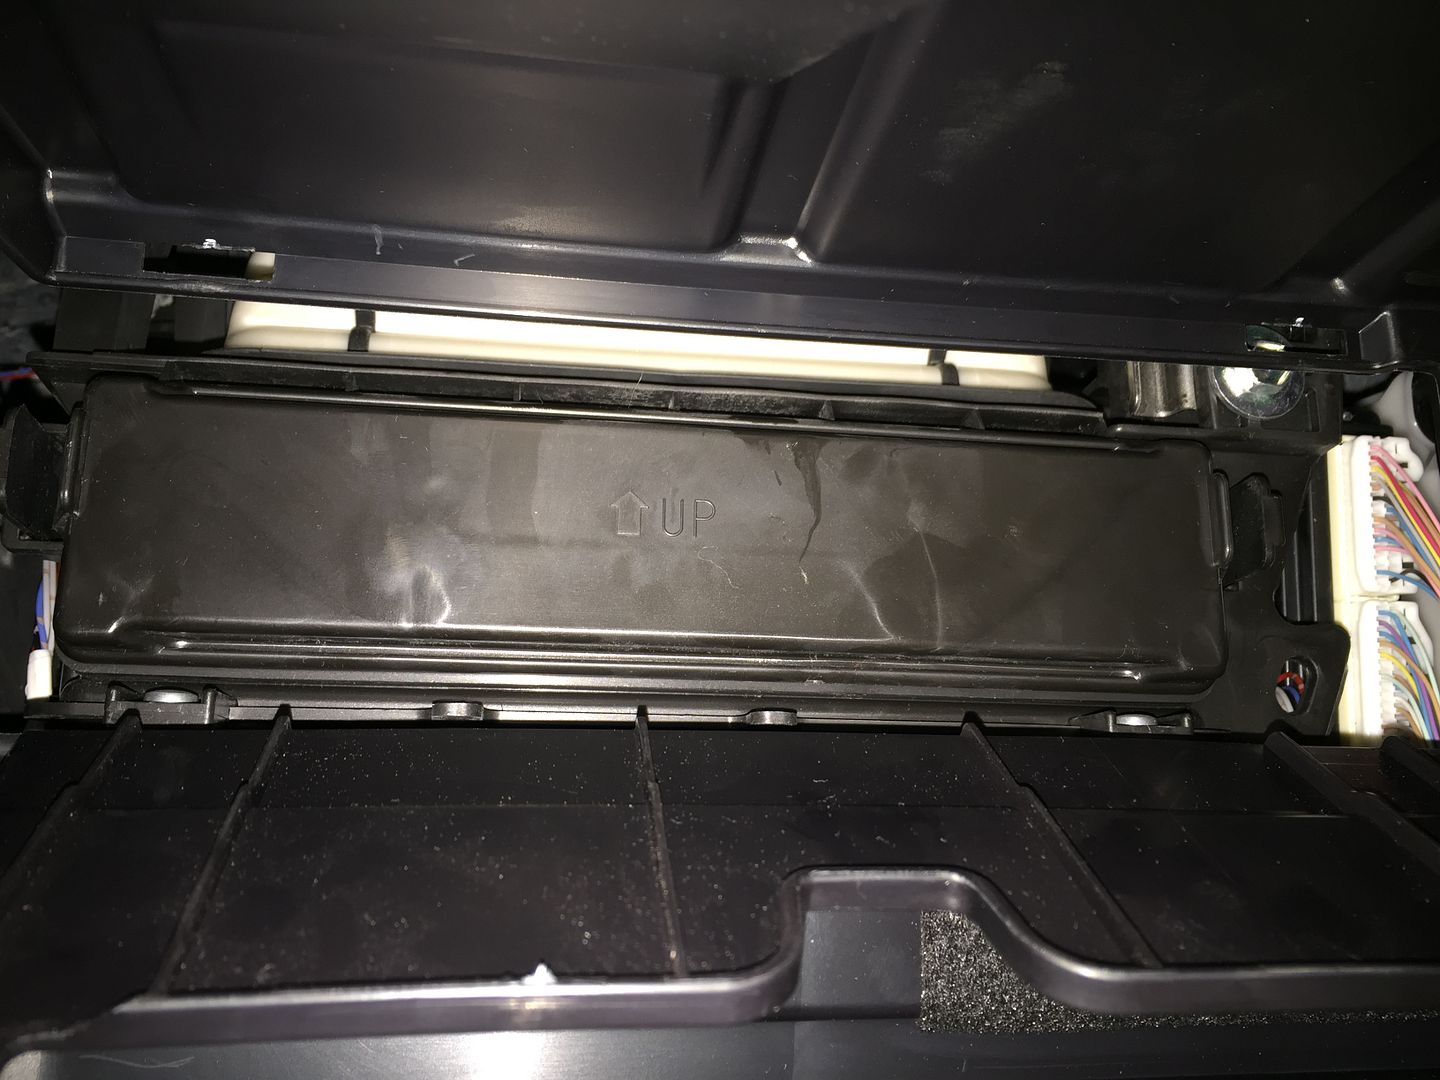
Press INWARDS on the tabs on each side and pull out and that will expose the filter.
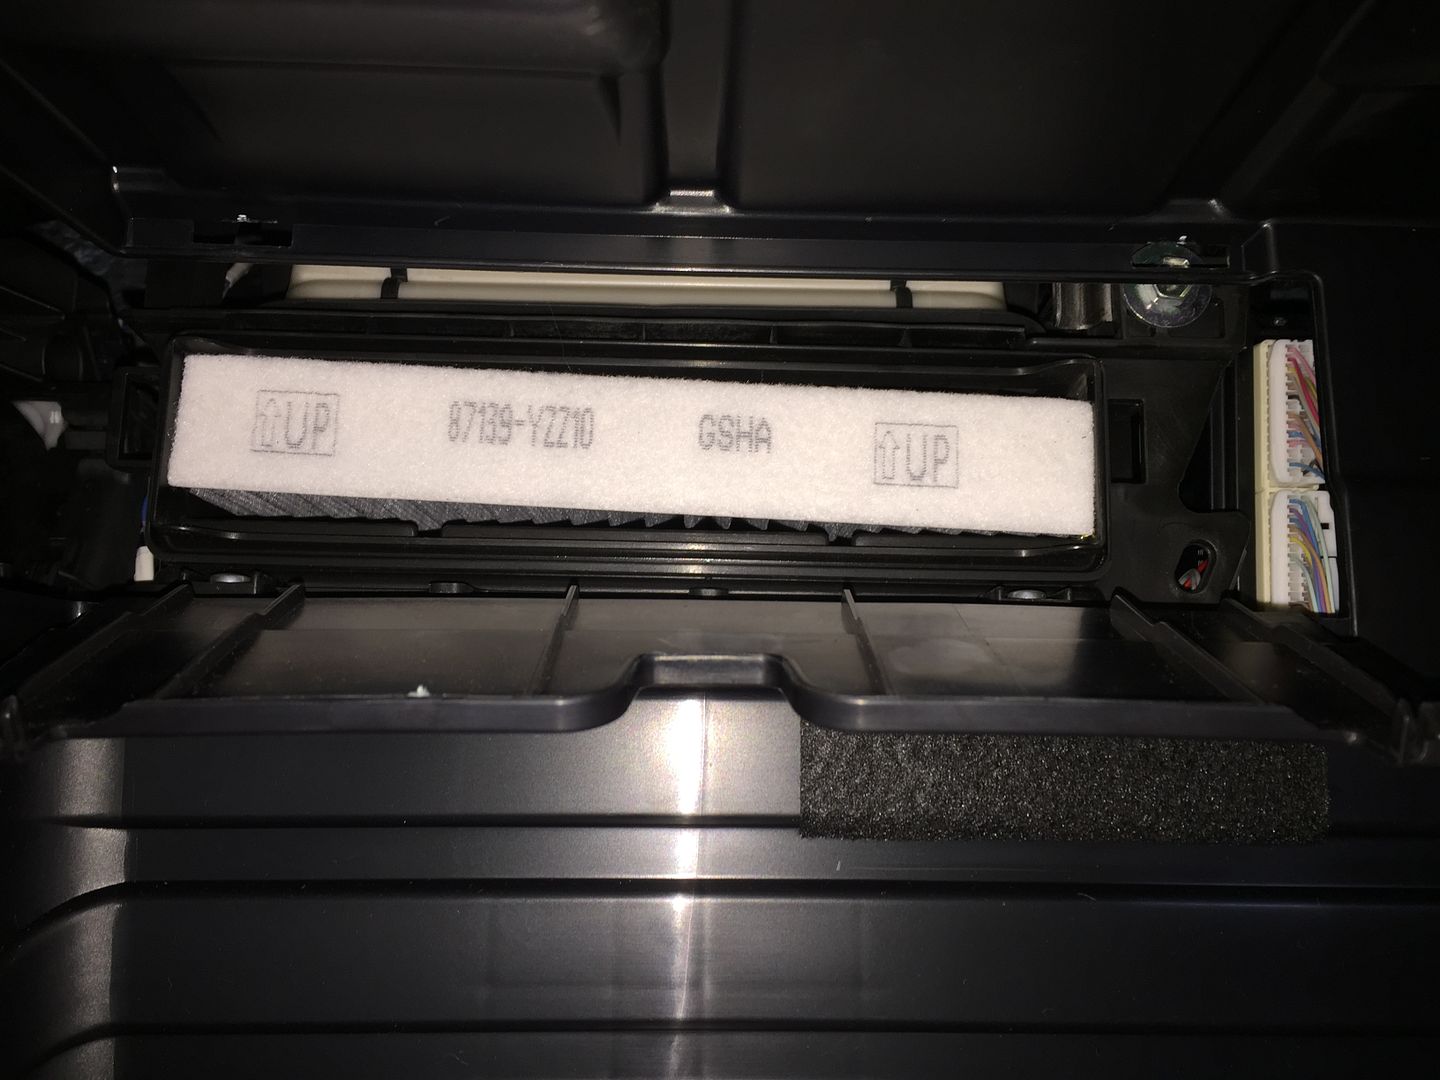
Note the orientation. Pretty much dummy-proof cuz the filter itself tells you which side is to face upwards. Replace the filter and re-assemble in reverse order.
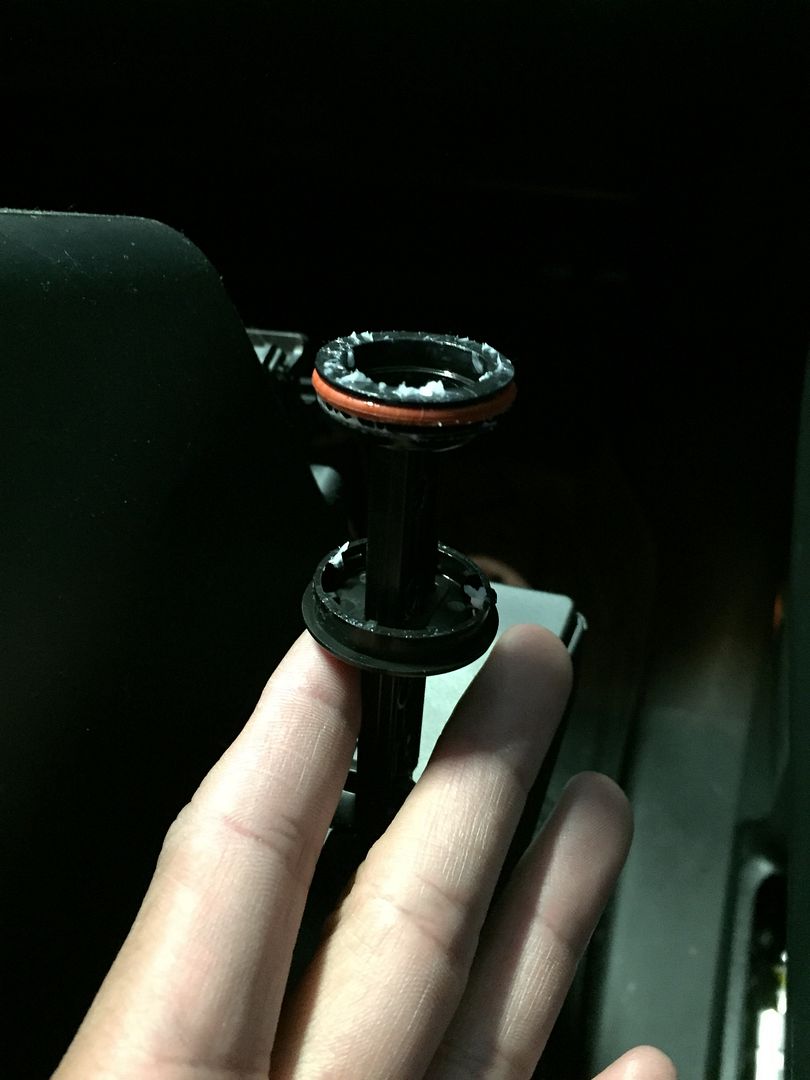
So, as I mentioned in the beginning, I went in blindly and didnt think to pop off the long attachment piece on the side in step one so I undid the compartment and then the "plunger" piece came out with it. Its a pain in the ASS to get back cuz the cylinder keeps flopping back and forth.
So yeah, just dont do that. Follow the steps above and you'll be fine. Thanks for reading.
I just changed the filter at 21k. It woulda been 20k but I was in the middle of a roadtrip. :grin:
Its really simple but just in case someone wants a walk-through with pictures. I just went in blindly so here ya go....
Open the glove compartment and look on the right side of the compartment and you will find the "plunger" mechanism. You'll see why I call it that in a bit. I guess you could call it the shock if you want. This is it here;

Pull/pry/pop it outwards towards the passenger door.

Now press the sides of the upper area of the compartment INWARDS so the retaining pieces pop inwards and allows you to fully remove the compartment.


Set aside the compartment and when you look inside where the compartment originally was, you'll see the filter unit. The small opening in the middle is where you're going to tug to open.

Then it will look like this....

Press INWARDS on the tabs on each side and pull out and that will expose the filter.
Note the orientation. Pretty much dummy-proof cuz the filter itself tells you which side is to face upwards. Replace the filter and re-assemble in reverse order.

So, as I mentioned in the beginning, I went in blindly and didnt think to pop off the long attachment piece on the side in step one so I undid the compartment and then the "plunger" piece came out with it. Its a pain in the ASS to get back cuz the cylinder keeps flopping back and forth.


So yeah, just dont do that. Follow the steps above and you'll be fine. Thanks for reading.
")


