Toyota Forum banner

Cloudy headlights WTH!?!?!?

1 reading
23K views 19 replies 16 participants last post by  OraDBAforPsoft  
#1 ·
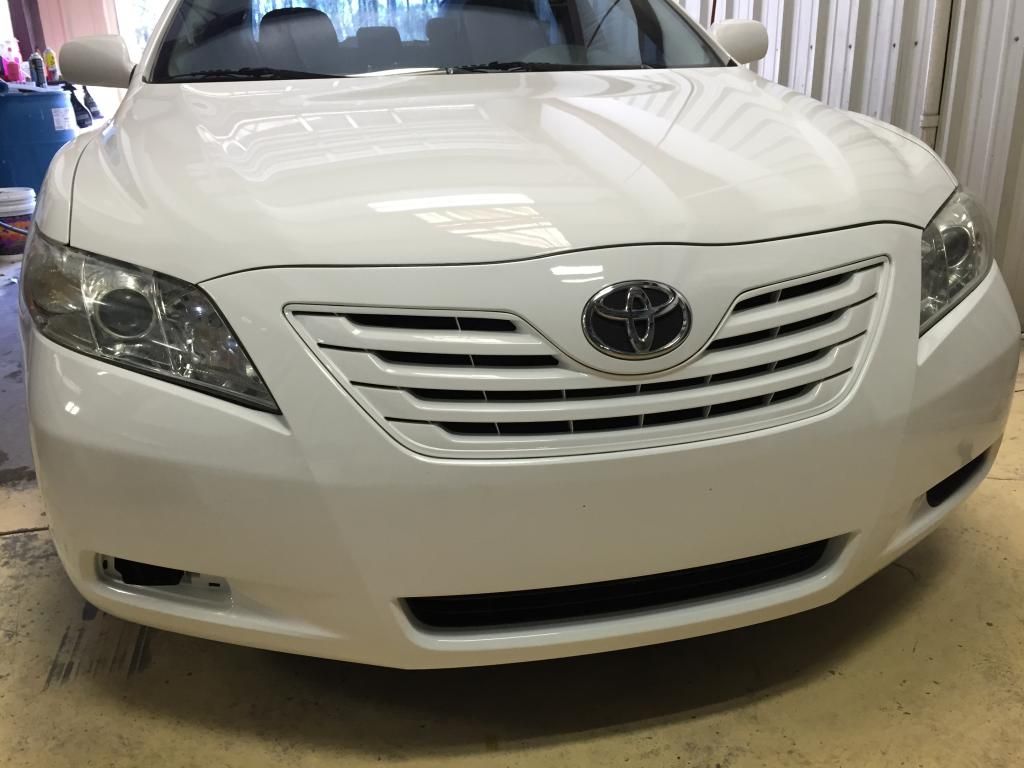
I just purchased a used 07 Camry. We love it but the headlights look very strange. There is a cloudy film on what seems to be the inside of each headlight, some areas are worse than others.

I would like to replace them (mostly for resale value later on) but wanted to post here in case anyone has run into that and might have a quick fix/solution before I drop a whole bunch of money on new headlamp mounts.
 
#5 ·
You can get a kit at any parts store that consists of some plastic polish and an attachment for your power drill. Mask off any paint you might hit and polish/buff away. Apply a little polish. Once they begin to do this, you will need to polish them about twice a year to keep them bright but it beats new assemblies that will also in time cloud up.
 
#6 ·
Eh, there's a good chance the yellow will come back. The UV coating is most likely gone/barely any left. I buff and polish my headlights once or twice a month and they still yellow/cloud up if I forget to do it after a while. Some people have tried clear coating their headlights, which may work. Or, just buy new ones.
 
#7 ·
Essentially - your options:

 
#8 ·
Factory headlights' UV sealant faded over times and that's why they are cloudy. If it's really bad, you need to wet sand it and then buff it out. The most crucial part in this process is to use a good headlight sealant (will last a year or longer) after you've clean them up or else, you'll be looking to do it again in a couple of months.
 
#9 ·
Once that coating is gone, they will continue to yellow. I'm fighting this on my 06 and my 07 Camry XLEs. About Once a month I put a good coat of glaze on them and they clear right up for another 4 weeks. If you let them go too long, you will gave to wet sand them before you polish them.
 
#12 ·
My 05 Camy XLE headlight became hazy around 2012, after 7 years of driving and I try the 3m headlight restore kit it was ok but not 100% as brand new as originial. There was some tiny scratch from the sanding and it lasted around an year before becoming hazy again. Then I try Plastx & Meguair's Headlight protectant, result was ok but you have to re-apply both by hand like after every 2-3 car wash. Last year, i purchase an set of headlight from https://www.autolightsbulbs.com/ the headlight brand they sent was VAIP Vision around $120 for both side included shipping. It took me around 2h (self teaching from youtube) how to remove the bumper, take notes which parts go where and re-install, also the after a few days of driving i notice the beam was 1 side higher, so you need to do Headlight adjustment (25 feet from the wall). Fit & finish is ok, but it's still cheaper than going to Toyota dealer and pay the full price for an headlight. I apply an thin coat of Meguiar's ultimate wax before installation and after each car wash an tiny amount of the leftover Meguair's Headlight protection and it still look like brand new that I installed two years ago. I notice now on Rockauto a lots of headlight quality like economy, NSF or Capa certify dunno if is really necessary to paid premium for these certification, and nothing went wrong since I installed.
 
#13 ·
https://www.rockauto.com/catalog/moreinfo.php?pk=1390123&cc=1433263

I'm not sure how the certification works either ...

For example, I don't think TYC has a generic, an NSF, and a CAPA assembly plant.

So the same headlights are going down the line. What I don't know is how good their QC is. (i.e. do 95% of their lights meet NSF/CAPA standards and you are basically paying extra for the same lights you could buy without the certification and save money) (or do only 10% of their lights meet the standards and they sell those for a higher price and sell the others as generic and you really want the certified ones and not the generic ones.)
 
#17 ·
Check out Optimum Opti-lens product. Lots of guys over at various car detailing forums raved this product. I did the full buff and polish treatment and seal it with the product. The headlights are still clear half a year later.
 
#19 ·
I dealt with this a bit on my 2002 Ford Focus, so I thought this thread was a good thread to post an update to.

Essentially - the modern polycarbonite headlghts have a fairly thick coat of clear paint with a UV protectant over them. Over time, the paint starts to wear away.

For me, this seems to happen in three stages:


  • Initially - the paint will start to wear off - you will see a discoloration on the lights, and you can feel "ridges" between the painted and unpainted surfaces, but the lights are still fairly transparent. Basically, there is nothing you can do at this stage other than replace the lights or heavy buffing or sanding to remove the remaining paint or protection.
  • Over probably six months to a year after the paint wears off, the unpainted surface will start to haze and yellow. I tried the toothpaste fix at this stage and was AMAZED at the results - however, you still see a border between the painted and unpainted portion of the lights.
  • Eventually, ALL of the paint will wear off and you have just the bare lights and that will start to haze over as well. At this point, you can just keep using toothpaste and wax (or vinyl or spar urethane) or replace the lights. The lights will get fairly clear but not quite as clear as when they were new.
Essentially, it is analogous to the clearcoat issues that GM had with exterior paint in the 1990's - i.e.:

  • Initially, the paint looks good.
  • Eventually, the clearcoat (CC) will start to crack and peel. The paint below the CC will start to oxidize, but with regular maintenance you can bring the shine back, but not as good as with the CC originally.
  • Ultimately, all of the CC will peel off and at this point you have single-stage paint, but if you keep it waxed (glazed, polished) it will still look as good as older cars that originally came with single-stage paint.
 
#20 ·
cheap but temporary fix

I used some bug repellent spray that has deet in it - spray it on paper towel, wipe on - add a little elbow grease - voila!
It will last a few months - like all the other ideas already listed that don't include resealing the lens afterwards, but a cheap easy fix and a good use for that expired bug repellent spray you have laying around.