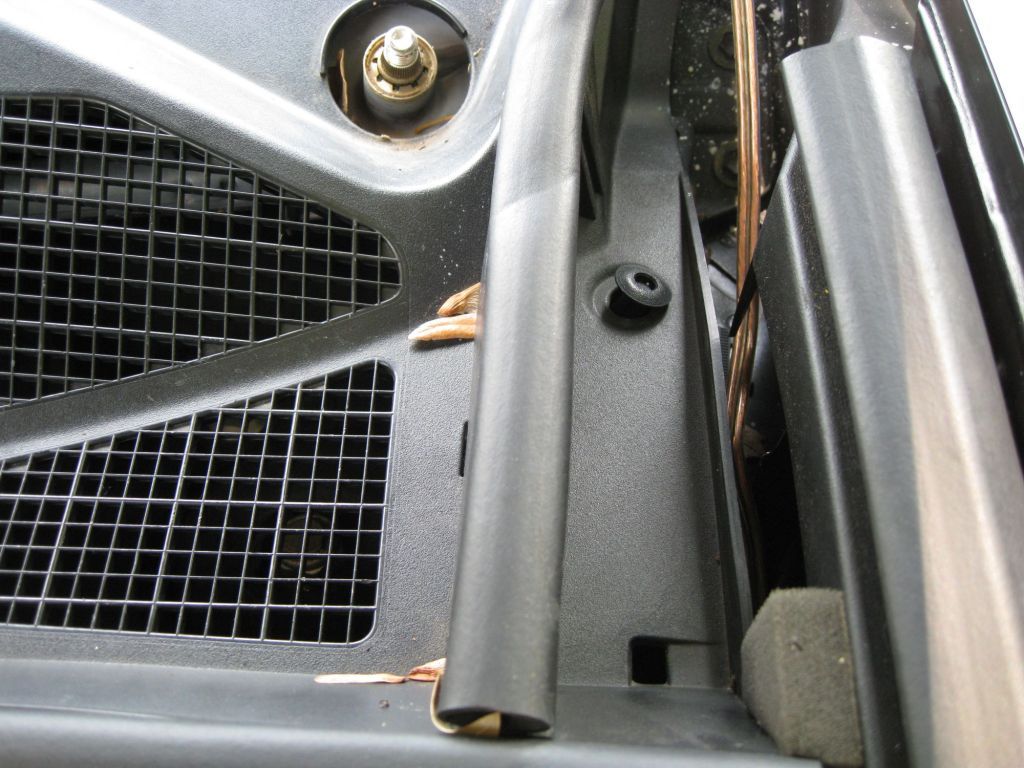
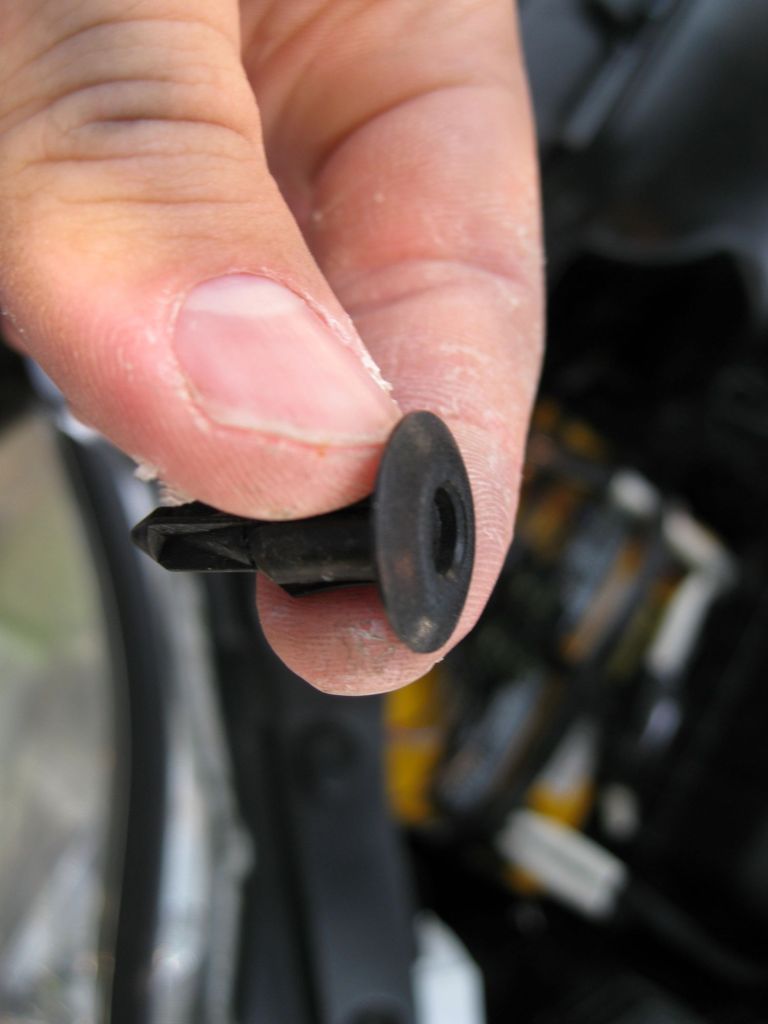
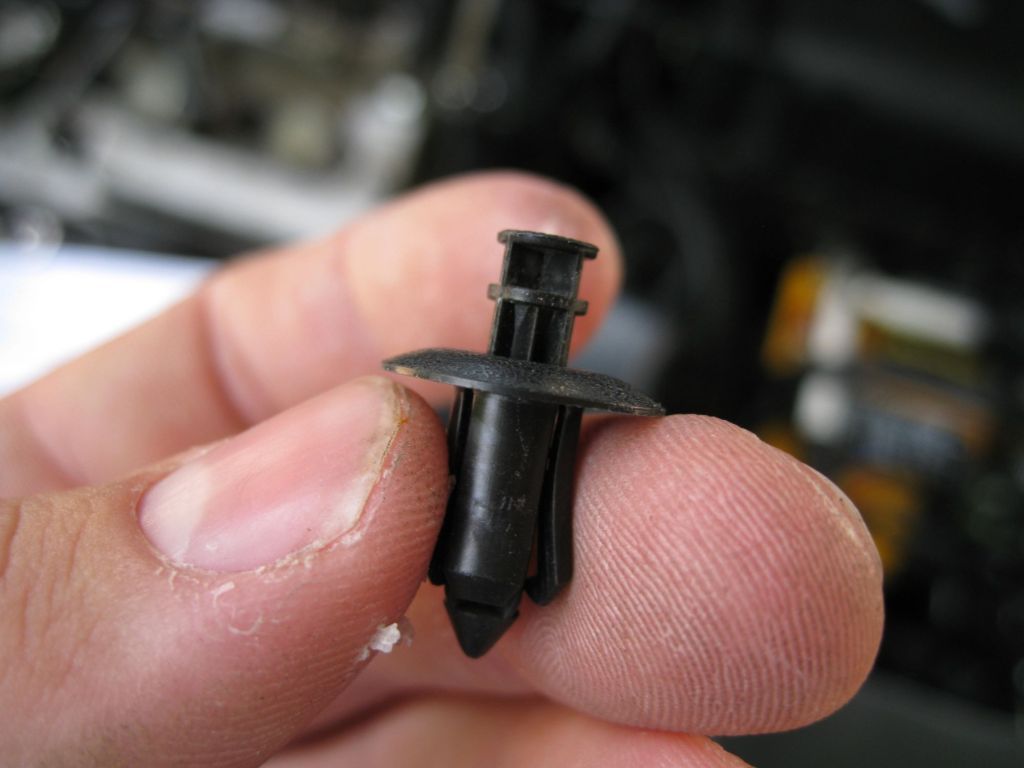
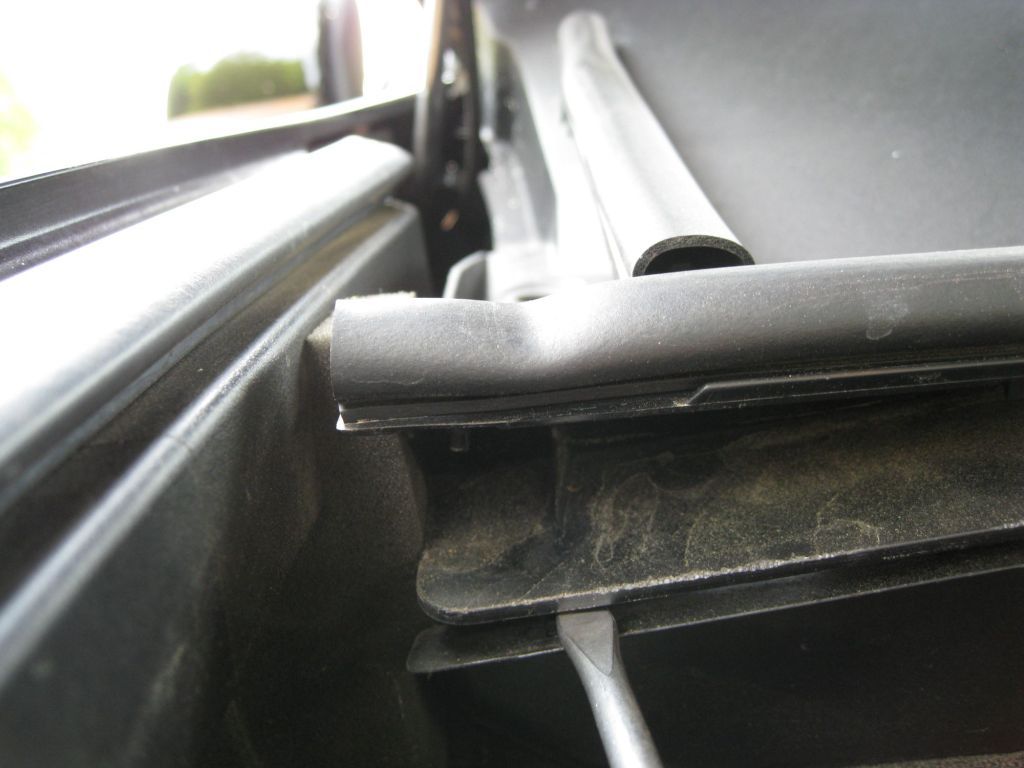
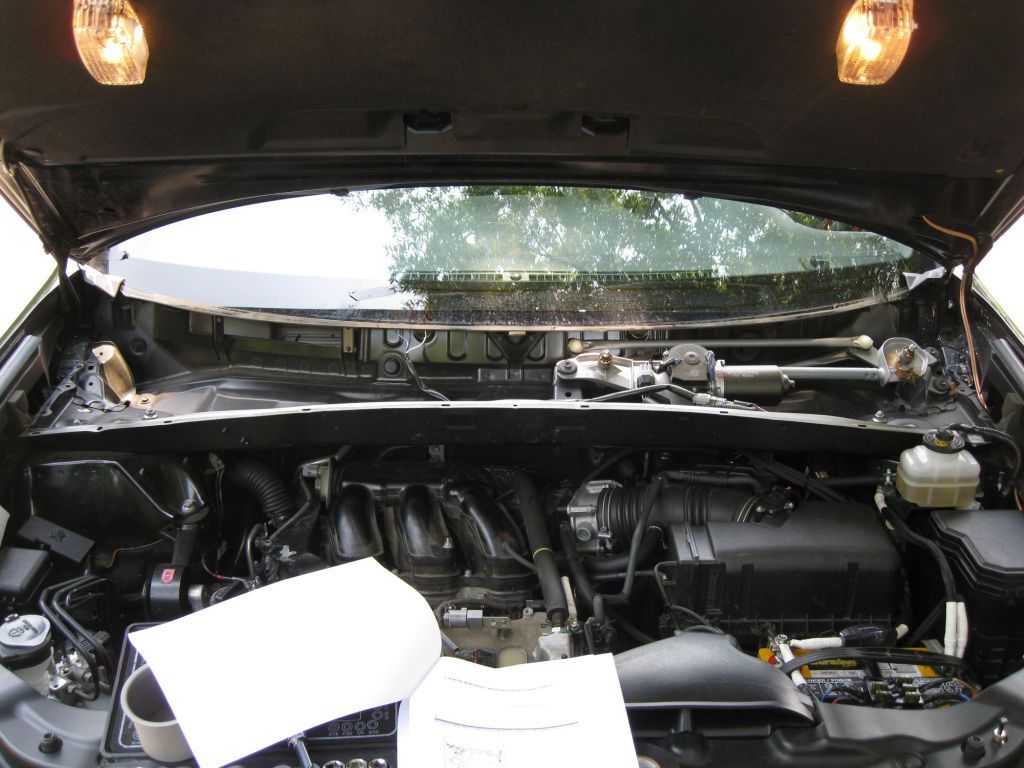
So yeah, finally got around to doing this. This took me ~7 hours yesterday and mainly because the front is a PITA, more on that later. All I can say is after ~166k miles and the parts being 10yrs old (I have one of the very early built '08's, built in mid 2007), they definitely needed replacing.
Parts list below. I used KYB for as much as possible, when I couldn't, I went OEM. I replaced all the strut components except a metal plate on the front, springs, and bump stops. The idea was if it had rubber, replace it.
![Image]()
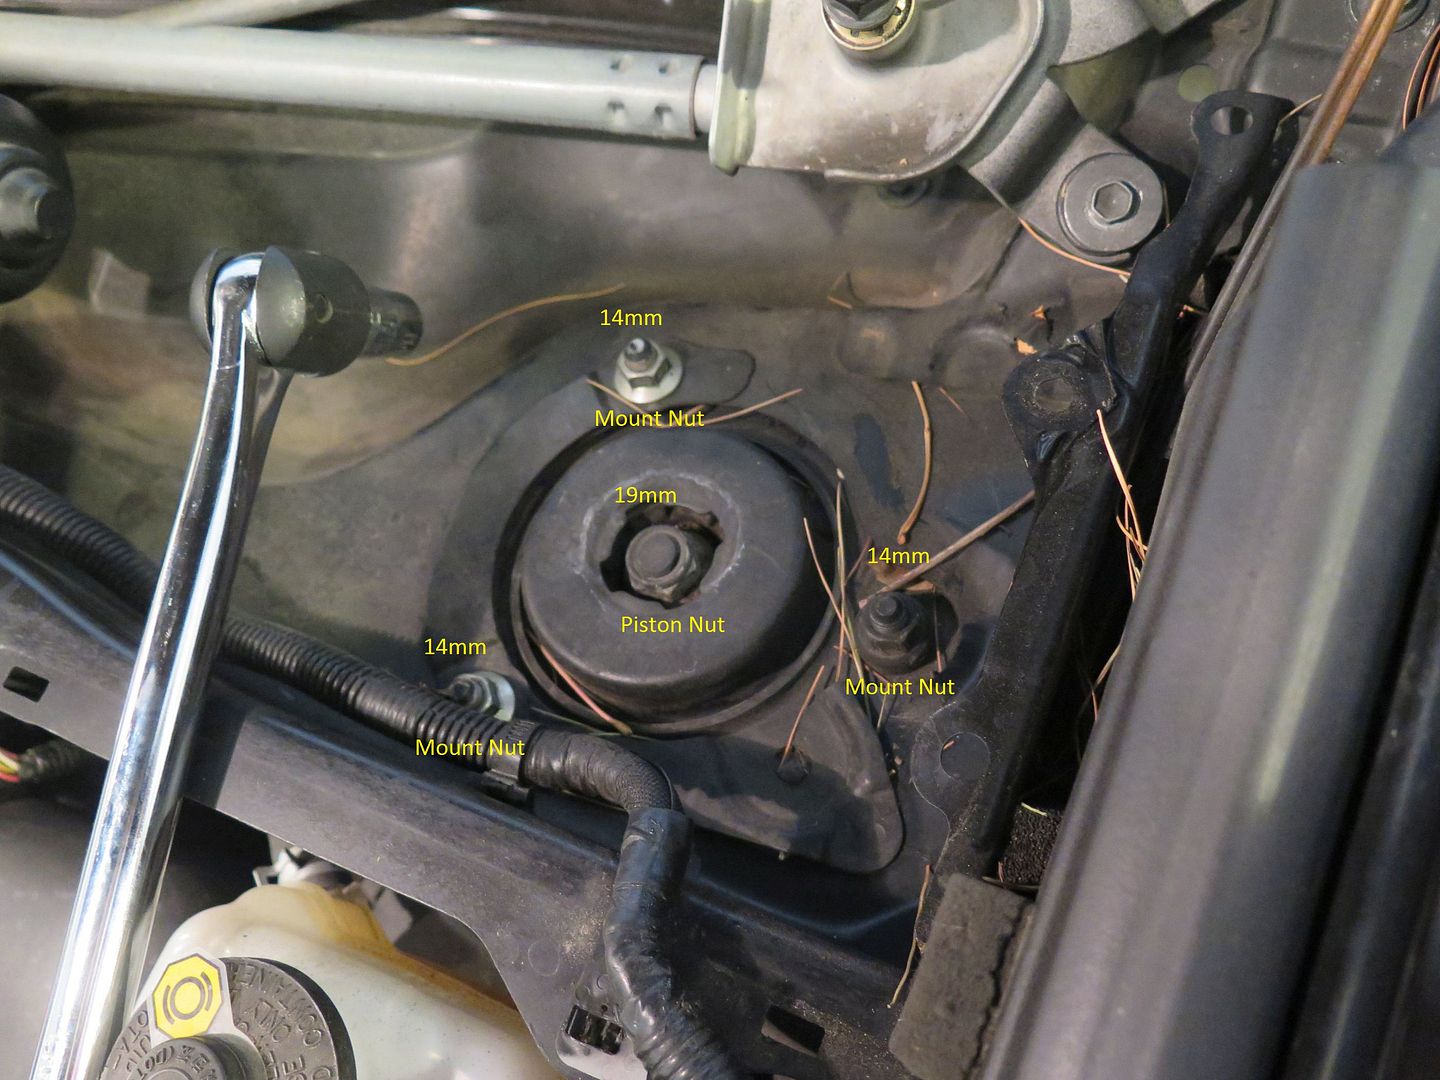
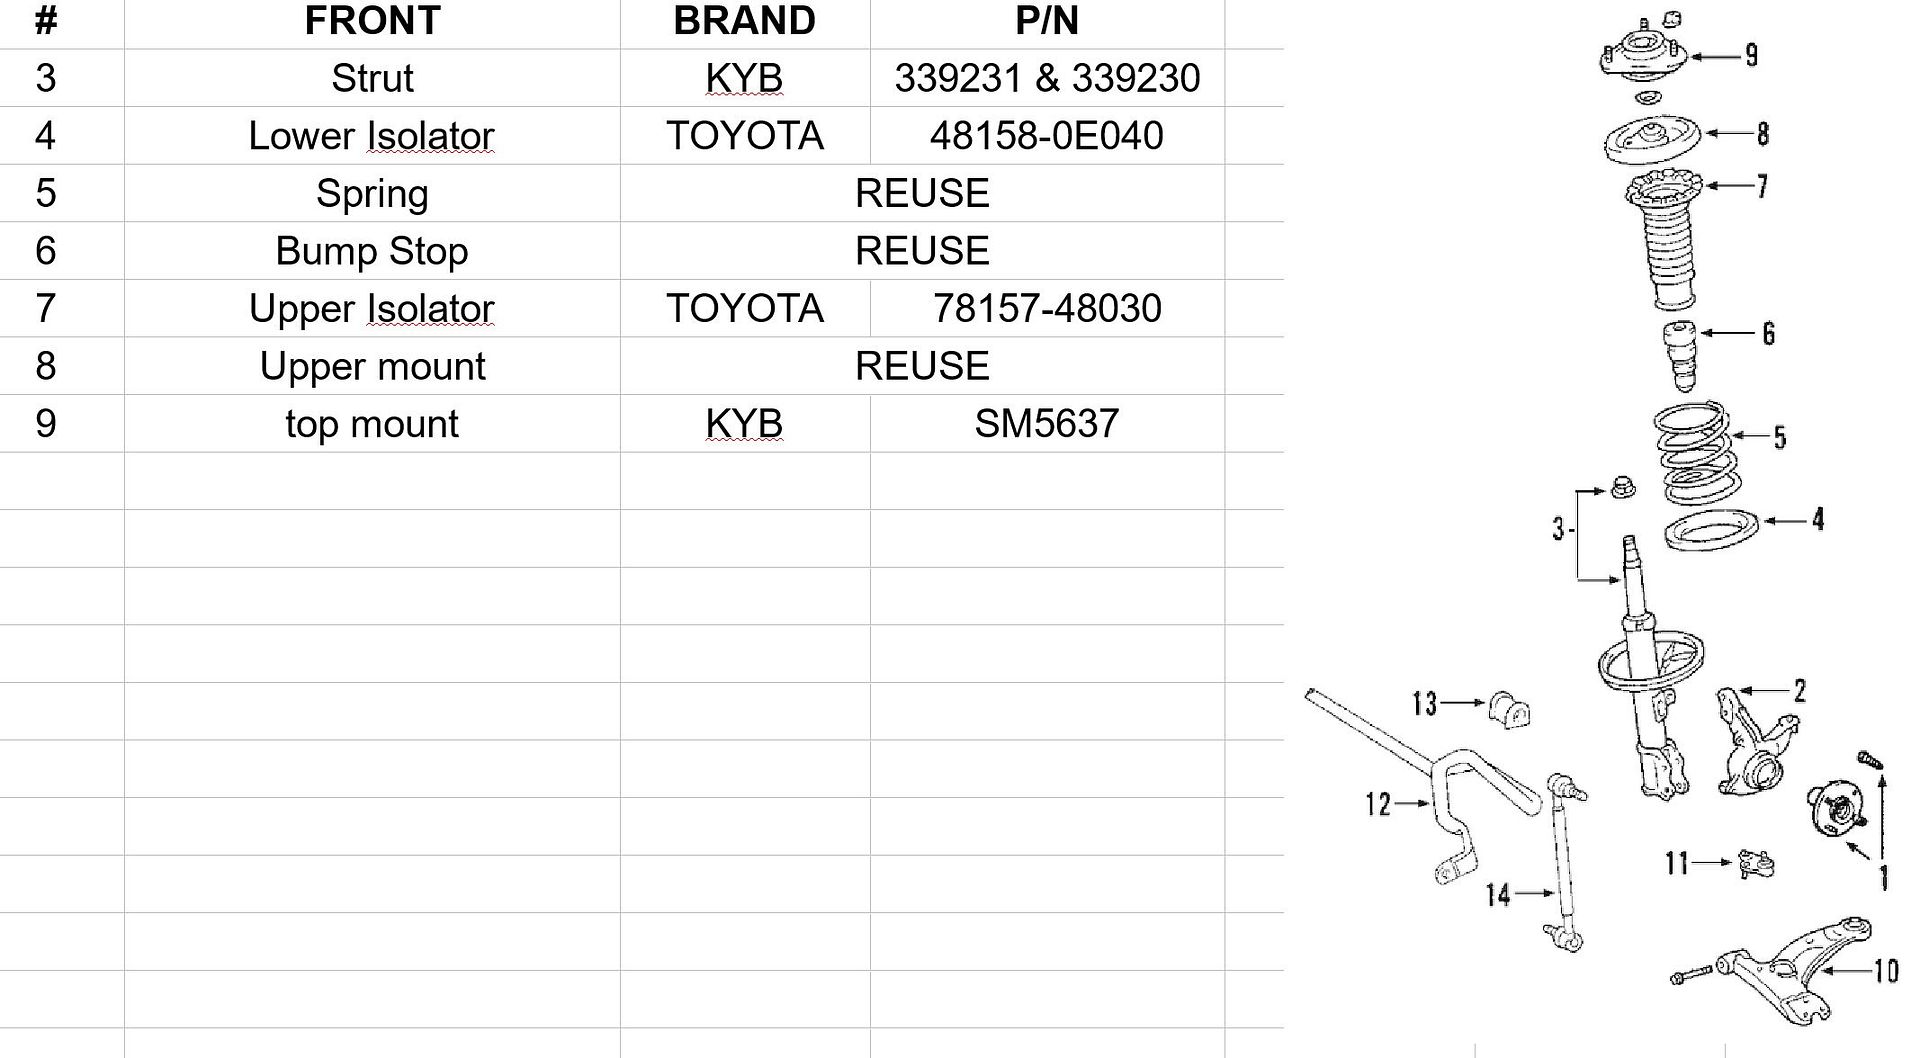
FRONT:
![Image]()
(NOTE: part numbers for the front are the same for FWD and RWD)
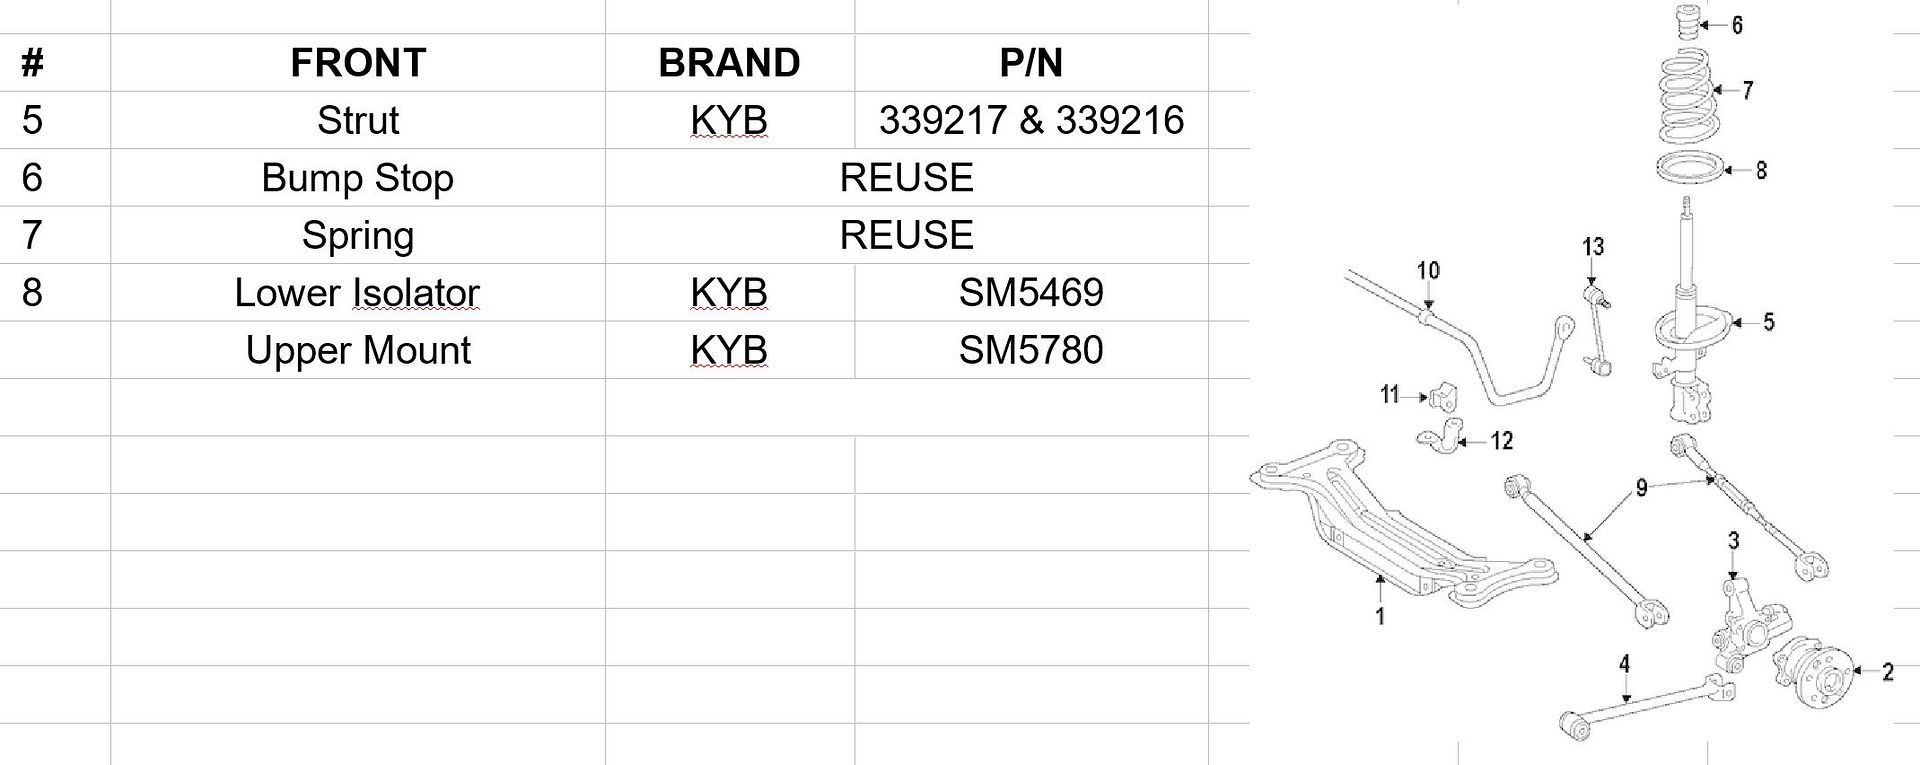
REAR:
![Image]()
(NOTE: part numbers for the rear are different for the struts for FWD and RWD. I have shown the FWD part numbers, the AWD strut part numbers are 339235 & 339234)
Quick Links:
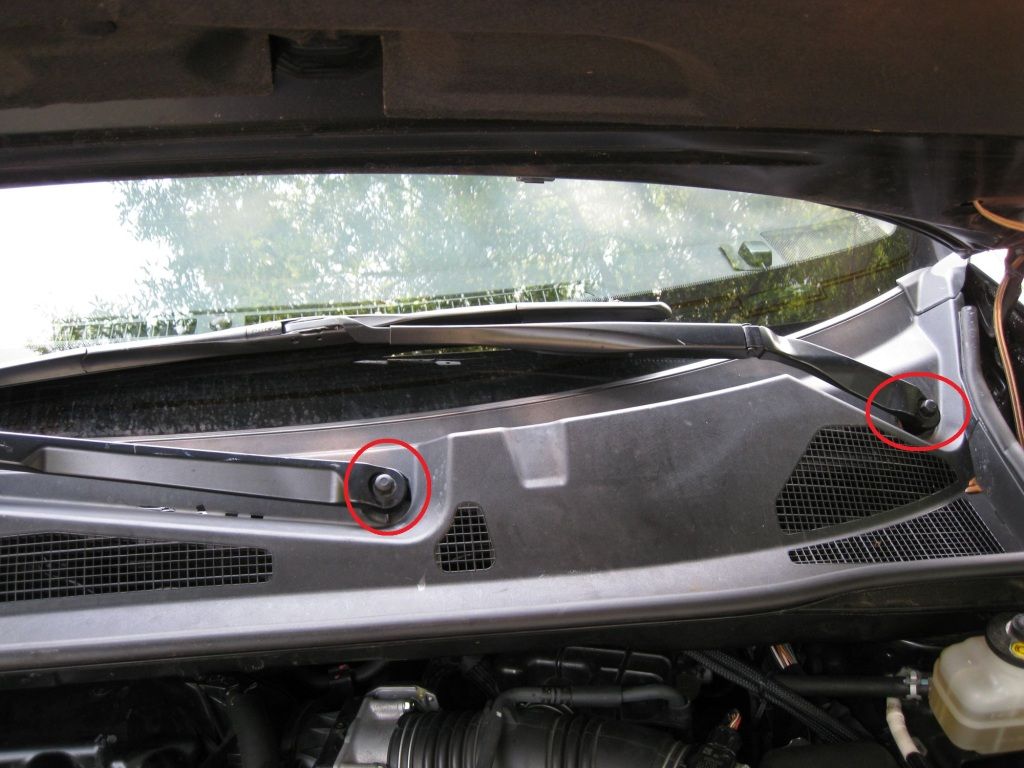
Front Strut Assembly Swap
Rear Strut Assembly Swap
Rear Strut Assembly
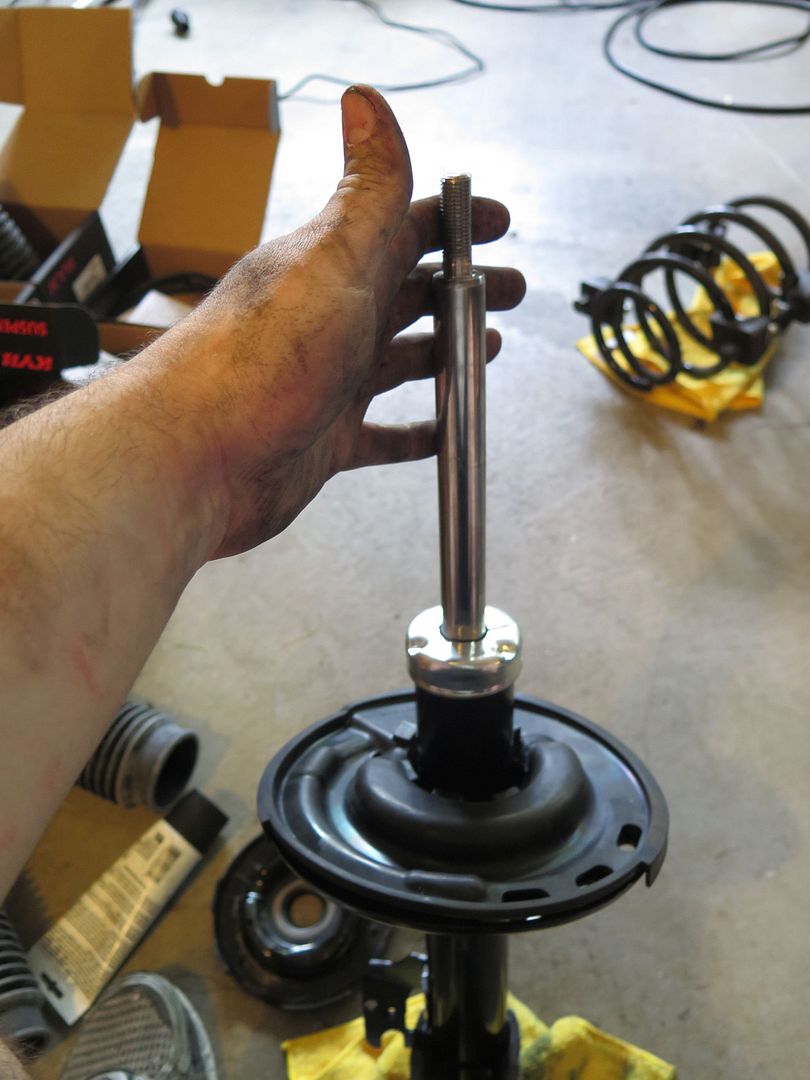
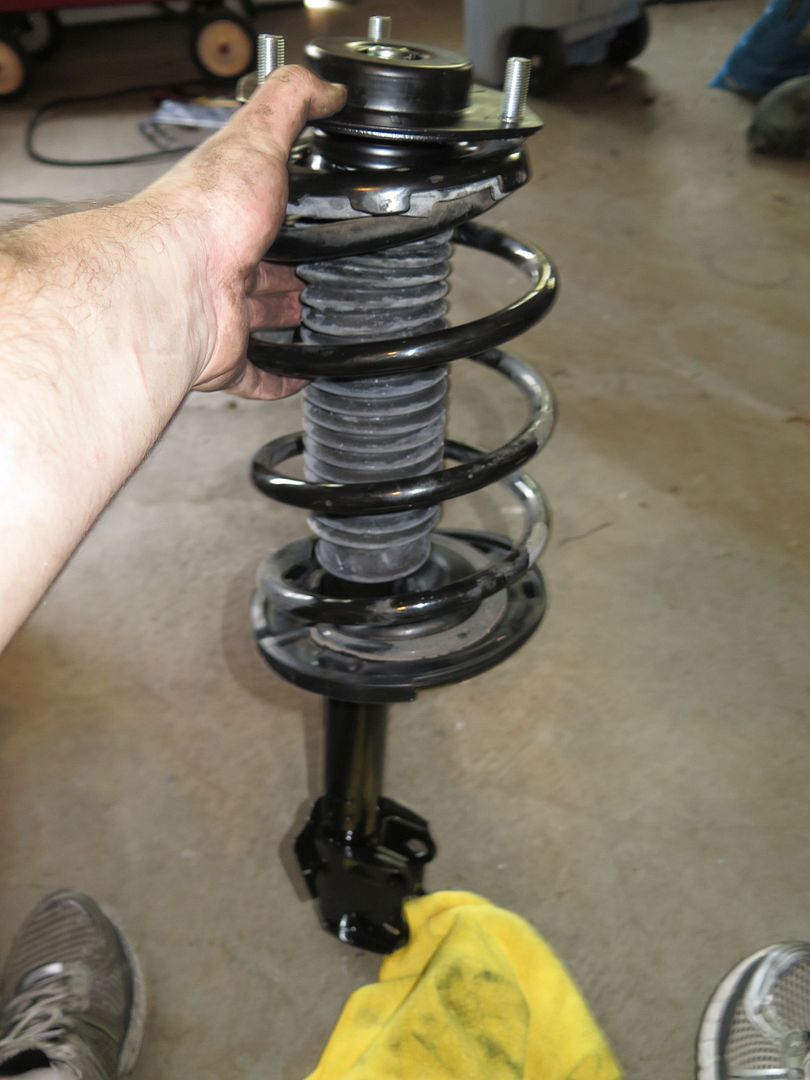
Front Strut Assembly
Initial Observations after the change:
-Obviously less bouncy, the old struts were definitely worn out
-I forgot you don't have to fall out of your seat when going around a corner fast :lol:, there is a lot less body roll/pitch when turning into a corner. Also there is tire squeal at a lower speed since the car is staying flatter and not sending as much weight to the outside wheel, ie less grip. Most won't notice this, but I may or may not drive rather aggressively .
.
-There is a lot less road based vibrations in the car. The old rubber isolaters must have gotten hard.
-Turning appears to be easier w/ the new bearings.
I'll get to posting the various parts later today....To be continued.
Disclaimer: Do at your own risk. I will not be held responsible for any damage to vehicle or bodily harm when performing these modifications, or any voidage of certain parts of your warranty.
Parts list below. I used KYB for as much as possible, when I couldn't, I went OEM. I replaced all the strut components except a metal plate on the front, springs, and bump stops. The idea was if it had rubber, replace it.

FRONT:
(NOTE: part numbers for the front are the same for FWD and RWD)
REAR:
(NOTE: part numbers for the rear are different for the struts for FWD and RWD. I have shown the FWD part numbers, the AWD strut part numbers are 339235 & 339234)
Quick Links:
Front Strut Assembly Swap
Rear Strut Assembly Swap
Rear Strut Assembly
Front Strut Assembly
Initial Observations after the change:
-Obviously less bouncy, the old struts were definitely worn out
-I forgot you don't have to fall out of your seat when going around a corner fast :lol:, there is a lot less body roll/pitch when turning into a corner. Also there is tire squeal at a lower speed since the car is staying flatter and not sending as much weight to the outside wheel, ie less grip. Most won't notice this, but I may or may not drive rather aggressively
.-There is a lot less road based vibrations in the car. The old rubber isolaters must have gotten hard.
-Turning appears to be easier w/ the new bearings.
I'll get to posting the various parts later today....To be continued.
Disclaimer: Do at your own risk. I will not be held responsible for any damage to vehicle or bodily harm when performing these modifications, or any voidage of certain parts of your warranty.